Fought At Gekidan Research Park: Yukimura Center
648 days 3 hours 38 minutes ago
Red Queen's Opening Gambit
View Linked Report - CLICK HERE 300 POINTS"She got lucky, that's all there is to it."
"Seriously. Freshly arrived to Durgama, and she wants to assault the Gekidan looking for scraps with untrained garrisons and PanOceania surplus? Some codename 'Red Queen' too. Leading an all-star, all-girl squad to drum up Arachne coverage."
"Too reckless, trying to lead the mission herself. Ended up getting knocked down by enemy hacker as well. So much for being the assault hackers the Reverends can provide. The PanO surplus didn't help either. I don't think those SMG bullets were armor-piercing, they just hit all the duct tape holding the TAG together. It should have been over when the armored spearhead fell."
"The worst part is, the operation was still a success. JSA defenders backed off after suffering heavy losses. While our backline Moderators and Riot Grrls may not be the best, they pulled through in the end. The Morlocks were brave too, rushing in to break the center-line held by the Ryuken-9."
"Will the personal defeat keep her ego in check? Or will she assemble another team to bite off more than she can chew? Guess we'll find out..."
01 - Family photo. Combat Group 1 on the left, Group 2 on the right.
02 - Close up of Red Queen (Reverend Custodier Lt.)
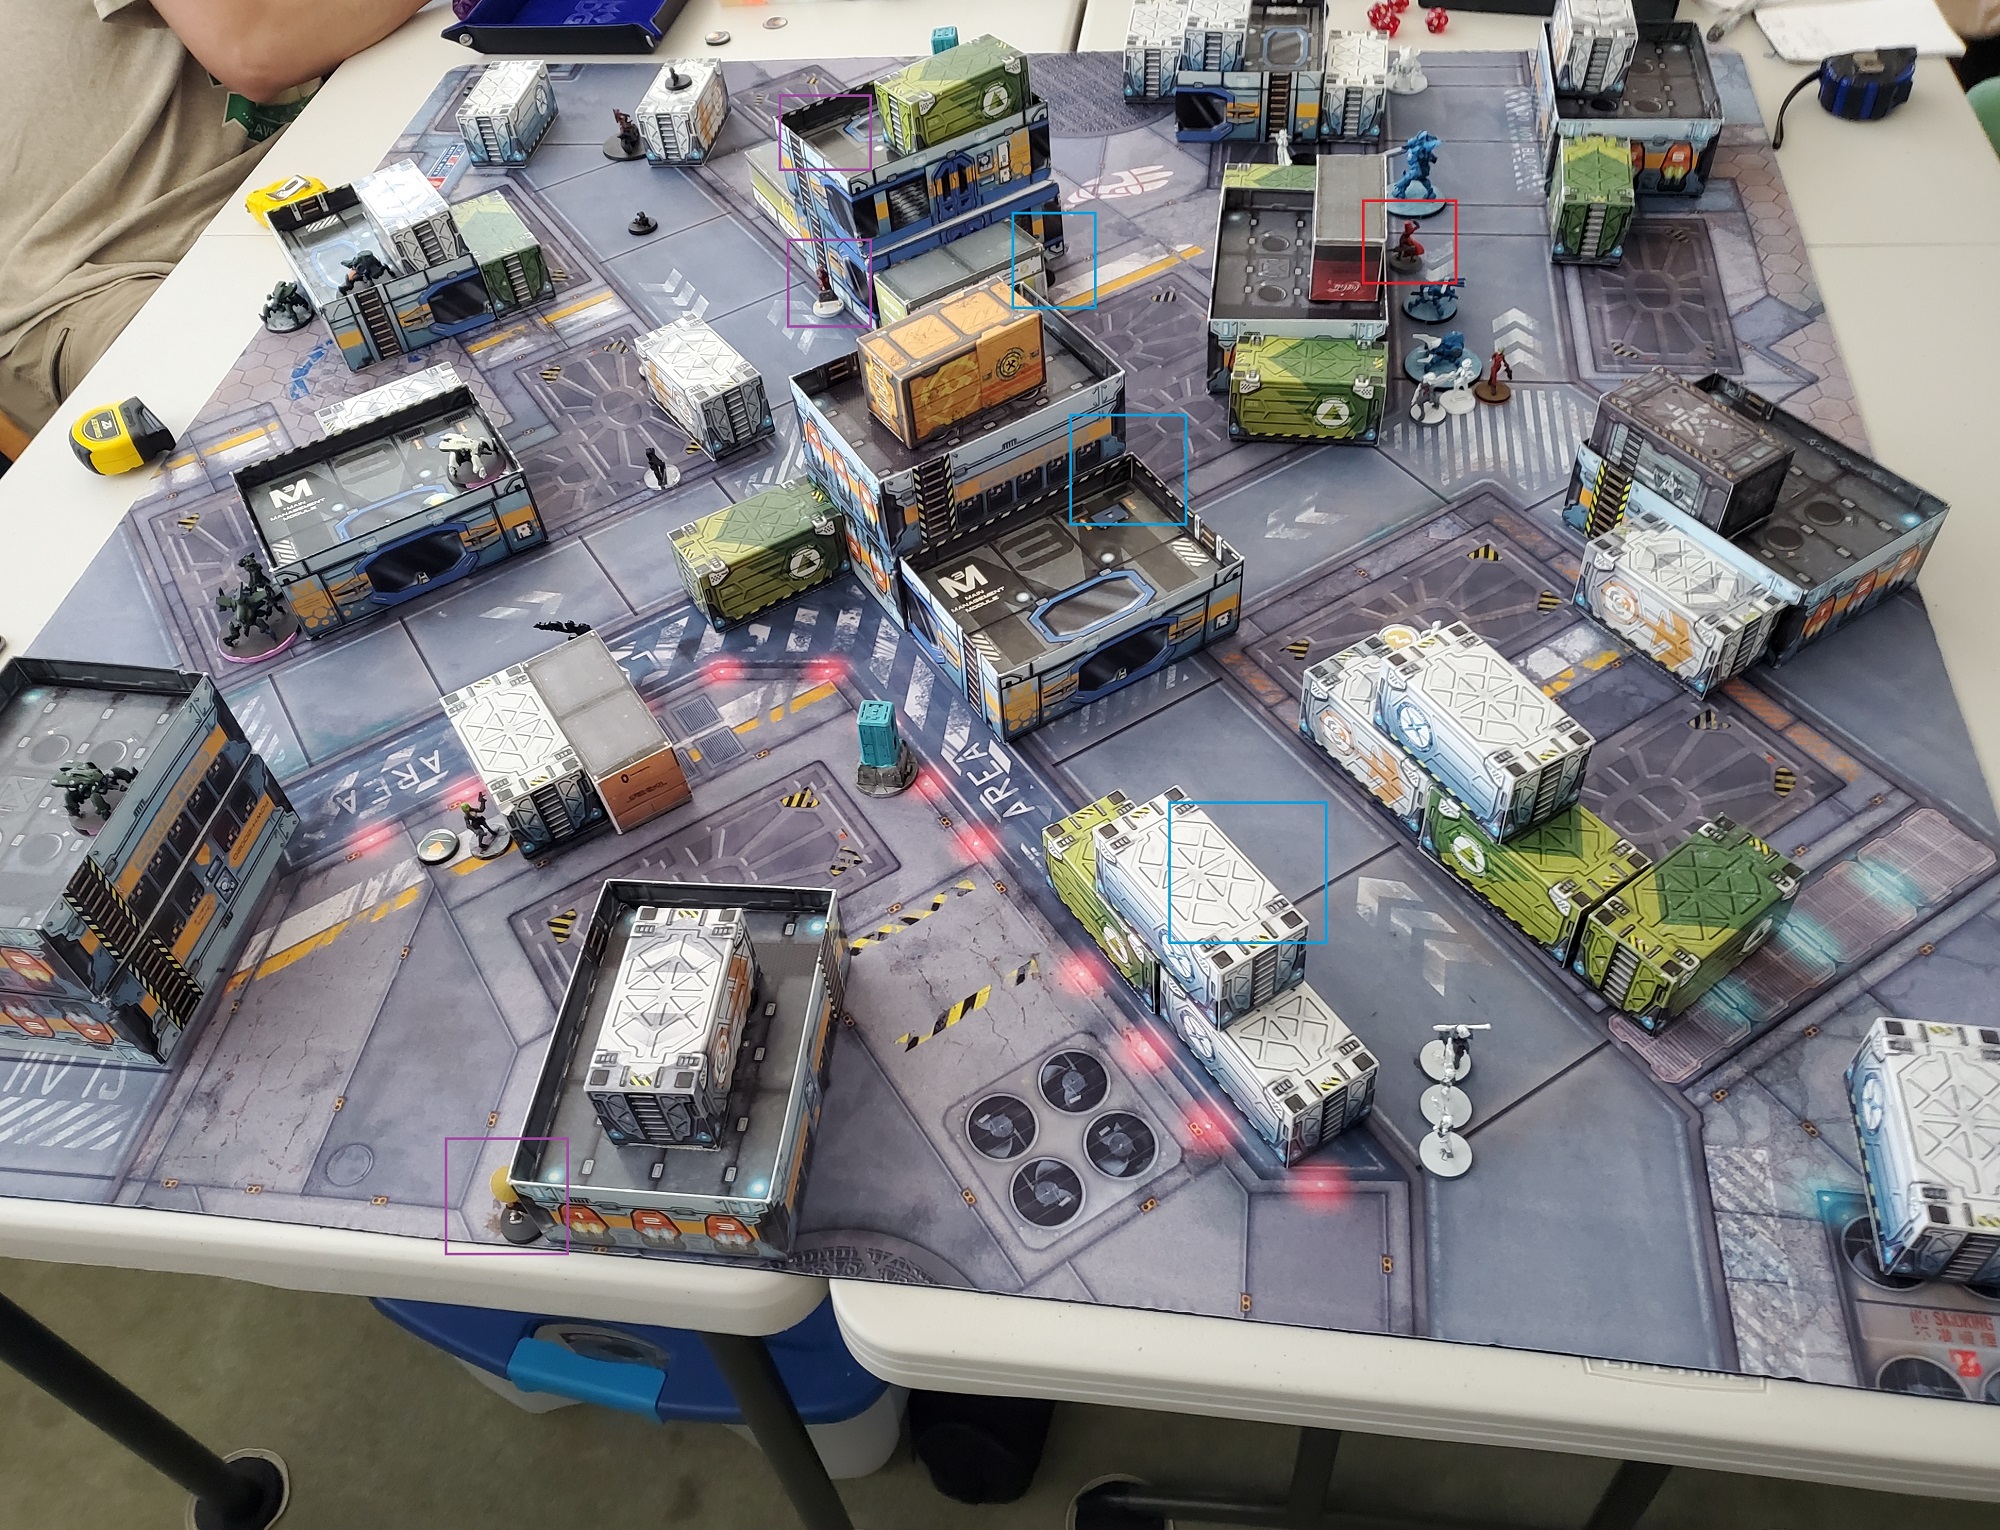
03 - Side-view of initial deployment.
- Red - Lt. Deployment
- Blue - 3 friendly HVTs
- Purple - 3 enemy HVTs
04 - My Turn 1, overview of how the turn went.
- Blue - Lizard TAG downed enemy Husong REM on high perch, Chaiyi REM in back corner, and a Crazy Koala.
- Red + Green - Custodier launching Deployable Repeater
05 - LT's grave mistake. Enemy Turn 1.
- Red + Green - Custodier's Repeater.
- Pink - Enemy Ninja with KHD de-cloaking to attack with Trinity.
06 - LT is down.
07 - Enemy Turn 1, enemy Ninja with HD makes a grave mistake. Multiple AROs kill her on the high ground, losing all of the hacking coverage on right flank of the table.
08 - My Turn 2, center is finally pushed. After suffering injuries/armor rolls against the Ryuken-9 suppressing the middle, the Riot Grrl Spitfire scores two criticals to down her.
09 - My Turn 2, another view of left flank of the table. Moderators have moved up to overwatch the left console.
10 - Enemy Turn 3, a desperate push from JSA. Rui Shi is one of the remaining attack pieces, but risks a bad gunfight against the Reaktion Zond and is destroyed.
11 - Enemy Turn 3, final blow. The last Ninja KHD attempts to push the left console, but misses with two pistol shots. A single Moderator bullet ends the JSA's hope to even the score.


Battle Report Author


Army Lists Used In This Battle
Recommend Commander For Commendation
Share this battle with friends
Red QueenWins
