Fought At Raveneye Port Battery: Port Rail Cannon
640 days 22 hours 50 minutes ago
Shotgun echoes
300 POINTSFrancisco slapped groggily at his comm, "What is it, I'm trying to sleep here?"
"Morats" came the reply. A bucket of ice could not have cleared the sleep from him quicker. "Your team is already being assembled. Meet them at Lift 23."
After hastily strapping on his sidearm and slinging his combi rifle Francisco was out the door in less than a minute. It was unusual for an Alguacil such as he to be given command, but he had declined the advanced EVA training offered to him with his years of experience, and preferred to stay in the thick of the fight with the regular troops.
Another probe by the Combined Army wasn't unexpected, but the Nomad forces had so securely locked down the port railgun that they had mostly shifted their efforts to the bow where the entire human sphere seemed to be trying to hold them back. Maybe they hoped that the nomads had become complacent or dropped their guard, he would show them the error of this line of thinking.
My opponent is playing Morats so I let him choose the location of our battle, he is the aggressor, I will defend anywhere he wants to attack. He chose the Port Railgun.
I win the Lieutenant roll and choose deployment as I have a good spot for my Alguacil missile and don’t like the look of the road on the other side. Lister had previously indicated that he thought going second was stronger in this mission so I half expected to be given first turn but he took first for the Morats.
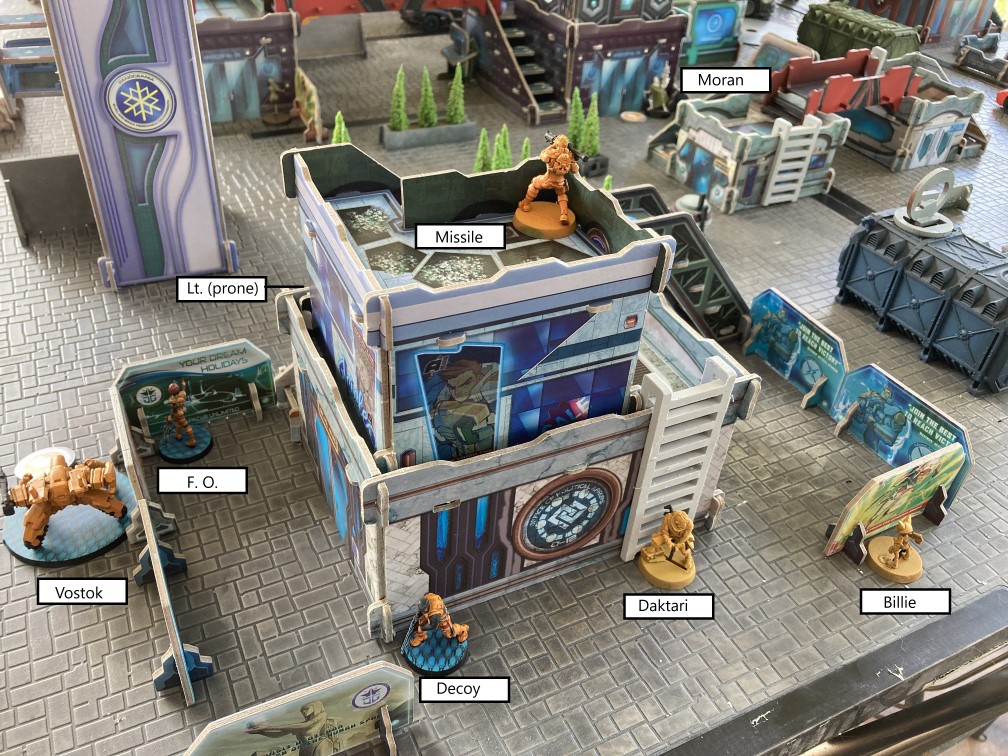
The missile took the roof with a mostly hidden deployment otherwise. I figured the missile would go down but it would hopefully give him some headaches or ensure he spent orders doing it safely. The Iguana was kept back as I wanted it safe from getting shot at first turn but wanted to get it into the action with minimal orders.
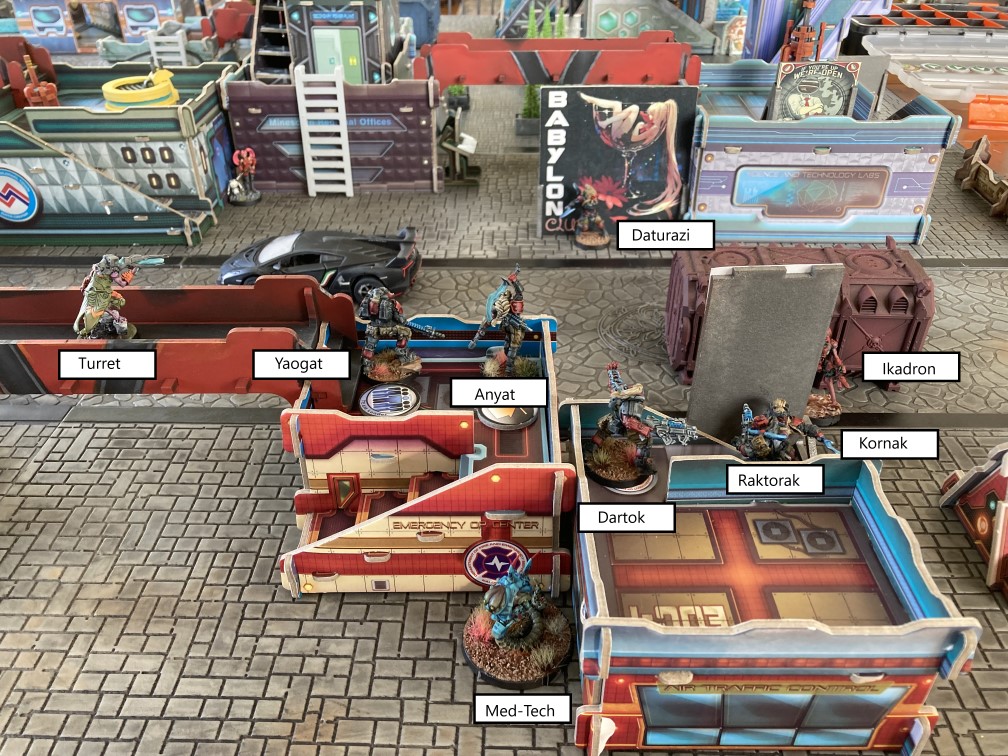
The Daturazi move up and do the smoke thing ensuring that the Yaogat sniper could shoot as safe as possible at the missile. Next order he activates the fireteam and Yaogat headshots the missile Alguacil – oh well, at least it wasn't worth much. Ikadron on my left moves forward to claim a quarter and the right one does the same. It then moves further up but triggers a koala and goes unconscious. Other than that he mostly pushes forward hiding behind buildings and ensuring he is safely in both of his zones with many bodies.
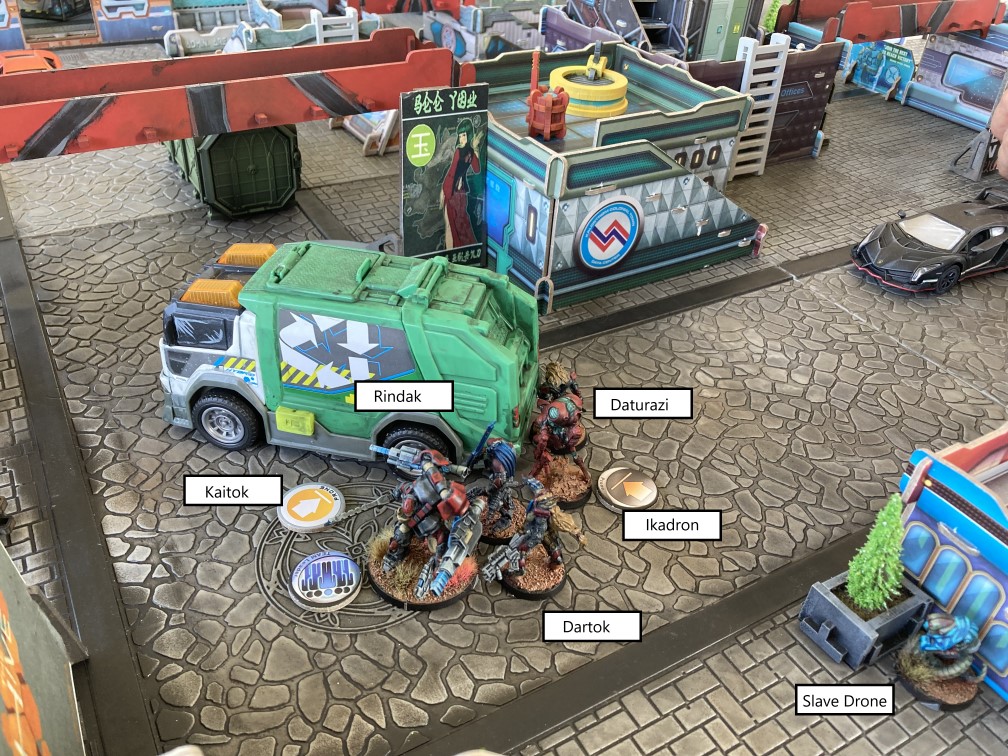
I want to move the Iguana up and take shots at the rocket Kaitok but it would be great to get a free crack at him if I can immobilise him first. So I very not cleverly move my sombra up into position forgetting that she is a killer hacker and doesn’t have carbonite – idiot. We abandon that plan and then just march the Iguana up taking out his turret on the first action and then spending another 4 orders to drop the Kaitok, he beats me twice but my armour holds firm, he is also well armoured though and only just goes unconscious. Reforge the fireteam to bring the Vostok in to replace the missile and push it forward to claim my left quarter. The Moran then shuffles up closer dropping his second koala on the roof in range of a Dartok. Final order of the big group is the Sombra throwing a trinity at the Dartok and forcing him to choose to eat the trinity or the koala. He dodges the koala and the trinity just barely drops him unconscious. Finally Massacre and his posse just mosey up the table for position.
The left Daturazi just moved up for position while the right one threw smoke from safety. Then the "little slave drone that could", moved up and got both the Dartok and the Ikadron back in the game before jazz managed to immobilise it through the Moran's repeater. I thought this would at least mean the Kaitok wouldn’t be a problem anymore but then the Rindak turned around and stood him up – FFS. The Daturazi on that flank then came forward through his smoke and tried to get the drop on the Sombra but her armour held and she dropped to her NWI state. On my left the core fireteam made its move and came over the building shooting down my decoy Alguacil, performing follow-up on my HVT, and then moving so the Raktorak put some hurt on the Vostok from point blank range. I had some hacking ARO's but they didn’t accomplish anything. Taking aim again the Raktorak went for the Vostok again this time waiting for the point blank shots before using blast mode 3 times. The Vostok fell unconscious but not before double crits on the Raktorak, painting the entire area in his blood. The fireteam then retreated behind some bushes but stopped very much on my side of the table daring any of the Alguaciles to stick their head up. The last action was for the Yaogat sniper to throw a couple of shots at the Iguana but the TAG got the better of him and sent him scurrying for cover while Jazz was able to spotlight him through the Moran.
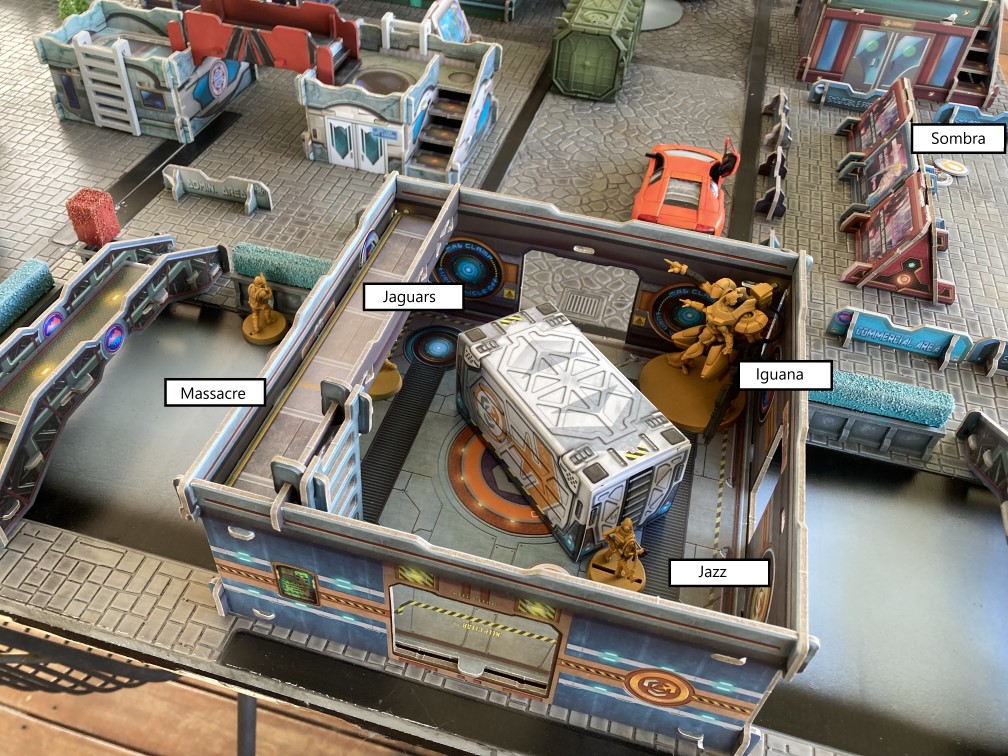
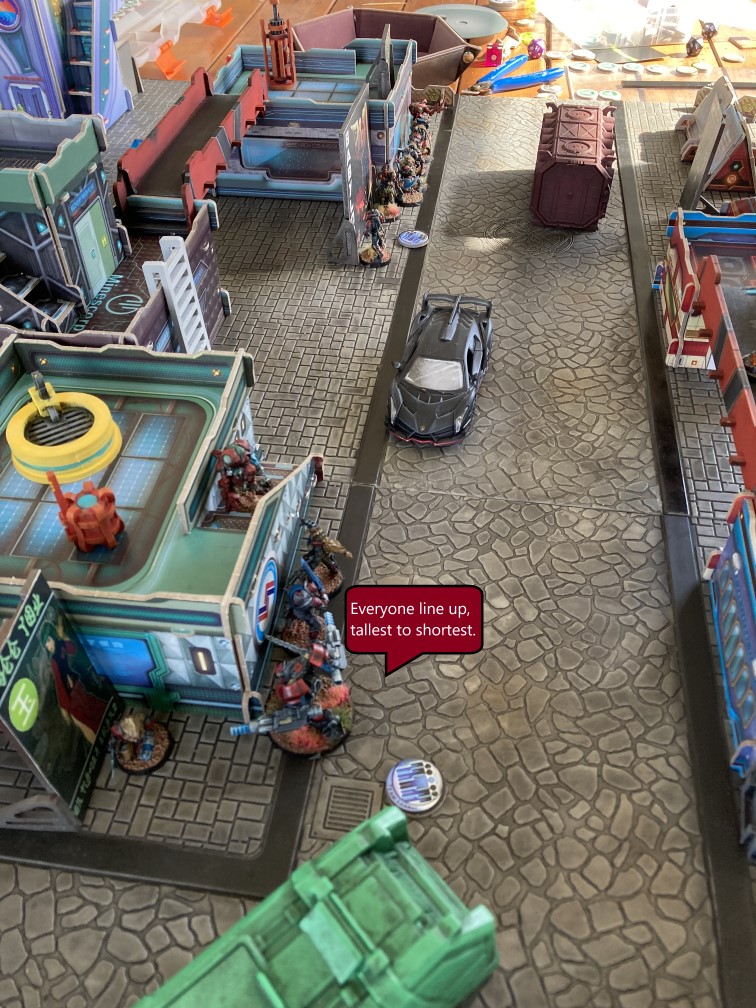
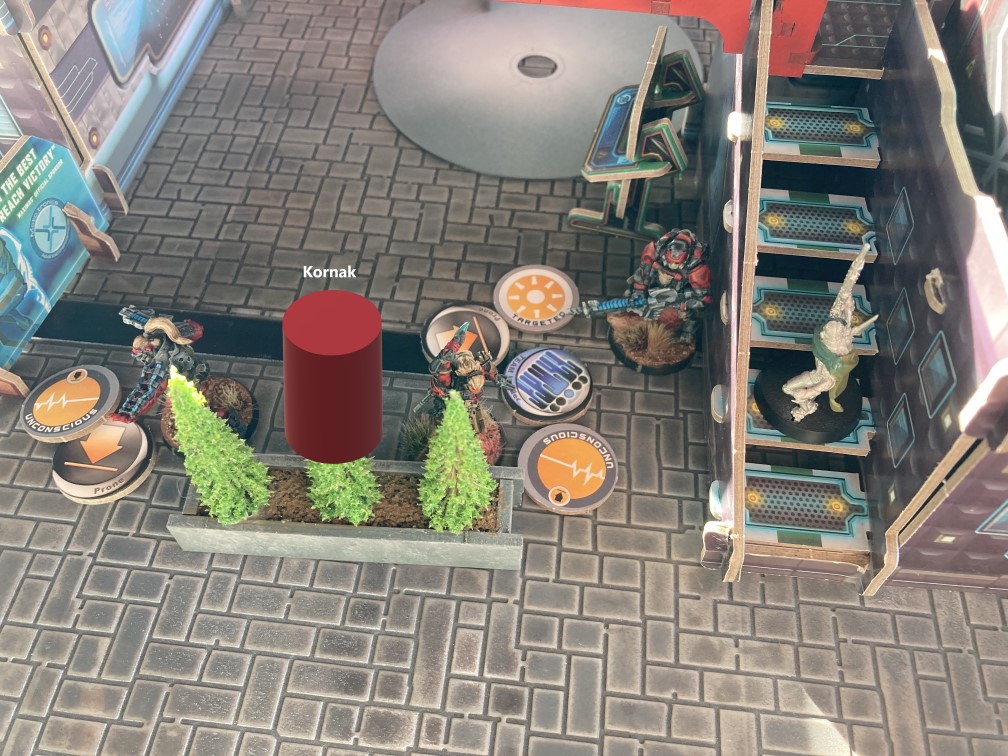
Started things off by shuffling the Moran over to the main group. Next the Sombra backed away from the Daturazi and gave him a spray from her shotgun with him returning the favour with his chain rifle. Her armour held and his did not – good times. Next the Massacre and friends moved up throwing an eclipse as they rounded the corner on Kaitok and friends, only the big boy made his dodge. Double moved into the Kaitok with Massacre while the Jaguars stayed in the eclipse and both the Kaitok and the Ikadron made their dodge, the former to get out of engagement and the latter to look at Massacre. Had a long think and then moved Massacre back into the Kaitok again but not before throwing a shotgun template at the Dartok, the Rindak, the Slave drone, and the Ikadron. Kaitok disengaged again, while all four targets took a wound, although the Ikadron did fry Massacre to a crisp – totally worth it as only the Rindak was left up on NWI from that cluster. Although he hadn't seen it, the Moran was inspired by Massacre's sacrifice and crept around to spray the core fireteam with his own shotgun. He also died from massed AROs but not before dropping both the Anyat and the Dartok into unconsciousness. The Iguana commenced a slow mosey to my left pouring fire into the Kornak and was rewarded with a kill. I mulled for ages what to do unsure about points in his right zone. Eventually finished the turn with the Sombra moving up into the enemy zone and attempting but failing extremis recovery.
I had both right quadrants (expensive Sombra for the win) but as the Yaogat sniper had made a guts move out of LOS of the Iguana he had inadvertently stepped out of my left zone. So it was two zones to one for 2 points, me in his right zone for 1, and his classified for 1. Score now at Morats 2, Corregidor 4.
Although Morats don't feel loss of lieutenant as much as some other forces he was hurting for orders in a big way after the last turn. The Daturazi on my right threw some smoke and took out a Jaguar. The other Jaguar then survived the attentions of the Kaitok. The Rindak got the Dartok back to his feet again to help secure that quarter and then the leftmost Ikadron ran to be far away while still securing his left zone.
I just had to secure my two zones for the win so the Iguana went on a merry stroll to clean up. He first moved across and took out the Yaogat sniper at close range and then continued to the left shooting unconscious Morats until he got line of sight on the Ikadron and dropped him as well. He then moved into the Morat's left zone to take control of it. My lieutenant revealed himself falling out of the fireteam and ran forward to claim my left zone as well. The Sombra backed off and completed extremis recovery and we ended the game there.
I hold two zones to his one for 2 points, his left for another 1, and my classified for another 1. Final score Morats 2, Corregidor 8.
The table had some wide open spaces which worked against my opponent moving quite how he wanted at times but the turning point was the two shotgun blasts from both Massacre and the Moran on the two groups of bunched up Morats. This will probably see me overvalue shotguns for the next few games and be punished for it, or just ensure that Lister spreads out more and doesn’t give me the shots. This was my first game with a TAG and it was good fun to stomp around with armour 9 in cover. As can be seen, the Moran is not even basecoated as I just finished assembling him and sticking on his cloak. I can understand why they are such a highly valued piece and I expect my opponent to put more effort into removing them early in the future.
Francisco regarded the combat zone. The last of the Morats had fled and his forces had taken few casualties, although he still walked the field to attend to each of the fallen. He was not surprised to find Massacre's body missing, there was no keeping that man down. He ensured the dead were treated according to their individual wishes before returning to his bunk and sleep. Celebration would have to wait.
Battle Report Author

Army Lists Used In This Battle
Recommend Commander For Commendation
Share this battle with friends
SheldonWins

Sorry to spam your battle report, but we’re missing your address for Durgama Defense Coalition patches! You should have received an email asking for your info, so check your inbox!
Great looking table! Can’t wait to see your painted models.
Good thing they were bunched up, templates for the win!