Fought At Darpan Xeno-station: Xenofarm Gamma
647 days 21 hours 40 minutes ago
Silencing the Witnesses
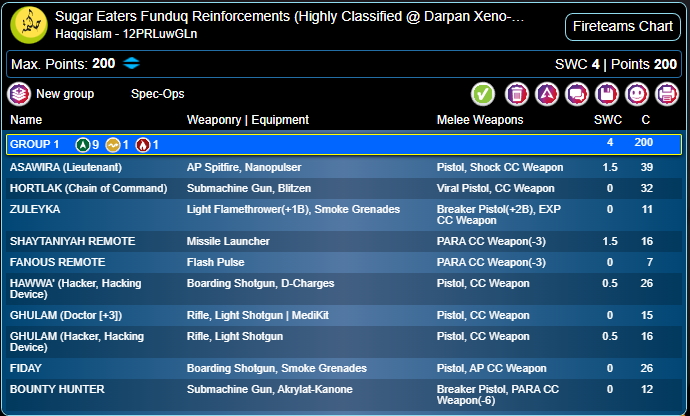
200 POINTSHot off the tail end of the battle with YuJingYu Imperial Agents during the Soruşturma Bölümü's initial investigations of allegations here at the Darpan Xeno-Station, all is not quiet. Remote sensors set up by quantronic defense contingents of the Sugar Eaters attaché have picked up the movements of a small assault force in the vicinity of the theater of operations. Signatures are fuzzy, but suggest more Yu Jing elements?
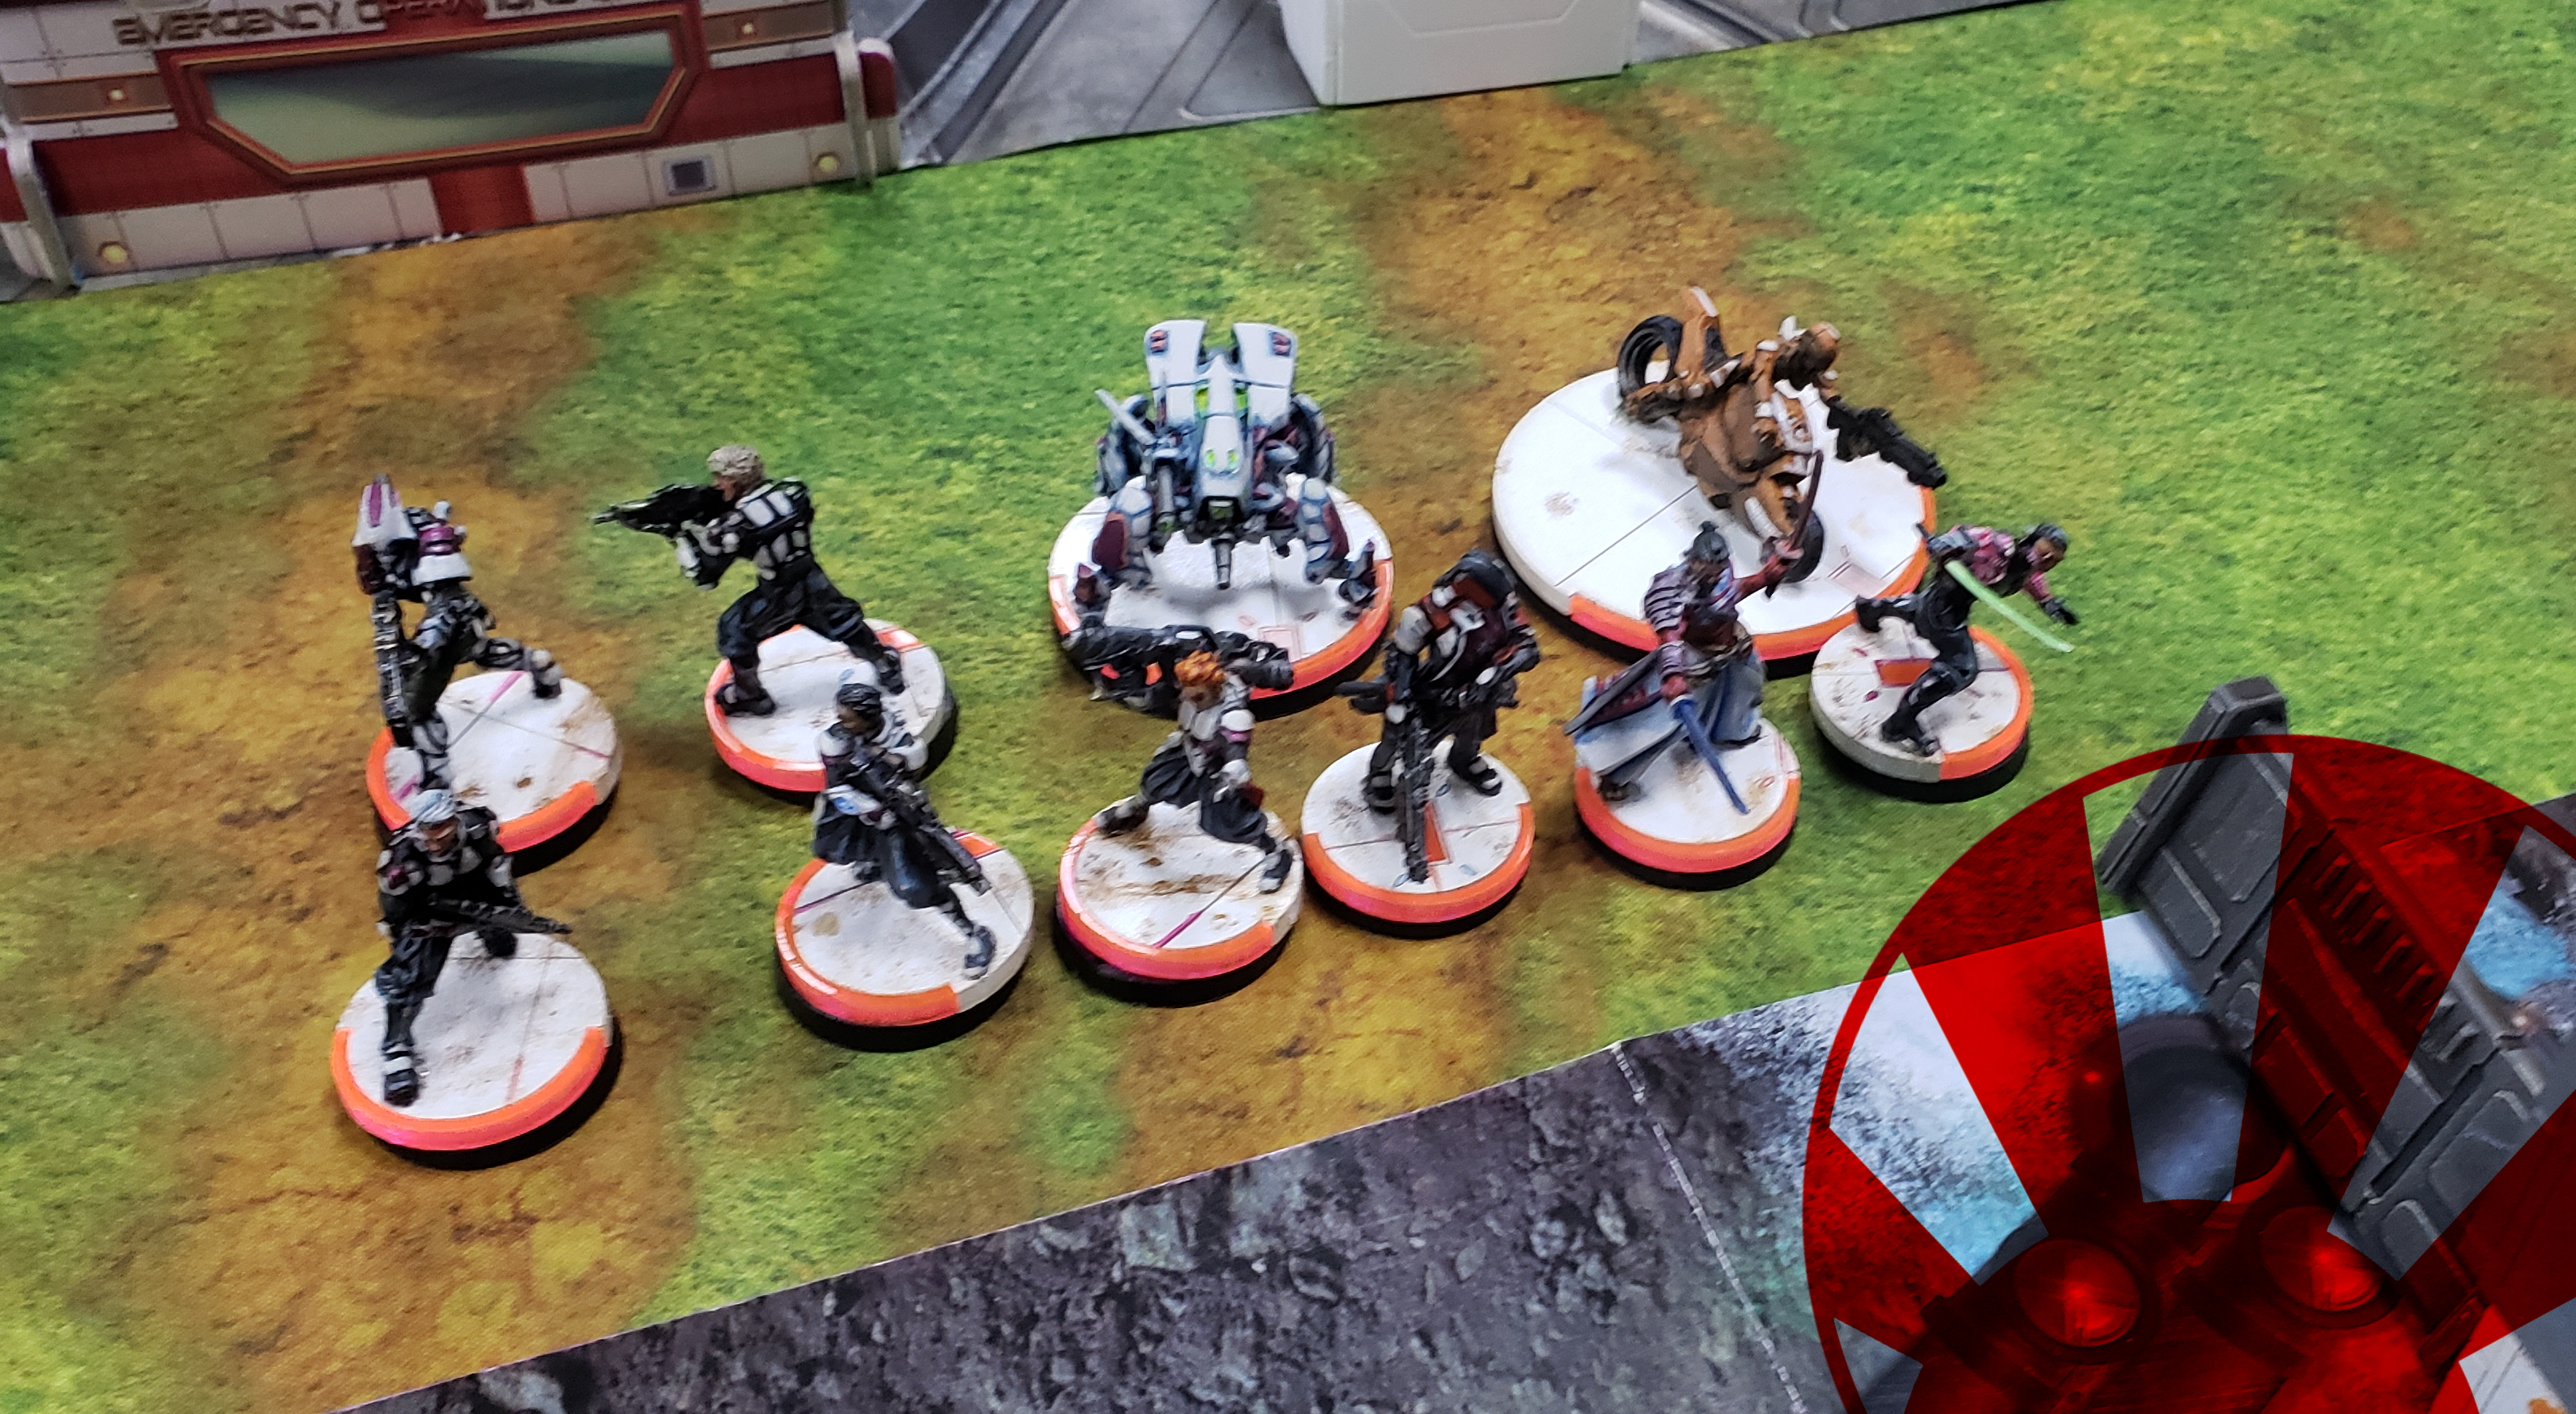
Hunzakut scouts are sent back from whence our troop came, and find themselves spotting stealthy figures moving about the cover near the main road. It's remarkable that these individuals can manage such a clandestine approach, but the crack spies of the Soruşturma Bölümü are experienced in gathering every detail of a target - and soon make out striking white armor and traditional Japanese imagery. This can only mean a JSA attack force. That they would be so bold is surprising, but considering the state of the Imperial Service contingent after the Sugar Eaters' last firefight - it makes sense.
As the Hunzakuts make their way back to the Mobile HQ, the "honorable warriors" continue moving forward, surely with blood in their intent. The Candy Corps readies for war, again.
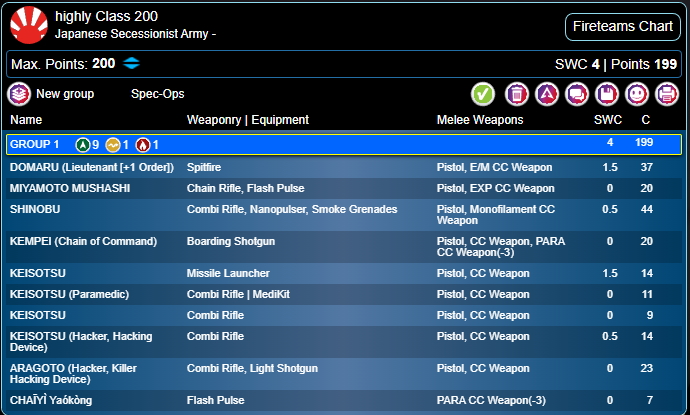
We can only assume that the Japanese combat group now before us was here to strike out at the Yu Jing elements we had just faced in unfortunate combat. With bloodletting as their intent, they most assuredly could not stand our presence threatening to report their plans to our Yu Jing allies. Perhaps not knowing that the Sugar Eaters had just squared off with Imperial Agents, the secessionists poised to strike out. With a bit of quick thinking, our Field Commander set forth our goals in this engagement.
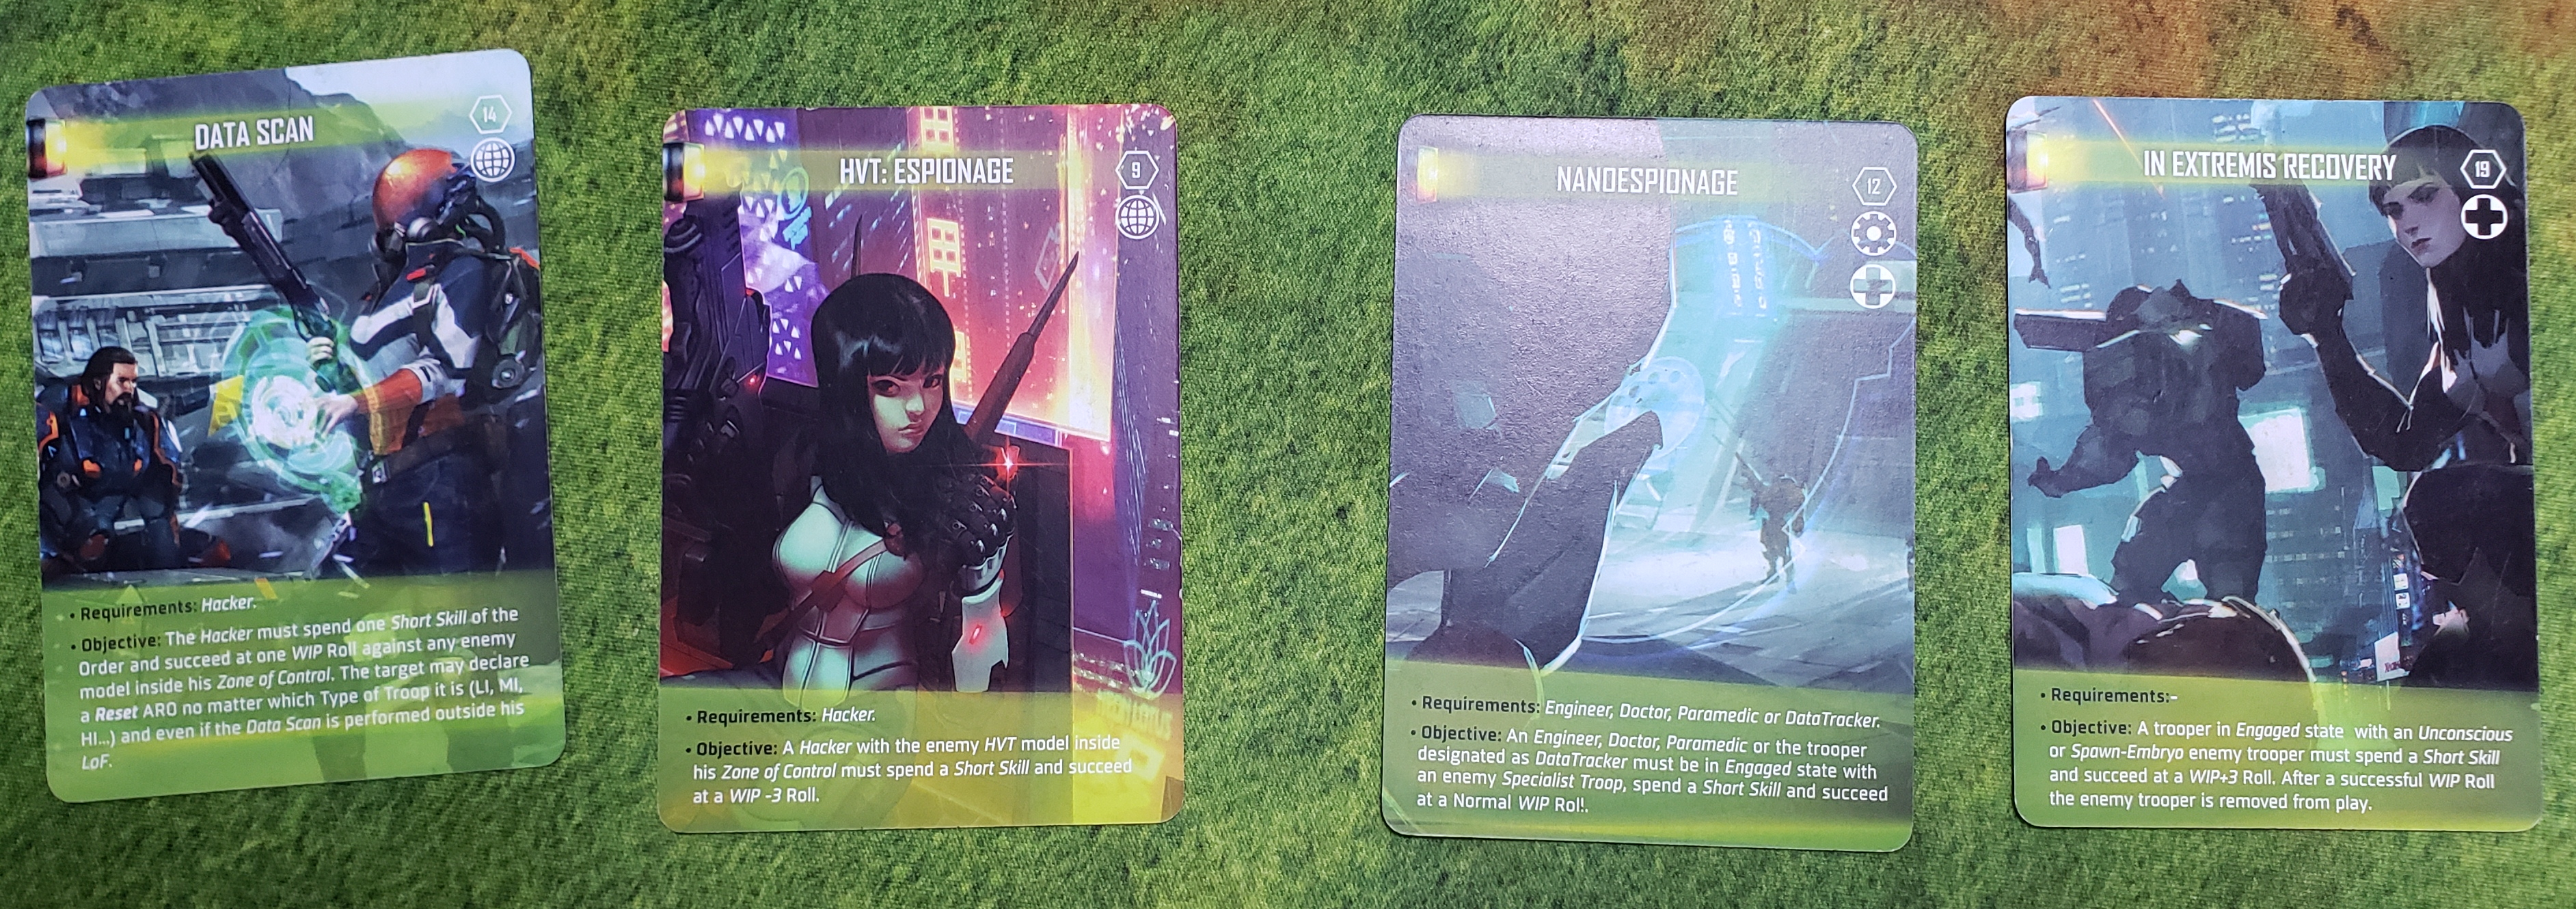
Classifieds are drawn: Data Scan, HVT: Espionage, Nanoespionage, and In Extremis Recovery
Confirming that this was now a combat zone, and with the JSA forces now on the offensive, we set forth testing the mettle of our respective leadership.
Candy Corps rolls a 13, succeeding out against JSA's failure on a 16. We opt for first turn, and the JSA forces our deployment on the red side.
* My Authorized Bounty Hunter rolls a DA CCW (7) and chooses to reroll... for a Light Flamethrower (4)
* I spend a command token to hold two models in reserve, allowing JSA to deploy.
* I choose to counter deploy one side of the field with my Hawwa placement. The intention is to score a classified or two and also spotlight Mushashi for a guided missile shot.
* My second model placement is a Fiday in the JSA deployment zone, succeeding on an 11.
{Player note: I was 100% sure that the Keisotsu without any specialization was a cheap lieutenant option, and I set my Fiday up to kill that piece early}
* KendoZero holds back a hidden deployment, placing his Oniwaban in his deployment zone as well.
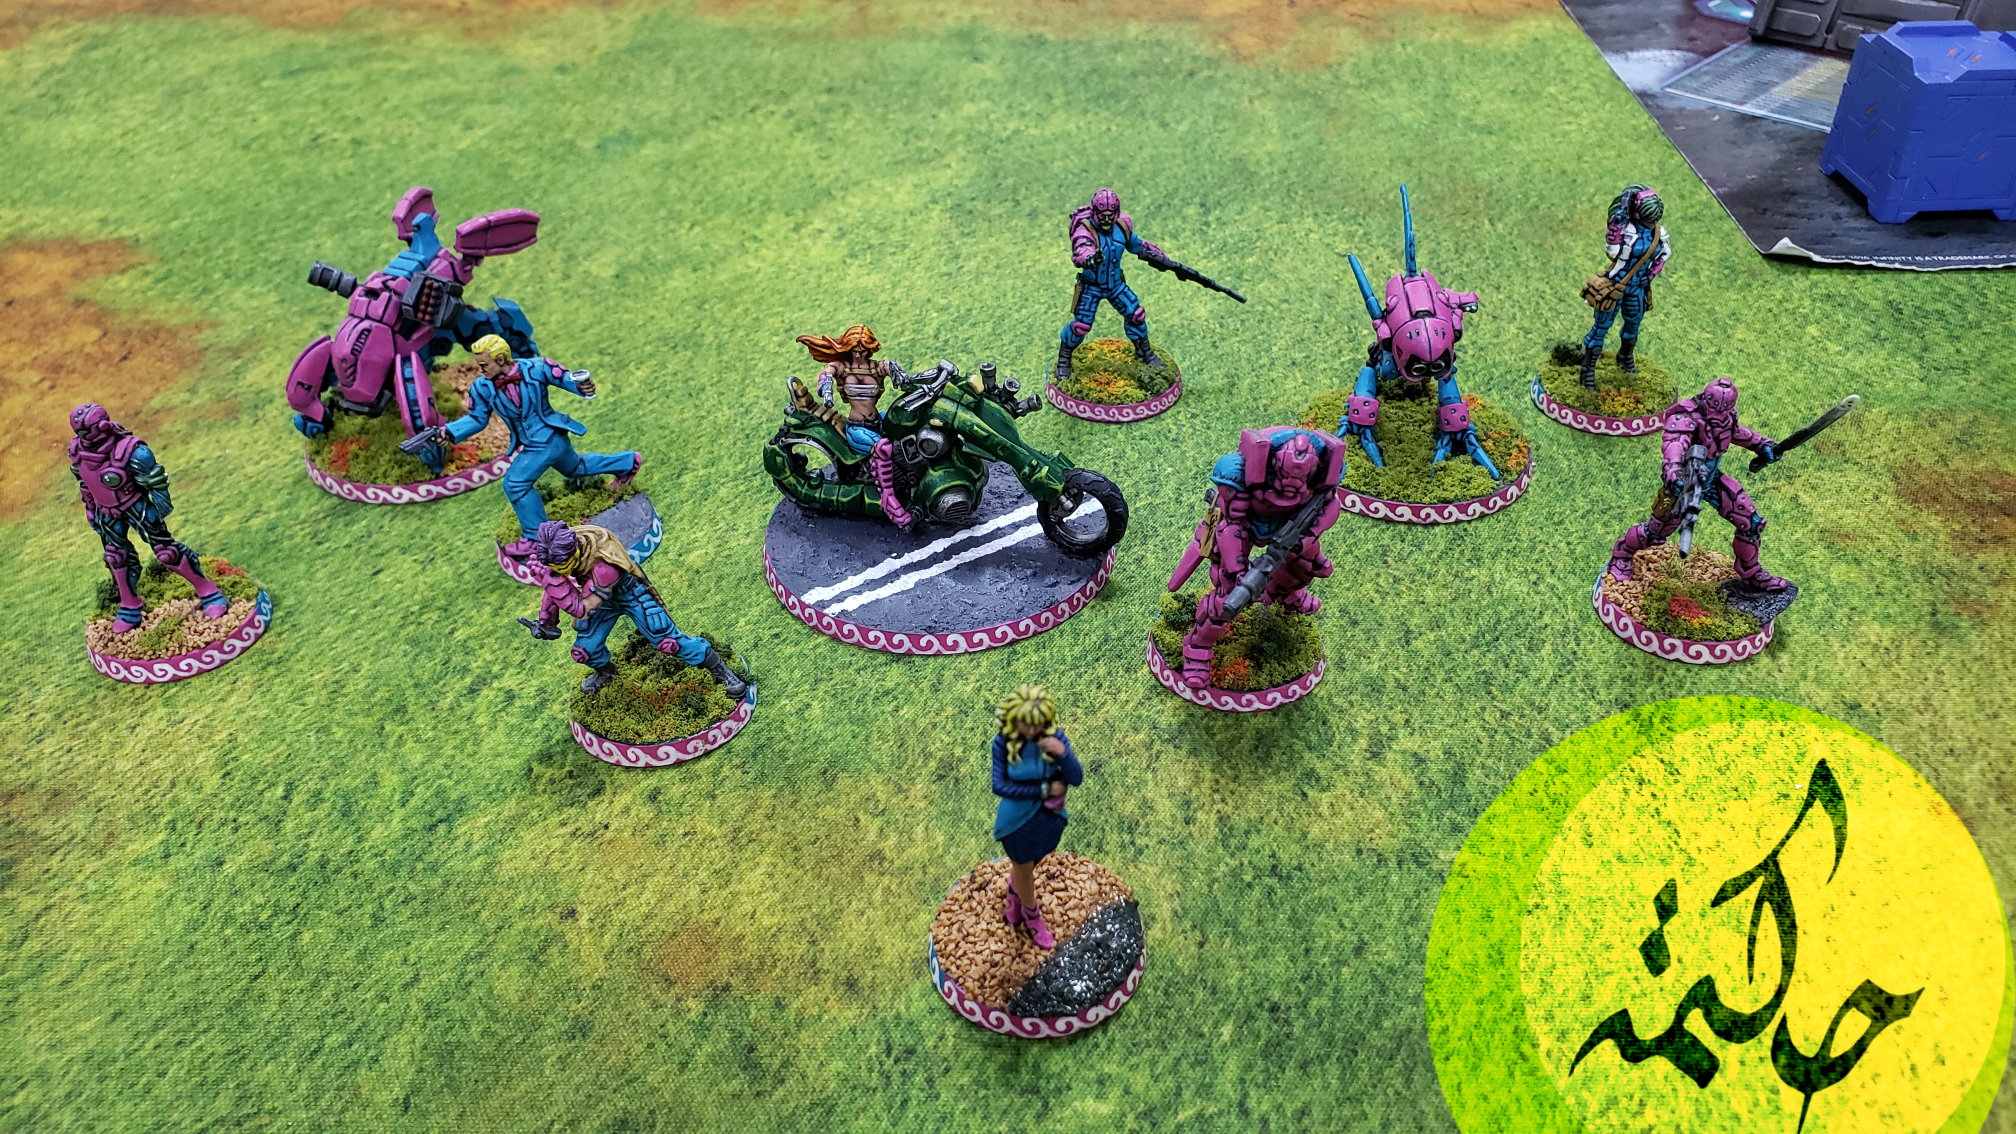
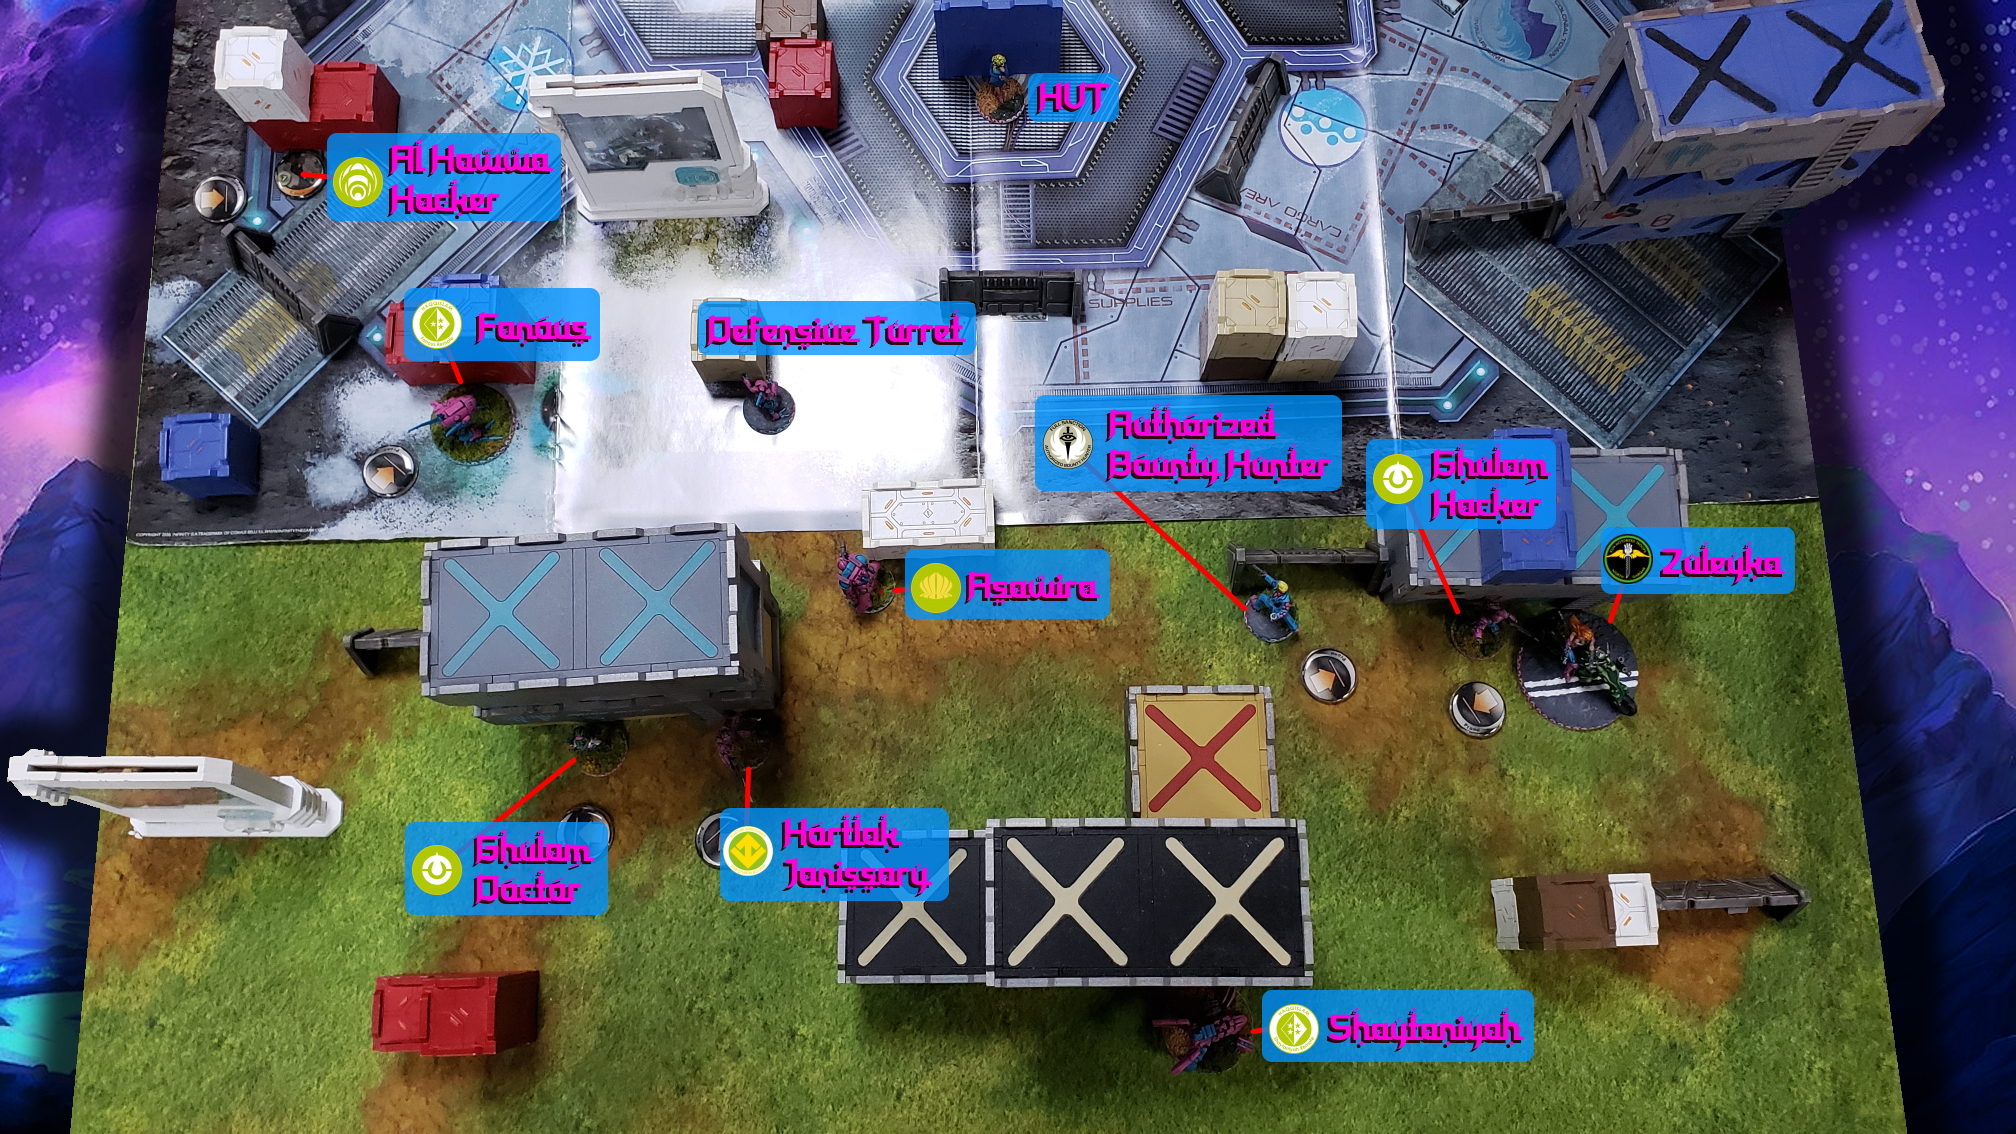 Haqqislam deployment - the Shaytaniyah is dug in for guided missile shots, and the Hawwa is poised to snag an early objective or two
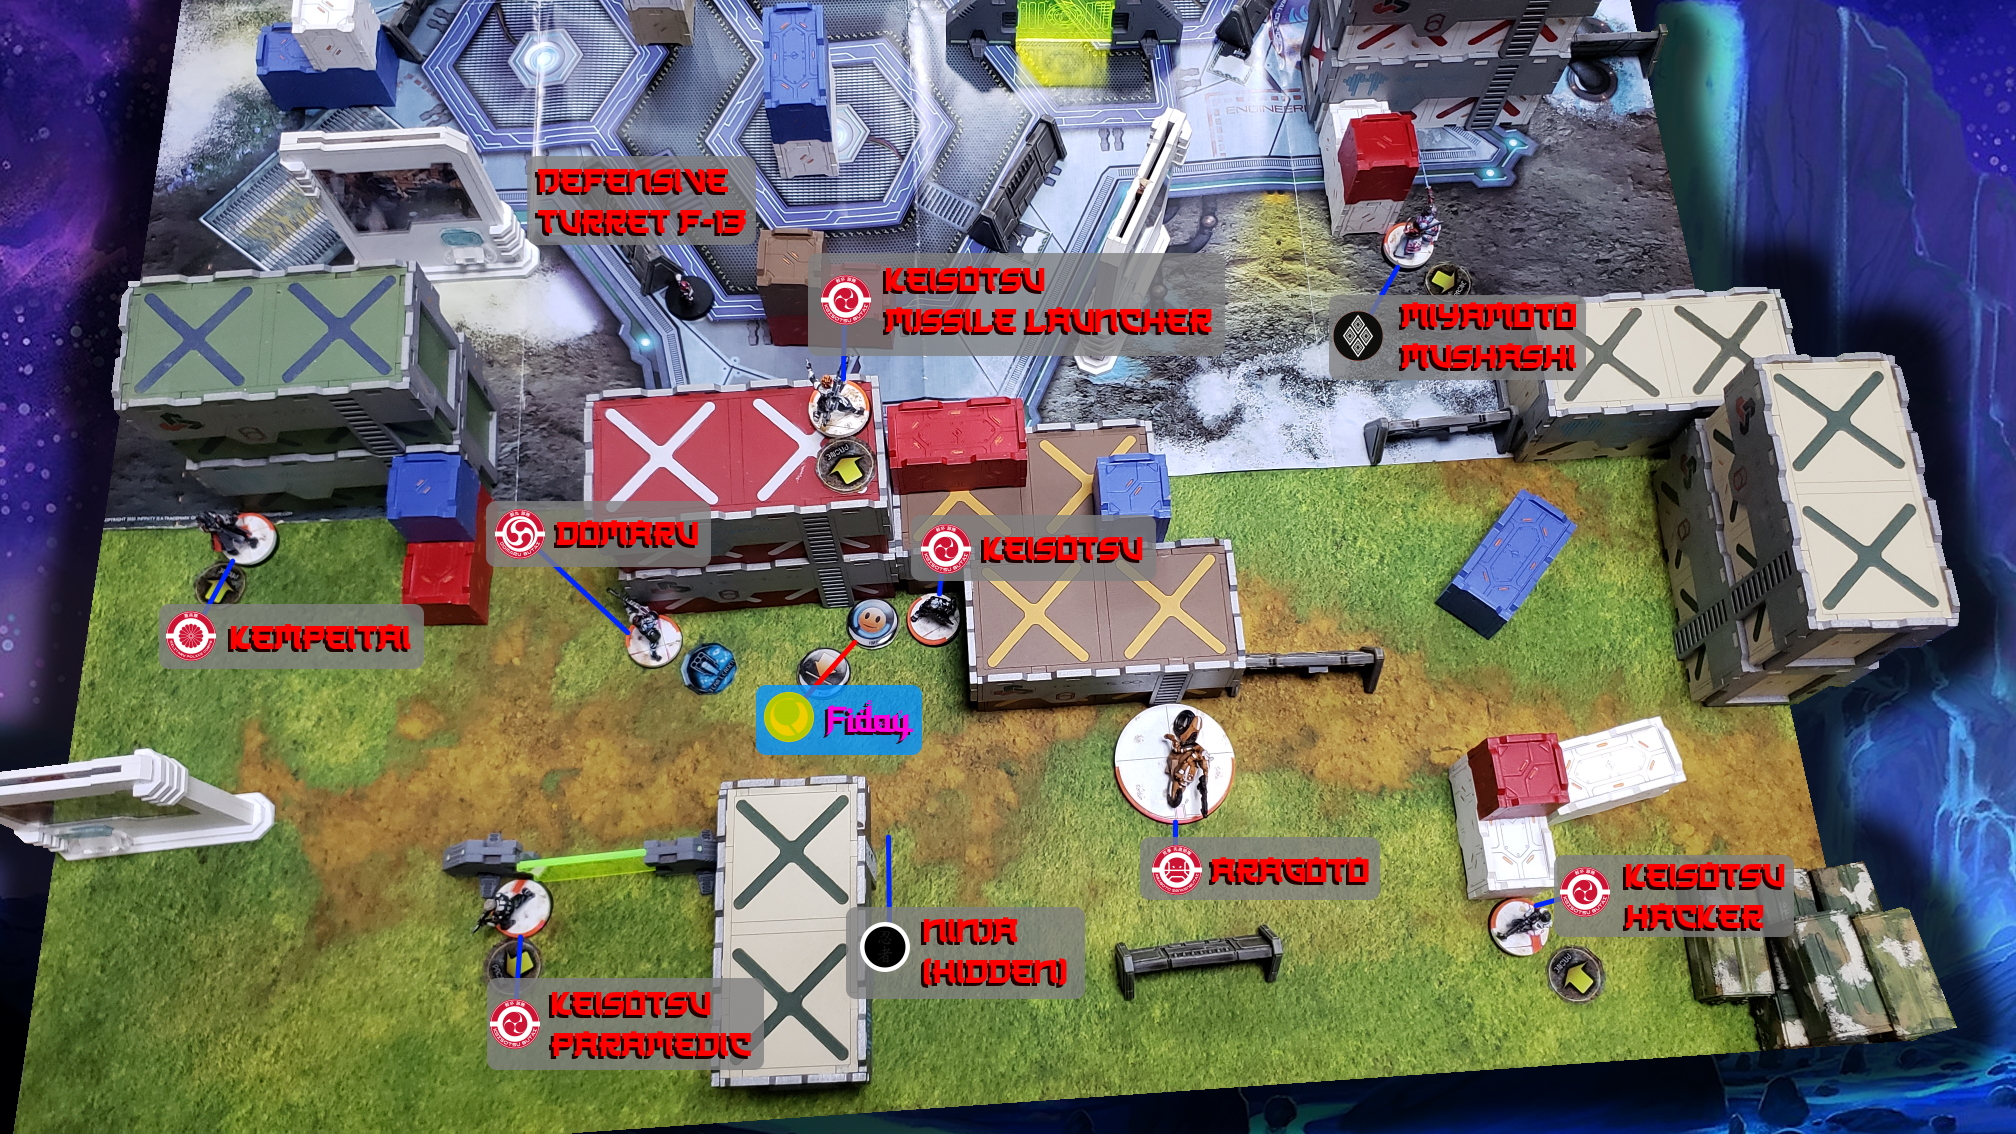
[- Top Turn 1 -] : Haqqislam
* I begin reluctantly to face off against the Keisotsu core team's missile launcher. Luckily, it's not a pure link due to the inclusion of a Domaru. My Asawira immediately reveals its status as my Lieutenant and shoots at the Missile launcher - we're at 23.5" and I'm able to fire in the +3 band. The Keisotsu gets an 18 and a 4 versus my 9, 9, 6, and 4. Two saves and one wound yields an unconscious Keisotsu!
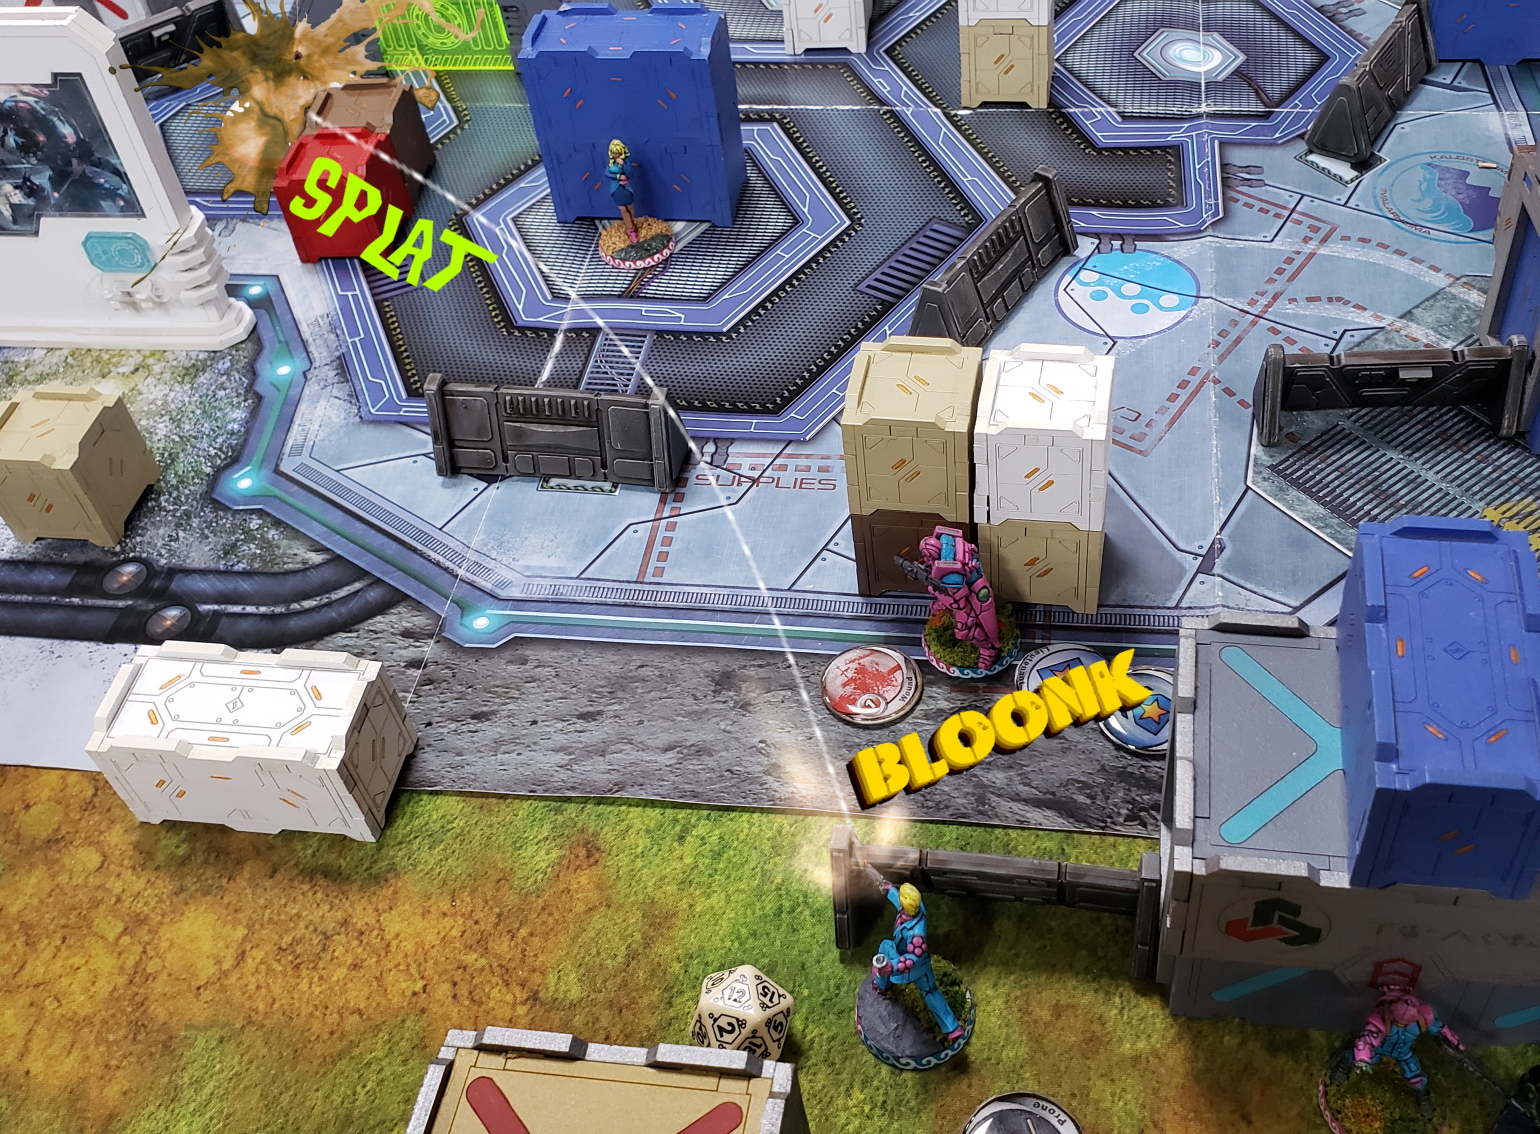
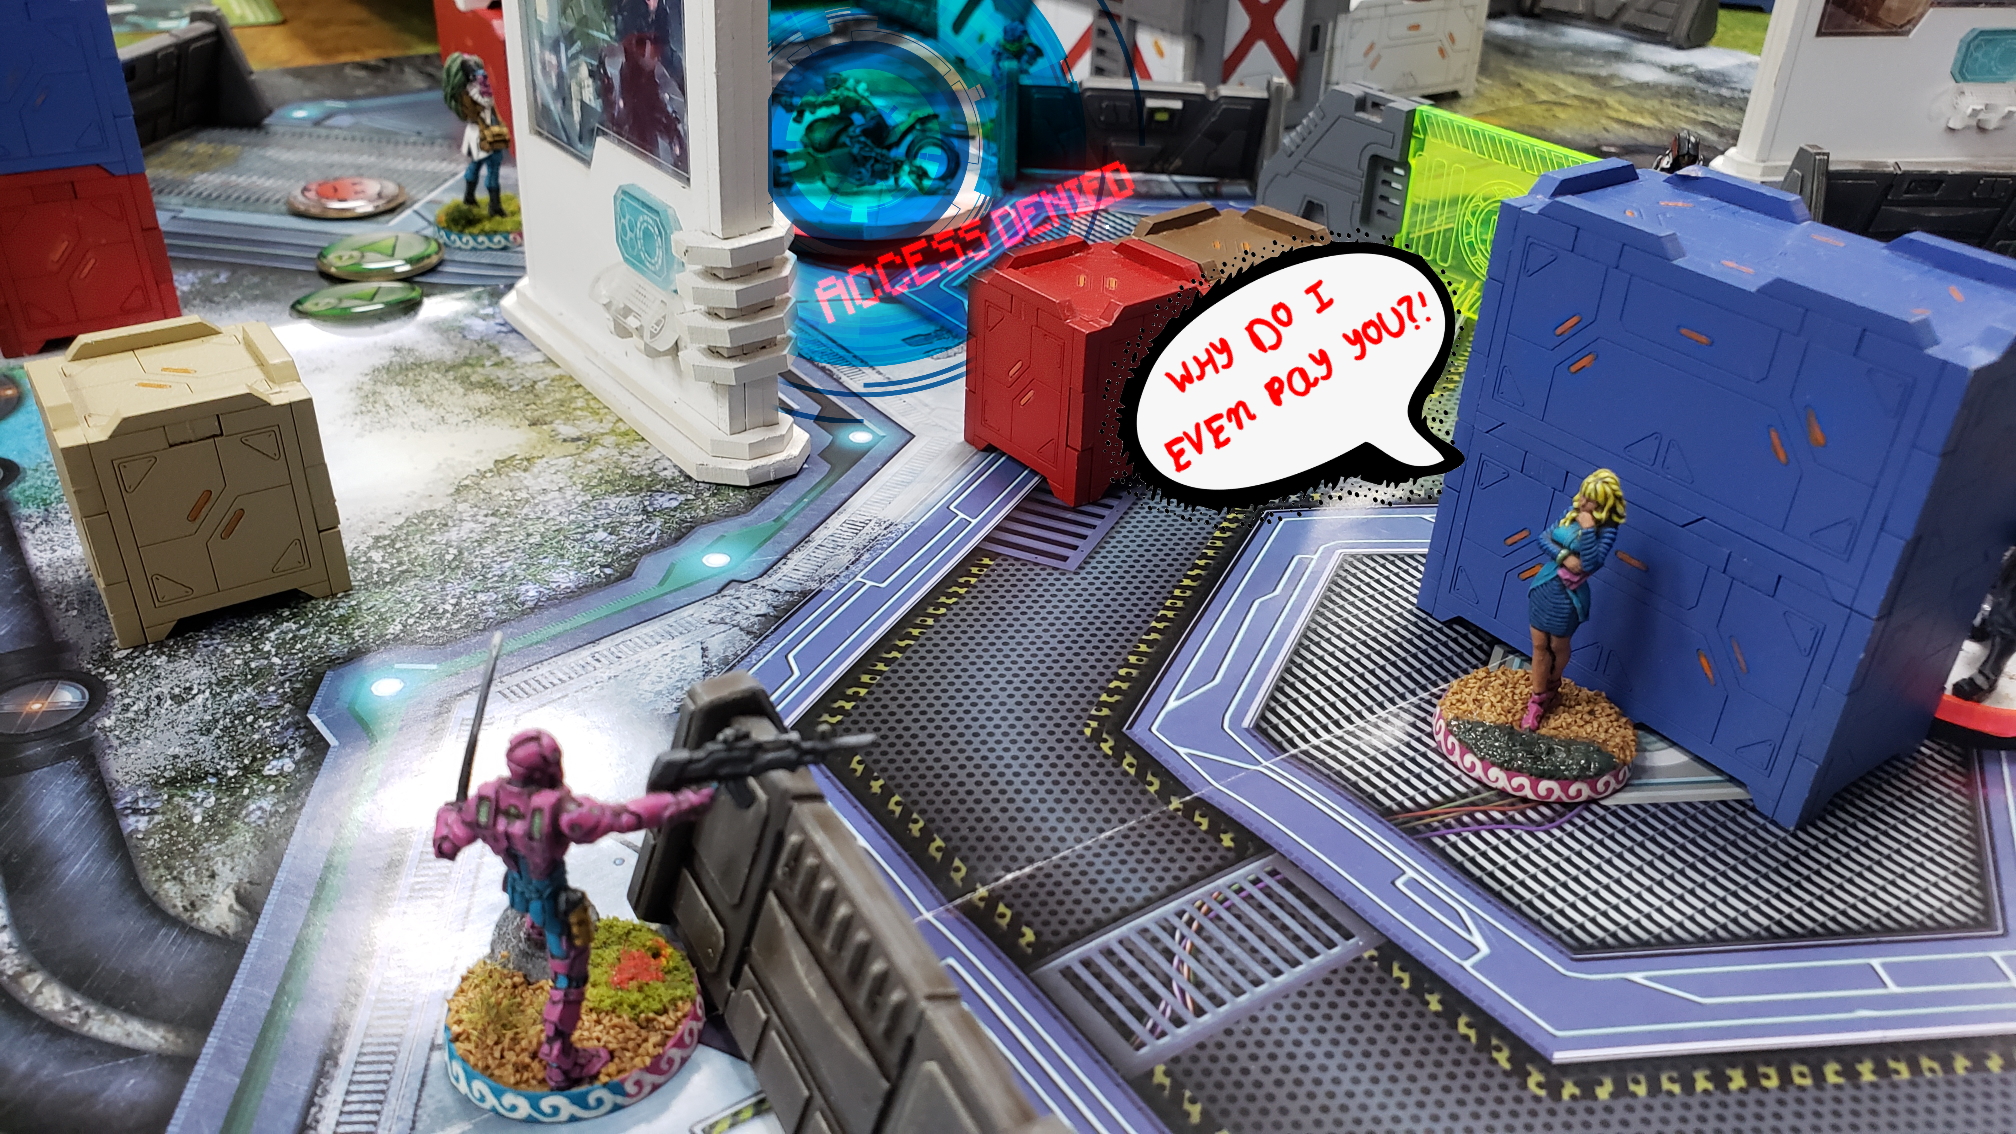
* With the danger of the Missile in overwatch removed, I move my Al Hawwa (Camo Token) towards Mushashi who is on the other side of an advertisement. Assuming that I will easily score a couple of classifieds, as I'm extremely close to the HVT as well - I attempt Data Scan first vs Mushashi.
Fail
I try again,
Fail
and again,
Fail
and again,
Fail
and again,
Fail
and again,
Fail
....one more time....
Fail
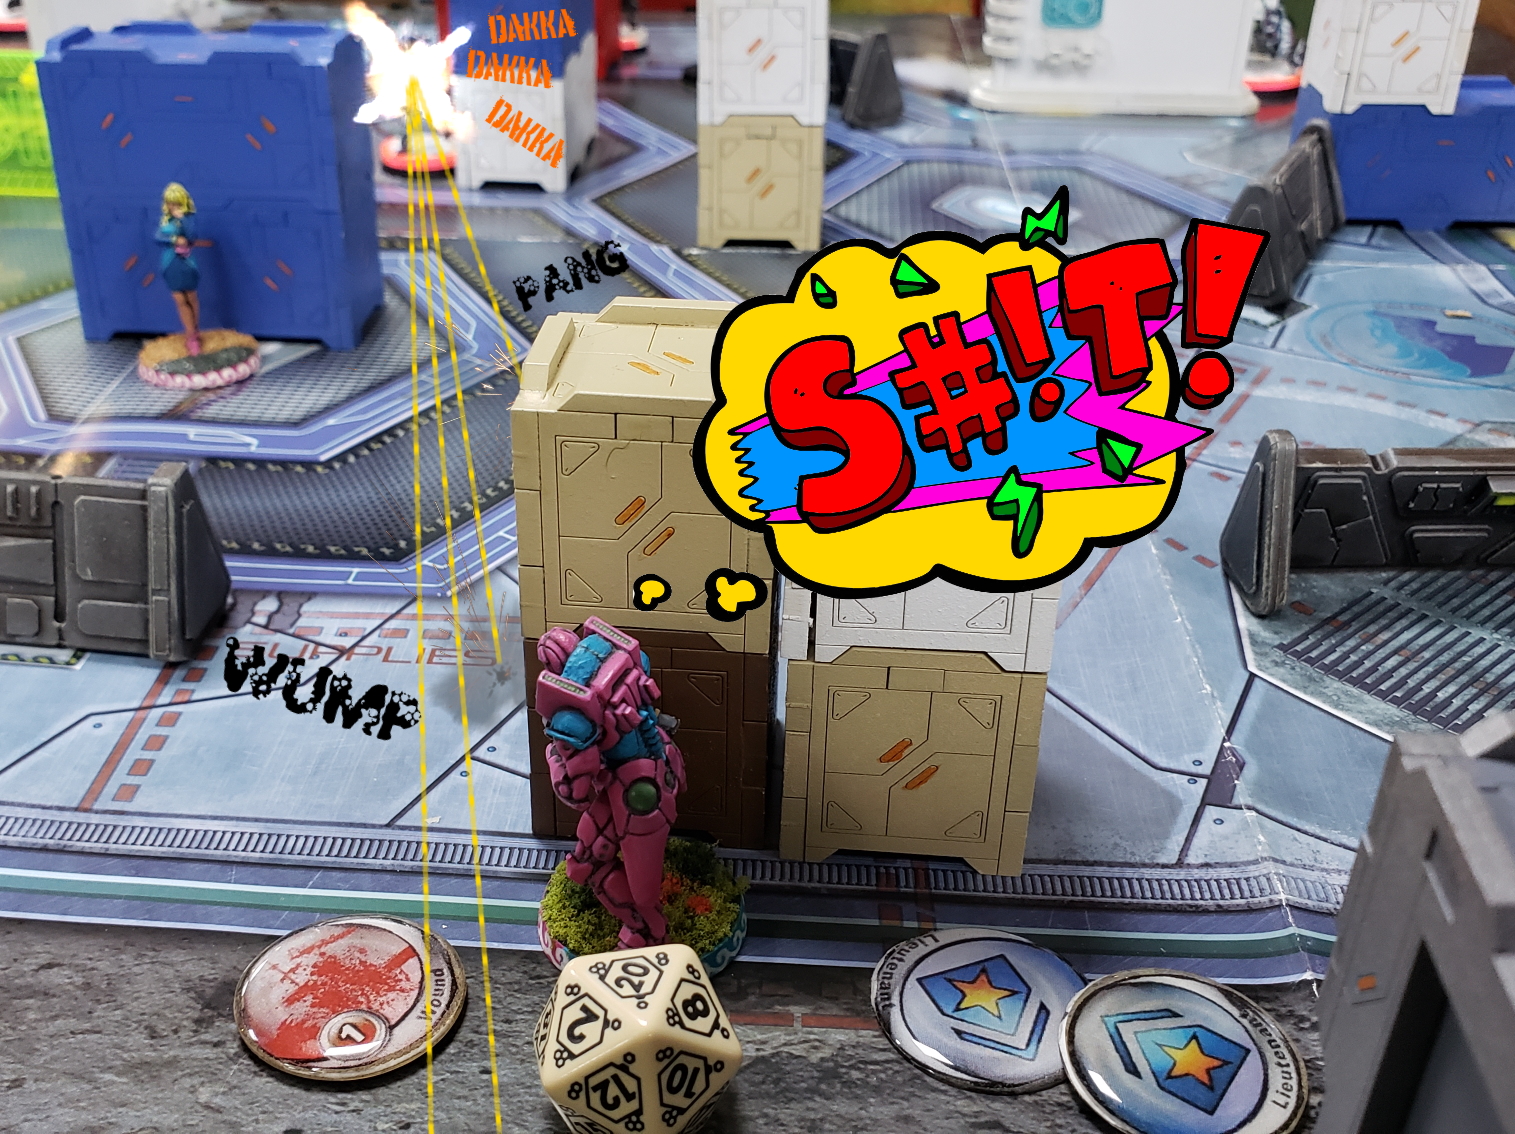
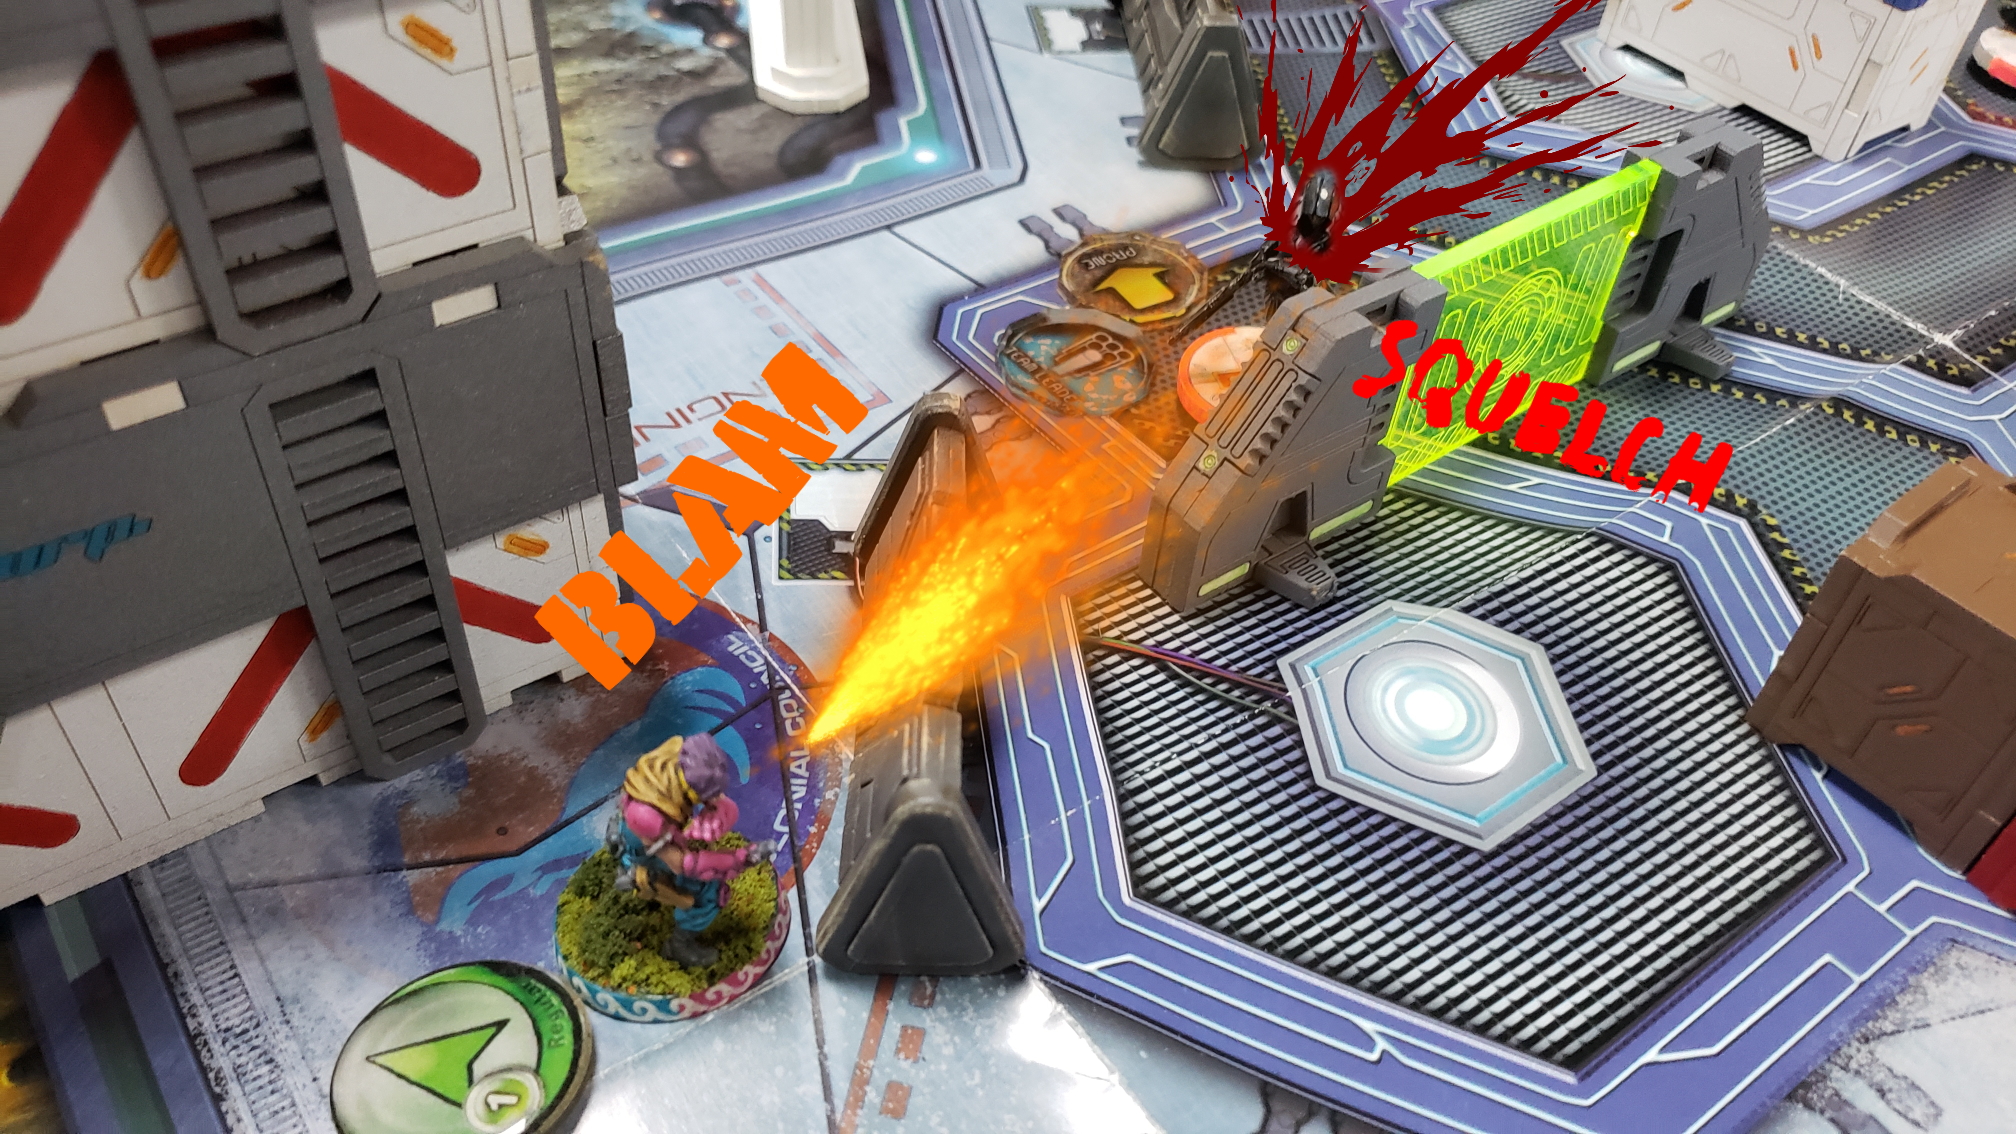
* Completely enraged, I make my move with the Fiday, sure that the Keisotsu is the Lieutenant. To my total surprise, an Oniwaban appears behind my Hassassin. I elect to shoot at both the Oniwaban and the Keisotsu with hit mode out of my Boarding Shotgun, but I lose the f2f vs the combi rifle and die.
* Feeling completely defeated, I use my other lieutenant order to push the Asawira into a better position for turn 2.
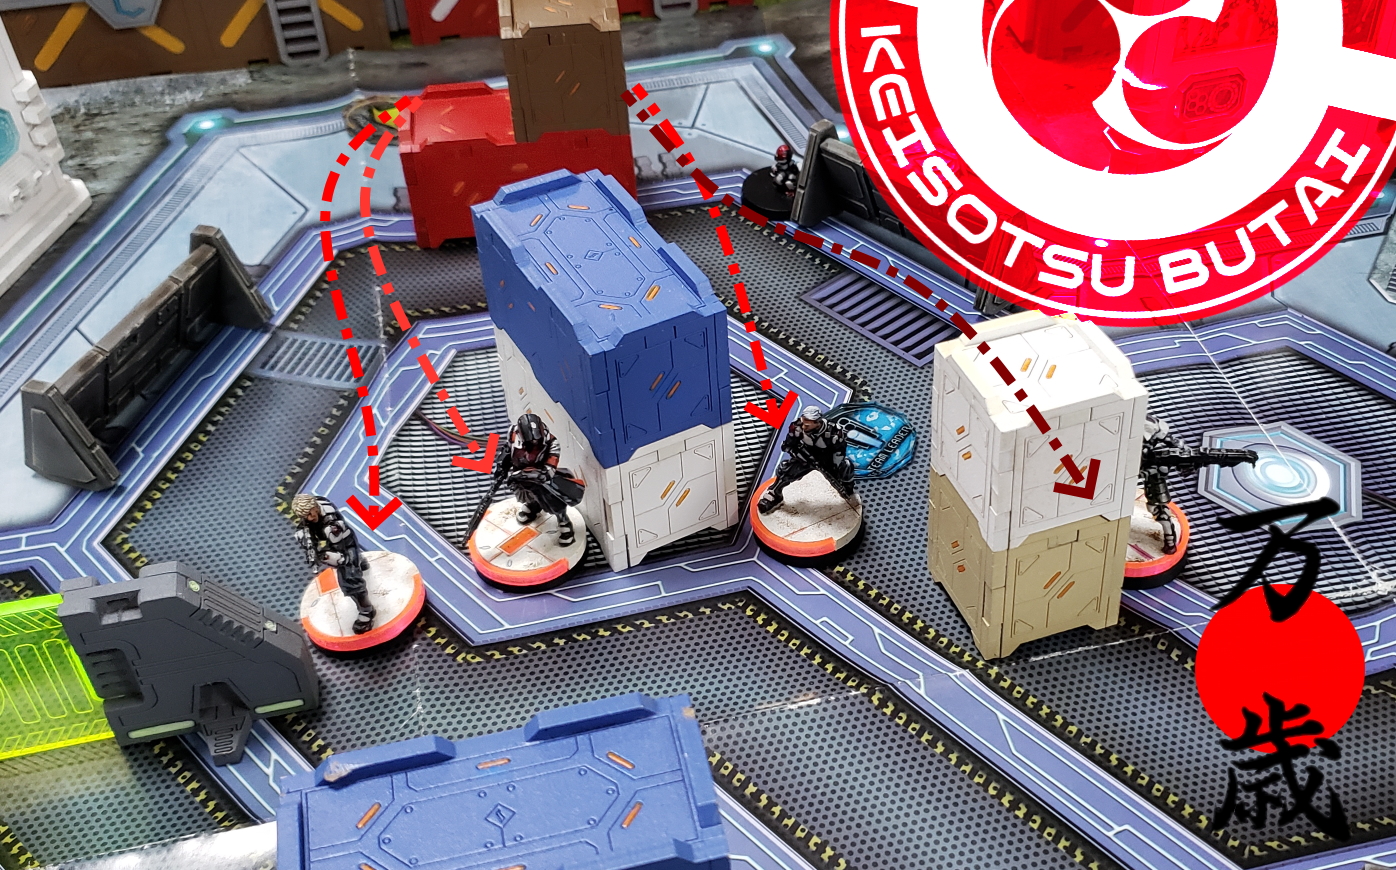
[- Bottom Turn 1 -] : JSA
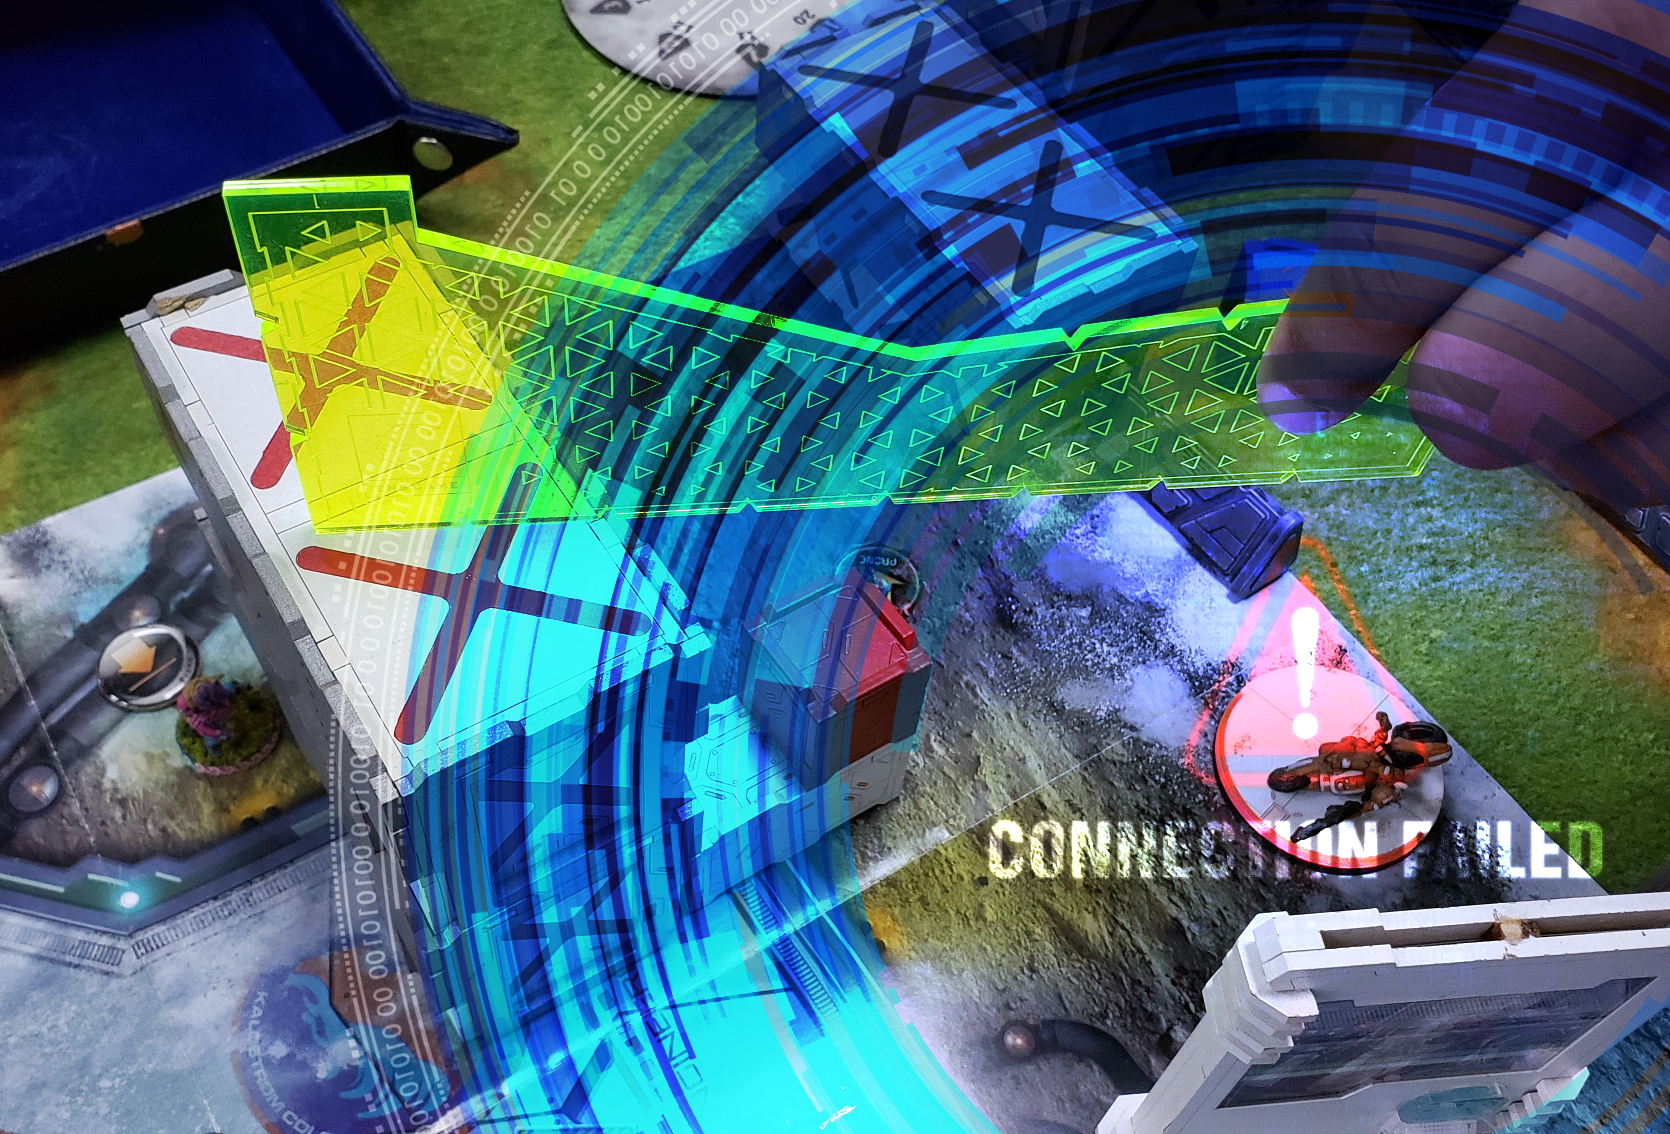
* KendoZero uses his impetuous order to rush the Aragoto forward towards my hacker. To my utter surprise, the biker doesn't reach ZoC for that all-too-juicy 1st order Trinity attempt.
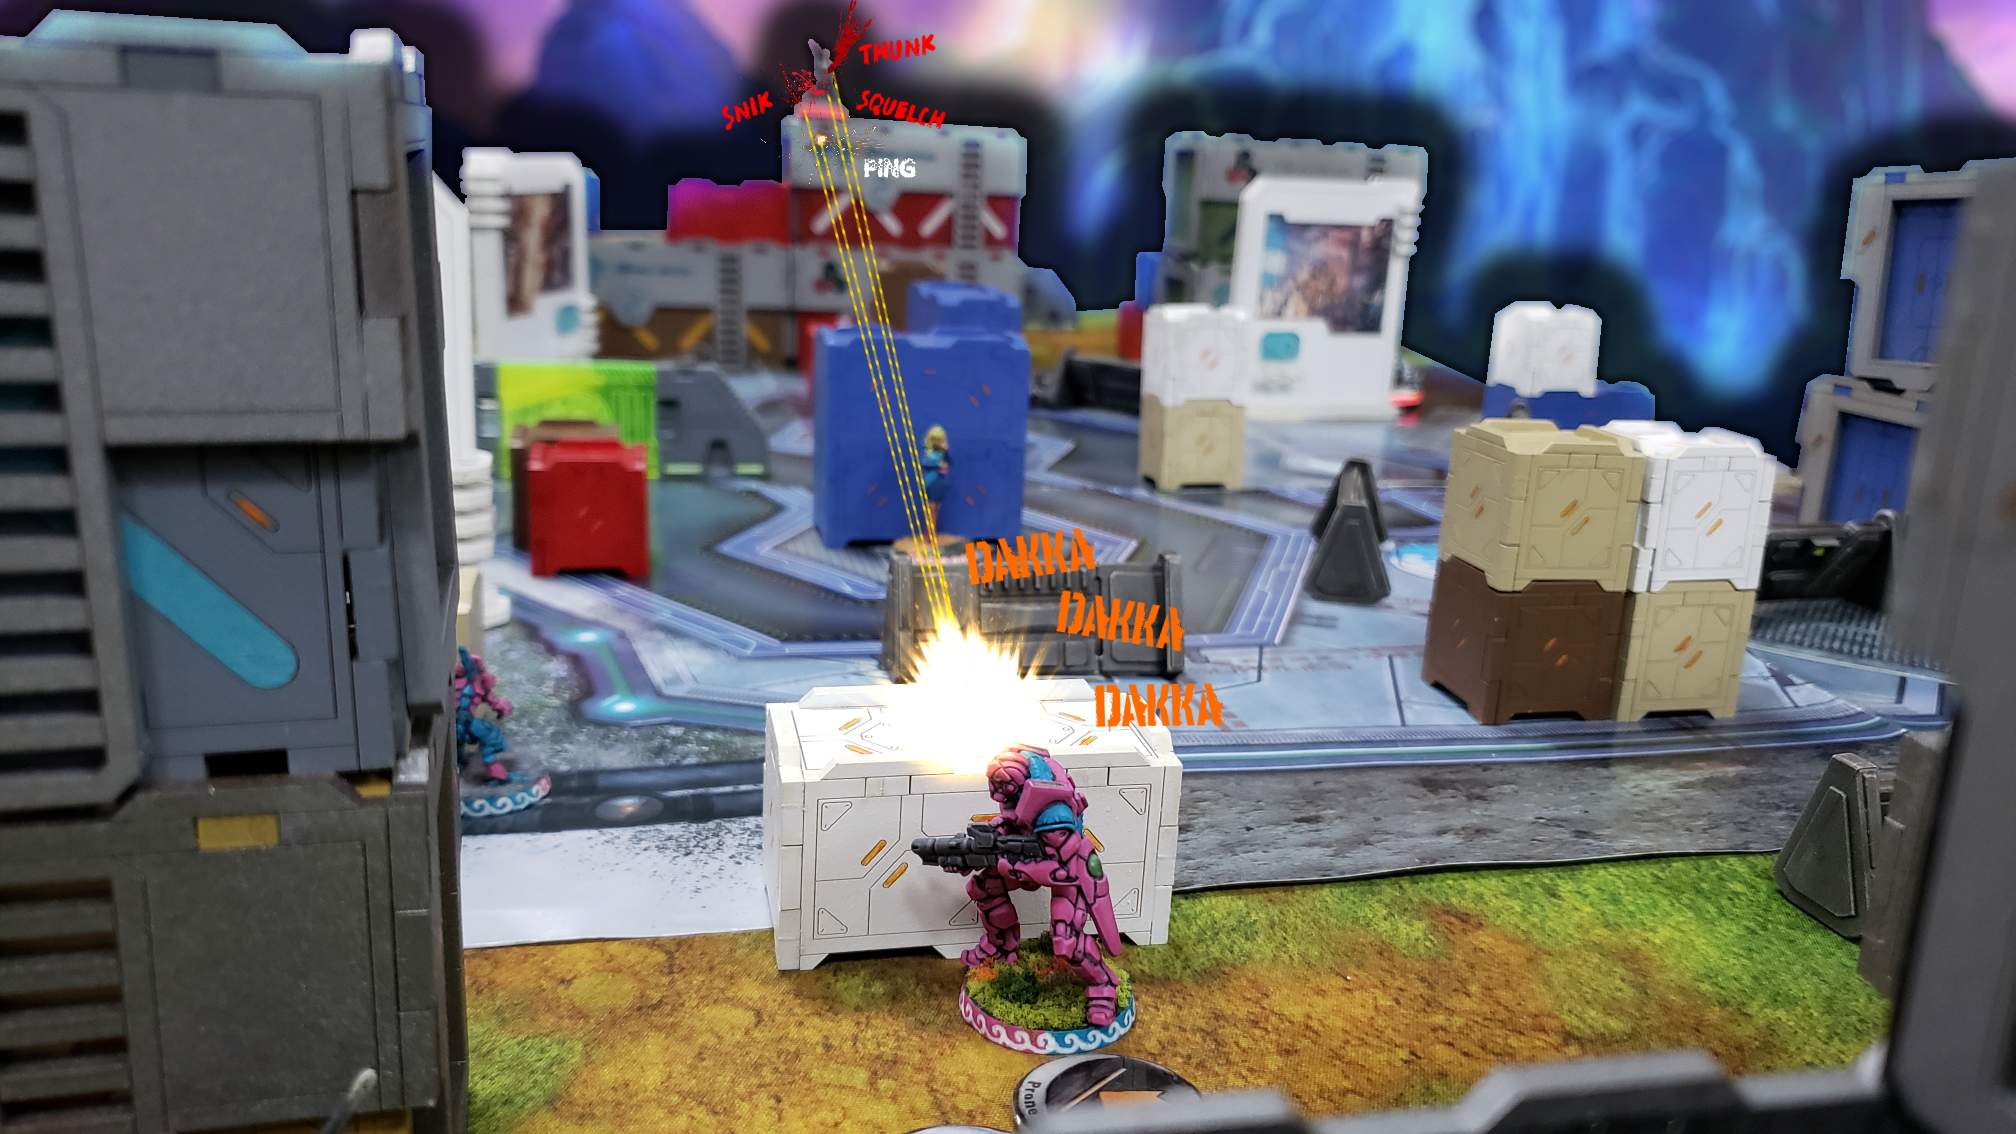
* Unfettered, he switches attack pieces and moves the Domaru out to see the Al Hawwa, standing in the open. He fires full burst at the Hawwa, rendering it unconscious before moving further forward to shoot at my turret - killing it as well.
* Continuing the assault, he moves into position to shoot at my Asawira, causing a wound. I elect to try and pass a Guts Roll to fail my Guts Roll (as the Asawira is a Religious trooper). I fail to pass to fail and have to stand in place with a 20.
* Once more the Domaru shoots at my Asawira, scoring two hits. I pass both armor saves and this time manage to pass to fail my Religious guts roll, moving into total cover.
* Seeing an opportunity, KendoZero moves his core team again, this time moving the paramedic up the ladder to MediKit the unconscious Missile trooper. To my dismay, this heavy hitter stands back up.
* Now completely free to act, the Aragoto spends two orders and handily completes both Data Scan.
* On a tear, the Aragoto pushes forward again to get the HVT in hacking range. She attempts HVT: Espionage and succeeds, but takes a critical hit from my Authorized Bounty Hunter's Akrylat-Kanone.
[- Top Turn 2 -] : Haqqislam
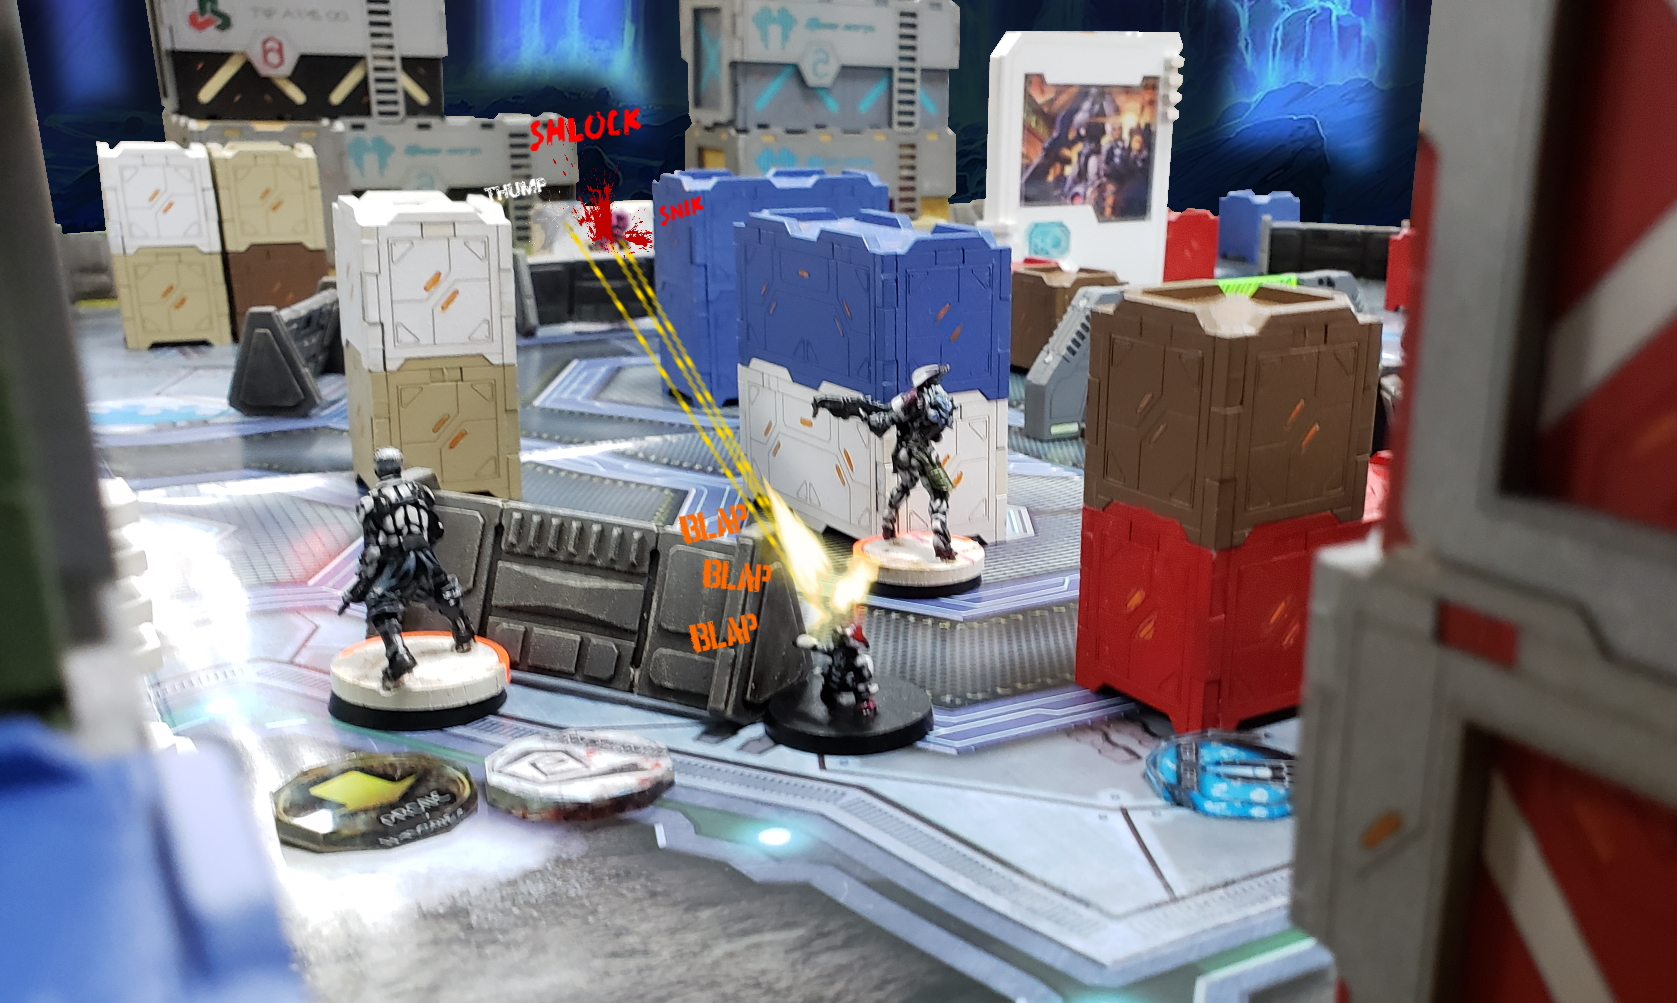
* My Asawira, enraged, moves up for the attack again. This time he shoots the standard keisotsu with burst 3 and the Chaīyì REM with burst 1. A critical and a hit on the Keisotsu, and one on the Chaīyì - the REM falls unconscious and the line trooper saves all but one, also falling unconscious.
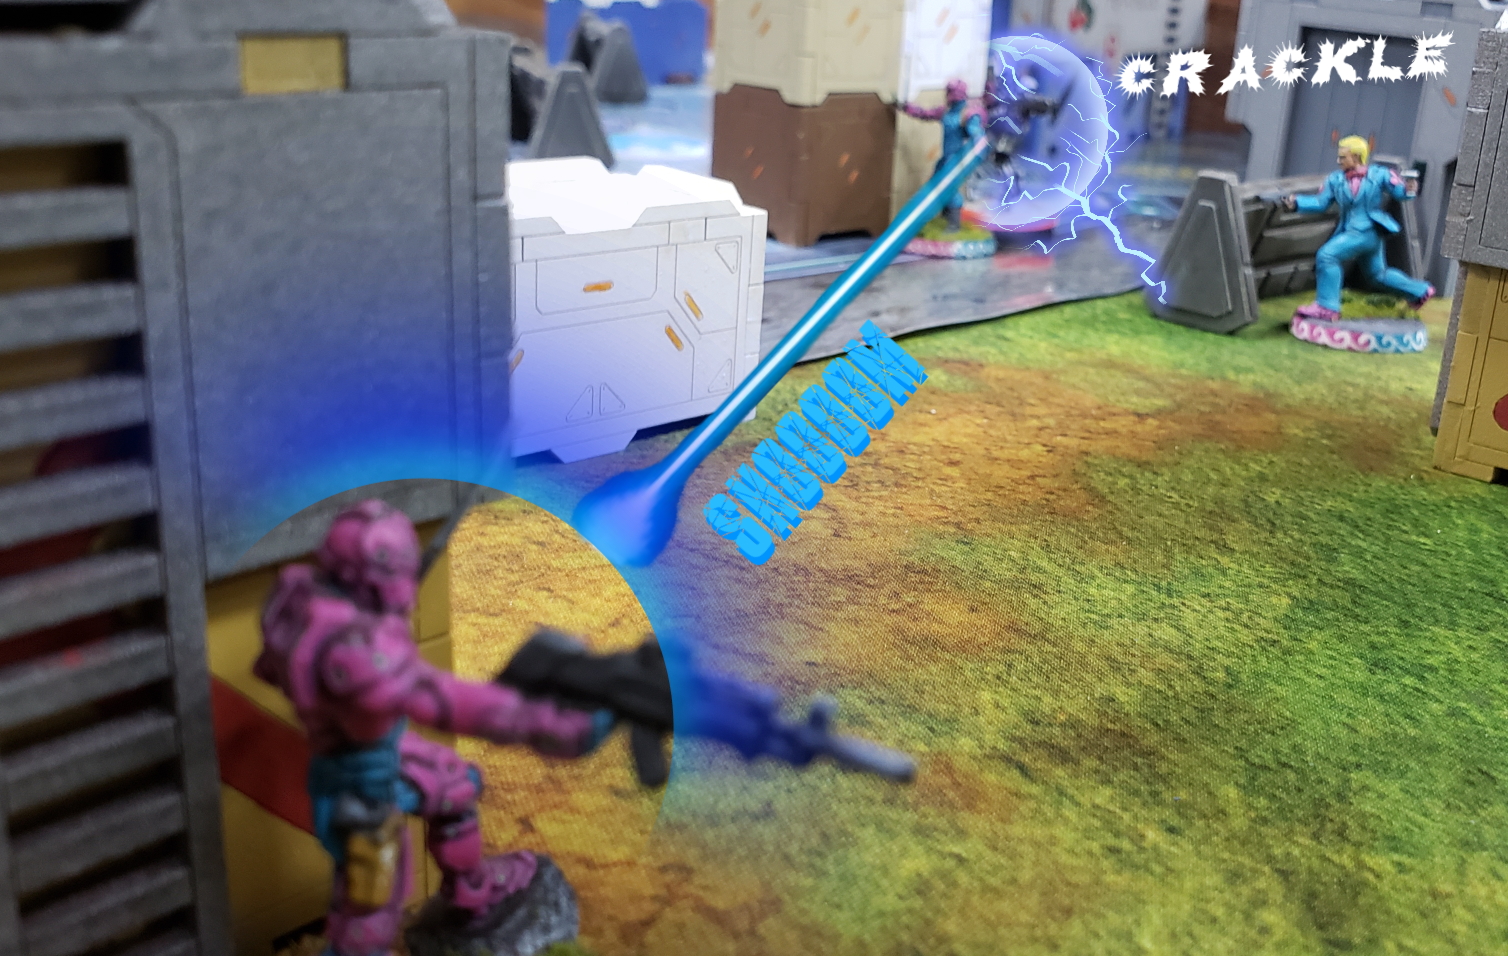
* I move my Fanous REM up into a closer position, hoping to get into Repeater range for an attack with my Ghulam Hacker. Mushashi sees the remote and we have a flash-pulse-off. I critically hit him with the flash and leave him stunned.
* Wishing to attack without eating a bunch of AROs, I send Zuleyka forward in a suicide push to throw smoke as a normal roll. She dies, but I get the smoke cover.
* Having covered one angle of ARO threat, I position my Asawira to shoot at the missile launcher again. I manage to kill it this time, but I fall unconscious to the Defensive turret F-13, failing to beat its rolls in a f2f.
* Continuing with an assault on the back foot, I move my hacker forward a bit and spotlight the Aragoto through my repeater.
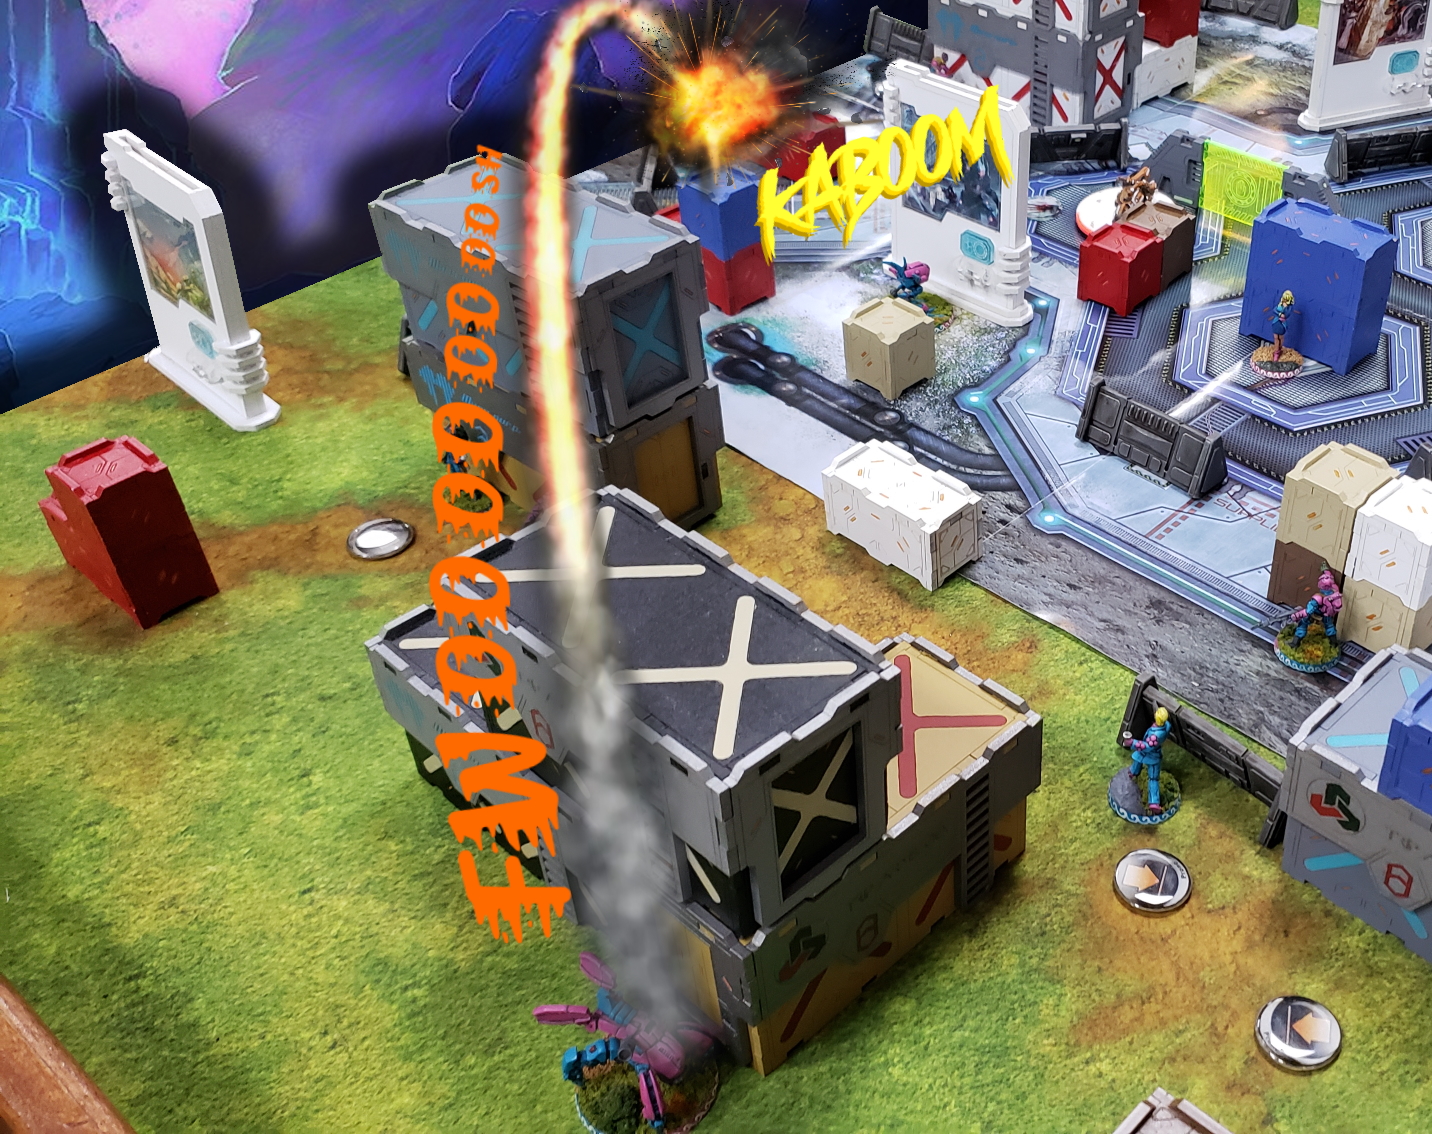
* My Shaytaniyah launches a guided missile, hitting the Aragoto - who only fails one armor save and falls unconscious.
* Again, I activate my Hacker, this time seeking to spotlight Mushashi, and I'm successful! Vengeance will be mine!
* With sadistic glee, I launch another guided missile, and score a critical hit on the legendary swordsman!
....
He passes 3 out of 4 armor saves
* Facing a hard choice between letting Mushashi run amok in my ranks or eliminating the Aragoto all together, I fire another missile at Mushashi with my last order. It hits, and he passes 2 out of 3 saves - but thankfully it is enough!
* Finally, at the end of the turn, I attempt to regenerate the Asawira... and roll a 15, dying where I lie.
[- Bottom Turn 2 -] : JSA
* Once again, the crack paramedic moves up to revive an ally from death's door - hitting the Aragoto with one out of two MediKit darts. The Aragoto makes the roll, and regains consciousness.
* Now the Domaru takes charge, and pushes forward to shoot at my Fanous remote. I win the f2f and hit with a flash pulse, but the attacker passes both BTS rolls.
* Steeling himself for another salvo, the Domaru takes more careful aim. This time, the Fanous dies to the concentrated firepower.
* Not being willing to suffer the existence of a Hacker on the field, the Domaru now uses stealth to approach to danger close near my Ghulam. He rushes the corner, engaging my Hacker. The hacker fruitlessly tries to save himself, but the Hortlak Janissary manages to score a hit with his Blitzen - bricking the Domaru.
[- Top Turn 3 -] : Haqqislam
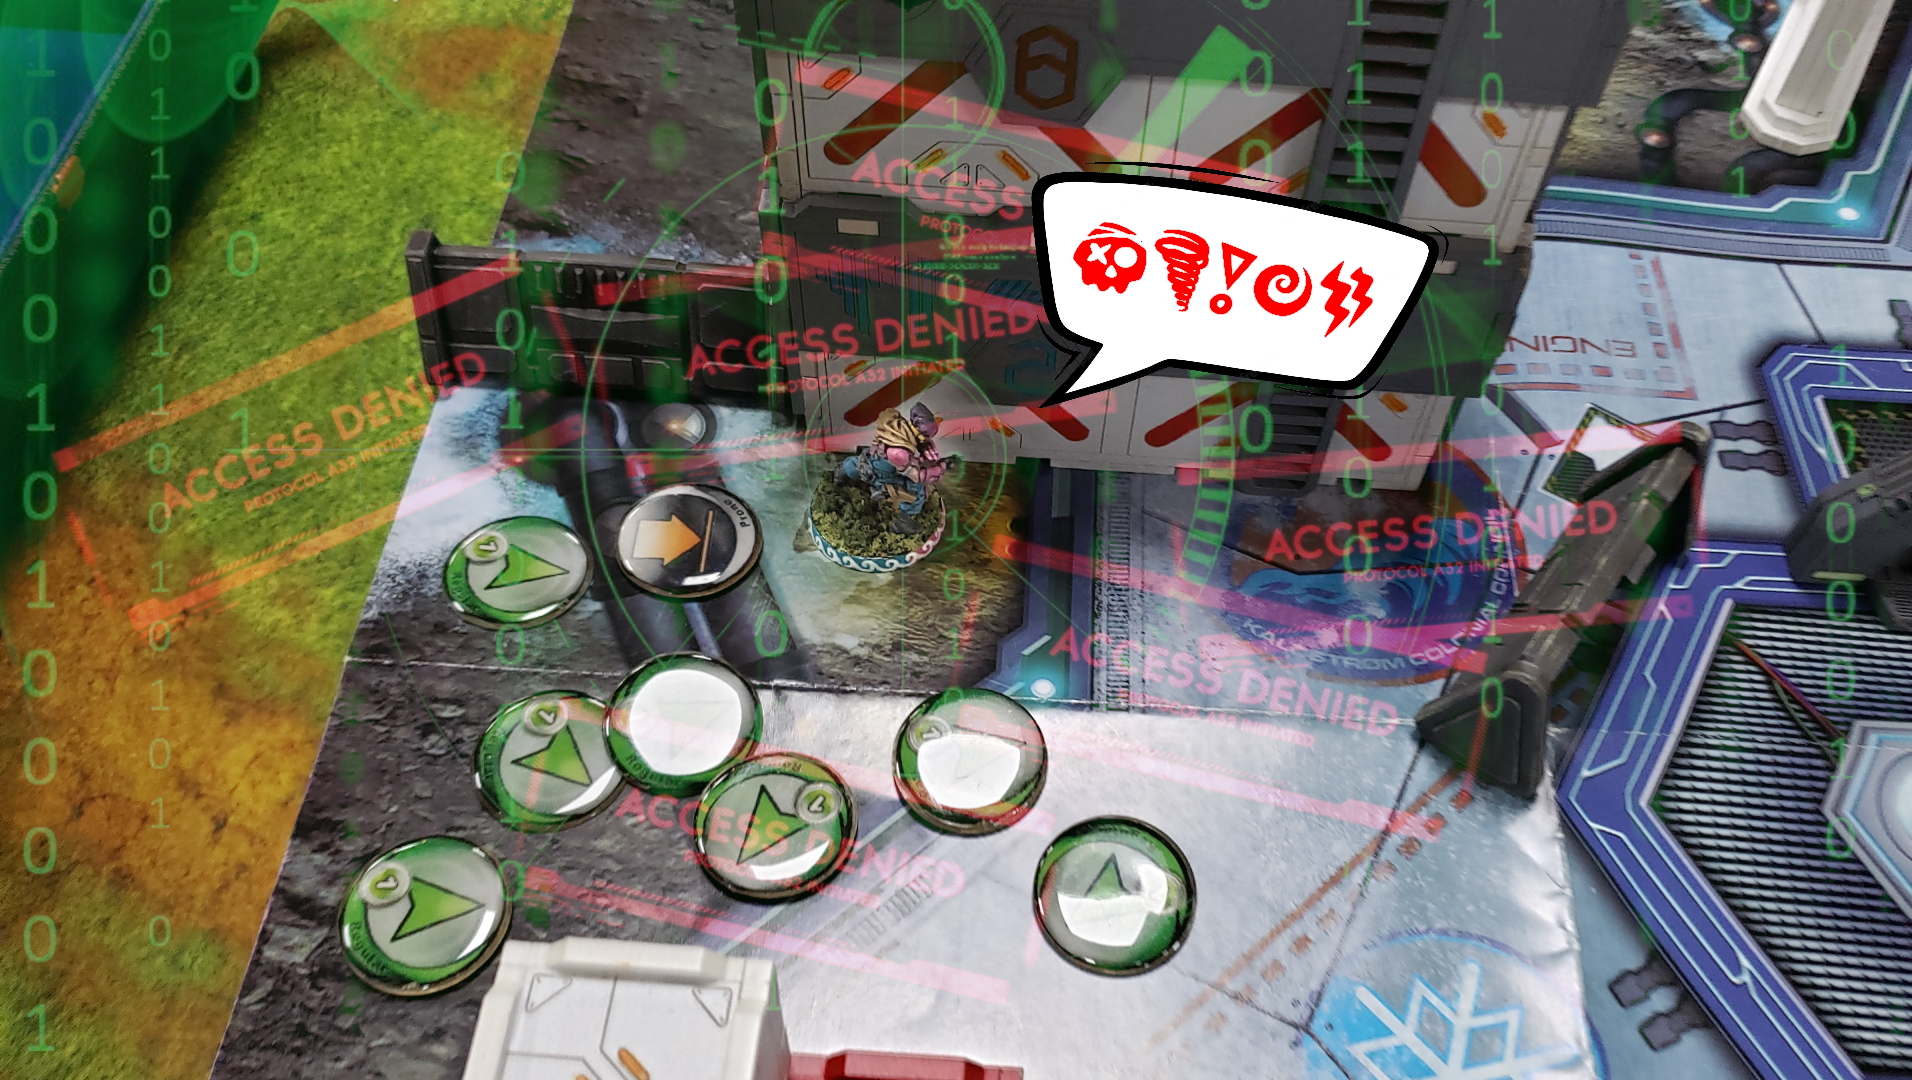
* At a loss for options, I'd like to get my Hacker up with a cheeky MediKit dart. Needing to remove the threat of the Aragoto killer hacker as well, I use a coordinated order to move several models forward, and shoot at her... fruitlessly.
* Committing to the plan despite the danger, I move my doctor up to the now active Aragoto. I shoot the MediKit at my Hawwa and go unconscious to a Light shotgun blast.
* Now conscious, I desperately try to score at least one classified objective. My Hawwa moves a bit, and declares a data scan against the Aragoto, who uses Trinity.... we both fail.
[- Bottom Turn 3 -] :JSA
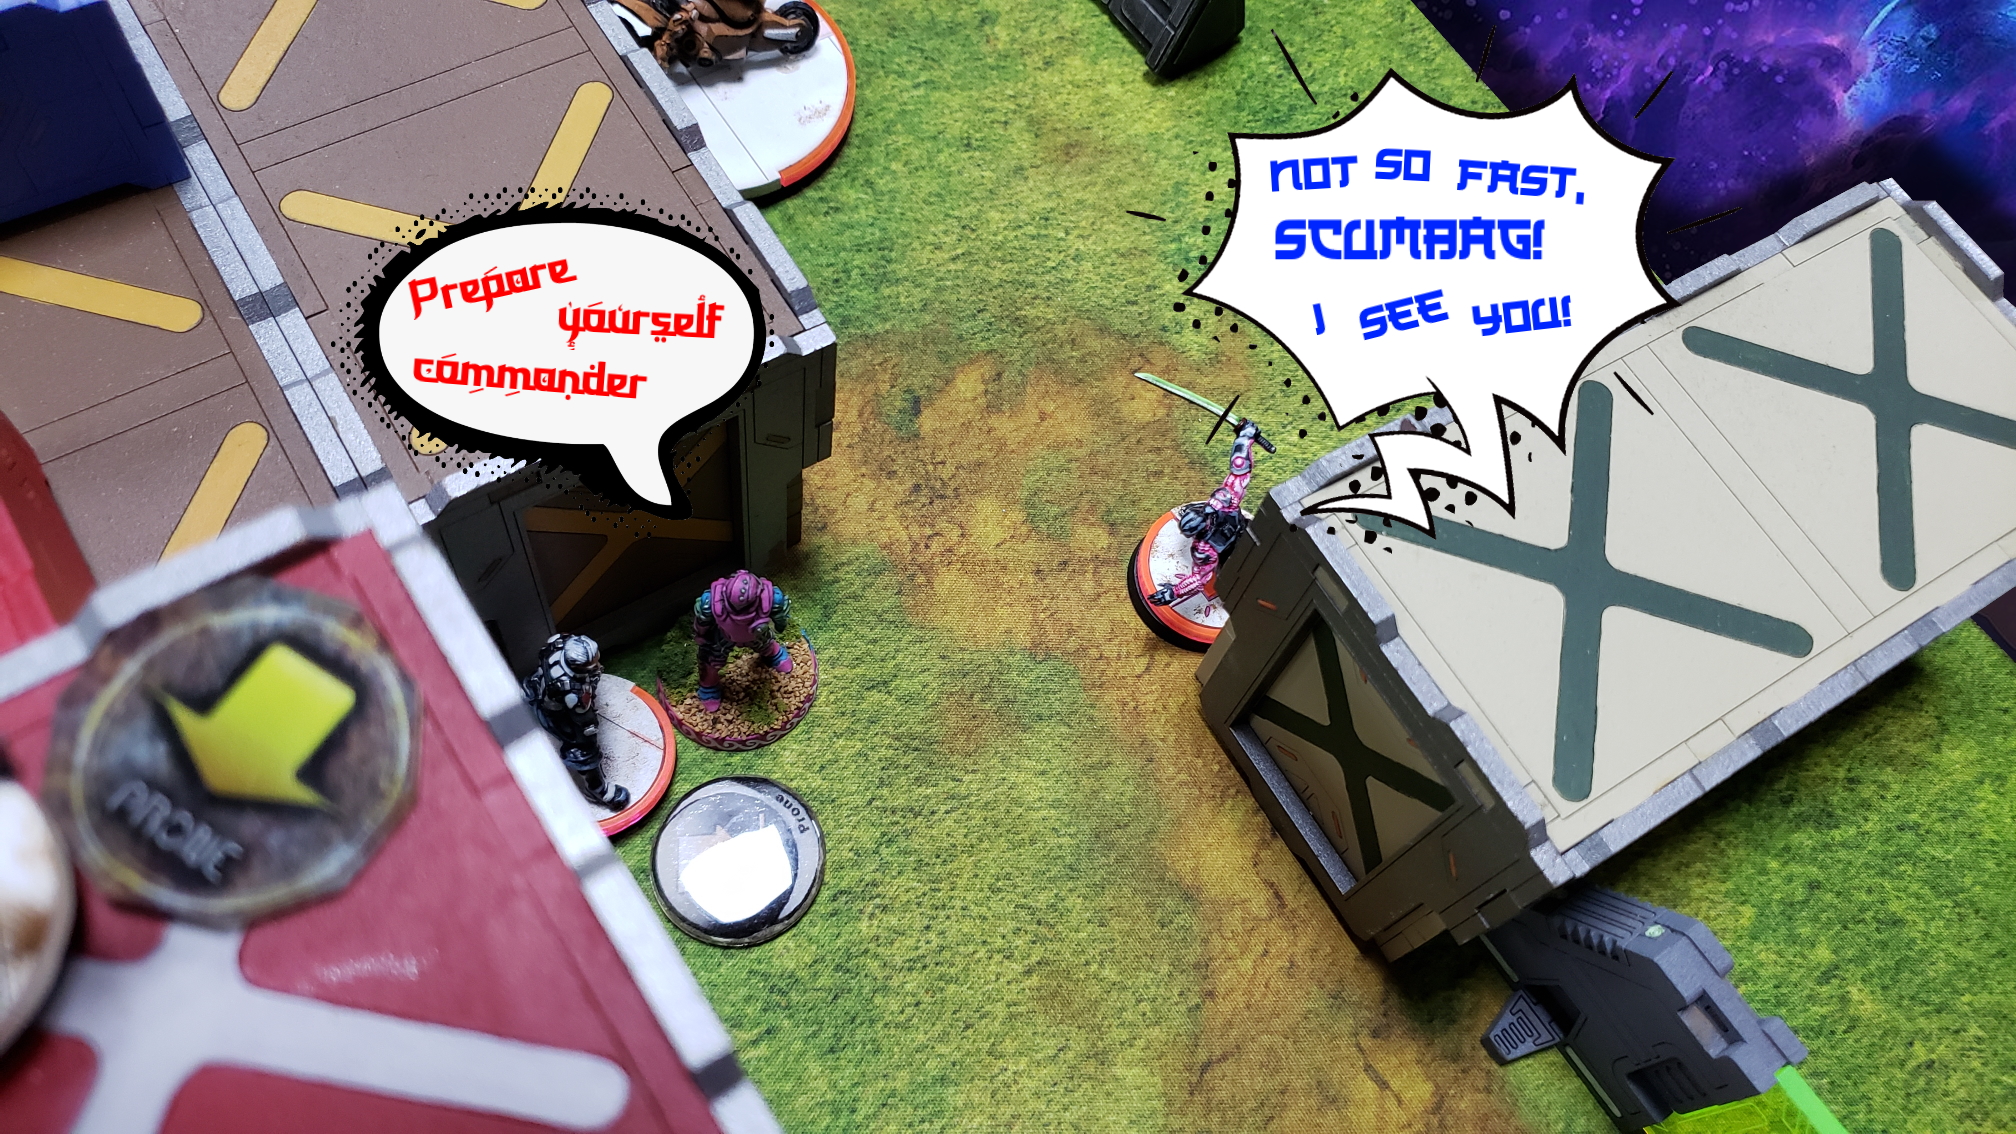
* Thoroughly irritated, KendoZero moves his Kempeitai forward to attempt to kill the Al Hawwa. I respond with a shotgun template, and render the attacker unconscious.
* One of the last remaining Keisotsu line troops peeks a corner to see the Authorized Bounty Hunter. We trade shots, and I suffer a hit, but pass the armor save and choose to fail my Guts Roll and fall into Total Cover.
* Pushing with the assault, the Keisotsu moves into another line of fire, and shoots again at the Bounty Hunter - and deals no damage.
Ending in a hellacious bloodbath for the impotent Haqqislam forces, we head into scoring.
JSA manages to complete the following:
- 2 Main Objectives, worth 2 OP each
- Complete more Classified Objectives than the opponent, worth 2 OP
- Secure HVT as the Secondary Classified Objective, worth 2 OP
Haqqislam fails to complete any objectives, scoring 0 OP
JSA ends the game with 78 VP
Haqqislam ends the game with 12 VP
Though the Soruşturma Bölümü dispatched the Sugar Eaters combat group to investigate claims made by Ms. Candy Double (looking into the bioweapon research happening at the Darpan Xeno-Station), interference from Yu Jing agents left the endeavor a complete failure. Worse yet, there was a hostile JSA element hot on the tail of the YuJingyu forces, and they crashed right into the weakened investigatory contingent. The Candy Corps has summarily failed - both in their mission assigned by high command, as well as the personal agenda set forth by their benefactor. With such a loss of prestige, it will be a long season before the ratings can recover to their previous state. This conflict has impacted the well-being of the entirety of the Corps as well as Candy herself.
Expect pay to be docked, and cubes left in limbo.
Battle Report Author

Army Lists Used In This Battle
Recommend Commander For Commendation
Share this battle with friends
KendoZeroWins

Great report and lovey armies. Can’t win them all I suppose; better luck next time!
That hits me right where I live. Dice can be so cruel.
Better luck next time, Commander! Excellent Report!
Genial reporte
@Fess Well, he survived, so I’m sure a demotion or at least a thorough inquiry is gonna be needed 😉
Are we even sure that Al Hawwa is a hacker at all?!? Brutal man just brutal.
Beautiful army and great report!
@Jager Nadim Thank you kindly for the warning, commander. We shall see it done.
Keep Candy safe, JSA and now O-12 seem to be targeting warcors.
Nice battle! I like it!
You should have fought at Gekidan research park
(・∀・)b
Great report – really highlights the best (and worst!) bits of the battle. That Al Hawwa… You need to find them another job!
Those armies are gorgeous. Lovely work on the report too.