Fought At Raveneye Port Battery: Ammunitions and Supplies Module
646 days 14 hours 54 minutes ago
Leave Nun Alive
300 POINTS
The global Infinity campaign is a bit awkwardly timed this year, as it coincides with preparations for the Rose City Raid 2022 Infinity tournament. I really enjoy the time before the Rose City Raid because I get to play competitive-minded games safe in the knowledge that I won't have to be stressed out about playing at a tournament that I'm running! It does mean it's hard to get fully narrative appropriate games in for the campaign, but at least I'm playing Nomads again.
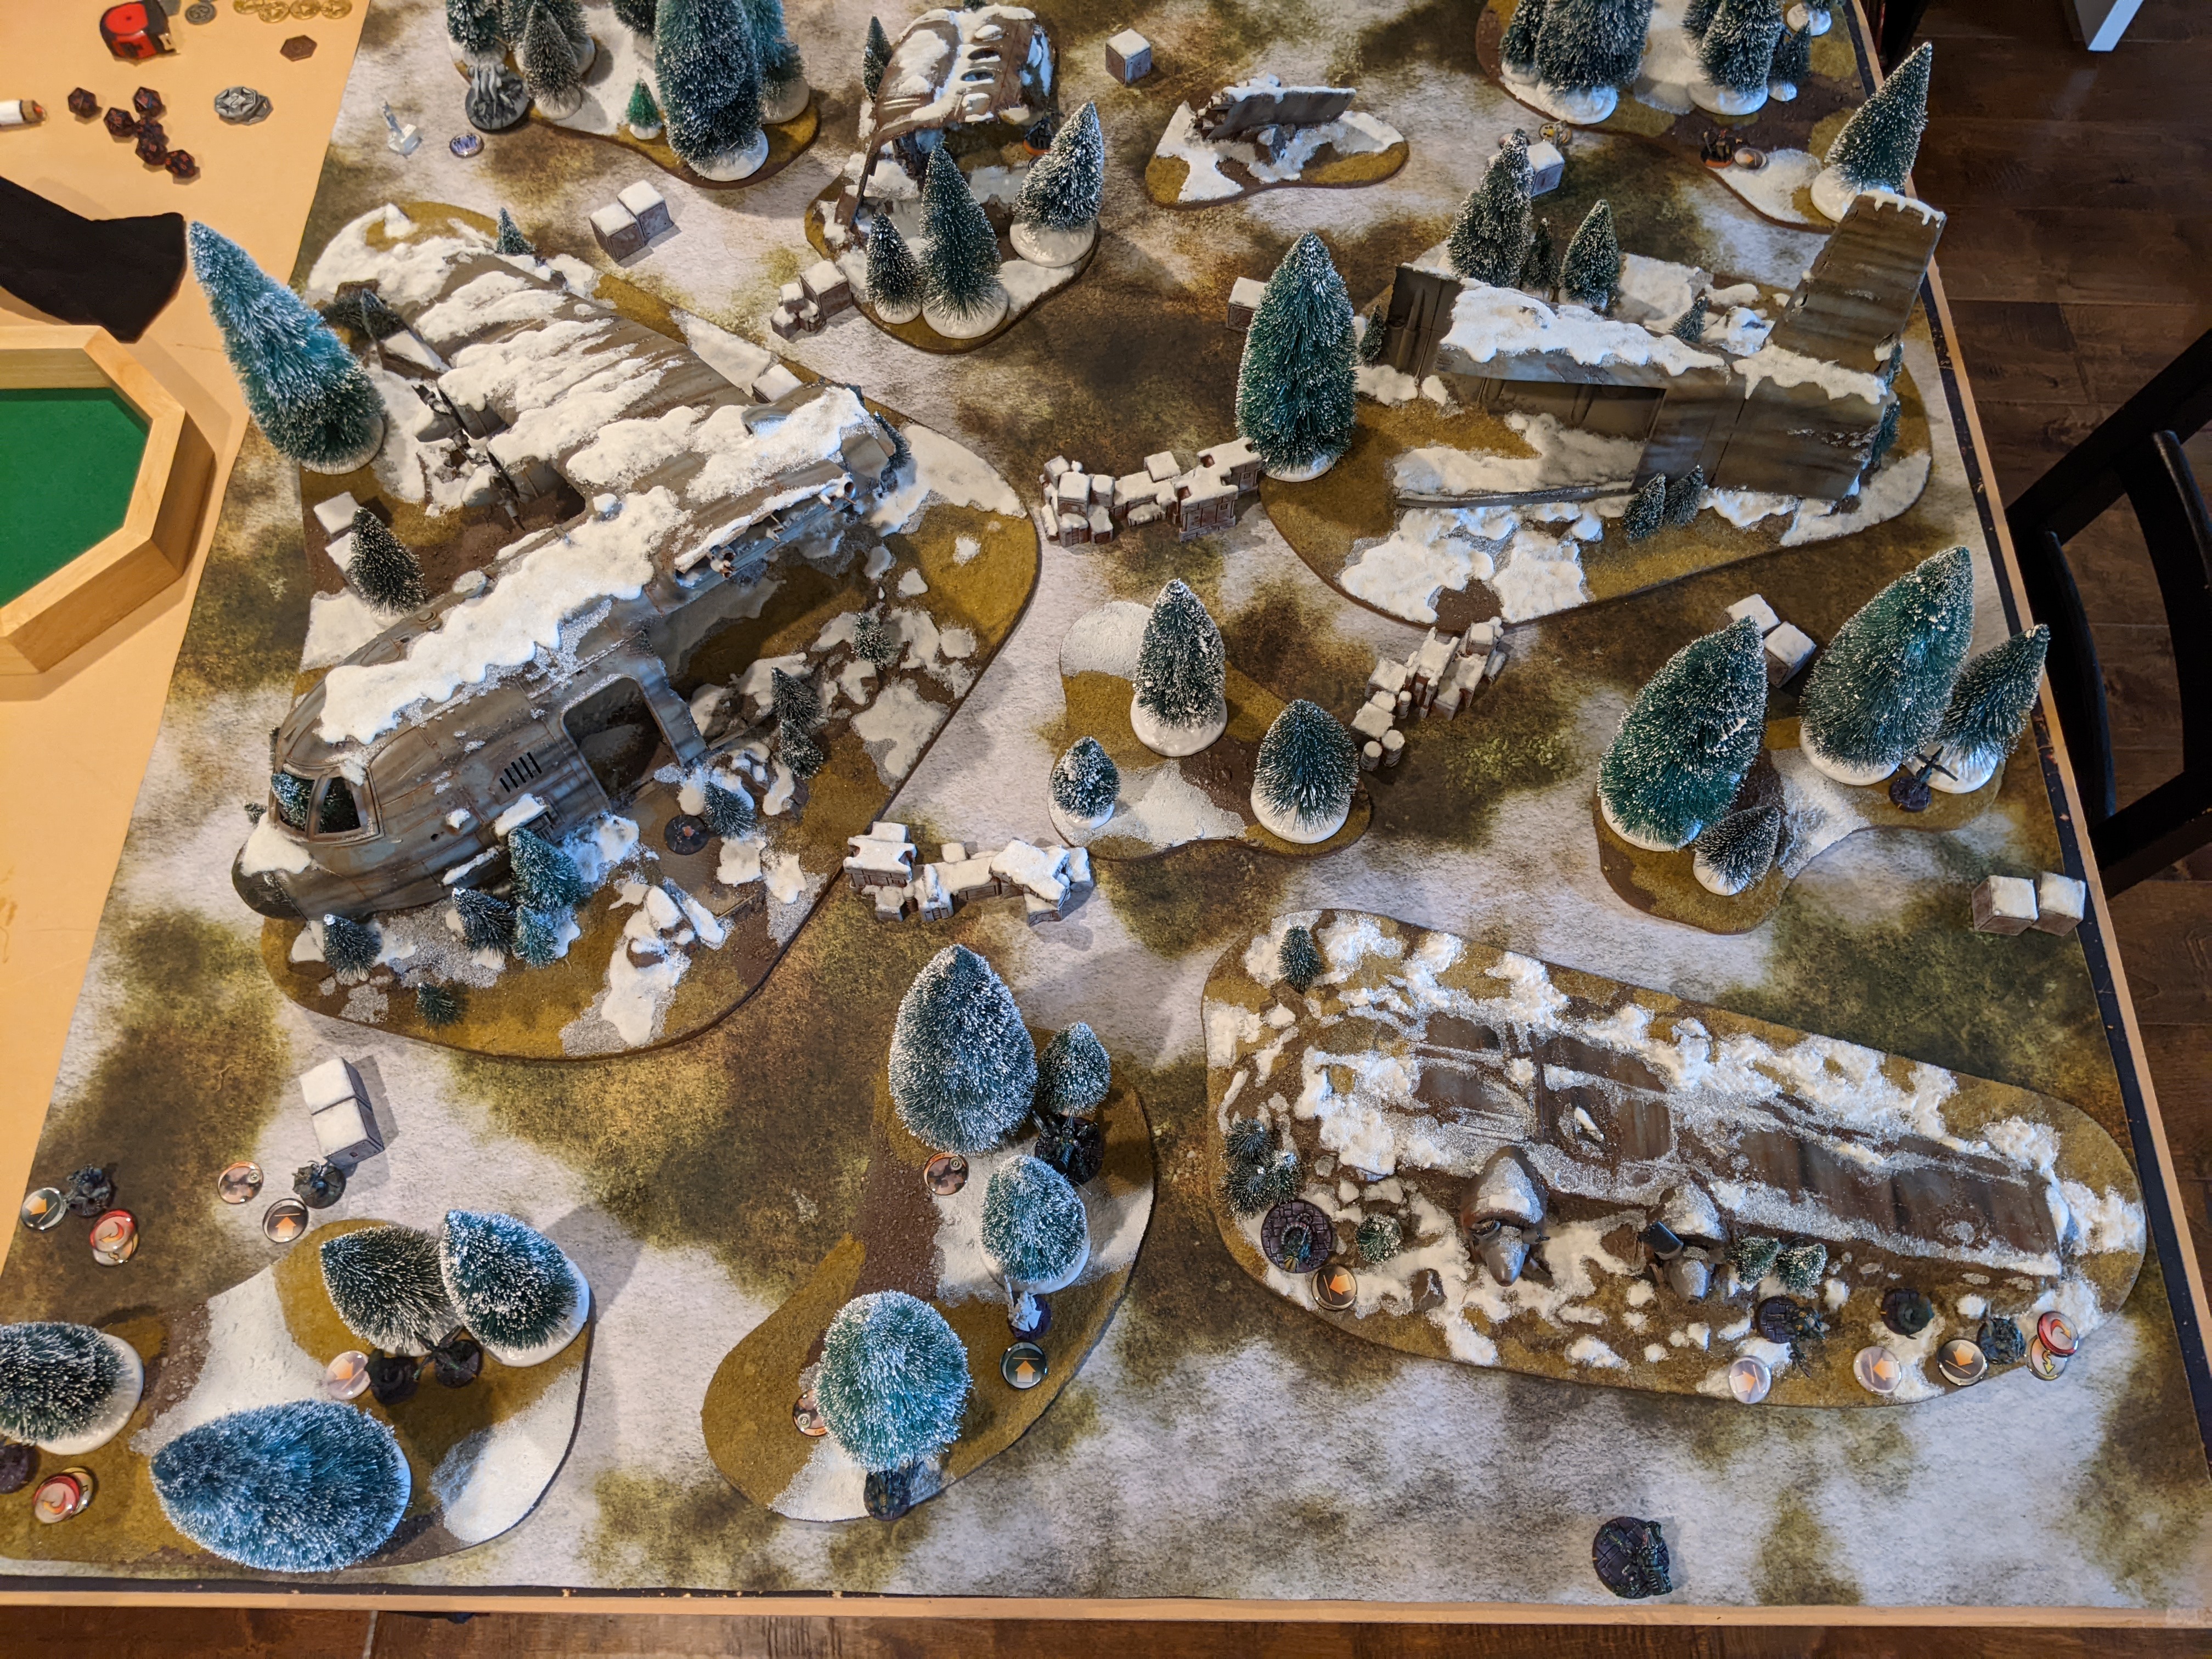
My latest tournament prep sparring partner was Erik! He and his lovely wife came by for some delicious fried chicken and a hangout/gaming session. Given that the Ektroplan Plane Crash table will be at RCR, Erik asked to play on it to get some practice, and I was only too happy to oblige. It's a very punishing table because all the plane parts are mounted on MDF bases, and all those bases are considered Difficult Terrain, Low-Vis Zones, and Saturation Zones.
It does make things a bit awkward for the Durgama Incident campaign, where we're supposed to be fighting on a space station, but tournament prep takes precedence here over thematic appropriateness! I've been playing a lot on the space station table lately, so this was a nice change of pace too. Erik wanted some practice for Biotechvore, so we played that.
Just a quick reminder about the Durgama Defense Coalition patch contest:
Overview
- Mission: Biotechvore
- Forces: Jurisdictional Command of Bakunin versus Combined Army
- Deploy First: Combined Army
- First Turn: Bakunin
I took the same list from the last game with Than:
I intended to leave the Moira and Riot Grrl out to ARO, and then use the Morlocks to protect me against the inevitable Noctifer ML.
Btech, Decap, Counter
GROUP 1
10
KUSANAGI (Lieutenant) Spitfire / Pistol, Shock CC Weapon. (1.5 | 42)
REVEREND MOIRA MULTI Sniper Rifle, Zapper / Pistol, Shock CC Weapon. (1.5 | 36)
REVEREND CUSTODIER (Hacker, Hacking Device Plus) Combi Rifle, Pitcher ( ) / Pistol, CC Weapon. (0.5 | 31)
CLOCKMAKER Combi Rifle, D-Charges ( | GizmoKit [+1B]) / Pistol, CC Weapon. (0 | 18)
RIOT GRRL Missile Launcher / Pistol, CC Weapon. (1.5 | 32)
MODERATOR (Paramedic) Combi Rifle ( | MediKit) / Pistol, PARA CC Weapon(-6). (0 | 11)
VOSTOK (Mimetism [-6]) Mk12(+1 Dam) / PARA CC Weapon(-3). (0 | 44)
PROWLER Combi Rifle, Light Flamethrower, Adhesive Launcher / Pistol, CC Weapon. (0 | 35)
ZERO (Hacker, Hacking Device) Combi Rifle, Shock Mines ( ) / Pistol, CC Weapon. (0.5 | 24)
GROUP 2
2
2
MORLOCK Chain Rifle, Smoke Grenades / Assault Pistol, AP CC Weapon. (0 | 6)
6 SWC | 299 Points | Open in Infinity Army
You can have a look at the other battle report if you want to see a deeper discussion of the list--it's not particularly complicated. Two links, lots of specialists for classifieds, and a Zero/Prowler combo.
Biotechvore and Countermeasures
GROUP 1
MENTOR (Lieutenant) Boarding Shotgun / Pistol, CC Weapon. (1 | 23)
AÏDA SWANSON FTO (Minelayer) Submachine Gun, Viral Mines / Viral Pistol, Shock CC Weapon. (0 | 20)
R-DRONE Flash Pulse / PARA CC Weapon(-3). (0 | 7)
Q-DRONE Plasma Rifle / PARA CC Weapon(-3). (1 | 24)
IKADRON (Baggage, Repeater) Light Flamethrower(+1B), Flash Pulse / Pistol, PARA CC Weapon(-3). (0 | 9)
SPHINX Spitfire, Heavy Flamethrower(+1B) / DA CC Weapon. (2 | 93)
SCINDRON Flash Pulse / CC Weapon. (0 | 0)
VICTOR MESSER (Hacker, Hacking Device Plus) MULTI Rifle, Cybermines, Nanopulser(+1B), D-Charges ( ) / Breaker Pistol, CC Weapon. (0.5 | 33)
MED-TECH OBSIDON MEDCHANOID Combi Rifle, D-Charges ( | GizmoKit, MediKit) / Pistol, CC Weapon. (0 | 22)
SLAVE DRONE PARA CC Weapon(-3). (0 | 3)
GROUP 2
GAKI AP CC Weapon. (0 | 4)
TAIGHA Chain-colt / AP + Shock CC Weapon. (0 | 5)
NOCTIFER Missile Launcher / Assault Pistol, CC Weapon. (1.5 | 32)
ÍMETRON . (0 | 4)
6 SWC | 300 Points | Open in Infinity Army
Erik's playing Vanilla Combined at RCR, which is a bold choice for any tournament mission lineup that includes Biotechvore. He's got the Combined Army starter pack: two Imetrons, two Ikadrons, and some number of R-Drones. There's a Q-Drone and then some sort of utility pieces like a camo lieutenant and Aida. Then the real meat of the list: Dr. Worm, a Sphinx, and a Noctifer ML.
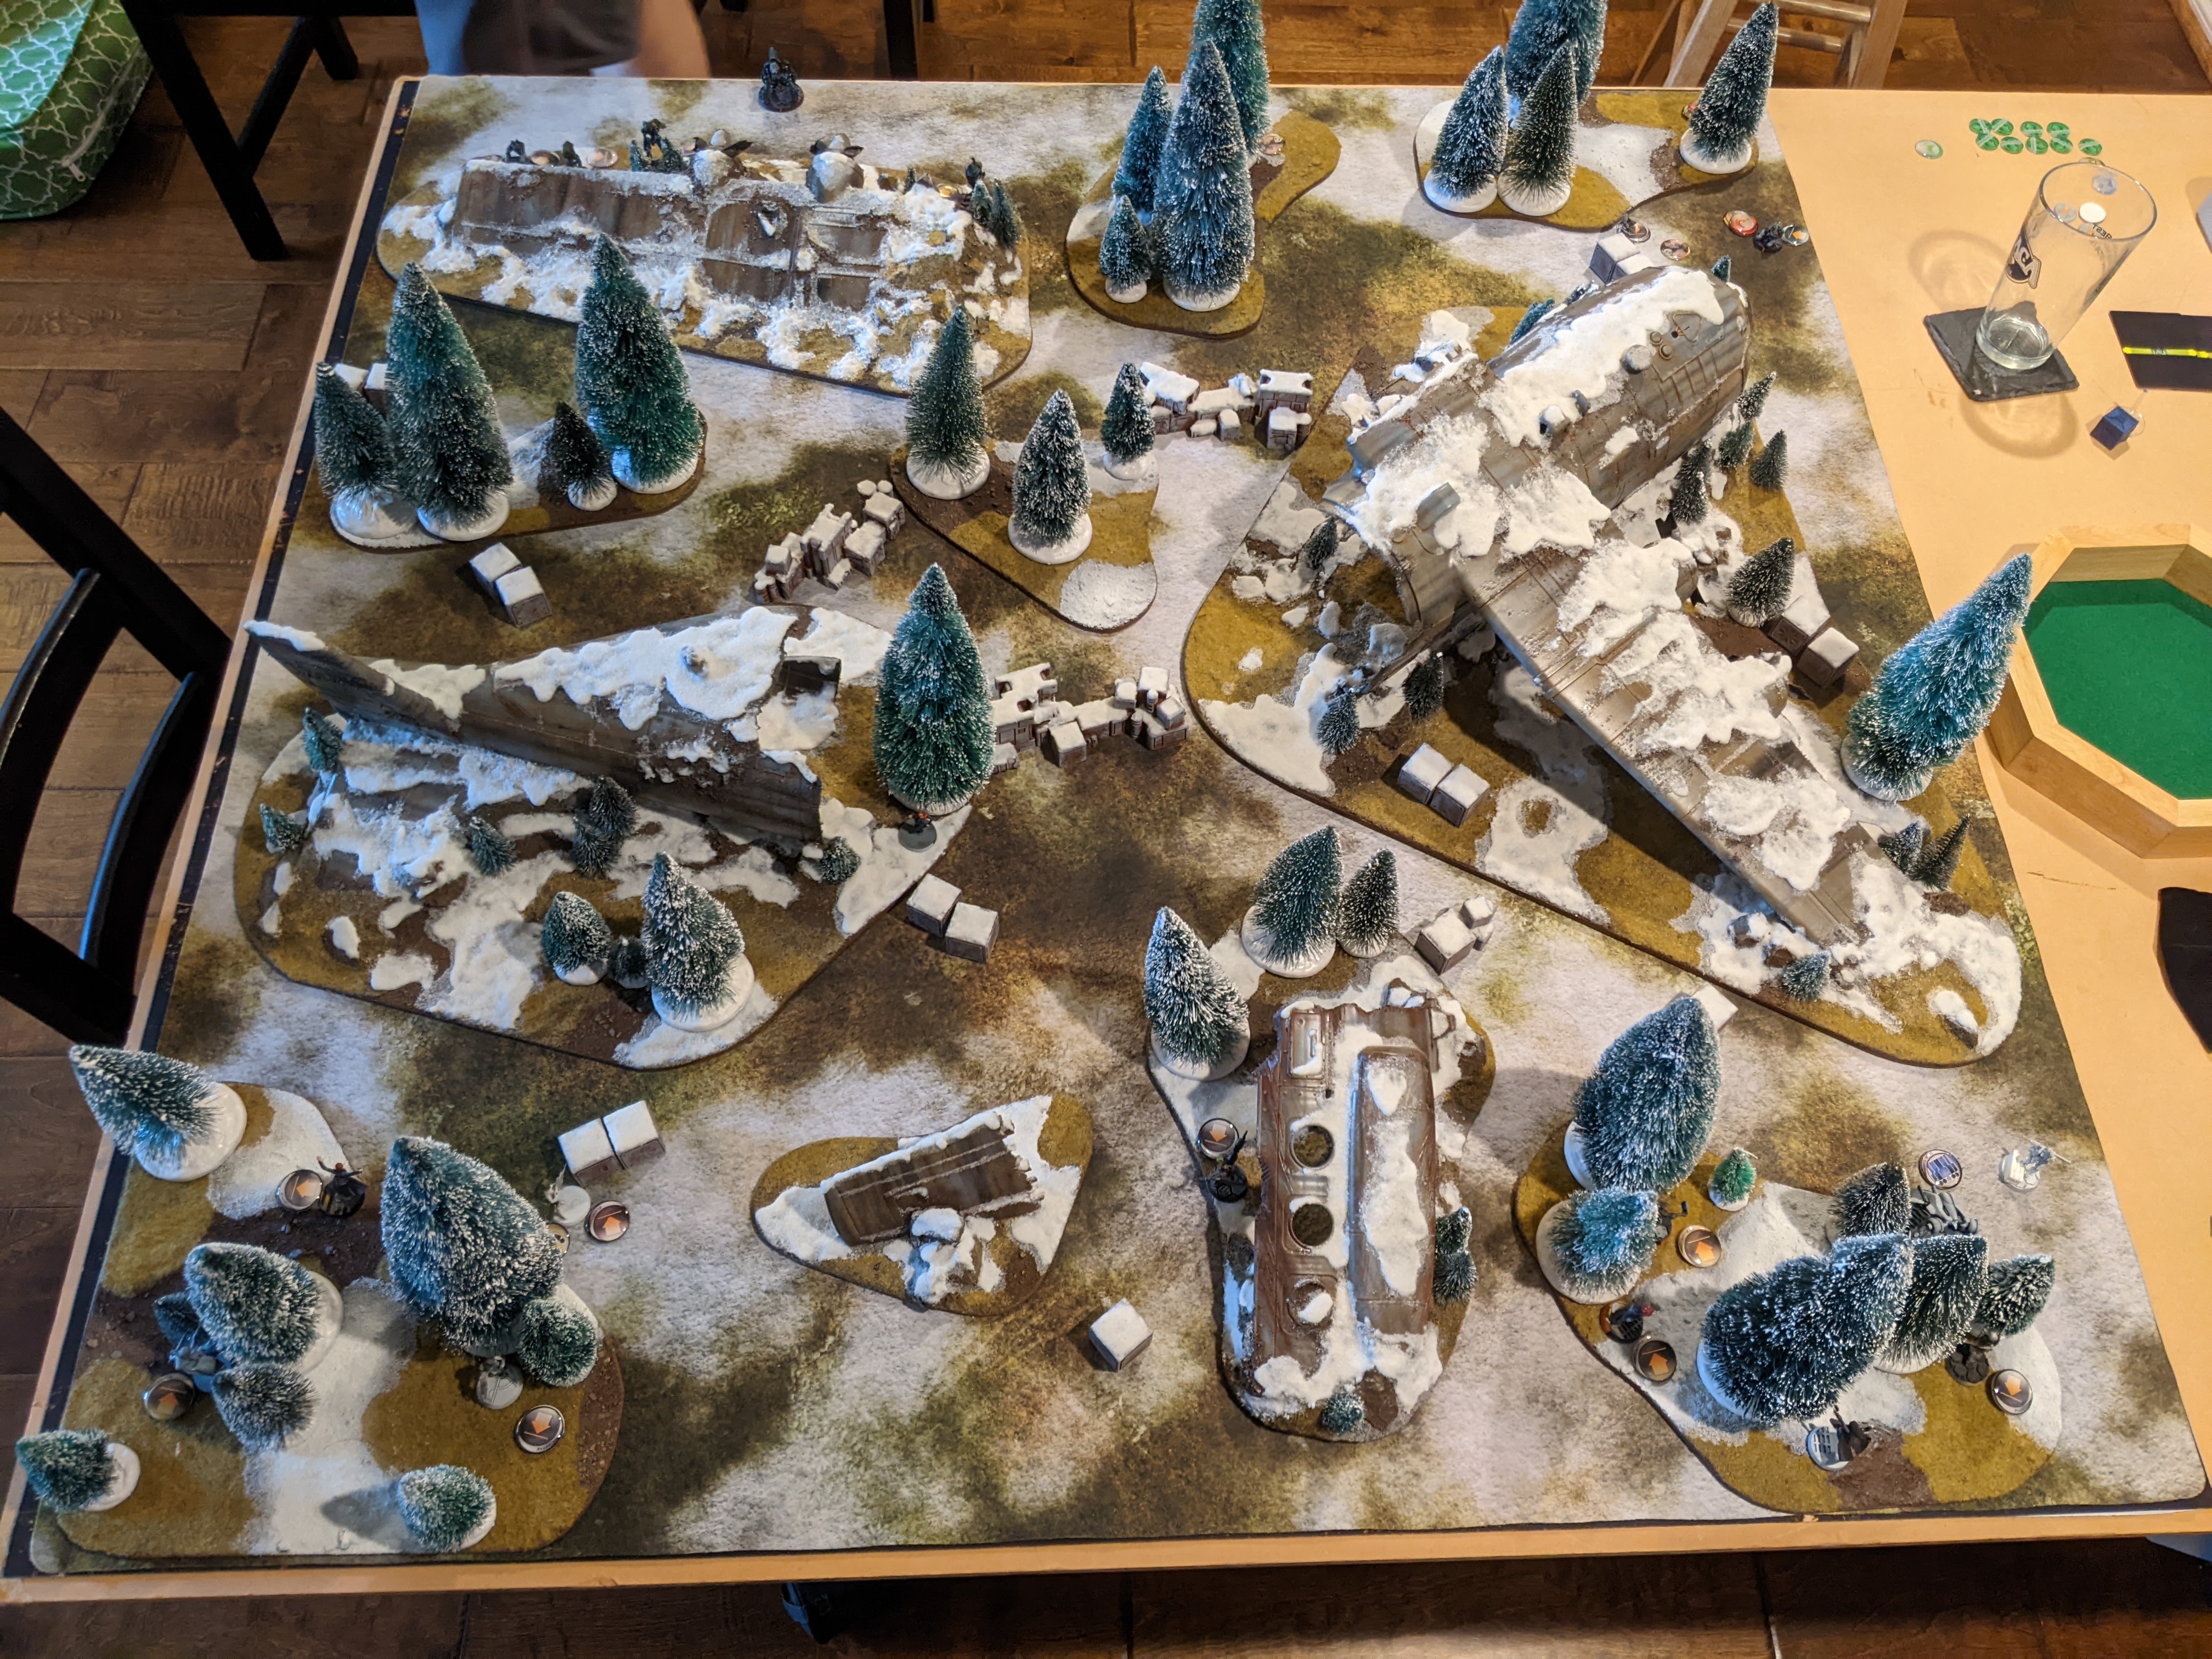
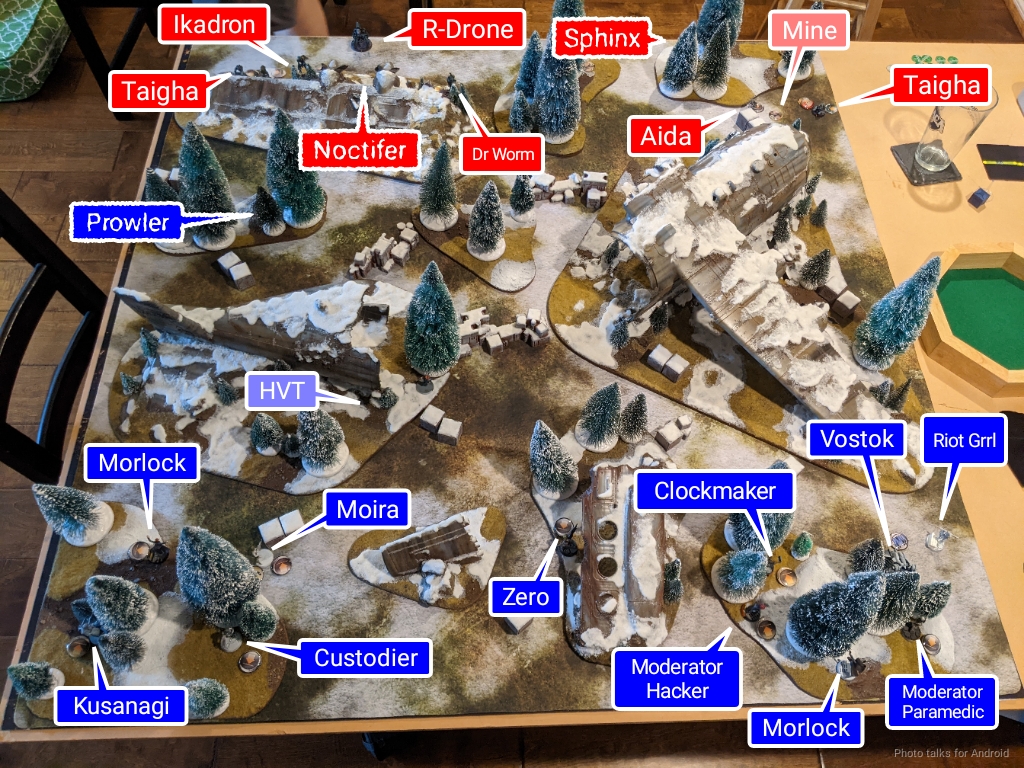
Deployment
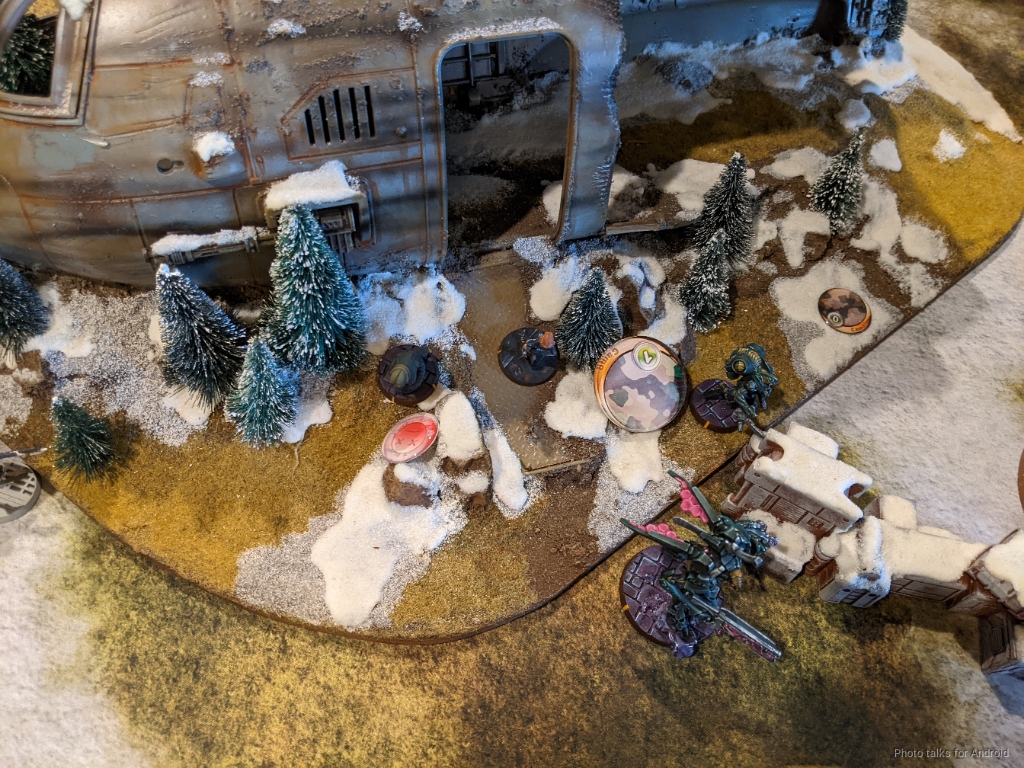
I won the rolloff and selected what I thought was the stronger side. Erik decided to go second, because he doesn't like going first in Biotechvore. I was only too happy to oblige. He started put down a bunch of warbands on the left and right, then sort of just spread out stuff in convenient places across his deployment zone. It was definitely a null deployment--basically nothing was left out to ARO except for the Noctifer in hidden deployment. One of his Imetrons made the confused deployment roll, but the other failed. Not pictured (intentionally) is the Sphinx, which ended up near the Imetron that failed on the left.
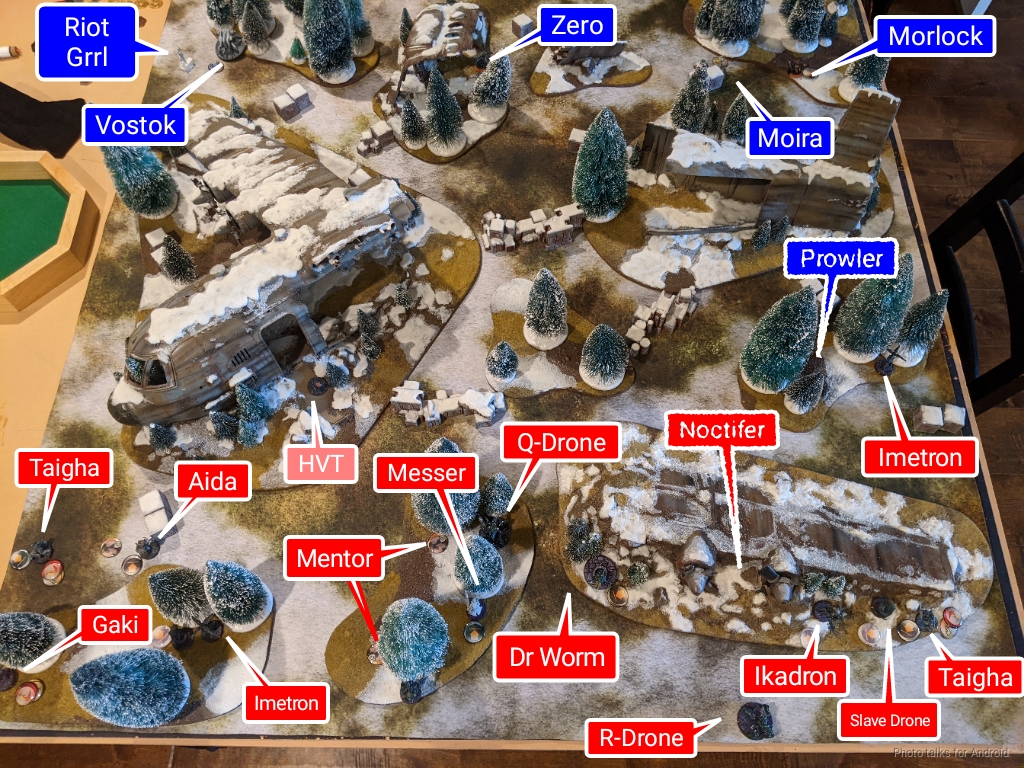
Just looking at this picture of the deployment validates my intuition to take the other side. It's easier said than done, but you really need to have a plan for where all your units will end up in the midfield at the end of your first turn. The places Erik's units can exist in the midfield and stay in cover are the stand of trees in the middle and on the right, and along the plane fuselage on his left.
The trees in the middle and on Erik's right I would say are neutral in terms of positioning. They have easy paths in and out of them, provide cover and LoF blocking from multiple angles, and provide access to some useful firelanes while also being exposed to reasonable attack paths. The plane fuselage, however, is very structurally weak. Anything on Erik's left that makes it to the plane is completely exposed once I make it to the tail section of the plane. You can gain cover from trees and some other elements of terrain, but there's nothing preventing me from just engaging you.
Erik could have offered a denied flank and gone heavy on his right, but the plane fuselage from my perspective is probably too strong in that case. I can climb the wing of the plane and then have the high ground to engage all of his units which would be in the middle of the table and exposed to plunging fire.
With his deployment done, I did a quick SWC and point cost estimate, which told me that all sorts of Combined nonsense was in play. It could be an Anathematic, a Sphinx, a Noctifier... who knows. I didn't want to take all day mathing it all out, so I decided to treat it as if there was at least one Noctifier and then one other high point cost threat like a Sphinx/Anathematic. I'm not really worried about big scary TO thing on his first turn, Erik's going to have a hell of a time getting stuff out of his deployment zone. I have to worry about it turn 2, but at that point I'll have had two turns and the help of the table and mission to whittle down his order pool. I decided to defer the teeth gnashing about a big scary TO thing to turn 2 and focus on the threat of the Noctifer.
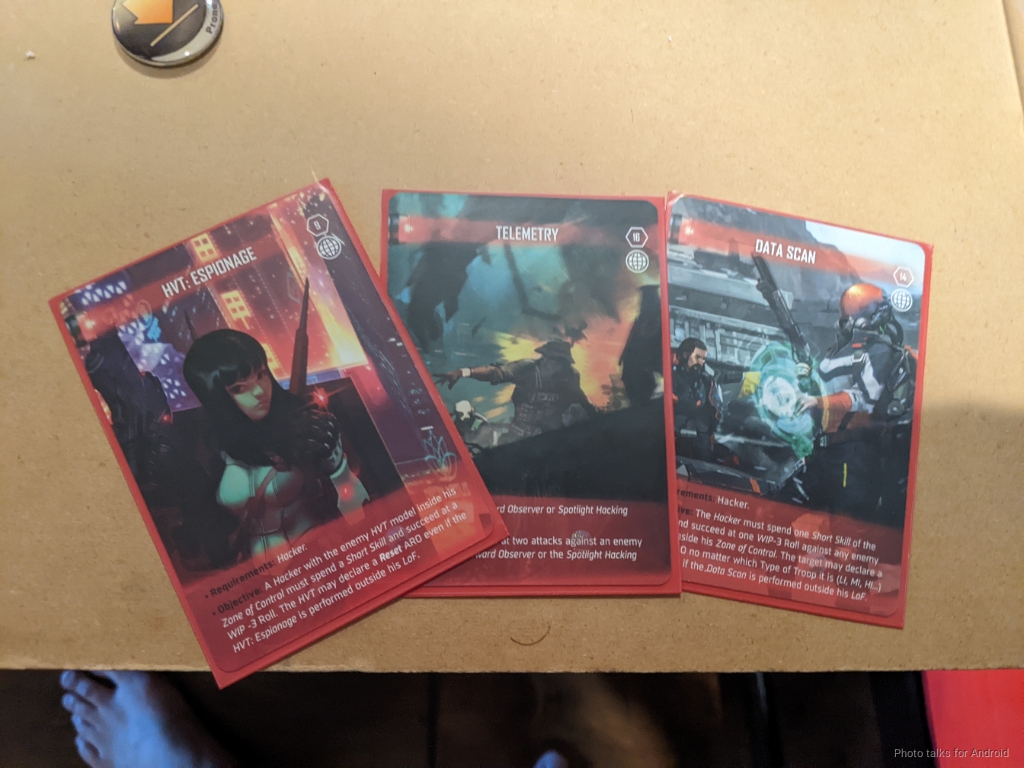
In any case, we both deployed our HVTs at exactly 16" to give us a measuring stick to know when we're out of the Biotechvore zone. After placing my HVT, I took a look at my placement options. In addition to getting out of the zone, you have to plan for classifieds, so I thought a little about what I could do for that.
I knew I had HVT: Espionage, Data Scan, and Telemetry. I figured with a Zero Hacker, Custodier, and Moderator Hacker, I could get Data Scan and Telemetry pretty easily as we'd be forced to meet in the midfield. HVT: Espionage required some planning, however. I figured I'd attempt to land my Zero on the other side of the plane from Erik's HVT, but I failed, putting her in the middle of my deployment zone. I put her there not because it was a good place for her--in fact it was bad--but because I knew I wanted to put my links on either side of my deployment zone. The way the tail and the plane body block LoF to Erik's deployment zone, I knew he could only engage one of the two links with a Noctifer, so I didn't want to give him another target to hit with a missile template as I moved bodies around.
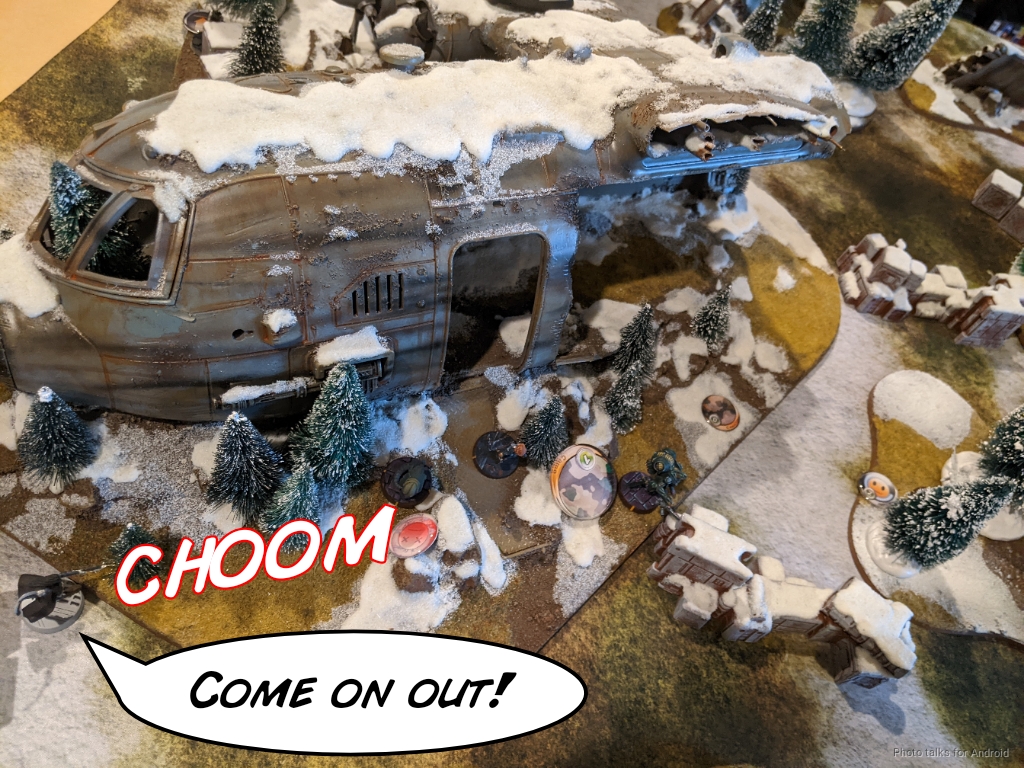
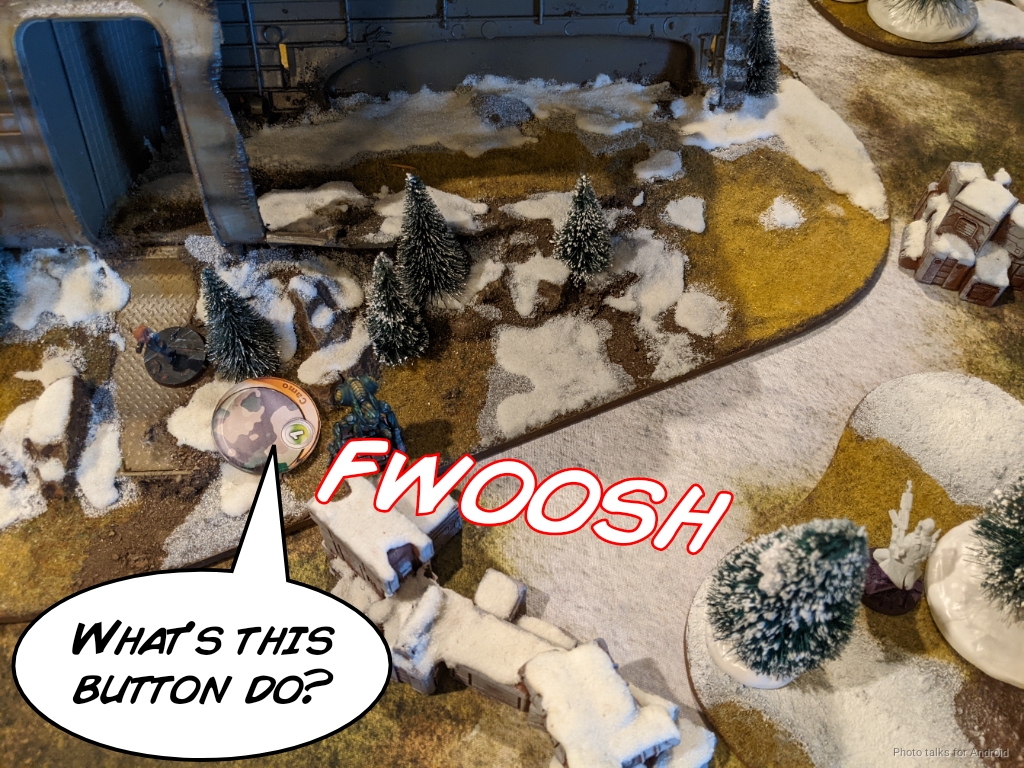
I then looked at his deployment and decided that it would be pretty funny if I landed a Prowler on his table half in the stand of trees that he would have to push a lot of the Combined Army starter pack towards (Ikadron, R-Drone, and Dr. Worm). I threw caution to the wind and went for it, sticking the landing! Amazing! I was just on the safe side of the Biotechvore zone, judging by Erik's HVT, so I figured he'd probably advance past me, giving me an option to flamethrower lots of stuff!
I then took a look at my link deployment options. I figured having the Vostok on the top of the plane sounded pretty good, so I put my Moderator link on the right side, very carefully spread out to avoid granting any free template hits. To protect them, I put a Morlock in their stand of trees. I made sure that even if the Morlock ate a missile her movement path wouldn't catch anybody else in the blast. This particular Morlock rolled +1 ARM and Bioimmunity. Not that relevant, but armor is good in N4 so not gonna complain too much.
I put the Reverend link on the left, also with a Morlock (who rolled NWI) for smoke cover. My intent was to push the Moira MSR to the tail end of the plane's tail to cover the body of the plane. I held the Riot Grrl ML in reserve, not for any particular big-brained reason but just because I wasn't sure where to put her yet. Erik placed his plasma Q-Drone in some trees in the middle of his deployment zone. I decided I'd use the Riot Grrl to engage Aida, the Gaki, and the Taigha on my right as the link advanced, so I went all in on the Morlock's smoke on that side and put the Riot Grrl in the open! With that, it was time to start.
Turn 1
Top of 1 - Bakunin
Erik docked me two orders and I was already down one from the hidden Prowler, so even with the Moira's NCO I'm hurting for orders to get everyone to safety through difficult terrain. I decide to prioritize the following:
- Get the Moderator link to safety while harassing Erik's left flank (my right). That's where most of my orders are.
- Get the Reverends to safety.
- Remove something, probably the Q-Drone. That thing will be a monster if it gets to the middle of the table and can start firing plasma in all directions.
- Get the Zero to safety if I can.
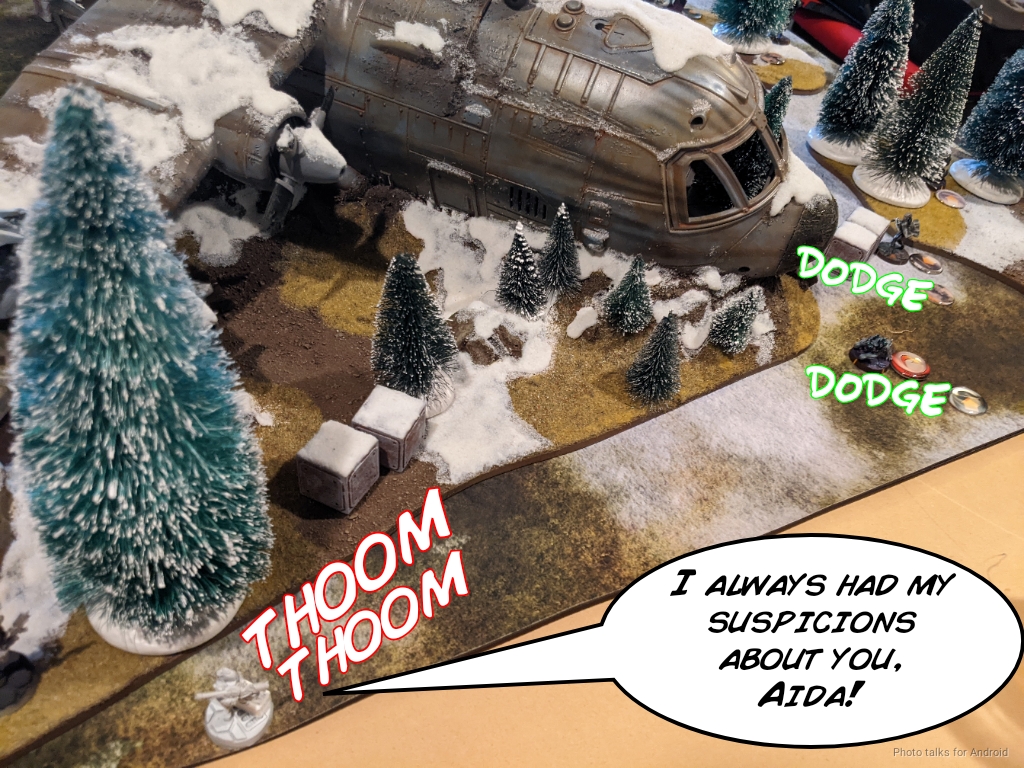
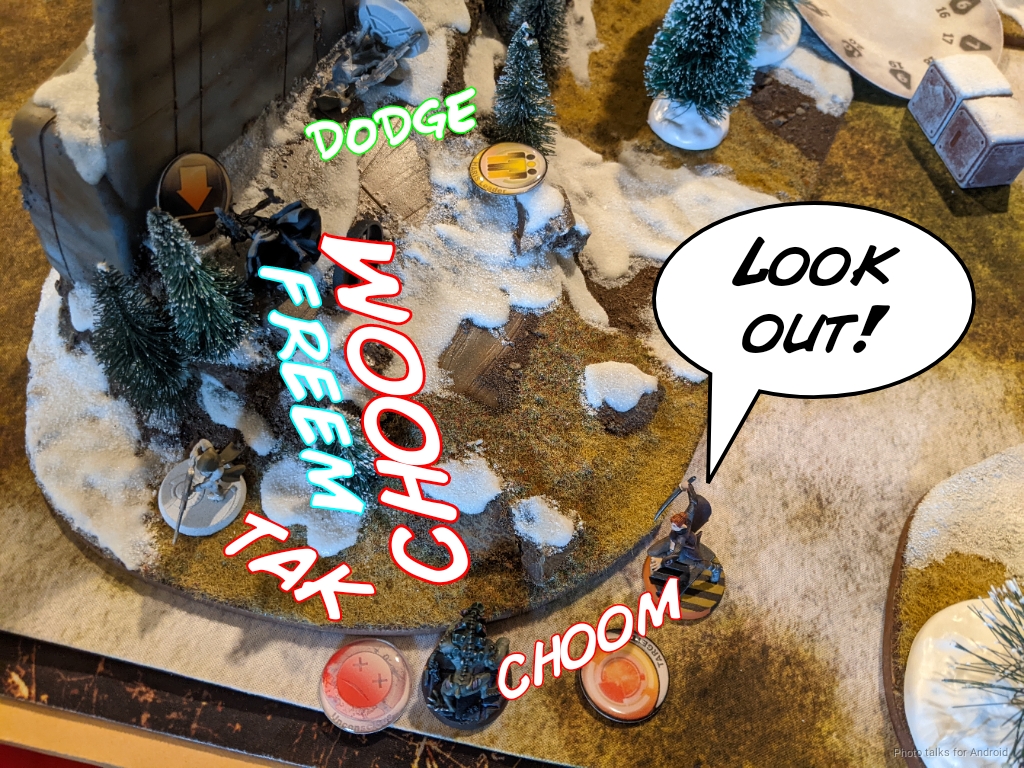
The Morlocks can handle themselves, really in Biotechvore they're there to put down smoke against the Noctifer. Any additional utility I get out of them the better. My turn starts and the NWI Morlock on the left covers the Moira with smoke, no problem. The other Morlock struggles a bit and requires an irregular order to land smoke for the Moderator link. I'm glad Erik didn't choose to reveal the Noctifer then. With the smoke landed, I push the Moderators forward and start engaging Erik's stuff. Aida goes down but that pesky Taigha keeps dodging forward!
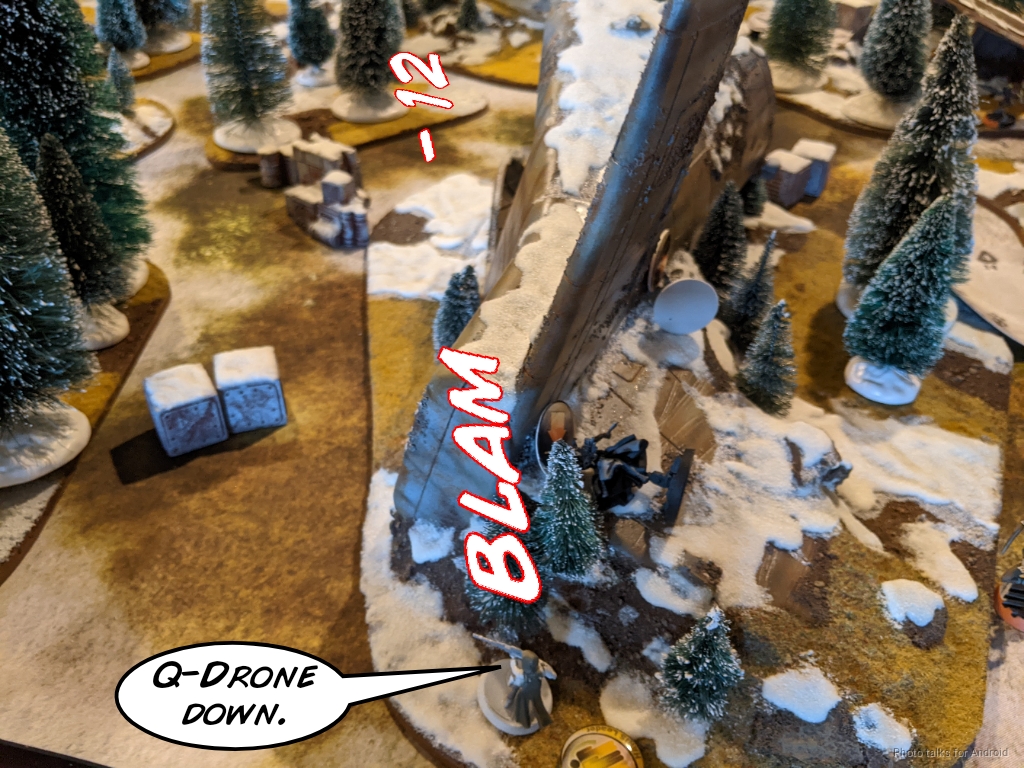
No matter. The Moderator link is safe with the Riot Grrl watching the approach of the Taigha and Gaki along with the Vostok on the wing. I don't spend any more orders fixing their positioning--it's not great but it will have to do. I get the Reverends to the tail of the airplane as planned, and note that I have a shot on the Q-Drone, which I take. It's a net -6 for me, but between Mimetism -6, the low-vis zone, cover, and range mods, I've put the Q-Drone at -12 so it auto misses. I land two hits and the Q-Drone goes unconscious.
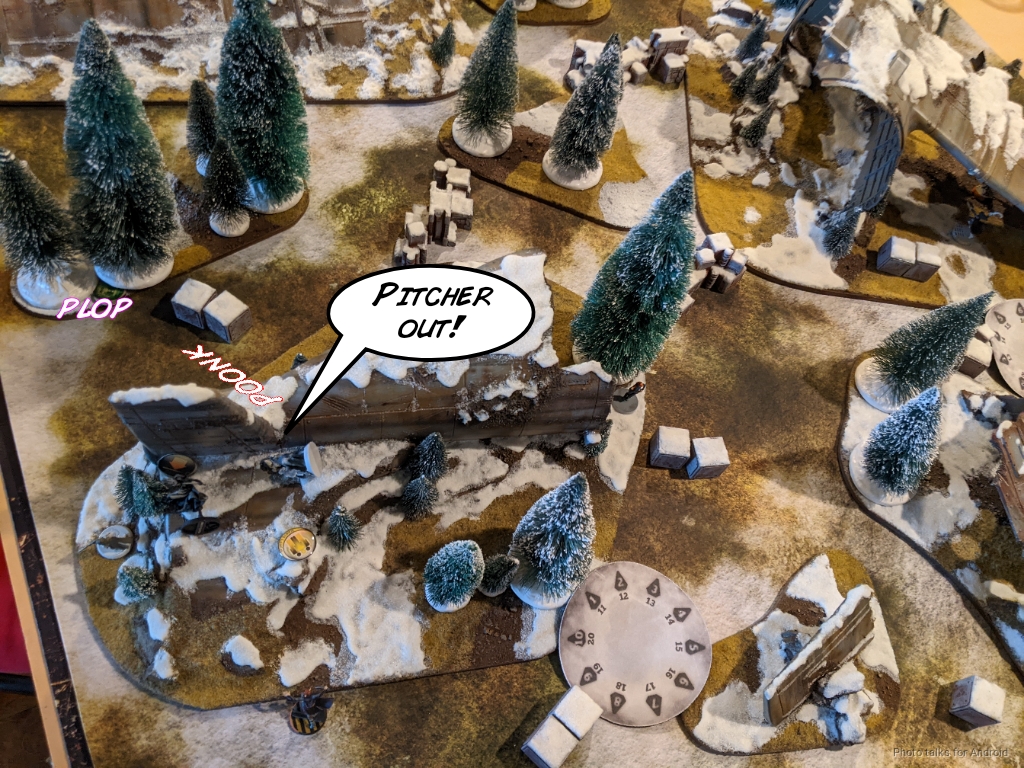
I've got two orders left, which is just enough to get my Zero to safety. I debate popping the Custodier up to fire some pitchers at the plane wing, but decide to rescue my Zero to have the order on Turn 2. It's at this point I think Erik makes his first major mistake of the game and reveals the Noctifer. I lose the Zero, but the element of surprise and the head space occupied by the Noctifer is gone. I now know the nature of the threat and furthermore, he now has to get it out of the zone! Whatever position it ends up in will be worse than it was before, so this is definitely a reasonable trade for me--a Zero for information and to put Erik in a worse tactical position.
I spend a command token and rescue the Morlock on the right (the one without NWI). I fail the BTS save on my NWI Morlock and take a wound.
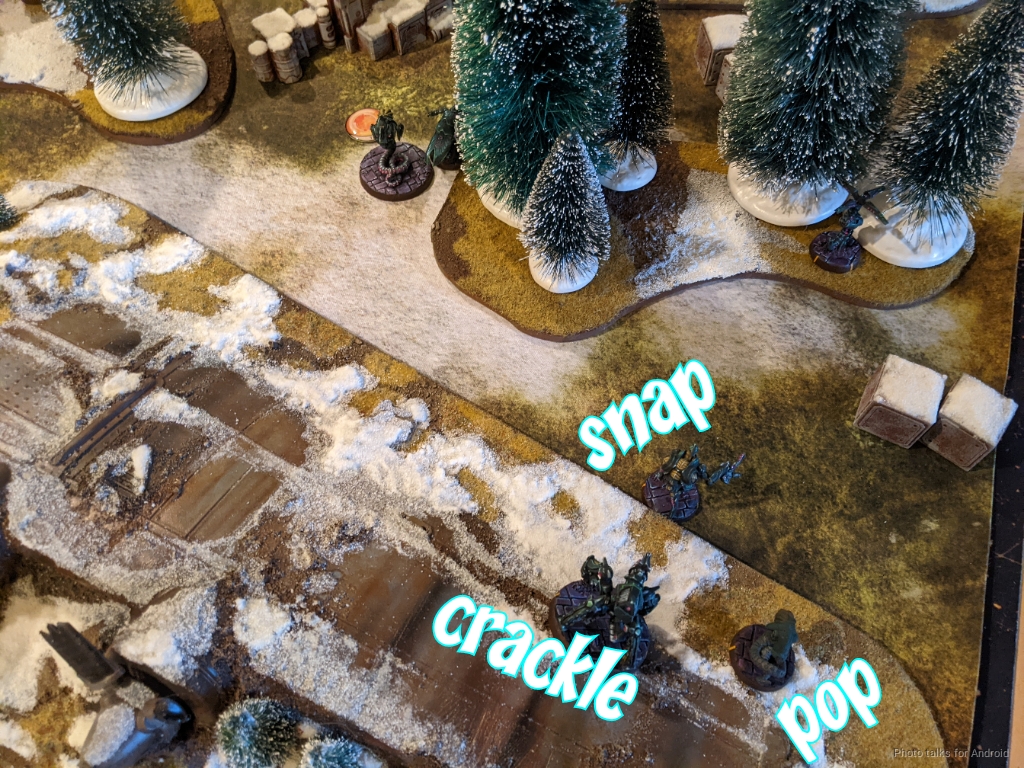
Bottom of 1 - Combined Army
Erik now has the unenviable task of getting his forces out of the Biotechvore zone on his first turn. I haven't made it crazy difficult for him, I'm really just contesting the main approaches for his warbands so I don't get templated. My Reverends are pretty exposed, but that's the nature of Biotechvore--you have to risk stuff to get to the middle. In any case, even with the Saturation and Low-Vis, my Moderator link shreds the Taigha on my right...

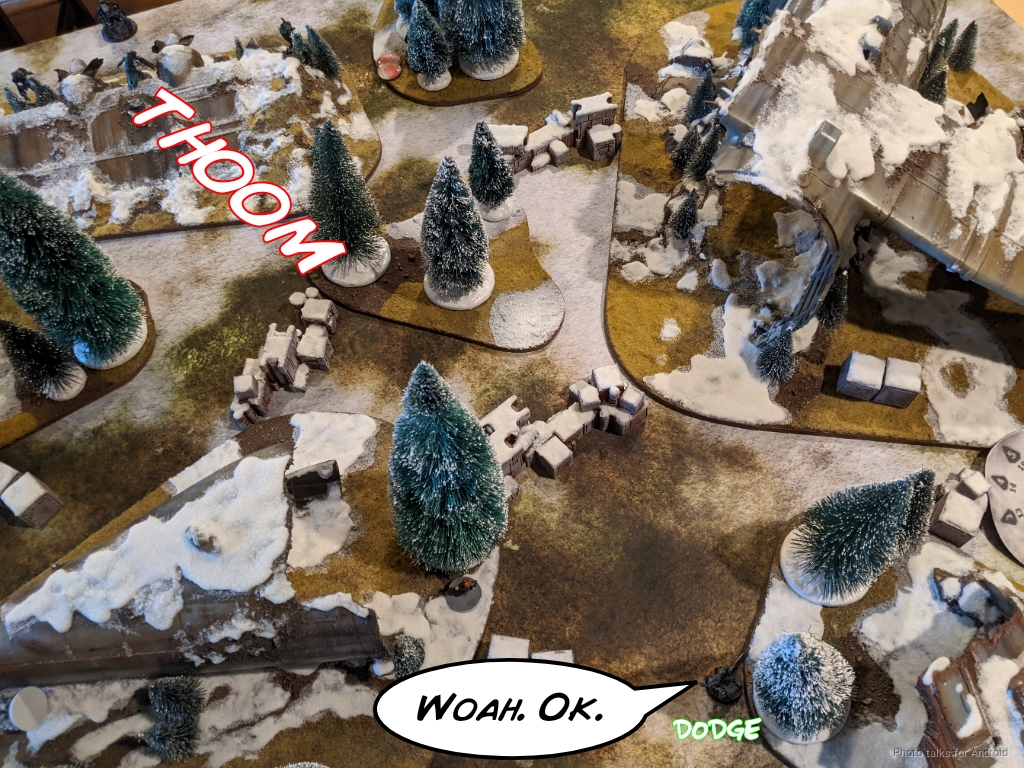
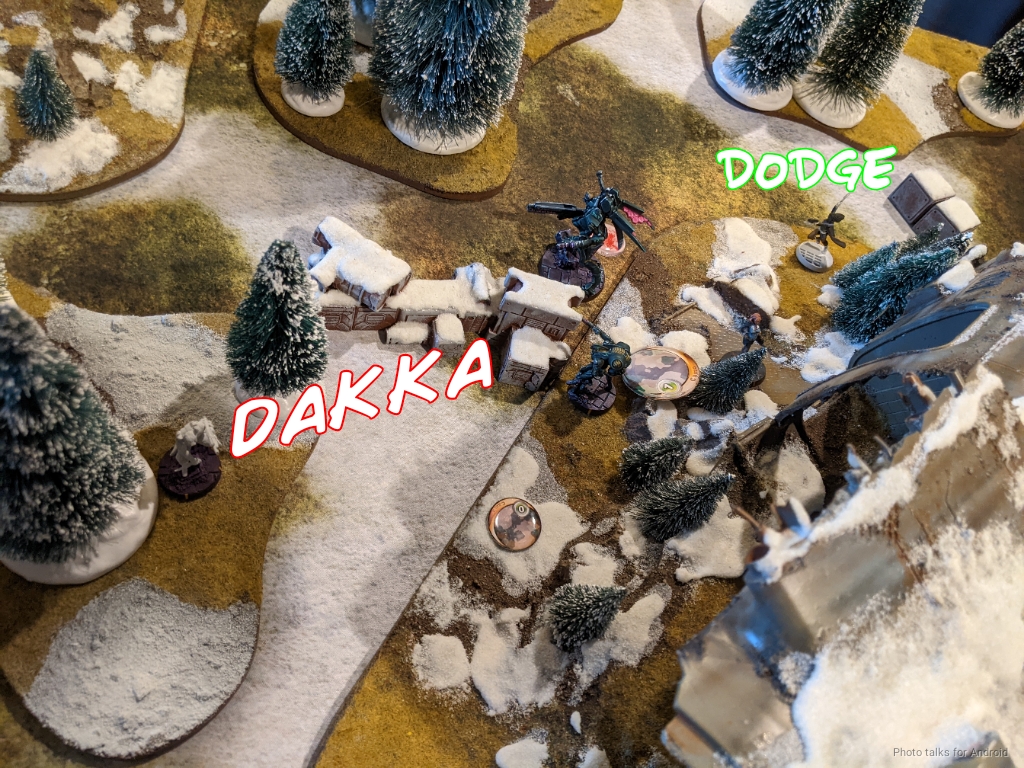
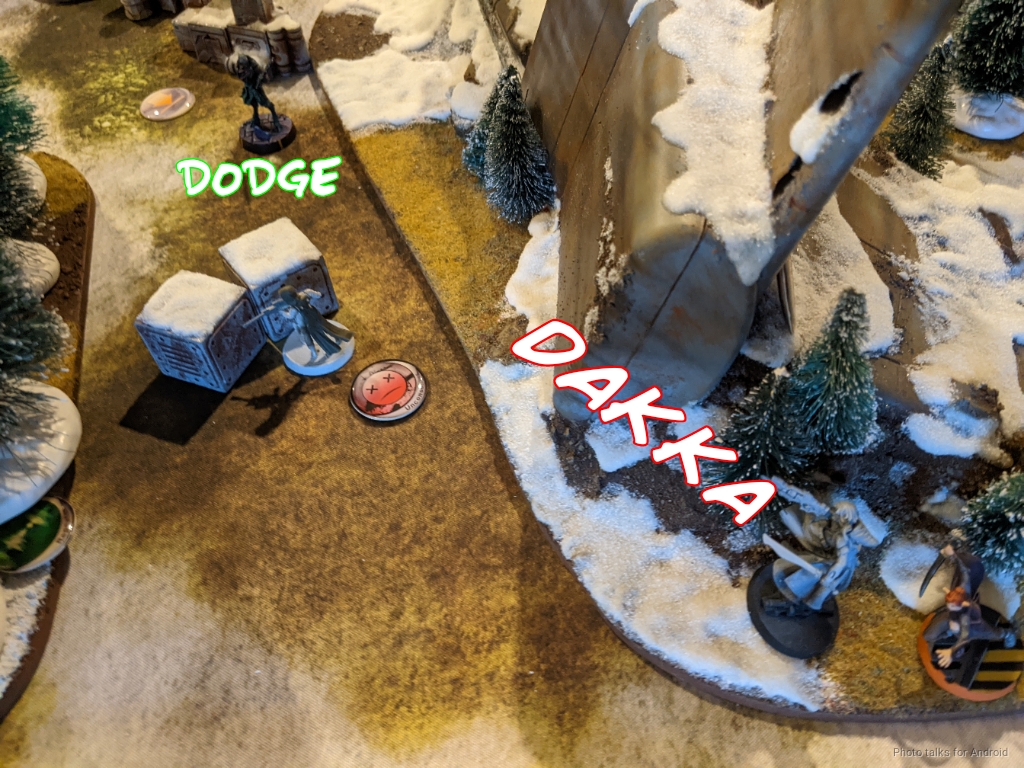
Erik dodges the Taigha on my left into view and manages to dodge his way around the Moira MSR's pistol fire to get into view of Kusanagi and the Custodier. I break the link and decide to tank the inevitable chain colt shot on Kusanagi while dodging with the Custodier. The Moira whiffs again with her pistol, the Custodier dodges the chain colt, and Kusanagi manages to tank the template, not even taking a wound. The Taigha is not so lucky and goes down to the Nanopulsar. Fortunately for me, it passes the Chain Rifle save, meaning I have an easy classified target for my next turn.
Unfortunately for Erik he had to spend a few command tokens flipping the Gaki and other Taigha's orders to get into position, which means he's short on coordinated orders to get the rest of his forces out. He manages to get Dr. Worm, the Noctifier, his Mentor Lt, a Cybermasked Victor Messer, the Sphinx, and one of the Ikadrons out, but he loses the other Ikadron, an Imetron, the R-Drone, and both of Dr. Worm's Slave Drones. Erik also attempted a Gizmokit on the Q-Drone but failed.
Turn 2
Top of 2 - Bakunin
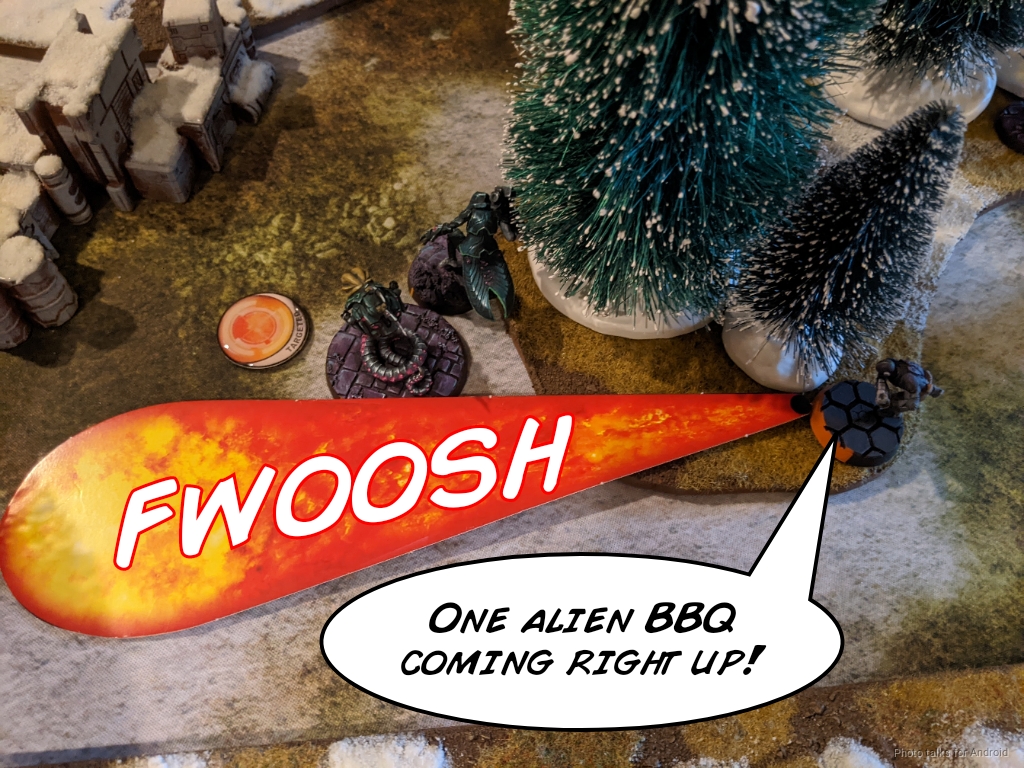
Well, things are looking decidedly okay for me, especially given that I have a Prowler behind Erik's Noctifier and Dr. Worm. They both fail their dodges and are burned off the table.
I spent a ton of orders grabbing all three classifieds. The Custodier gets Telemetry and Data Scan off of the downed Taigha, and the Moderator Hacker gets HVT: Espionage for me after a few tries. Red Deck Classifieds are rough, so this basically takes my entire first order pool. I do manage to get the Moira MSR to a better overwatch position on the Sphinx through some Morlock-provided smoke though.
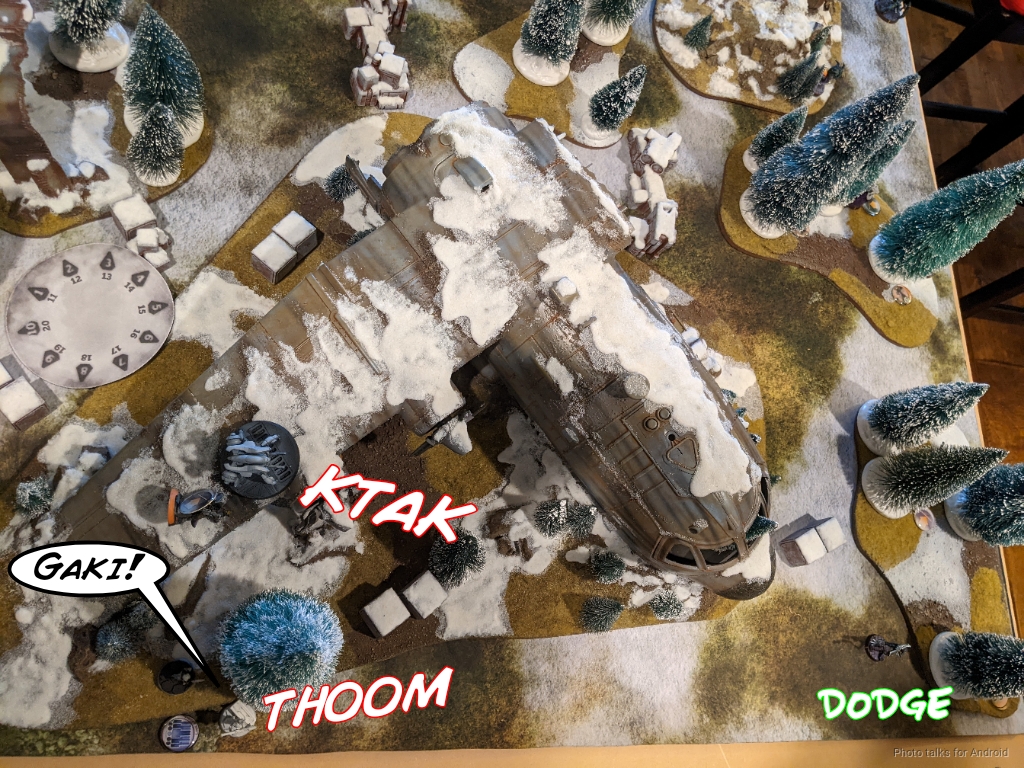
I've got just enough orders and command tokens to get my Morlock on the right into view of the Sphinx and drop a chain rifle on a downed Slave Drone to reveal it, actually doing a wound to the Sphinx!
Erik did such a great job painting the model we were afraid of ruining the paint job if it fell over so we just put it next to the camo token which represents its actual position.
If you want to see higher res photos of Erik's beautiful paint job, you can check them out here:
And you can watch the Late Night Wargames episode where we talk about the painting competition here:
Bottom of 2 - Combined Army
Erik's really out of options here, so he just tries to deal with the troublesome Morlock by shooting it with Victor Messer. I dodge once, but die to the second round of fire.
Erik's Lieutenant successfully shotguns my Moira MSR down, then Erik decides to protect his Sphinx by re-camoing it... but I end up Total Controlling it with the Moderator instead.
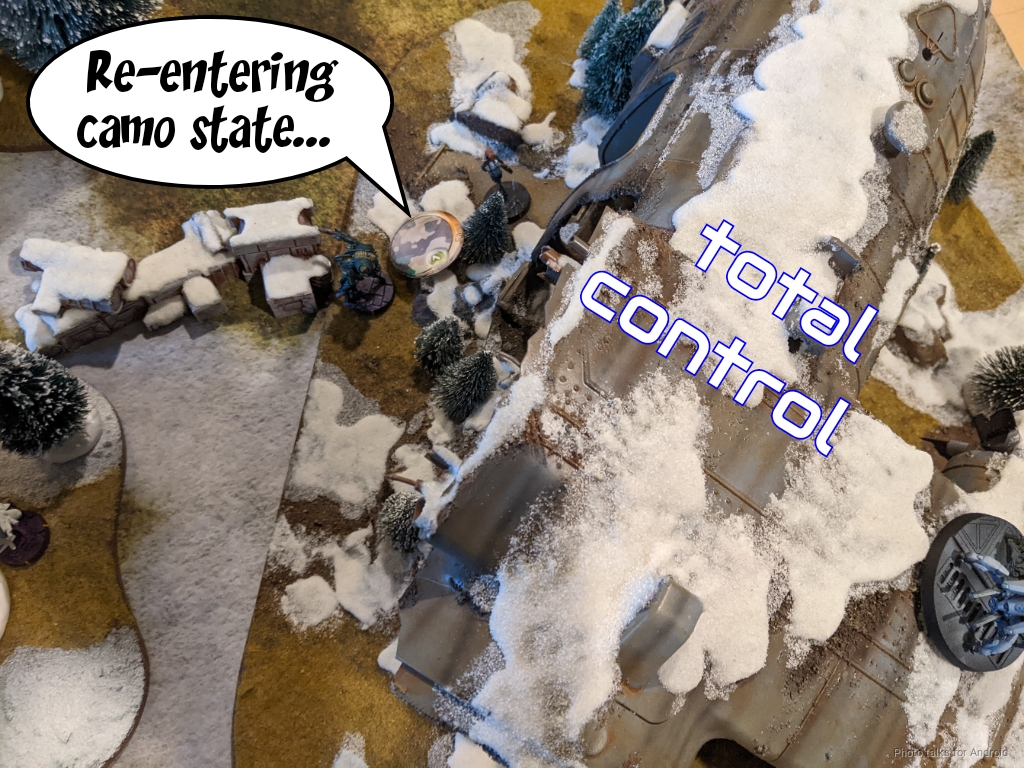
I've got essentially a full order pool to try and kill an Imetron with a Prowler, so we decide that I succeed and call the game there. I've got three classifieds to Erik's zero, and I have 233 points remaining to his 0, making it a
9-0 Jurisdictional Command of Bakunin Victory!
Post Game Analysis
Well, playing Vanilla certainly didn't do Erik any favors here, but I don't think we can actually chalk this loss up to that. He only lost an Ikadron and an R-Drone in terms of order generators to the Biotechvore zone. So only two orders. Painful, to be sure, but not back breaking. There were a few key missteps:
- Revealing the Noctifer - A turn 2 Noctifer reveal is generally pretty brutal. I think in this game since I spent all my orders turn 2 getting classifieds really the big loss here was ceding tempo to me by revealing the threat and then having to break from that position.
- Dumping orders into the Taigha - It's not that dangerous for me to be in LoL. All my stuff is where it needed to be. I'm content to spend a bunch of irregular orders improving my positioning and working towards classifieds, then I can just reform links if I really care. The Saturation Zones make it less important to have links in the reactive turn anyway.
- Moving the Sphinx - A turn 2 Sphinx surprise is pretty powerful, especially when I've advanced to the midfield. Could have easily flamethrowered my entire Moderator link.
But really, the big problem here was deployment and first turn lack of a plan for Erik. We discussed at length a few ideas of how he could have deployed better. As it stood, he was funneling everything except for warbands into the center of the table which is very dangerous to do in Biotechvore. I chose to advance along the flanks instead, which basically protects my rear from everything except for Parachutists and the like. I think for killing missions advancing along the sides of the table is generally pretty good if you can somehow prevent your opponent from isolating your two groups of units.
In this case, the Prowler was able to help remove the Noctifier, which would have been a pretty big wedge between my two links. I was less worried about the Sphinx, shockingly enough, because I had reasonable hacking coverage and also Erik's order pool was pretty much obliterated by the time the Sphinx was really in play.
This really goes back to my earlier point about his side of the table not really having a strong place to put units in the midfield. If you look back at the table, you can see that the tail section of the plane creates a much safer LoF "shadow," because it's turned away from the middle of the table. The plane fuselage on Erik's side of the table where his Sphinx ended up doesn't create an LoF shadow to the center of the table at all. Victor Messer was actually pretty safe in the center stand of trees, as was the Imetron until the very end, but everything else was just sort of dead.


I think had I been playing Erik's list, I would have had a hard time pushing to the middle and holding ground. I think a better development shape would have been to center-load the warbands, and then anchor the flanks with the Ikadrons. As the game develops, push into the middle in a sort of triangle wedge with the warbands at the tip and everything trailing behind. This controls the center with expendable and cheap forces and lets you engage my attack surface at range, and most importantly keeps my links divided with a pile of chain colts.
In any case, I only go into this much critical detail because Erik's prepping for a tournament and this is how we both enjoy engaging with the game. As he puts it:
"Man. That game left me wanting more Infinity. Nothing like being CRUSHED to make you want to try again."
Thanks to Erik for a great game, and thanks to you for reading! Enjoy the rest of the Durgama Takeover campaign! Just a quick reminder about the Durgama Defense Coalition patch contest:
Battle Report Author

Army Lists Used In This Battle
Recommend Commander For Commendation
Share this battle with friends
WiseKensaiWins

Excellently made! Well done!
Go go bromads!
Please ignore, test comment to see what tags the backend strips out:
Nomad News Network – Durgama Crisis Update Phase I
Quality as only WiseKensai can provide. That’s one of my all-time favorite tables as well.
Go Bromads go!
Great battle report, nice miniature and tables !
Excellent job Commander! Great batrep.
Very nice report. Totally love it!
This is great! I would love to see a bit more narrative writing, especially with the comic book style photos! Maybe that is just a personal preference though. Definitely cannot complain with that report mate!
Amazing high quality report. Good job.
Fantastic and entertaining presentation here, really enjoyed it. Also, +1 for pun name, or should I say, nun name?
We must maintain Nomads space!
really excellent!
Excellent work bromad! Keep going!
F Yes! Great batrep, great win and an awesome table! Rated 10/10 and recommended!
Another solid, high quality report, as we have come to expect and appreciate from you during these campaigns, WiseKensai! A glowing example of what a high quality report should be, and I look forward to what you create over the remainder of the campaign!
Very nice report, i like it
and now it is linked!
Well done on the win, and thanks for the thorough write up! You gave both your thoughts on what needs to be done, and explanation on your tactics. Definitely a report worth reading for newer players!
Excellent report as expected of you, well done.
Excellent report!
very nice battle report!
Fantastic Batrep one of the best yet!
A very detailed report
Great Idea with the defense coaition! Great victory as well. Good job Bromad!
Wow bravo, the comics batrep bromad are the best (⌐■_■)ノ♪♬
Excellent batrep! I also love the table, well done!
Very nice battrep ! Thanks for taking the time to put it online. Enjoyed it.
Absolutely brilliant report!
Always loved your style of reporting, from the pictures to the narrative. Fantastic as always!
Outstanding job wisekensai! an example to follow!
#DEUSVULT
amazing report
Oh yeah!
Clap Clap Clap just wow great report!!
Sir, this is an exeptionally well made report and should serve as a guideline for all reports!
excellent report
Wow, what a great report.
So much detailed! Great report! Glad Nomads friends win!
YEAH! Great victory! Great Report! Great Nomads! *cheers*
Erf to bad for the CA.
Great batrep !