Fought At Darpan Xeno-station: Max-Sec Vault
641 days 2 hours 28 minutes ago
The Mole
150 POINTSA game of The Mole. Mercenaries league game.
Azamatam (Dahshat mercs, here acting on a commission from the Office of the Hachib to infiltrate and exfiltrate a mole to at Darpan) vs Diomedes Airborne Training Academy (Corregidorian hired guns, supported by rogue Assault Subsection elements).
“Infinity: Mercenaries” is an rpg-oriented campaign framework for Infinity the Game, based on the harsh world of the smaller mercenary companies that populate the Human Sphere. Your task is to form and manage a new mercenary company, navigating it through contracts and trying to survive until your group will be strong enough to seize a permanent spot in the world of sanctioned fights.
In other words, It’s an inherently imbalanced 90-ish points Spec-Ops campaign with its own missions and XP and random events, written by Lareon. Here we are playing an IGL 1.0 evolution of Mercenaries.
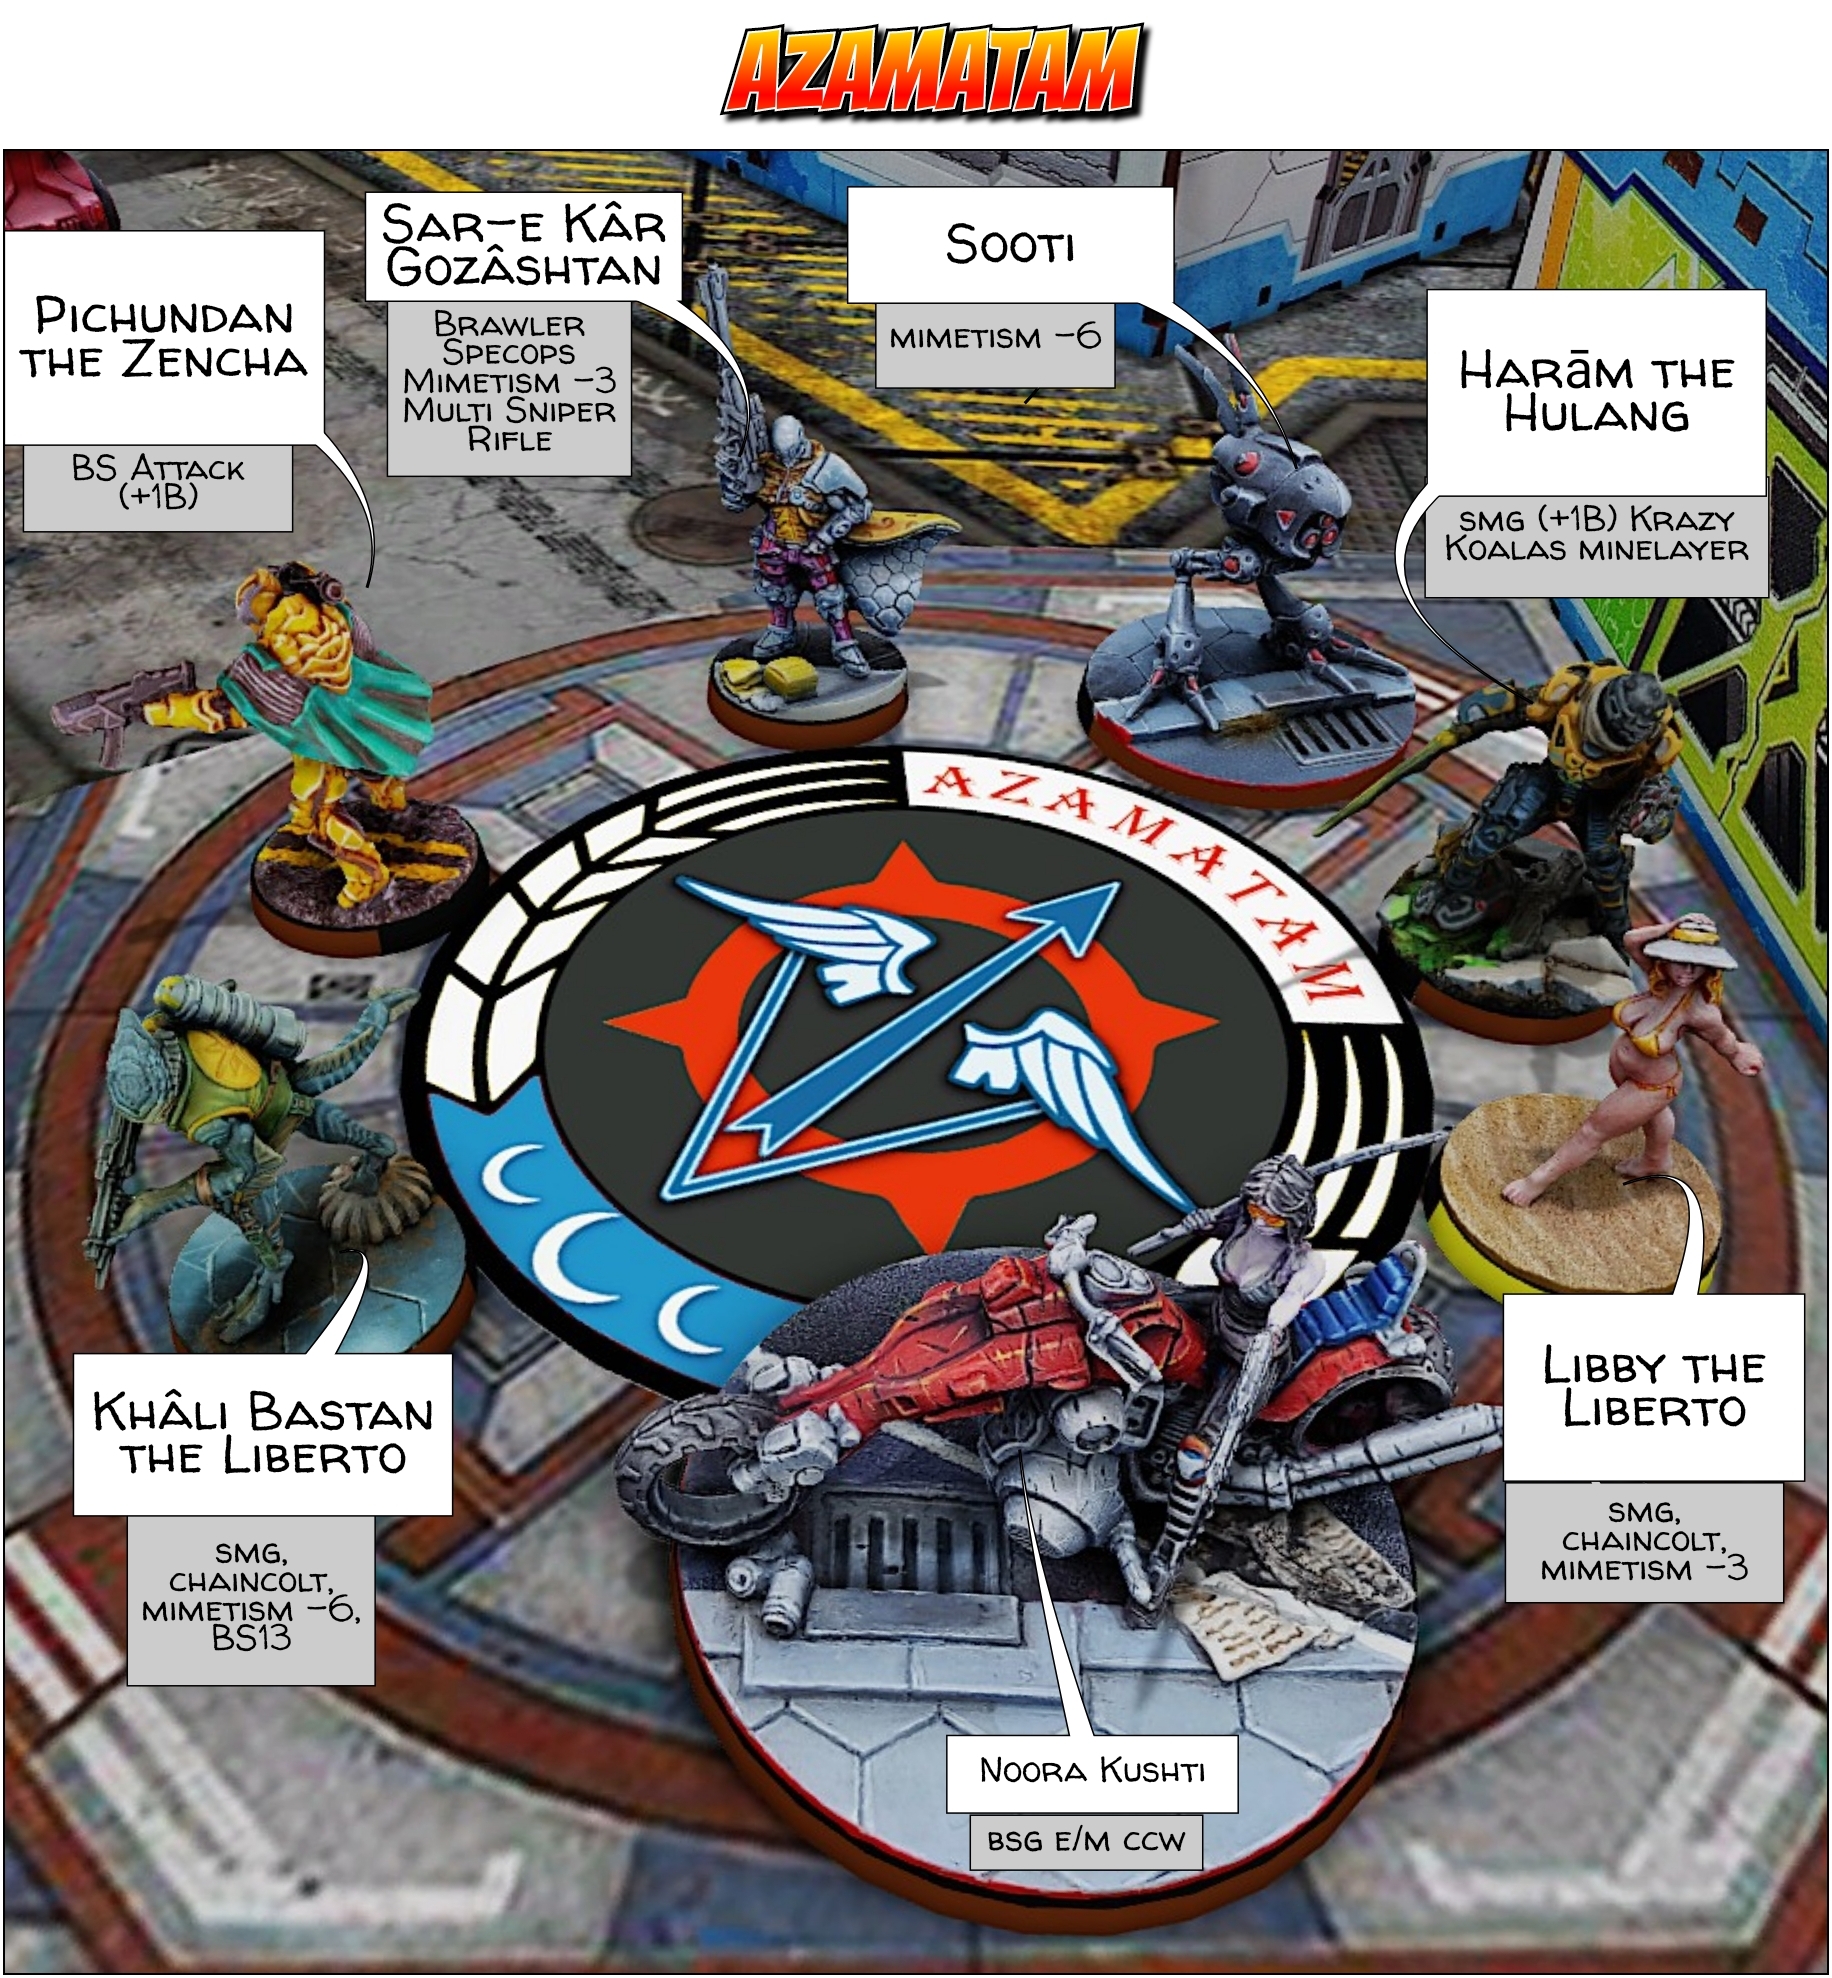
Azamatam:
A minor division of Boylik Corporation, represented in the field by Sar-e Kâr Gozâshtan, using a broad array of dirty tricks to make the best out of the deals they make.
Diomedes:
Diomedes, the Ekdromoi Officer that became a Hero, has established a training academy. Classes are taught by specially trained Thorakites.
A group of Hellcats recruits have been provided full-tuition paid training by Construcciones Cosmicas.
The Mole.
4 HVTs are placed within 4" from the centerline of the table, their ZoC is Exclusion Zone. In order to discover the mole, a unit must be in the ZoC of a HVT, spend a short skill and pass a WIP-6 roll. If the analyzing roll is failed, the HVT is not the mole: the HVT is removed from the table. If the analyzing roll is successful, the targeted HVT is the mole.
The HVTs cannot be analyzed on the 1st turn of the game.
OBJECTIVES
1 OP for each HVT analyzed
1 OP if, at the end of the game, the mole is not controlled by a friendly unit, but the CivEvac action was performed at least once on it.
2 OP if, at the end of the game, the mole is in CivEvac with a friendly unit, outside its own deployment zone
4 OP if, at the end of the game, the mole is in CivEvac with a friendly unit, inside its own deployment zone.
Diomedes wins the Initiative and chooses to go first. Sar-e Kâr watches not many troops deploying opposite; just two netrods landing, one immediately activating active camouflage, and a Jaguar..
Azamatam deploys with Sar-e Kâr on overwatch with his MSR, the other flank protected by the upgraded to Mimetism -6 Sooti the Fanous. Both Libertos deploy on the flanks, Noora Kushti the Kum protecting the back of Sar-e Kâr. Pichundan the Zencha deploys on a rooftop centrally.
Diomedes’ reserve drop is an infiltrated Nál the Raveneye Officer deploying some E/M mines. Azamatam reserve drops Harām the Hulang in front of the Sar-e Kâr, with a minelayed Koala protecting the middle.
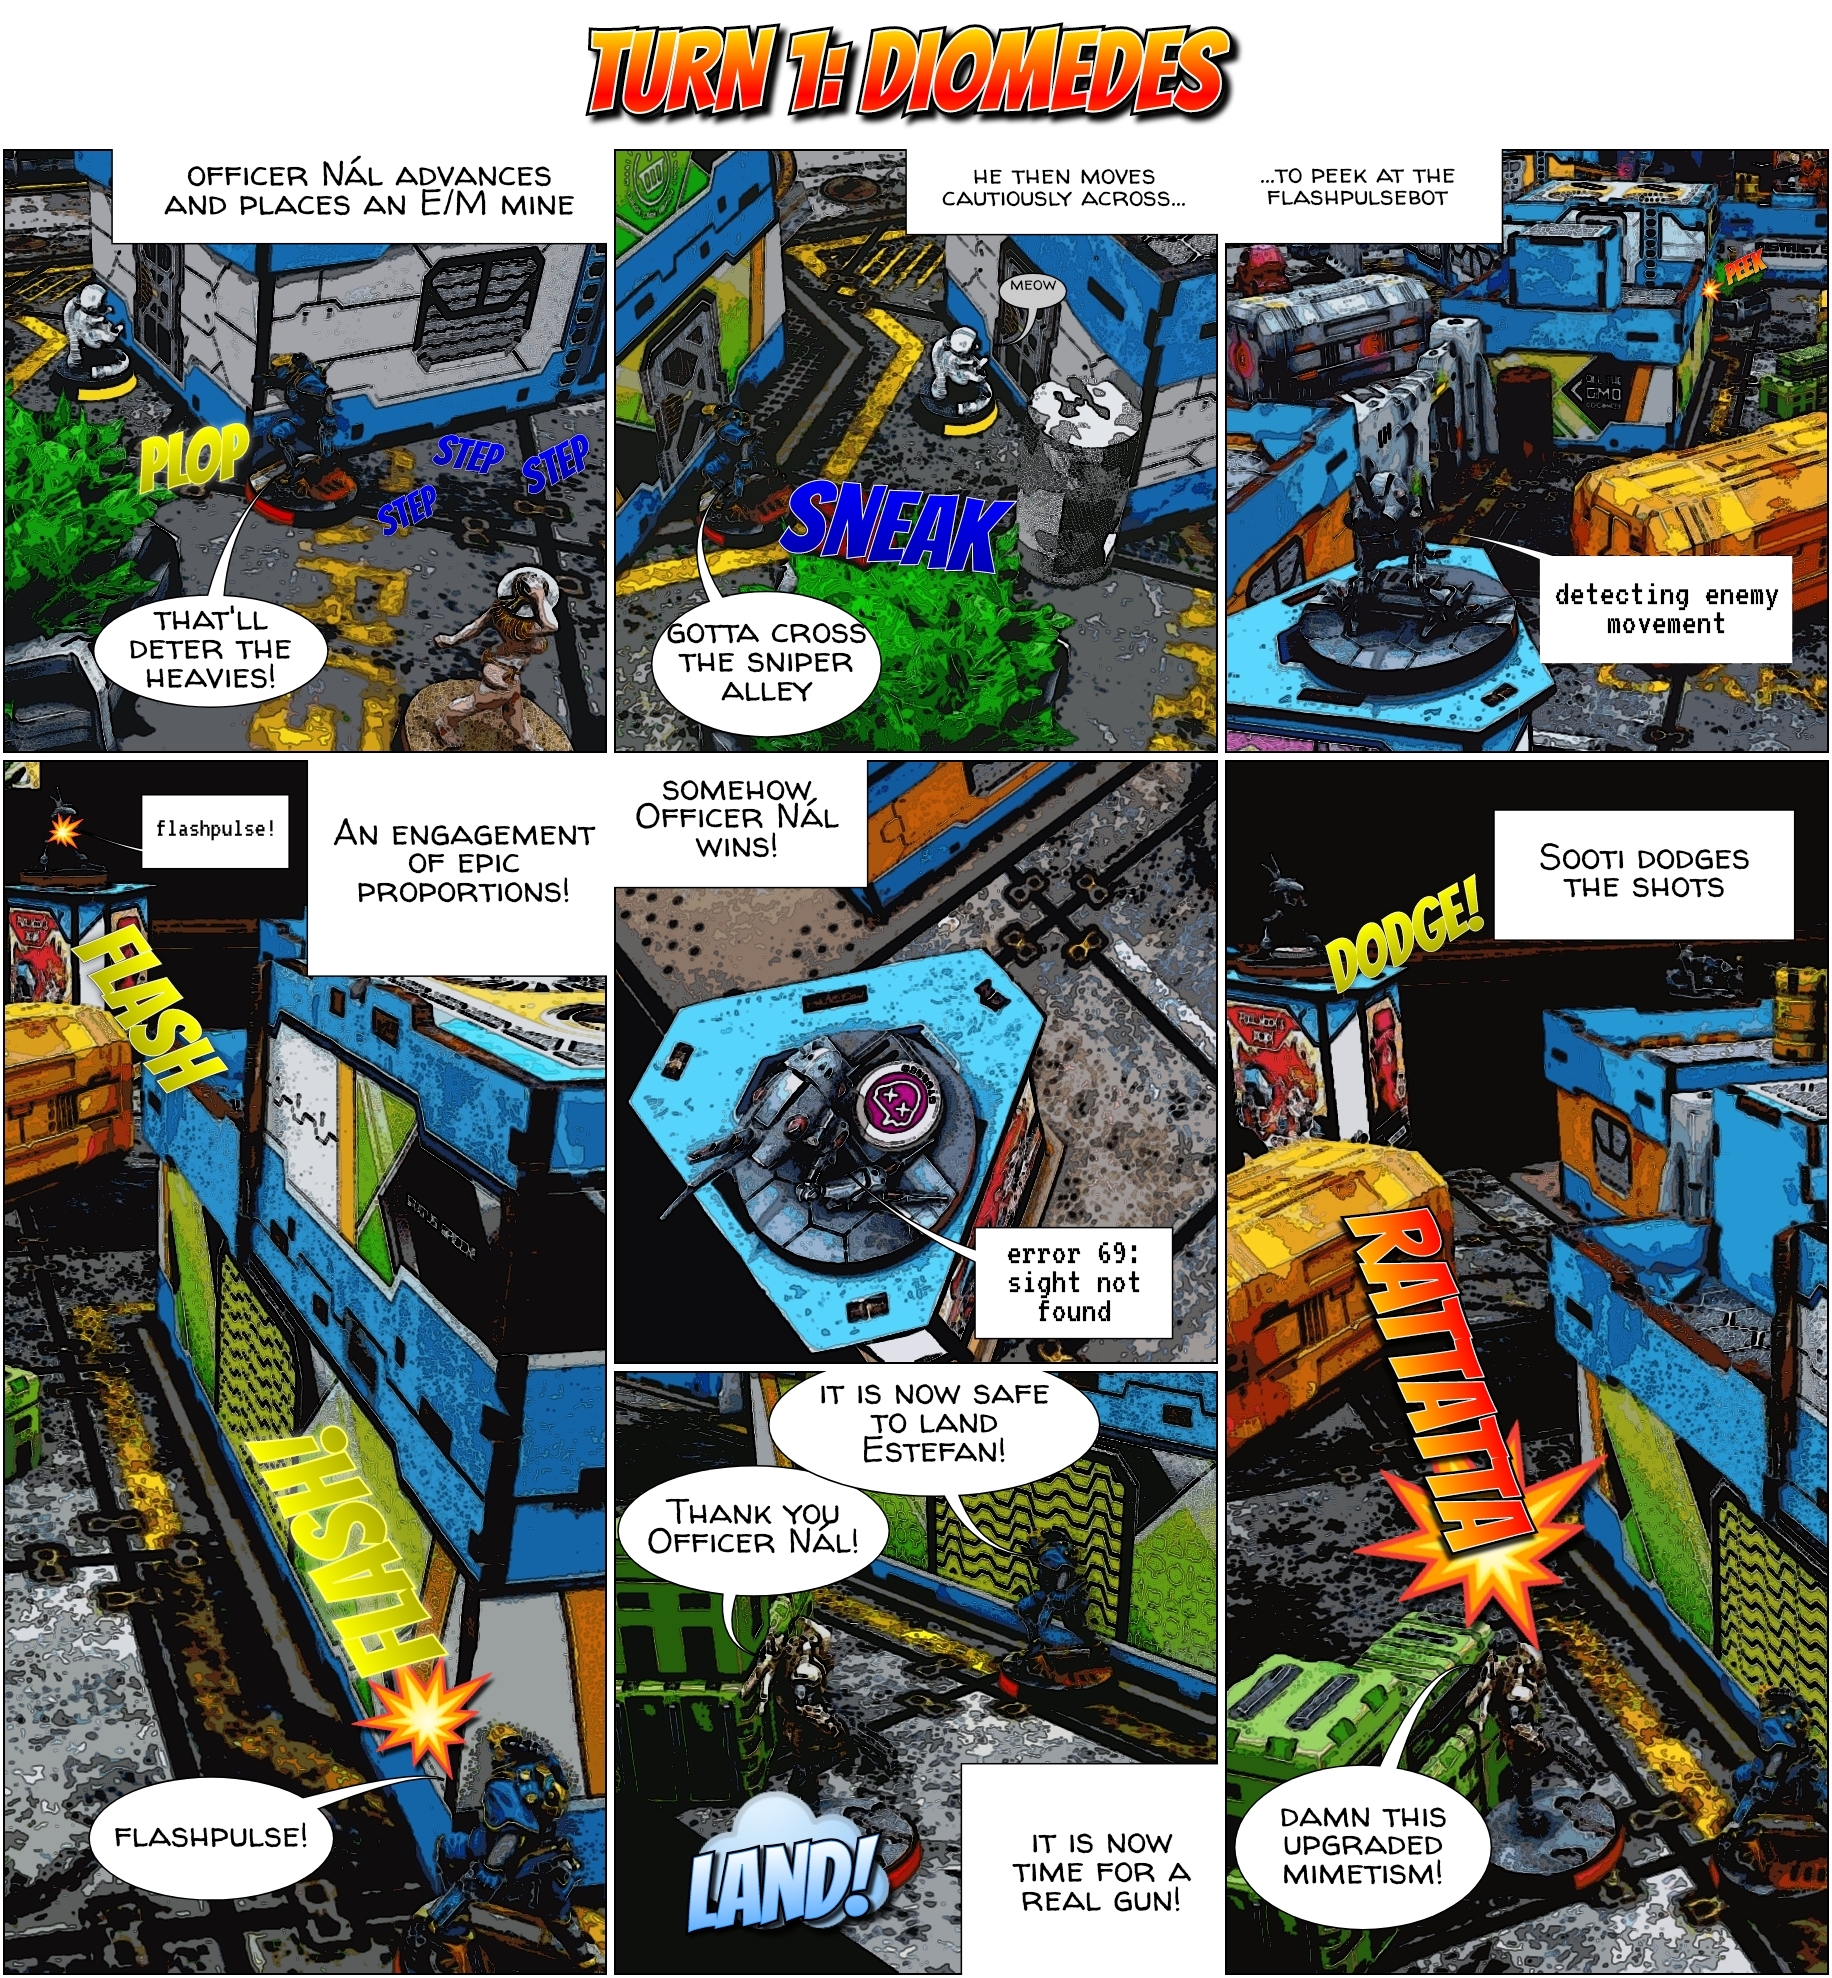
Officer Nál advances forward, drops an E/M mine next to the HVTs and scoots past Sar-e Kâr’s line of fire. He engages Sooti in a flashpulse duel, and wins! This allows Hellcat Student Estefan Montiel to deploy and engage Sooti, but it manages to dodge the shots.
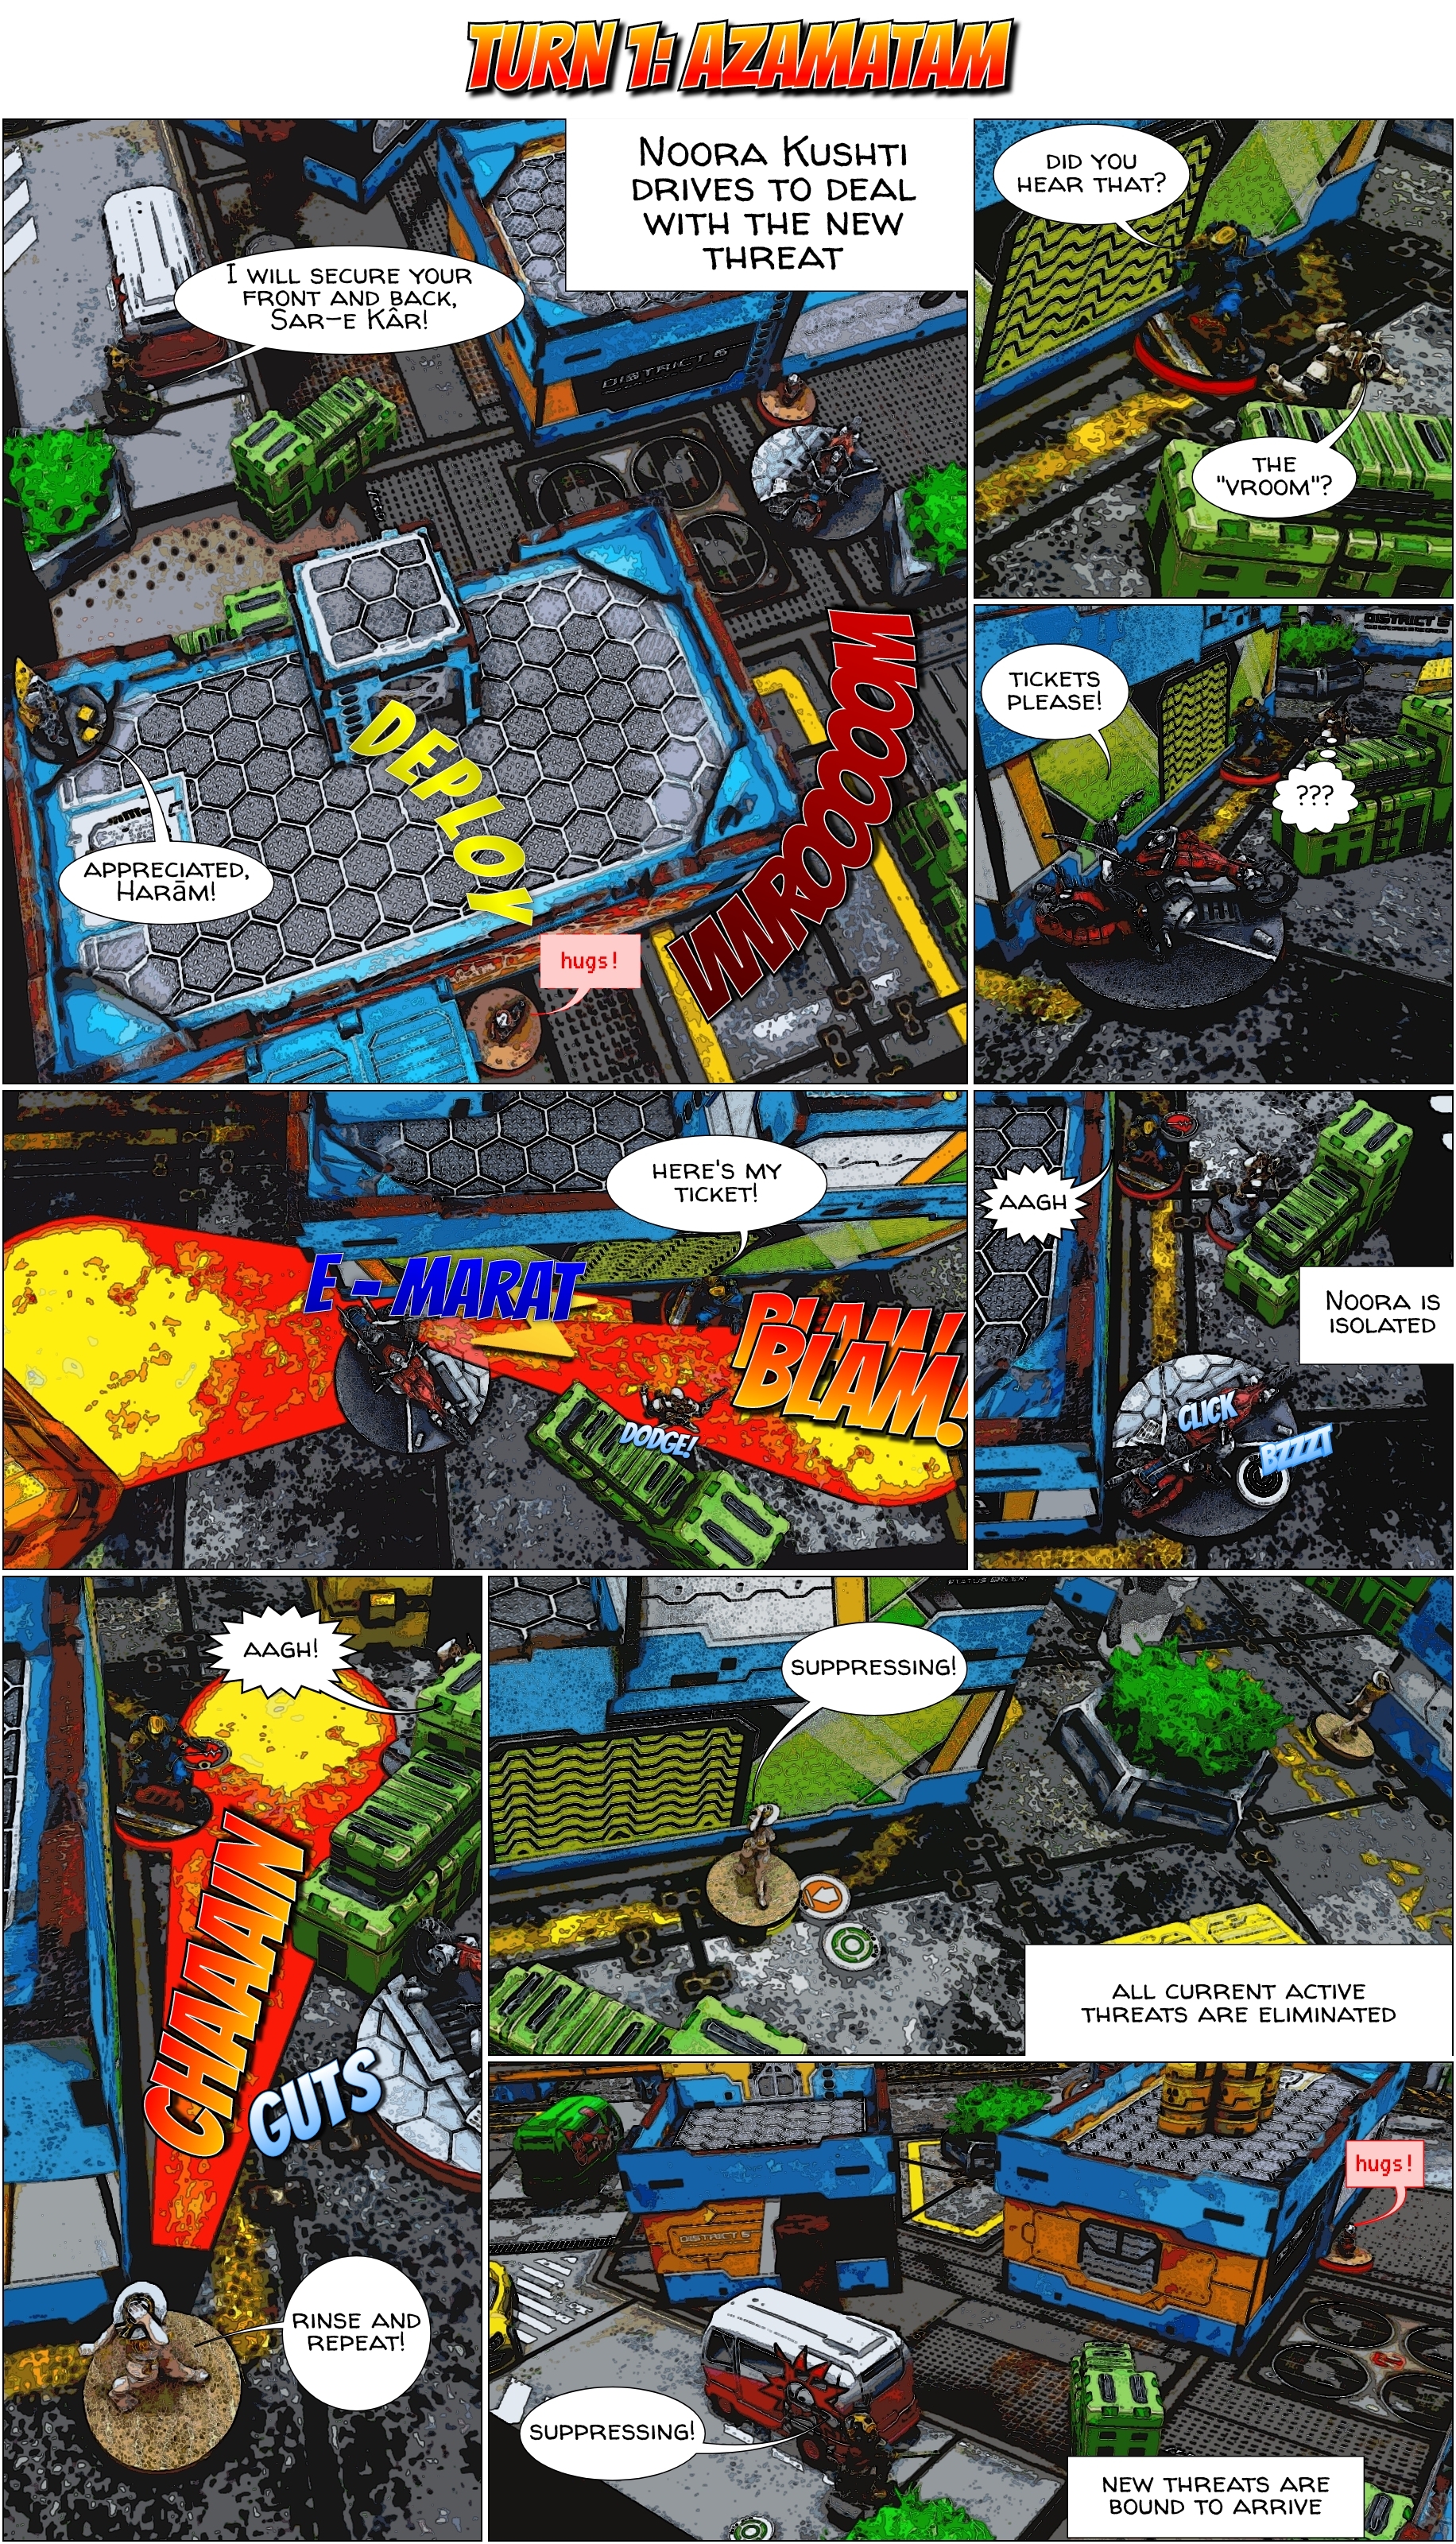
Noora Kushti vrooms towards the enemies. Sensing more airdropped shenanigans incoming, Harām advances but drops another Koala back where the Kum was.
Noora screeches around the corner and blasts the Officer Nál eating an E/Marat and losing comms with her team, while Estefan the Hellcat dodges!
Libby the Liberto puts Estefan and Officer Nál down to not let them regen up and suppresses, as does Harām the Hulang.
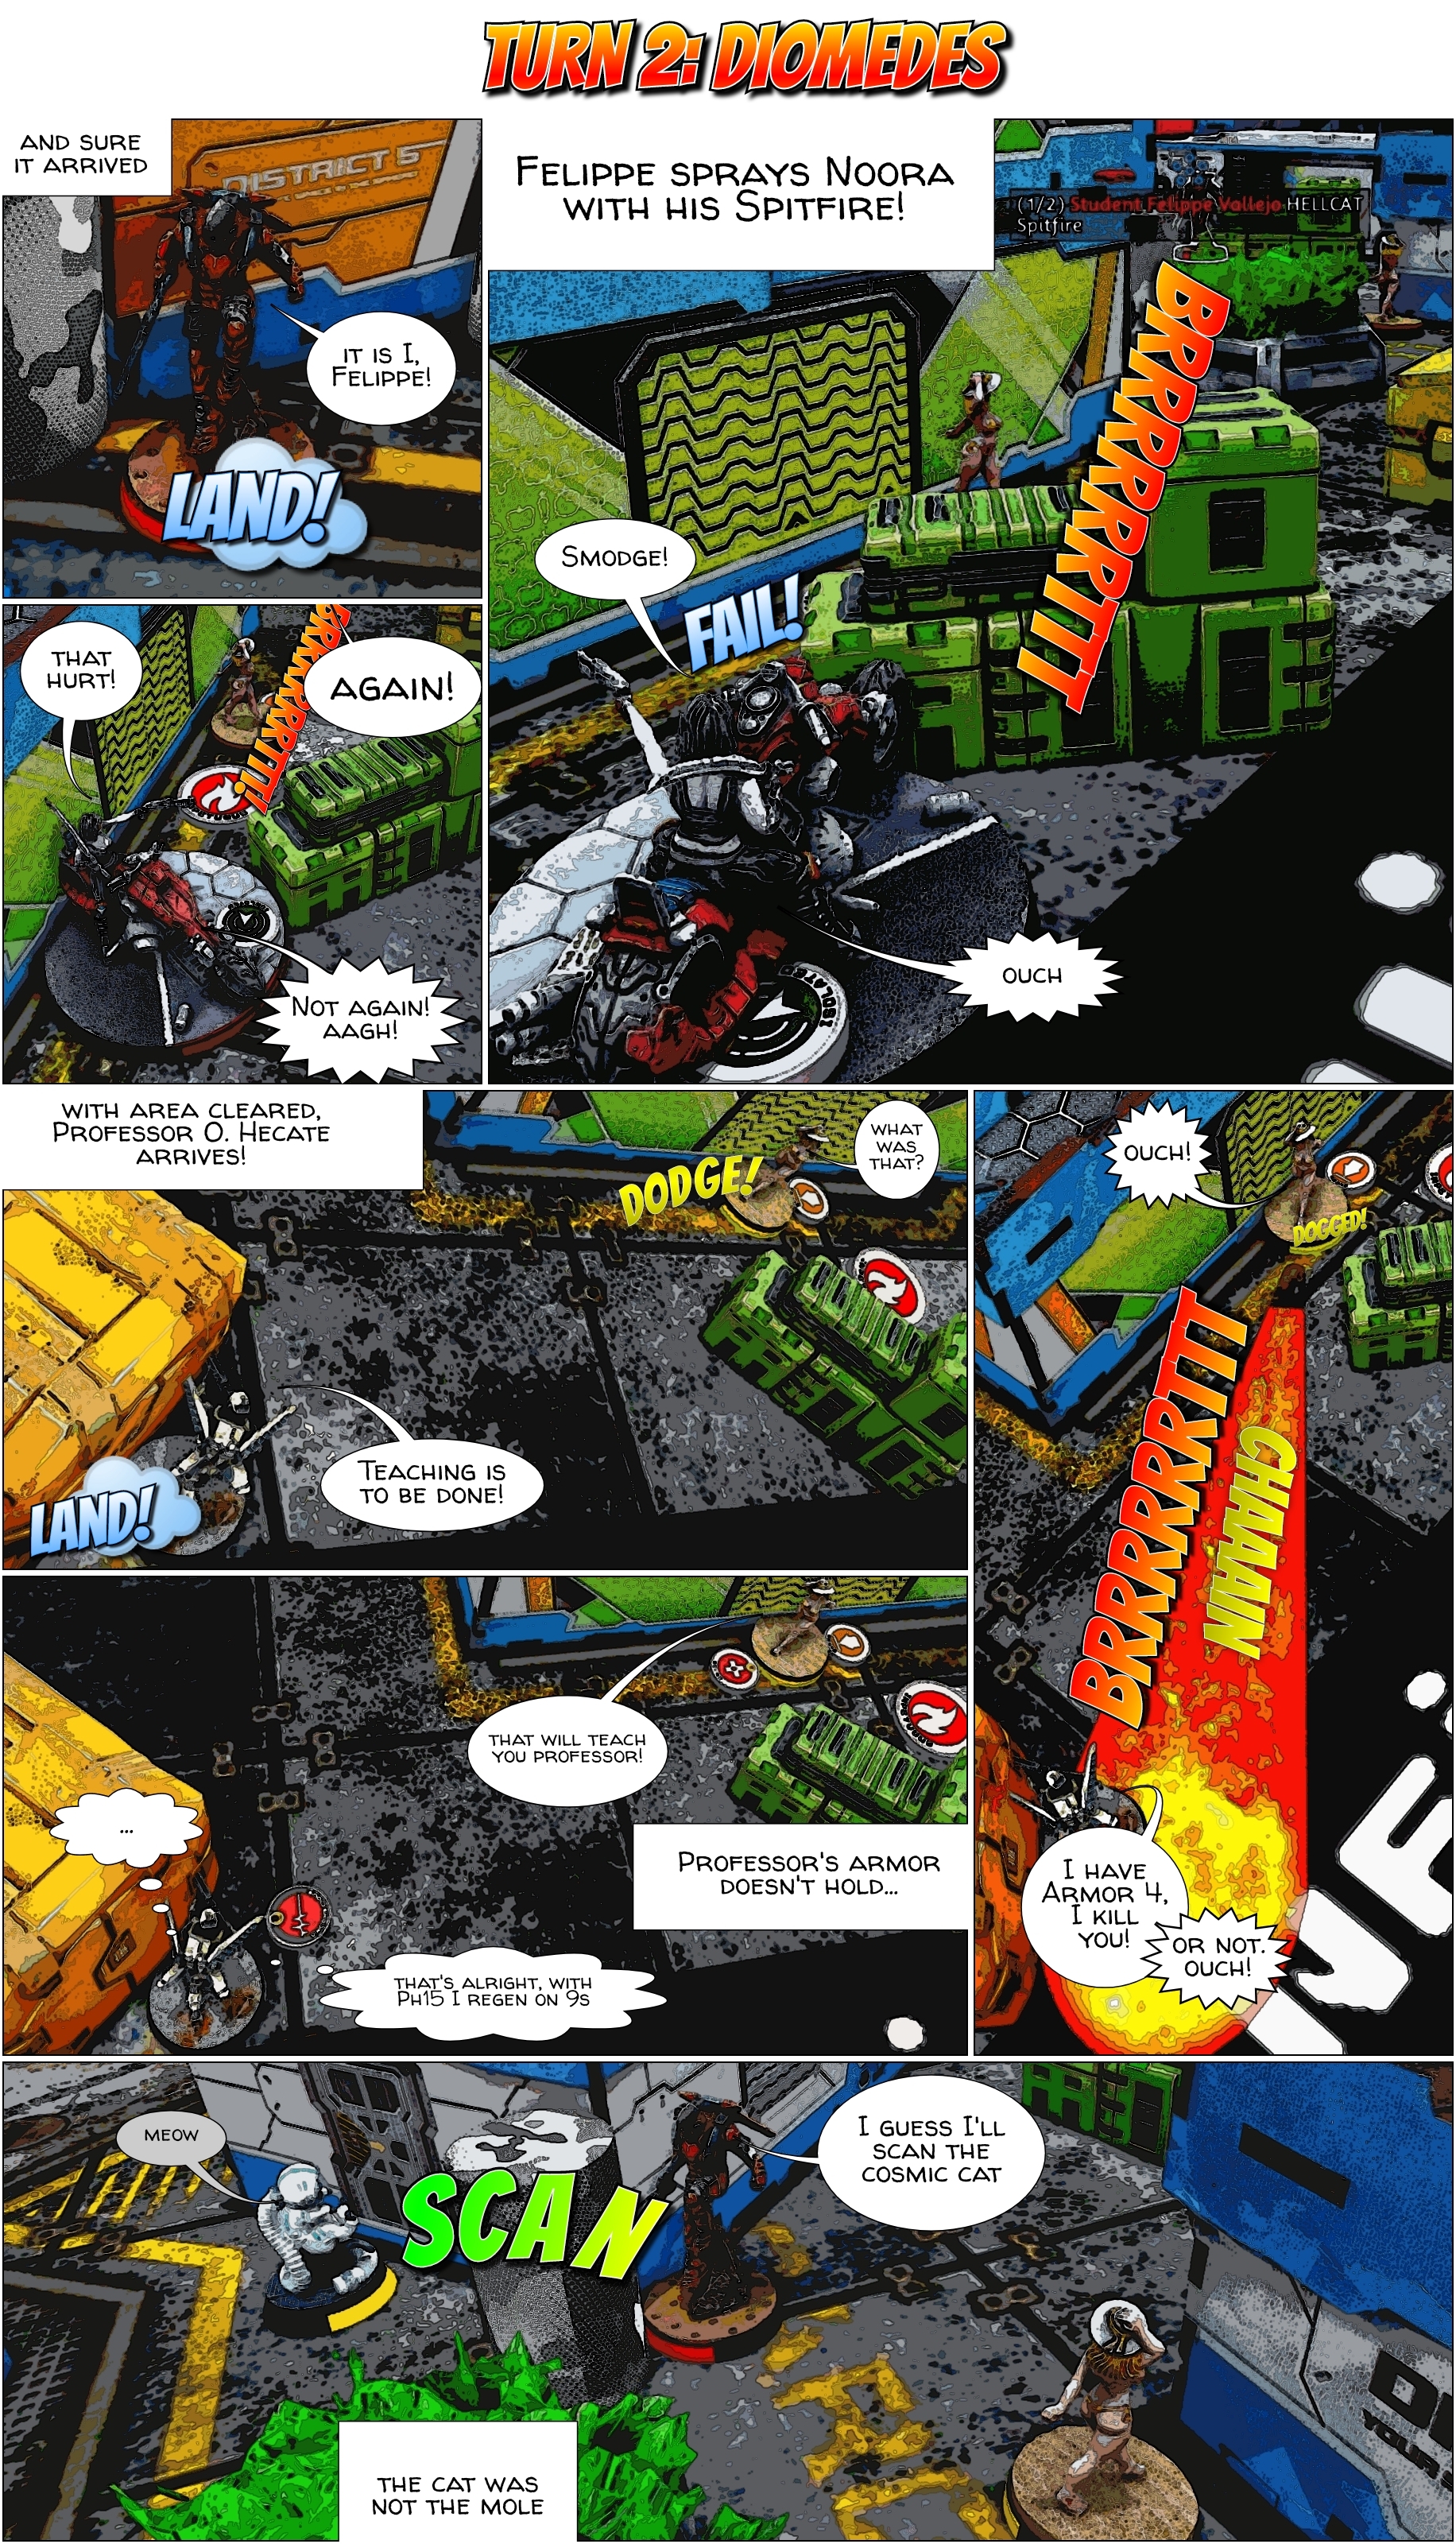
Hellcat Student Felippe Vallejo artfully drops in with his spitfire and shoots down Noora the Kum. He forwards Professor O. Hecate, Thorakitai Chandra, the coordinates of a safe landing spot between the Sooti and Libby. Professor enters but Libby dodges to face him. He engages her with his combi trusting in his ARM4 but they both hit the dirt. Felippe scans the Cosmic Cat but it’s not the Mole.
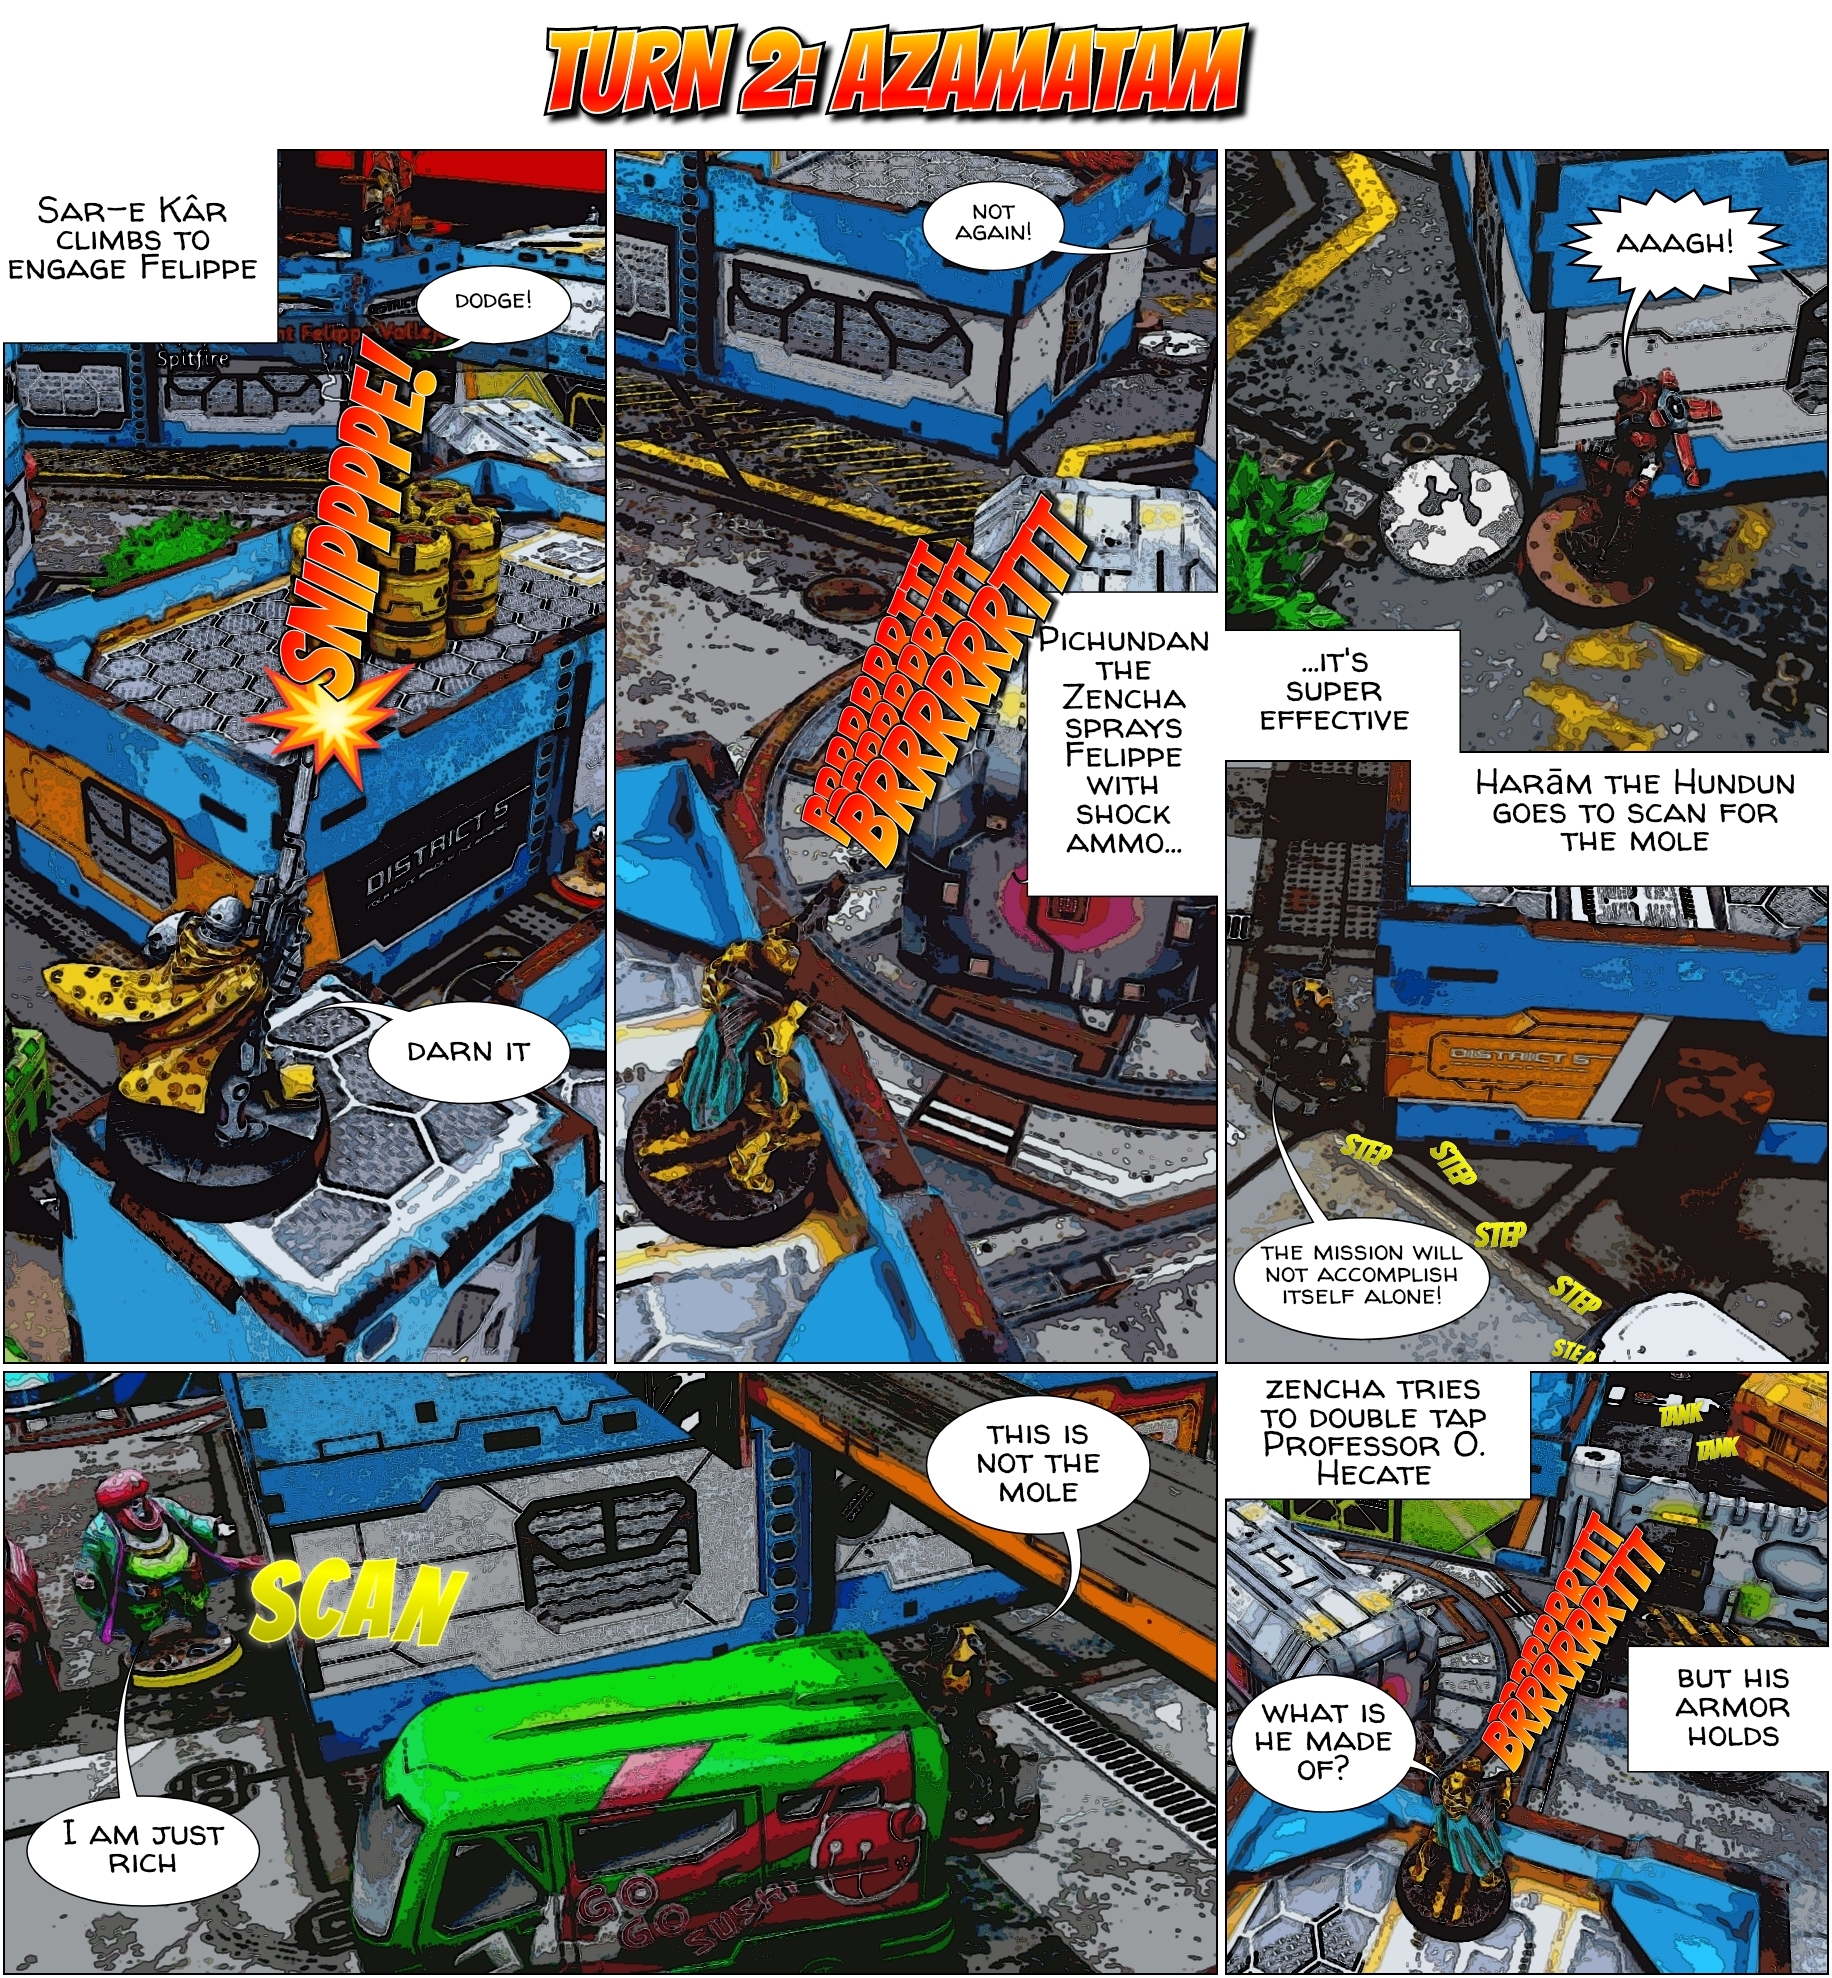
Libby is not fit enough to regen up. Sar-e Kâr climbs up to see Felippe and downs him for good. Pichundan the Zencha gets up to shoot Professor O. Hecate a few rounds but his armor holds.
Harām the Hulang advances and scans the Fat Wealthy Man but he’s not the mole.
TWIST is rolled for and results in:
WE GOT COMPANY!
Two brawlers (rifle/light shotgun profile) are placed inside the mole ZoC. Each player place one of the units in the field. The brawlers are considered hostile to both players, they don't generate orders, they never move from their position (not even as a result of a dodge roll). If a unit generates ARO from one or both brawlers, the current reacting player choose which ARO to perform.
This twist is always in effect: if the mole is discovered and/or in CivEvac, the units are immediately deployed. If the mole is not yet discovered, the units will be placed at the end of the action that reveals it.
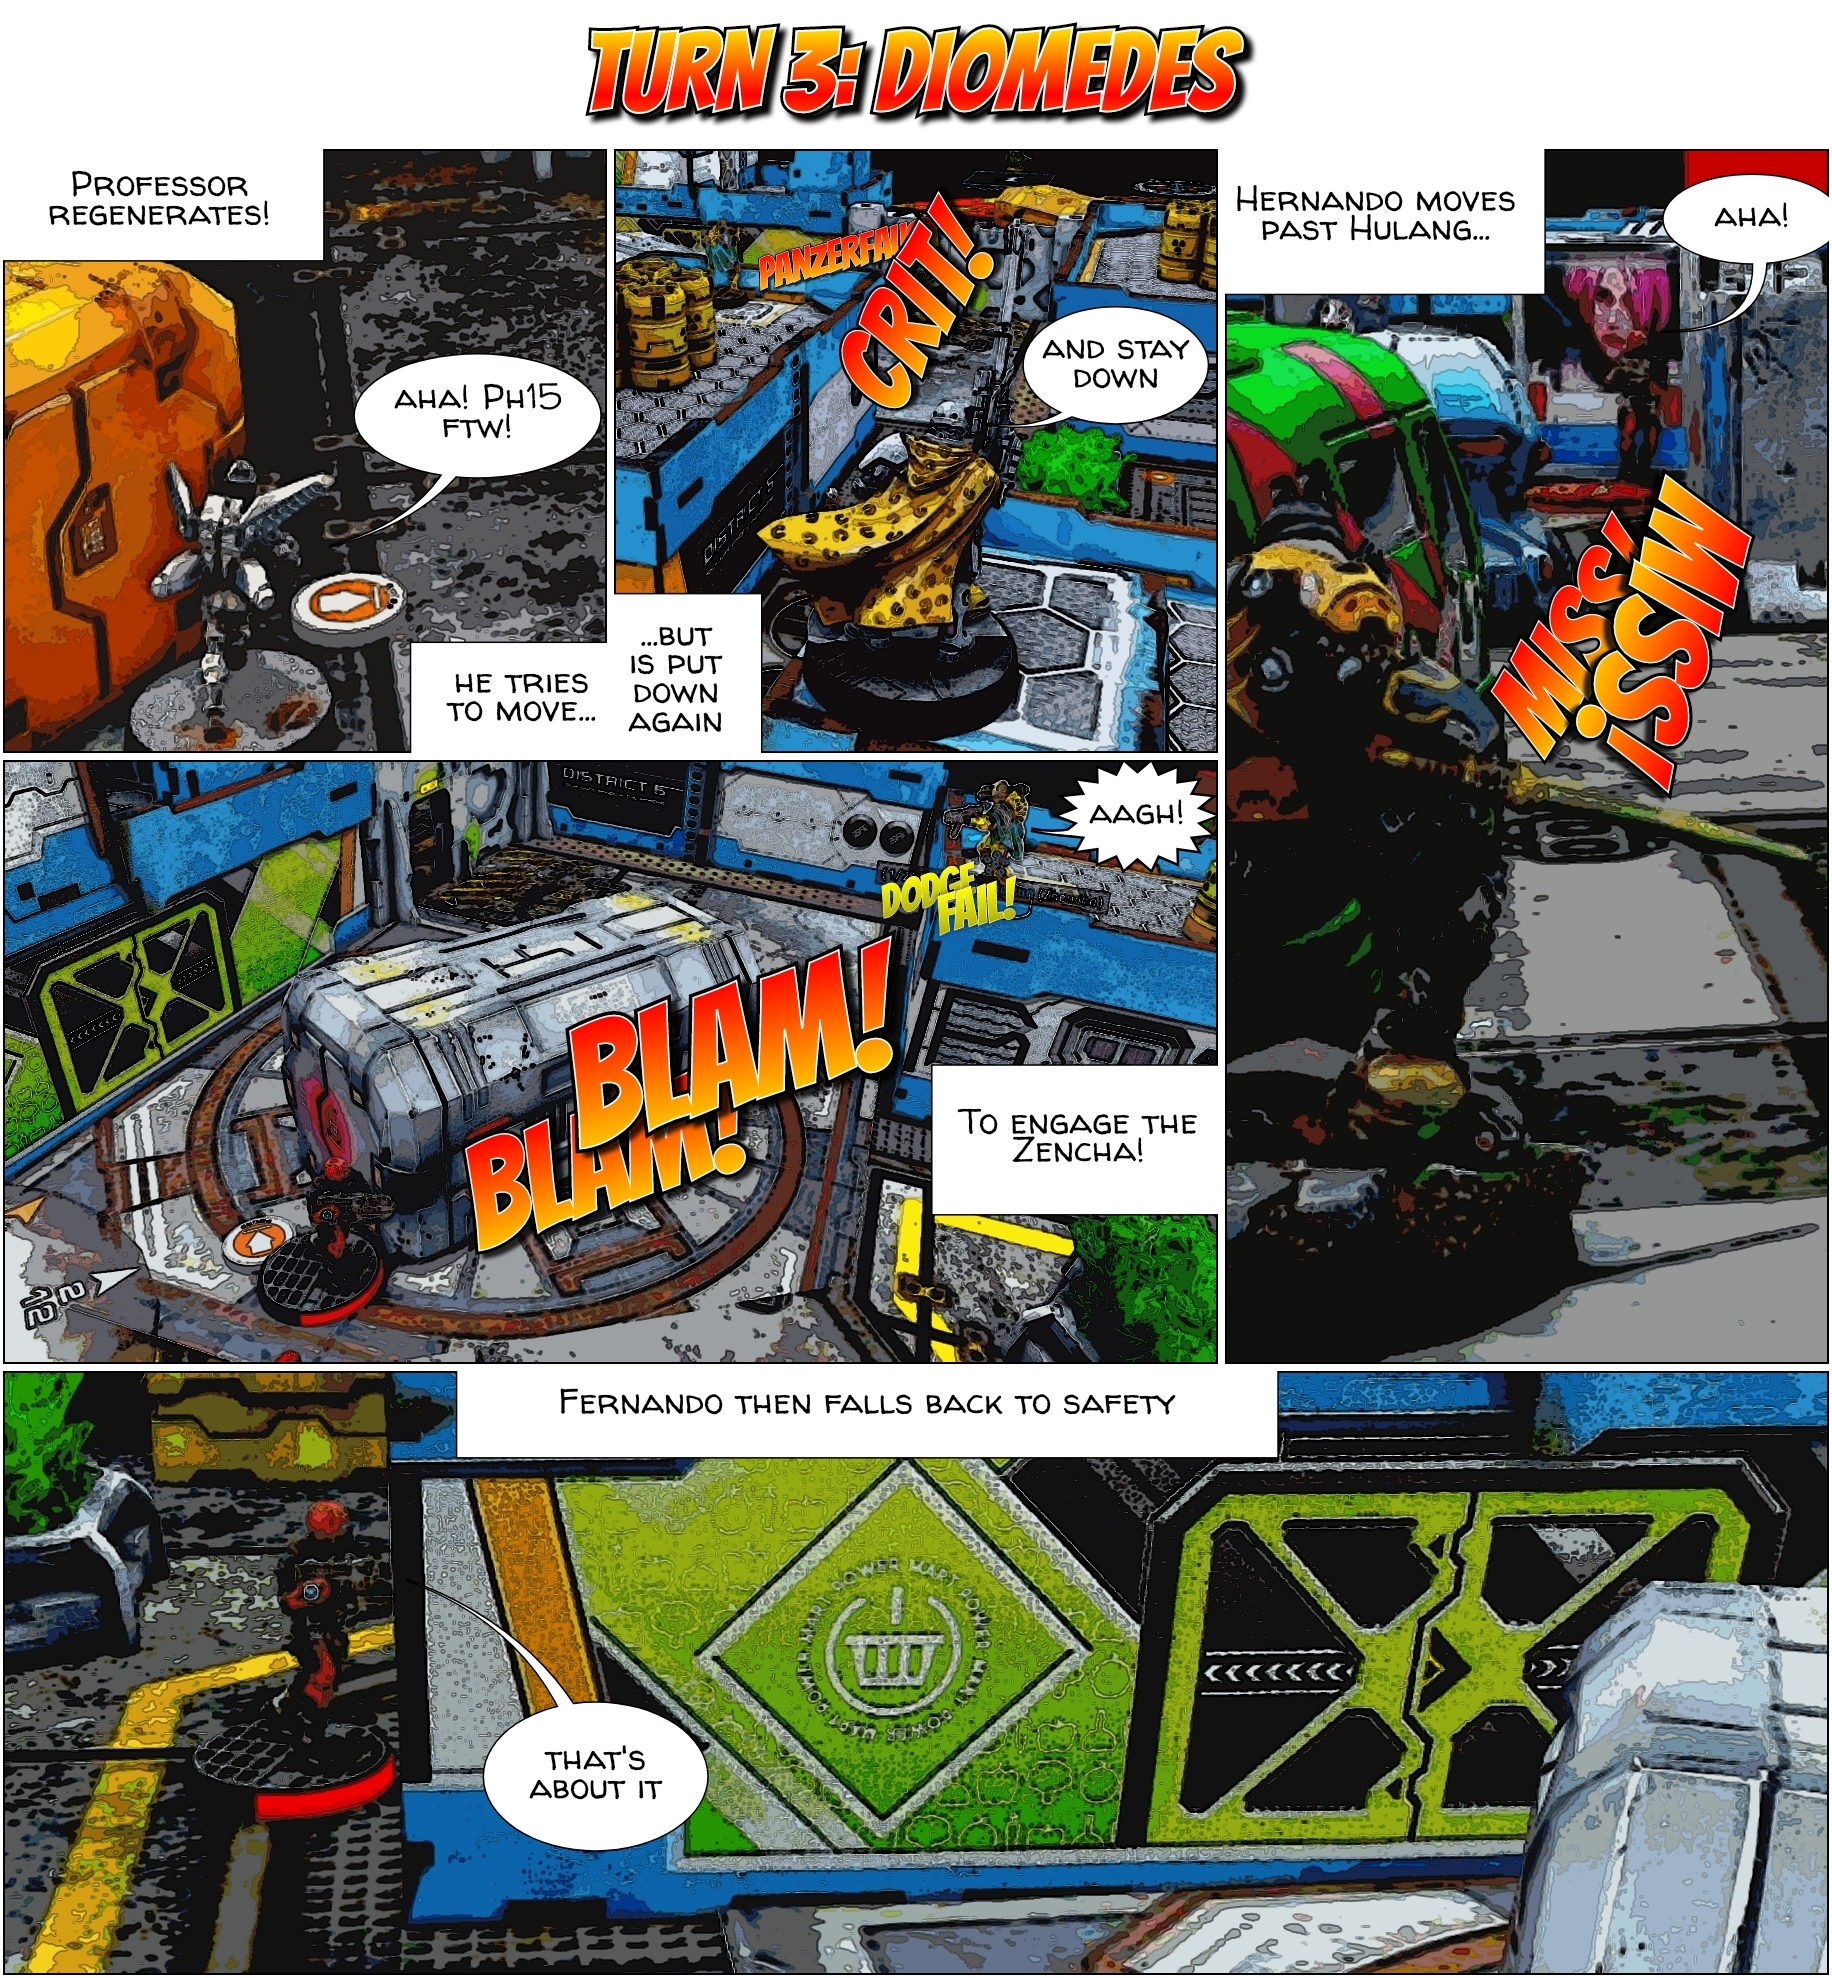
Professor Hecate easily regens up to his feet but he’s covered by Sar-e Kâr’s sniper and Pichundan the Zencha’s panzerfaust. He tries to move out anyways and dodges the panzerfaust but Sar-e Kâr finds a weak spot and crits him straight to dead.
Hernando Blandon the Jaguar realizes it’s down to him and he advances to maybe down the Hulang but they miss. He then scans the second to last HVT next to him to ensure the Brawlers appear next to the Mole and far away from him.
Turn 4: Diomedes
With no real chance to reach Harām the Hulang, Hernando just focuses on what’s available for him; he settles down for the Zencha and manages to kill Pichundan the Zencha in one shotgun blast!
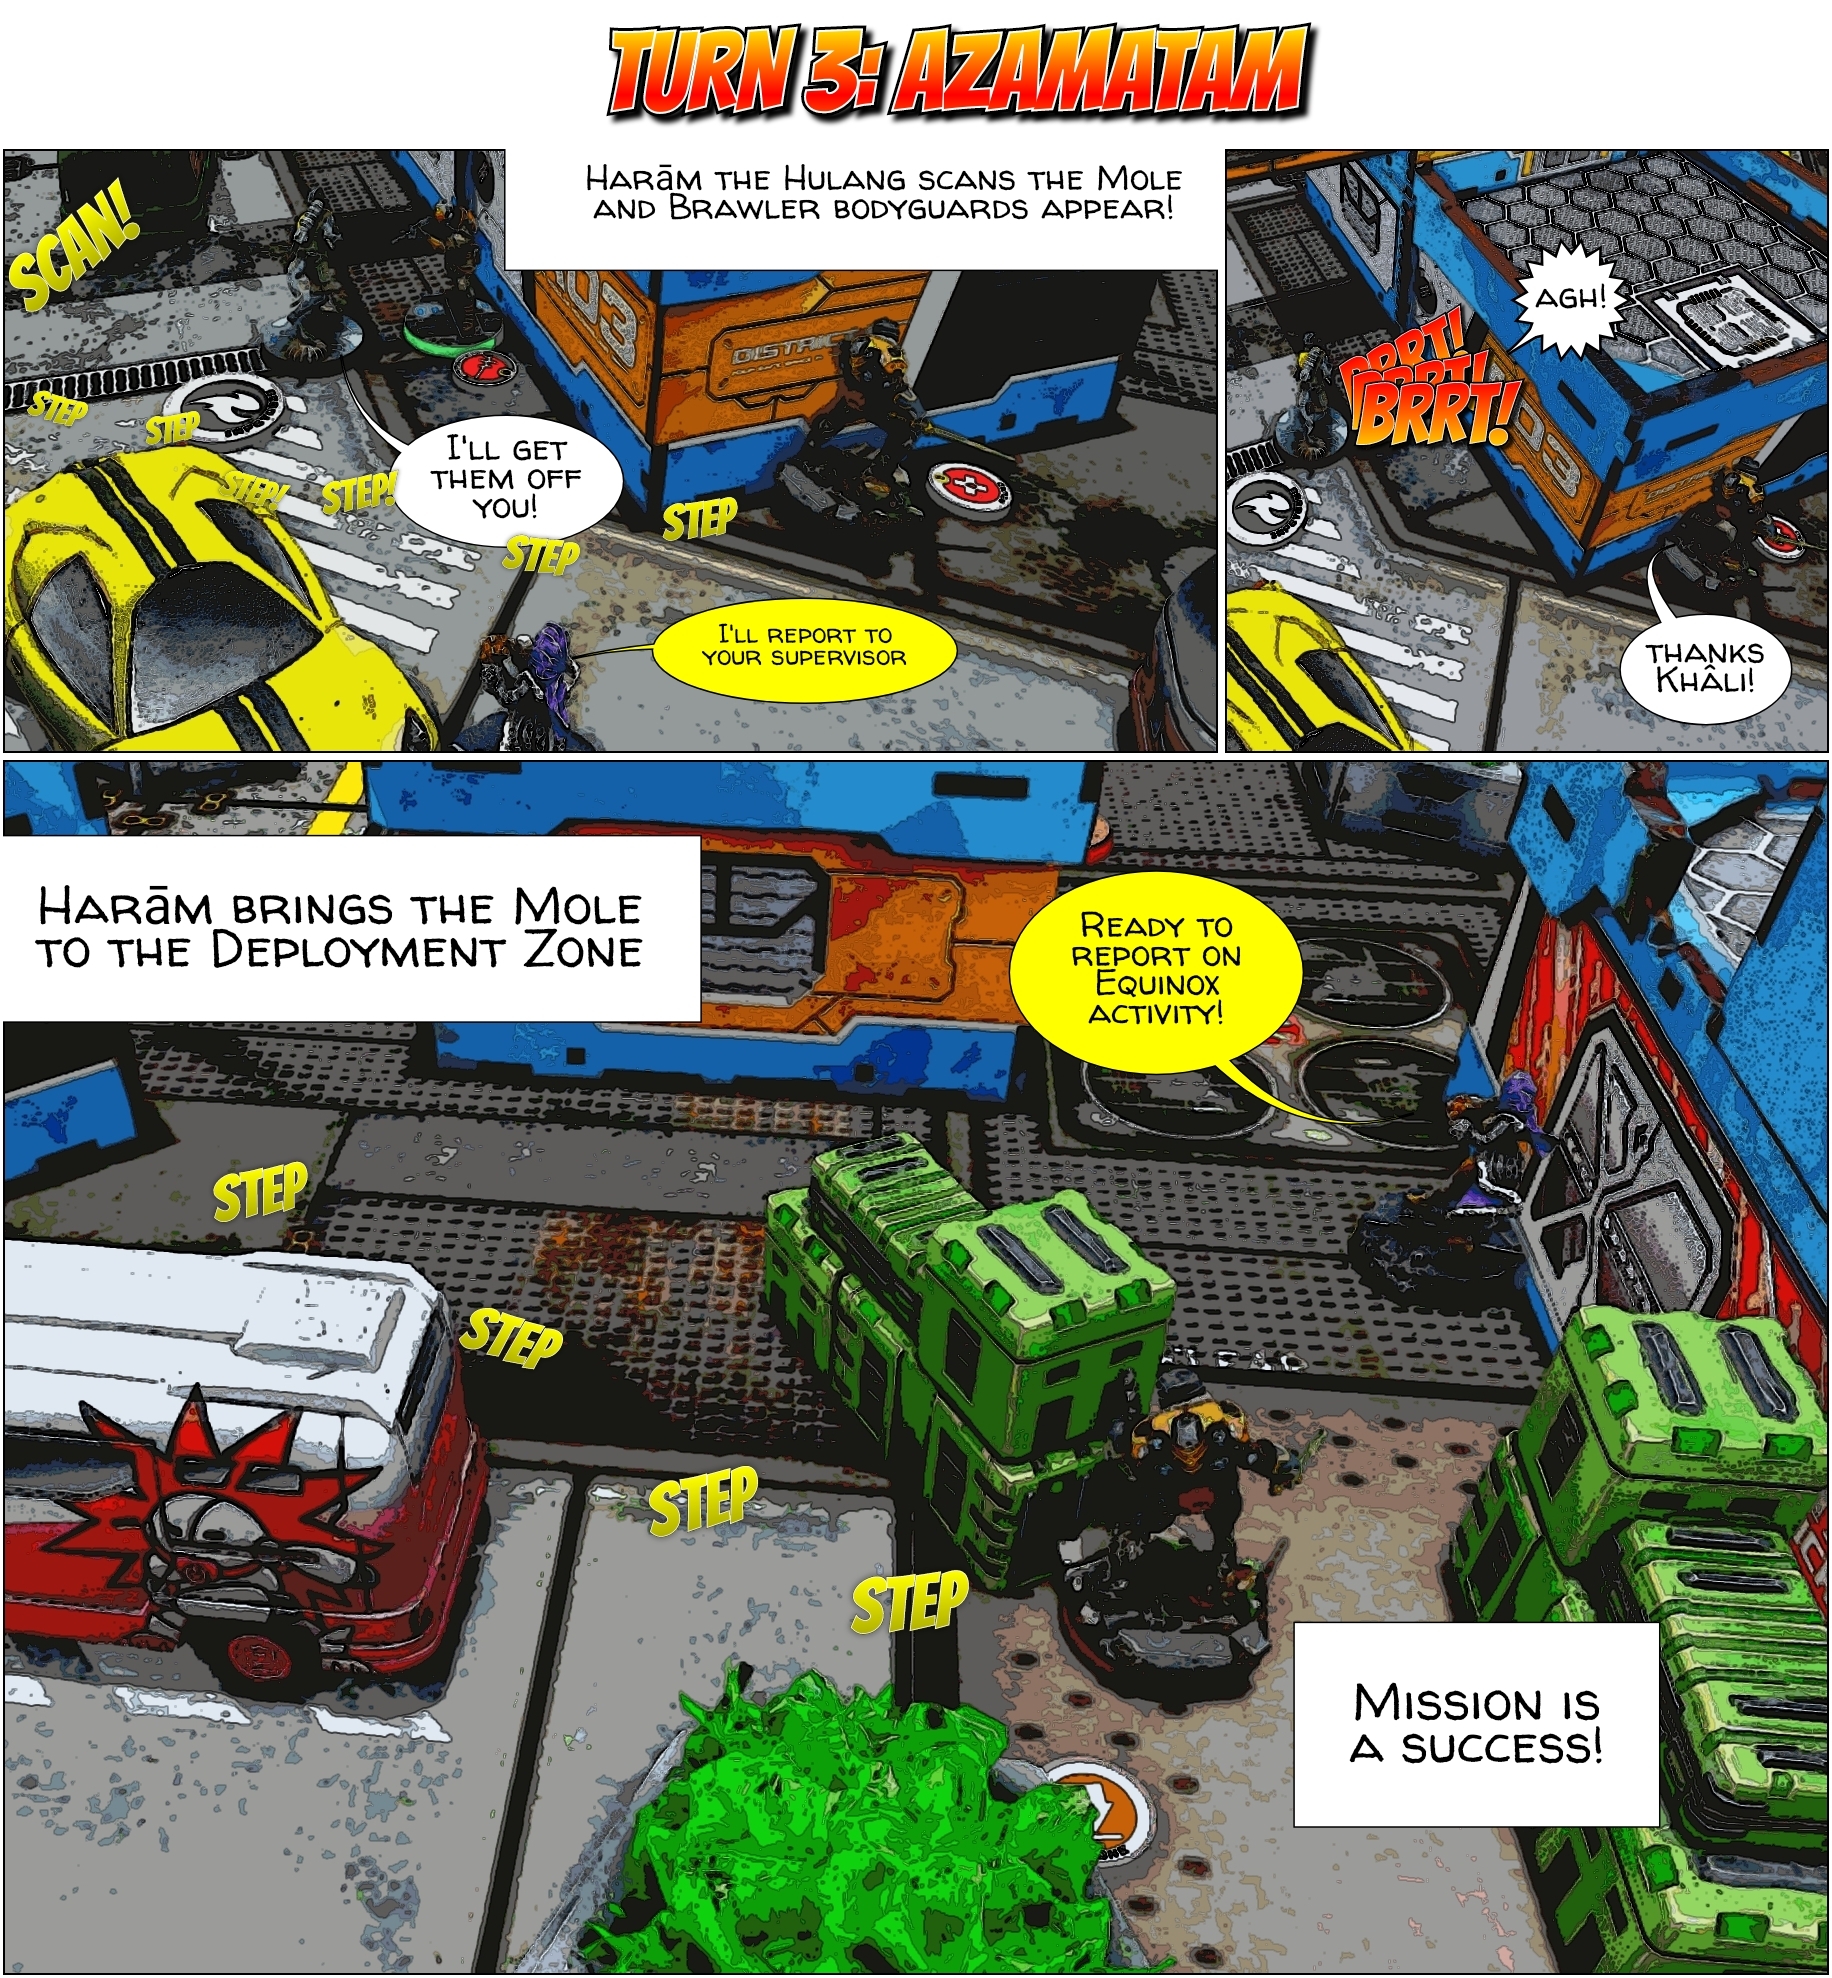
Harām the Hulang scans Tarika the HVT and she is the Mole! Two Brawler bodyguards appear, one looking directly at him down the barrel of his shotgun. Harām attempts to synch with Tarika the Mole but fails and suffers a wound from the Brawler.
Khâli Bastan the Liberto peeks out and sprays the Brawler with smg downing him. It takes the Hulang 2 more attempts to finally synch with Tarika the Mole, and that only allows him to fall back behind the building next to Khâli.
Battle Report Author

Recommend Commander For Commendation
Share this battle with friends
PerzanWins

Oh, Merceneries! Gret to see this here! Of course a well written report, as always.
So so so good
I love the comic book style!
Awesome report. I like this comic style.
That is awesome! I want to get my guys to play Mercenaries. Maybe I’ll make the push for it after the campaign is over.
What an excellent report