Fought At Cameliard: Reliquary
638 days 5 hours 24 minutes ago
After-Action Report 3: Defense at Cameliard, aka Everything Died in ARO
300 POINTSPei Zhi clenched and unclenched a power-armored fist as she huddled behind a building in the Cameliard Reliquary. Official word was that the StateEmpire had taken over guard duties, but few of the soldiers believed the PanOceanians would part with their sacred relics so easily.
I’ve got more important things to be thinking about, she reminded herself. She glanced down at her cloaked, armored form, shimmering slightly with refracted green light from the oppressive jungle. She was rated for Shang Ji armor, but Daofei gear was new to her. But with the chaos of Durgama, pilots and soldiers found themselves spread thin and in new roles as the situation demanded.
She glanced at her HUD. Alien mercenaries had gathered on the outskirts and refused to return communications. Whoever they were working for, they were clearly not friendly, and she cycled through available intel. The mercenaries were bringing heavy armor… but so was she.
She activated her comms channel. "Sarnai, you ready?"
The Blue Wolf's pilot's comm crackled. "Ready and raring to go boss."
"Alright team, eyes up and weapons hot. Here they come!”
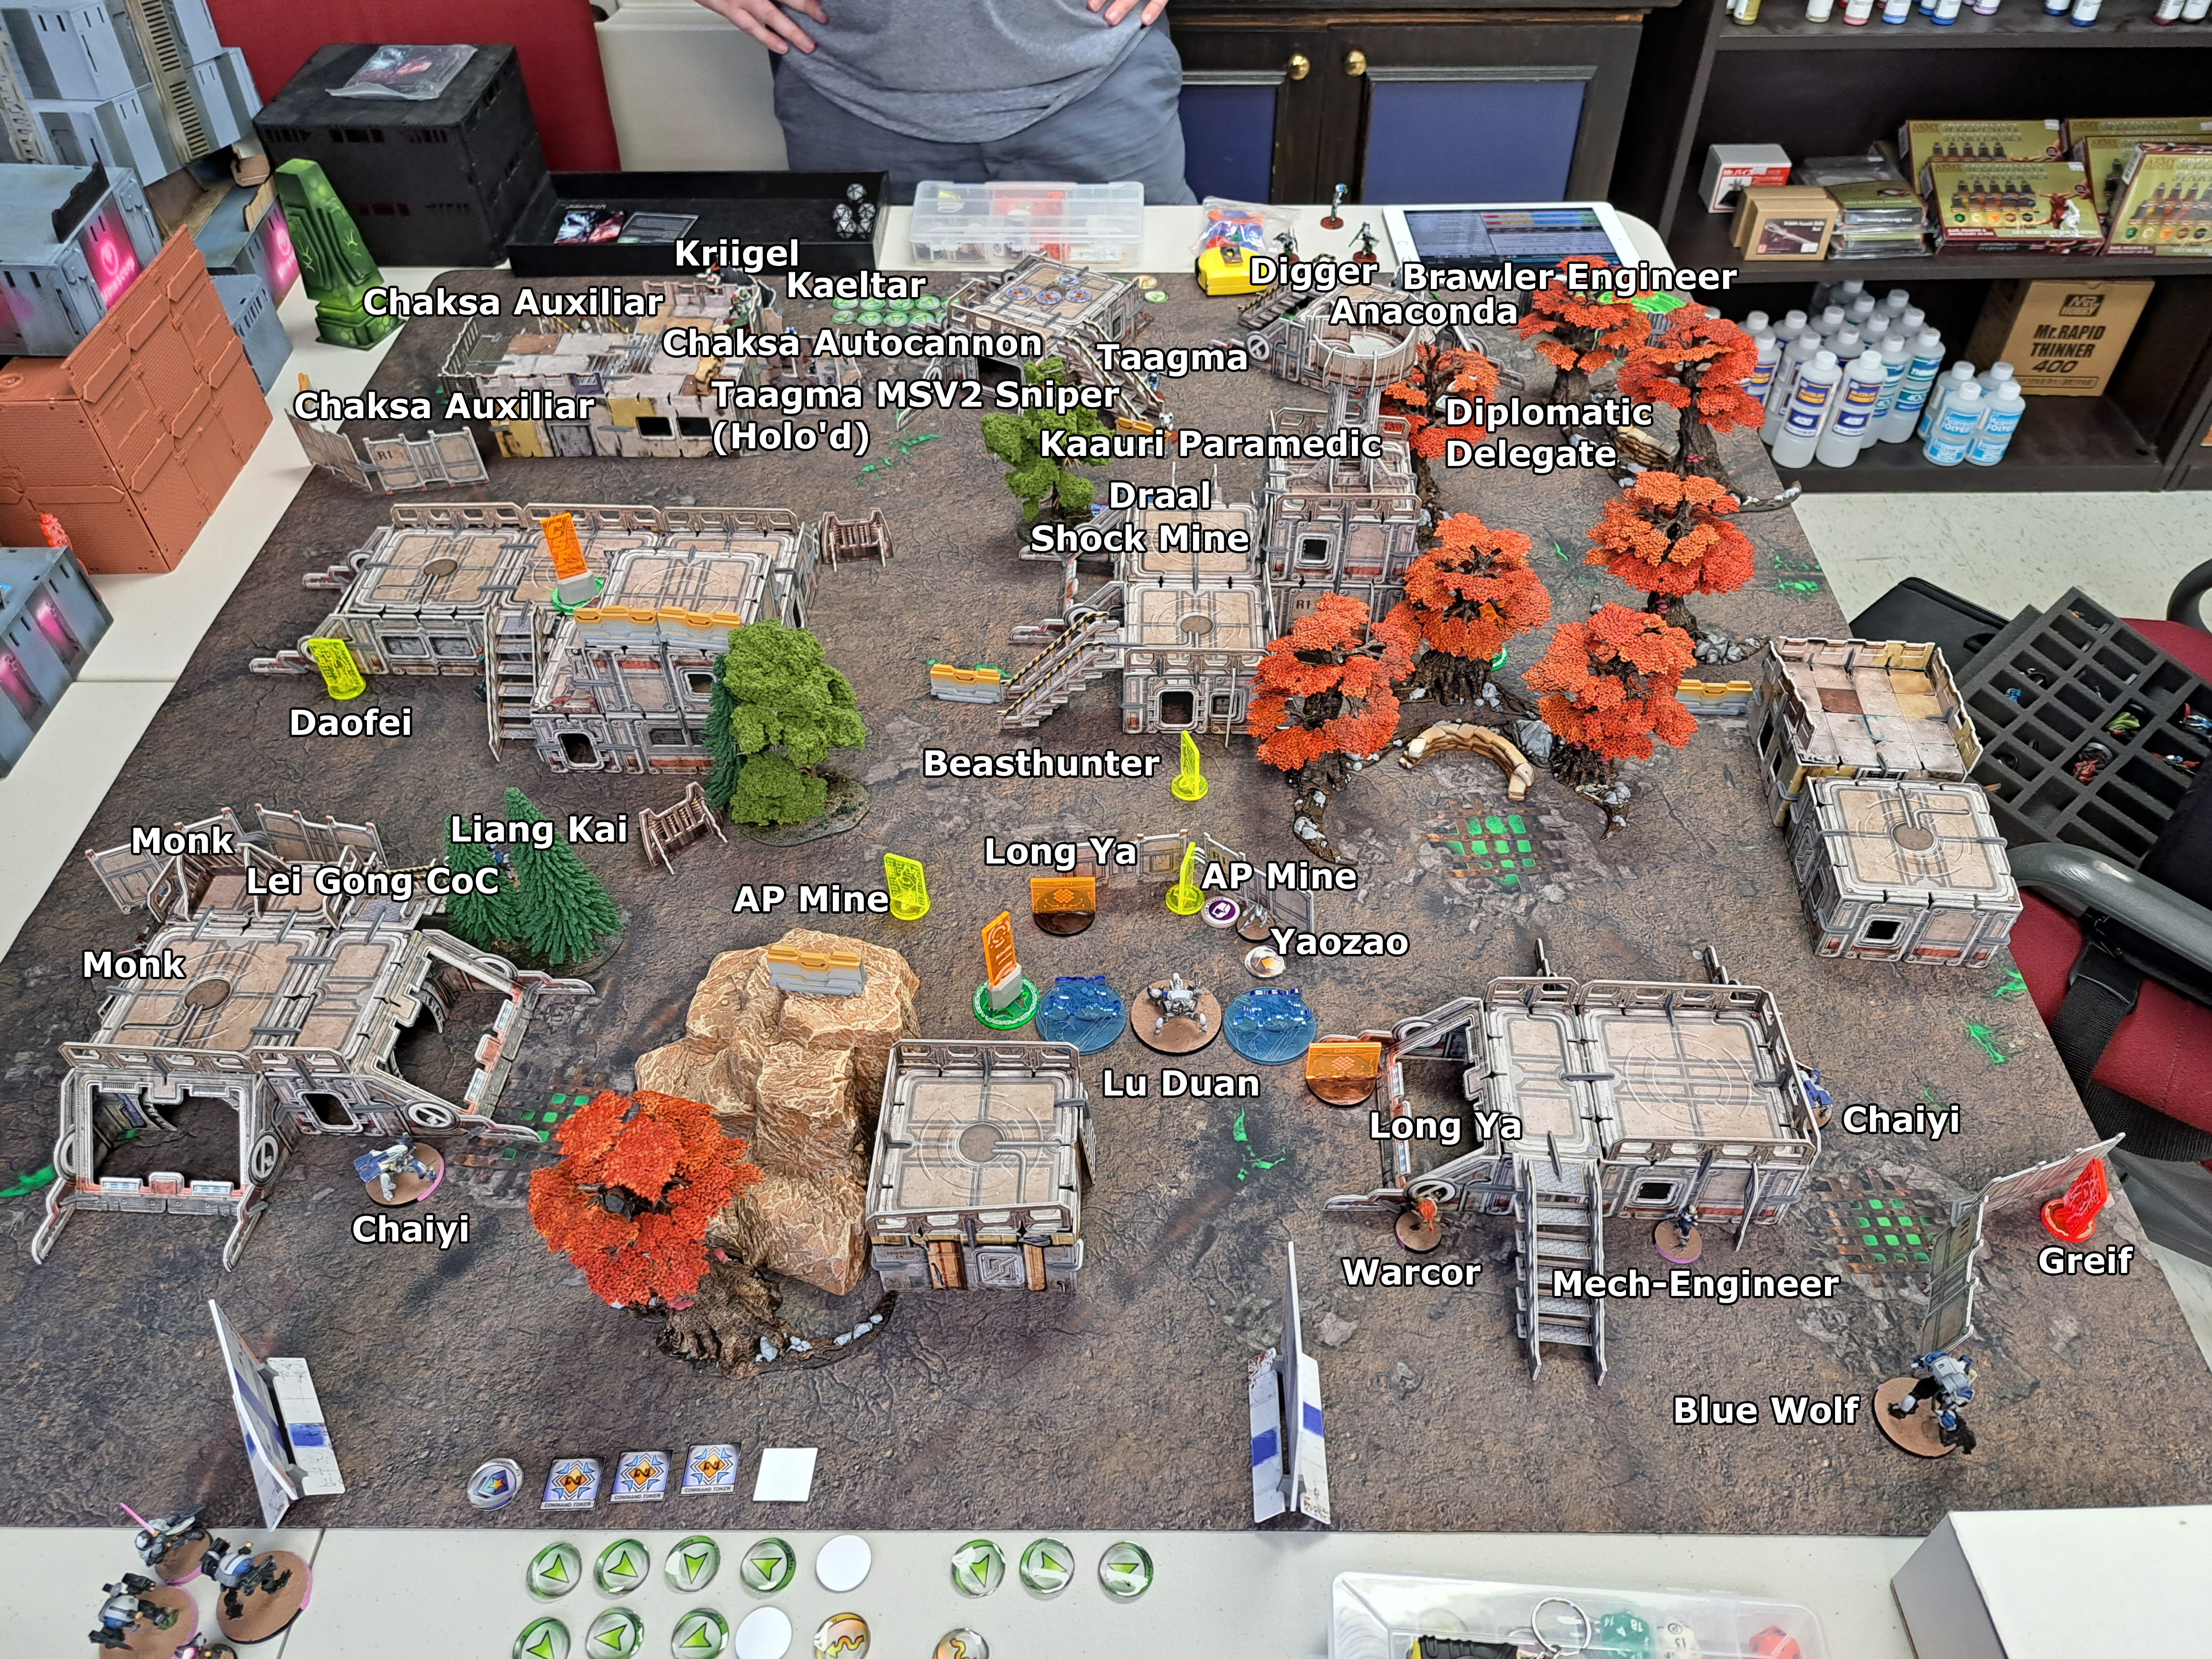
I won initiative and elected to go first. I’m really not sure what the better choice is for L&S, but I figured having the potential to alpha strike was better since there weren’t any end-of-game objectives. I deployed most of my forces tightly in the middle to defend the AC2, with Chaiyi guarding the flanks. The Beasthunter was in a forward position in the centre, where it could either launch an attack or threaten anything that tried to pass the central lane, while I put my monk haris off in the far left, hoping to force my opponent to commit more defenses there. In retrospect I think they would have been much better close to the middle, where they could support other elements of my army with smoke, or be in place to deal with any incoming impersonators.
I spent a command token to hold back my Daofei and Blue Wolf.
My opponent deployed pretty heavily on his right flank, with two triads behind the building there and the Chaksa Autocannon standing to ARO. The Draal, Kaauri, Kaeltar formed a triad guarding the AC2 itself. On my opponent’s far left, he placed down the Brawler engineer and Digger, ready for the Anaconda, then a Diplomatic Delegate in cover but out to ARO. He planted an impersonation marker on my right flank behind some walls.
I put the Daofei on my left flank, planning to have it knock down the Chaksa, then push in from the side, then dropped the Blue Wolf close to the impersonator, ready to discover-shoot it. Unfortunately, I placed it with a clear line to the other end of the board through the trees. My opponent reserve dropped his Anaconda behind the delegate in cover, watching my spitfire-ranged TAG.
We played the trees as true LOS for the trunks, but any shots that passed through the foliage counted as going through low-vis zones.
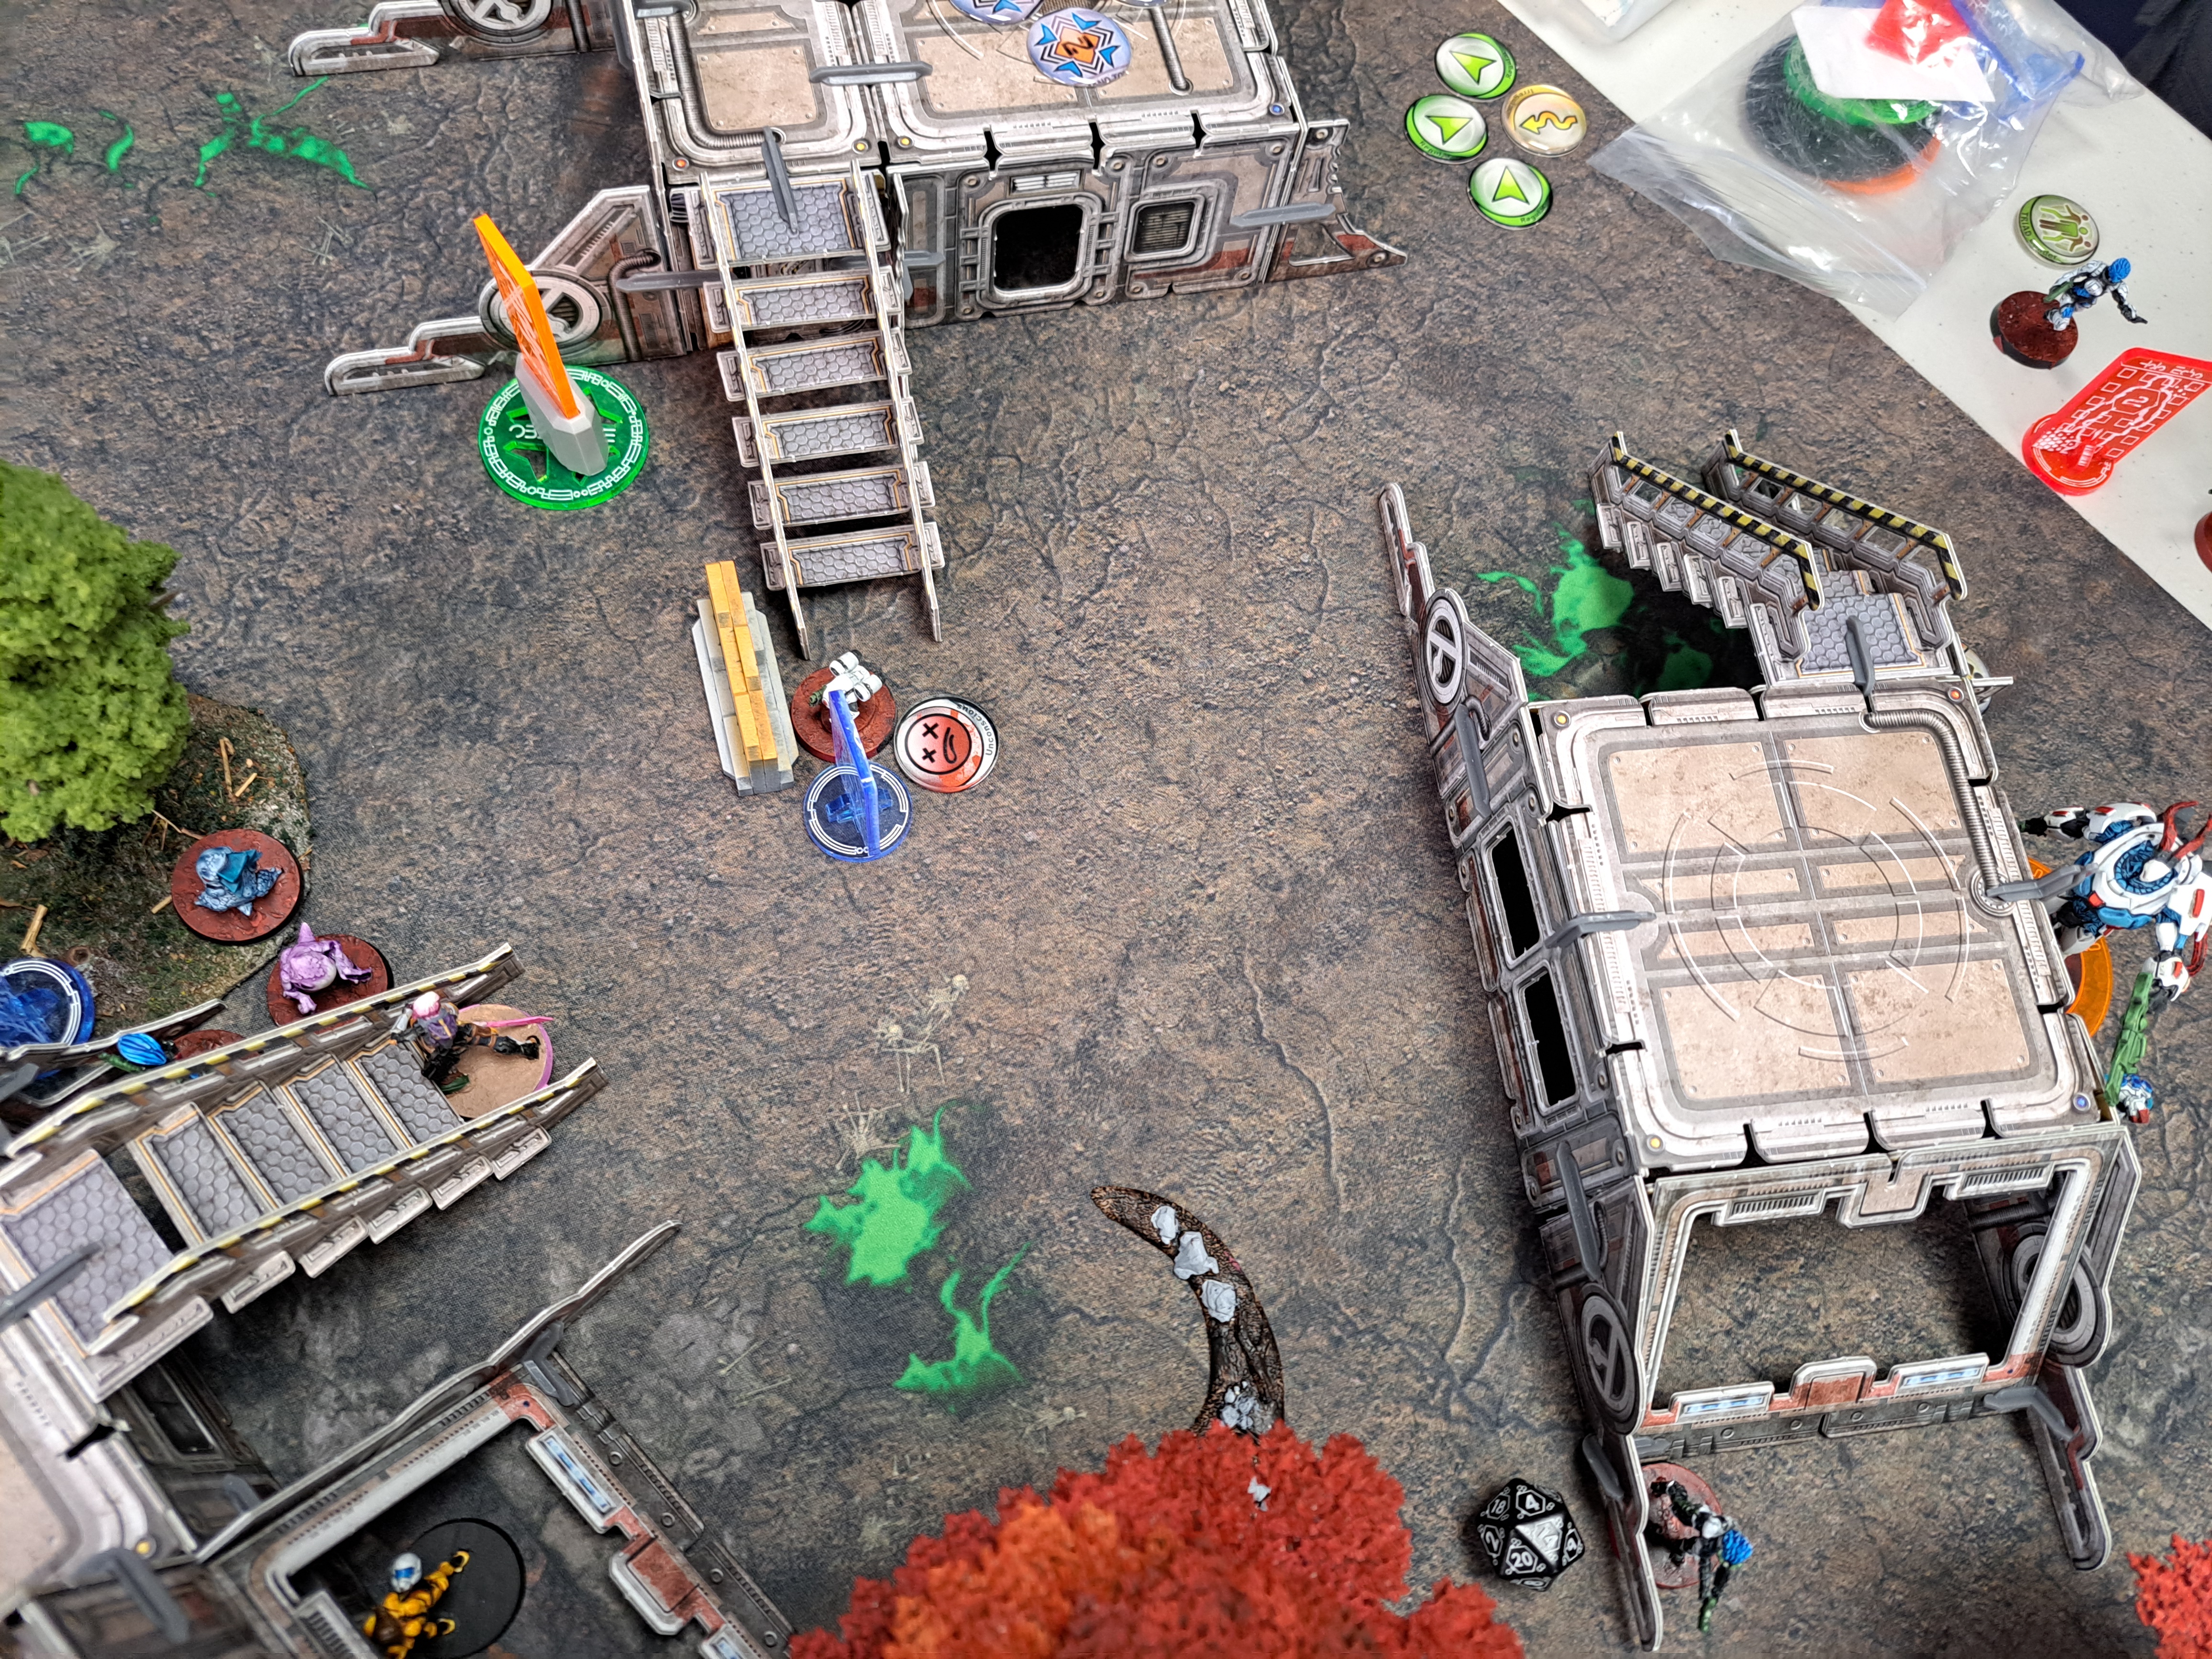
The Daofei spent its LT order to move up and surprise shot the Chaksa Autocannon down with a spitfire.
 The Chaksa falls to a surprise-shotting Spitfire-armed Daofei. This would be one of my few successful active-turn engagements!
Back in my DZ, the Blue Wolf discover-shot at the Greif, but was placed in an awkward position that exposed it to the opposing Anaconda and the Diplomatic Delegate. The Grief dodged a potential flamethrower, so I instead sent 2 panzerfausts down-range at the Anaconda, ignoring the Diplomatic Delegate. The Wolf whiffed both panzerfausts, ate a hit from the Anaconda and failed ALL THREE armor saves while in cover.
Luckily the Mech-Engineer was nearby and recovered the Blue Wolf to 1W (on a 16, thank you special rules!), then took matters into her own hands and rounded the corner and killed the Greif herself.
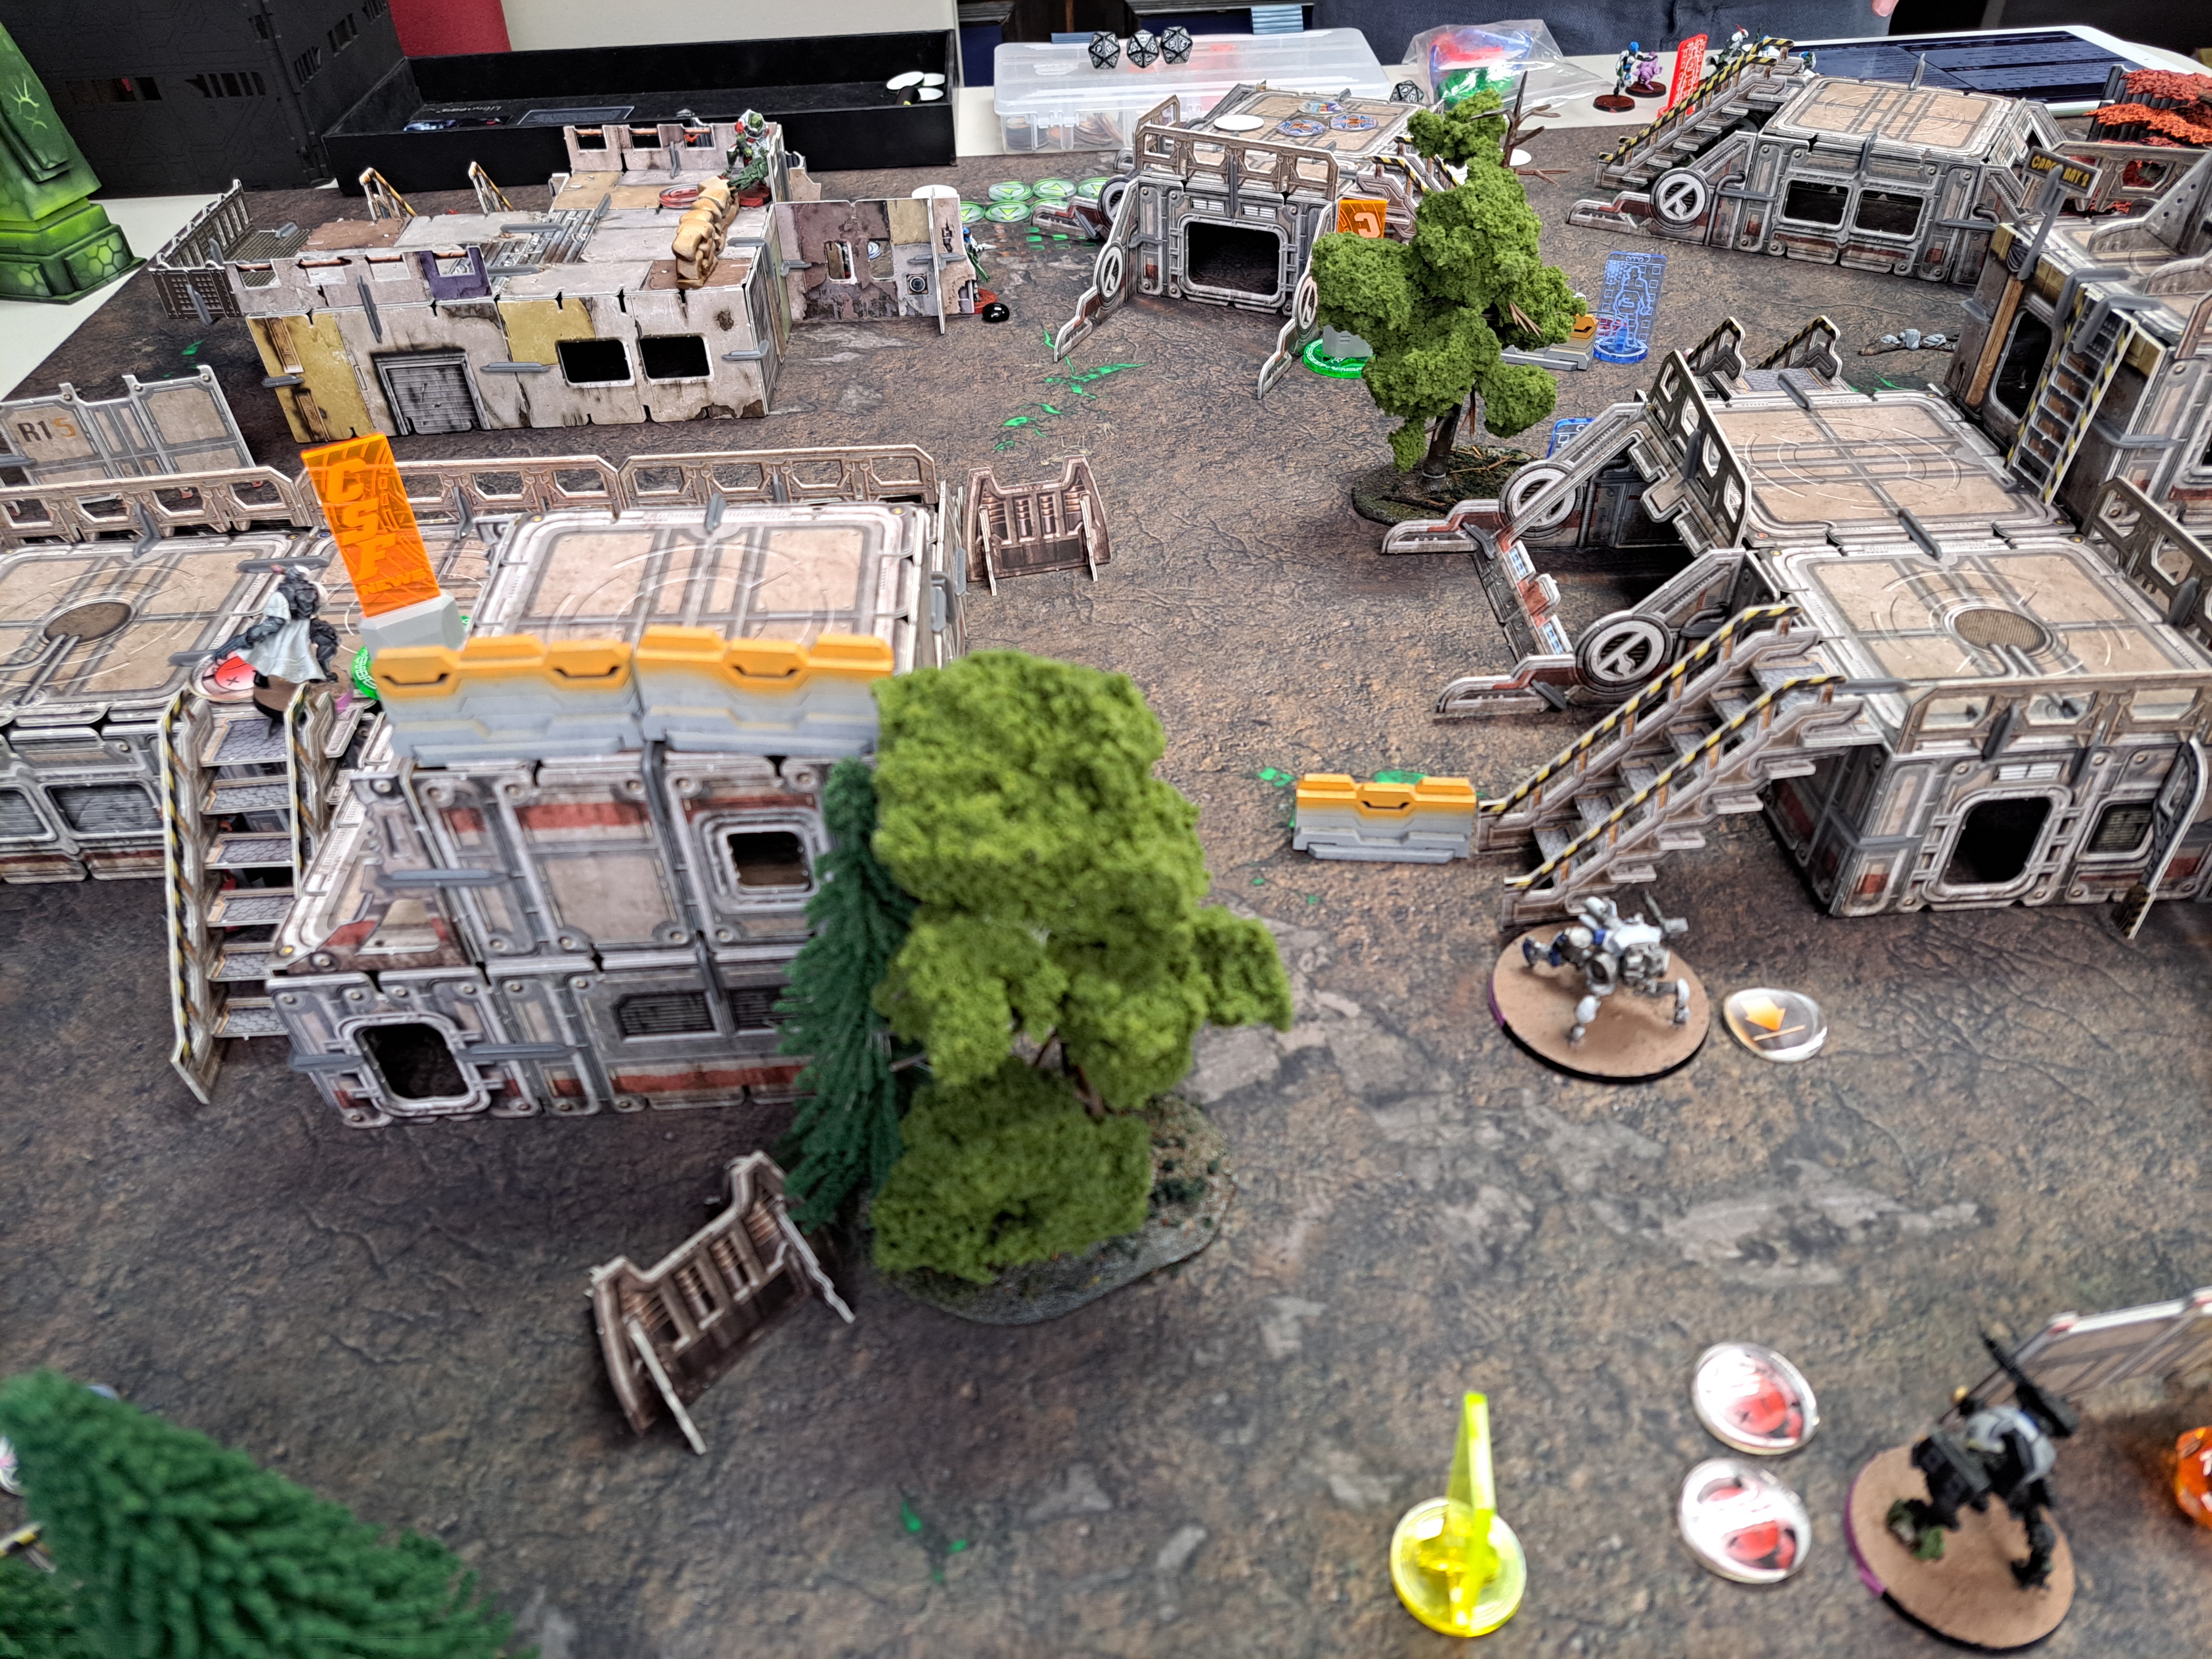
At this point I waffled a bit on which angle to push, and I eventually decided on sending the Beasthunter forward. She move-moved through some discover attempts and flamethrowered down the Kaauri Sentinel - which laid down an EM mine - and Taagma, going down in the process.
With orders running low, the Daofei LT fell back and spent the last order picking up an Adhesive Launcher out of the Panoply and recamoing - but importantly, remained standing.
Finally, the Lu Duan advanced up to cover the central lane. In retrospect, the Lu Duan might have been a better alpha-striker as the holoechoes could have popped the Draal’s mine, and it could still have made a similar flamethrower play.
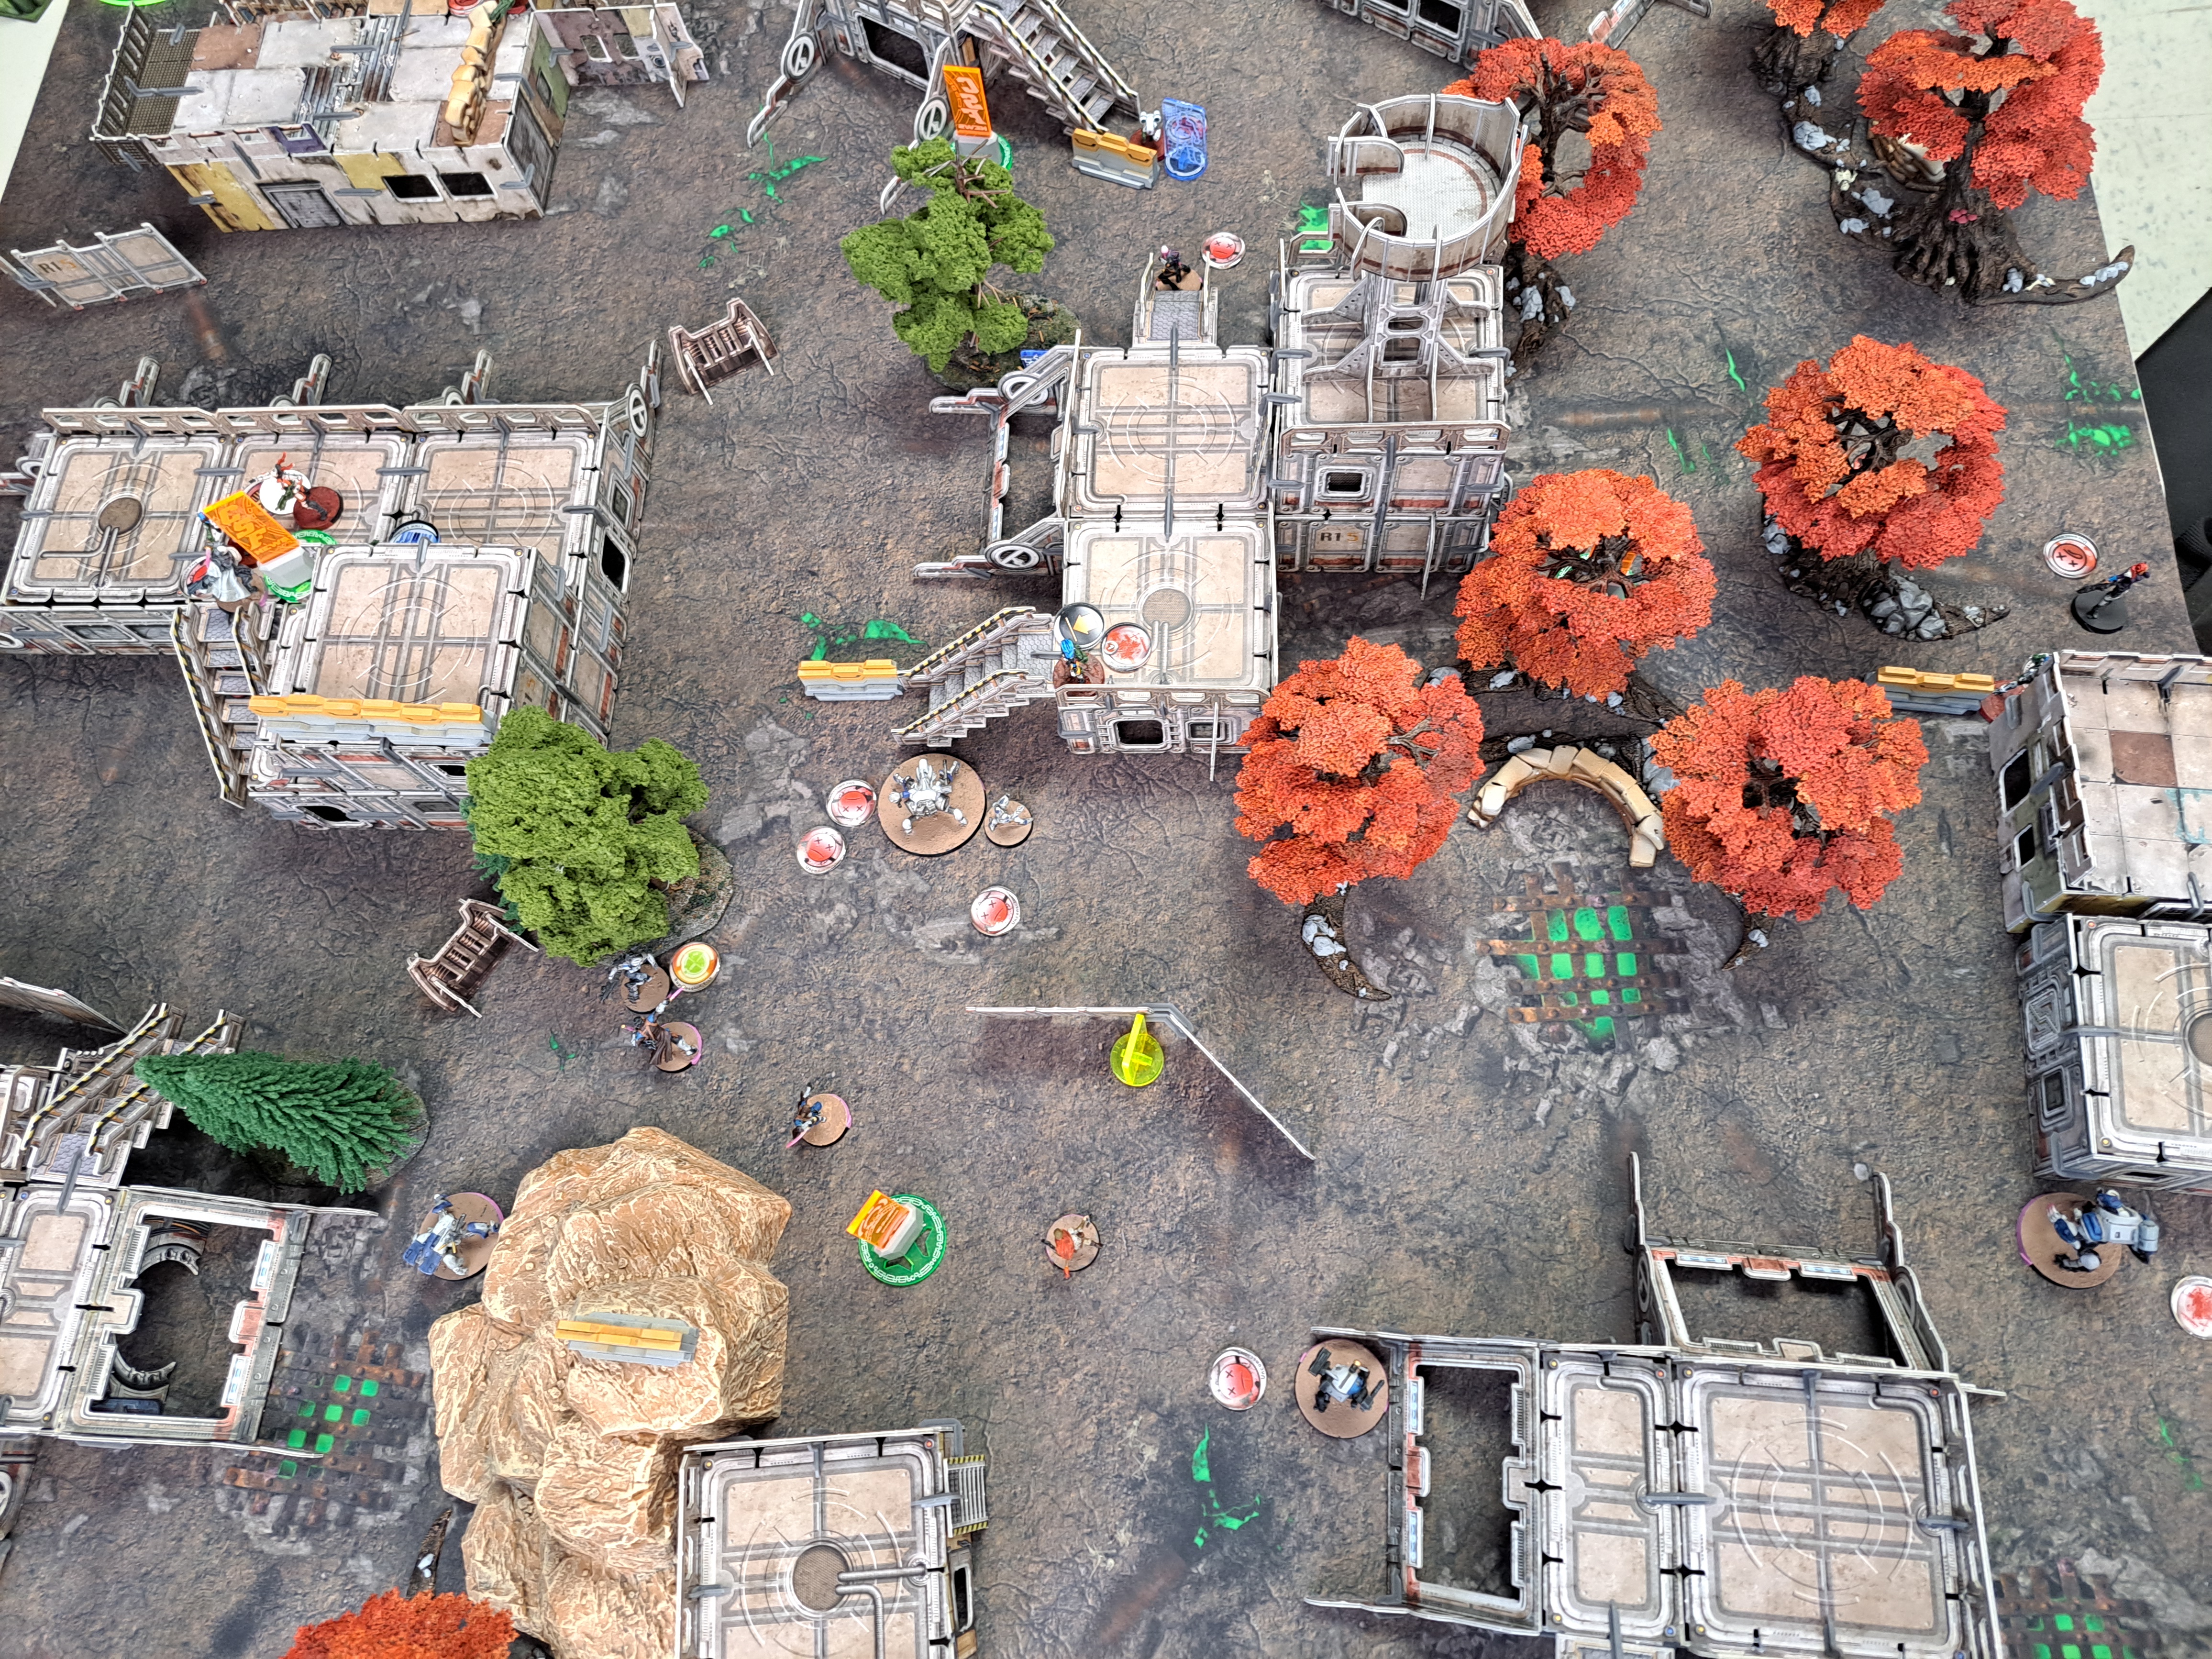
The Kriigel lays down smoke, then one of the Spiral Corps units near the centre revealed itself as a Taagma MSV2 sniper! It discovered the Daofei - which idled for the 50/50 to whiff the discover - and knocked it unconscious in one shot, landed a shot on the Lu Duan - which tanked the armor saves on BTS 6 and went prone, then shuffled over and successfully discover/shot the Long Ya covering the middle. I was banking on it failing one of those 50/50s, but alas. The sniper remained in overwatch, cutting off the central corridor.
Group 2 orders spent, the Anaconda haris began moving out and traded shots with the Blue Wolf but range, the low-vis trees, and various other AROs from my REMs, Liang Kai and Lei Gong meant the the Anaconda couldn’t quite bring down the Wolf and its advance stalled, with the Anaconda taking 1W on the way in, but not before it eliminated my Lu Duan, the other Long Ya and a Chaiyi.
The engineer picked up the forward Long Ya, which peeked out and launched double flammenspeers at the Brawler engineer beside the Anaconda! The Anaconda and overwatching Taagma destroyed the Long Ya completely, but not before the engineer took a flammenspeer hit and went down. The Anaconda itself remained unscathed from the template.
With the haris down, the Blue Wolf moved up and engaged the Anaconda. At one point it landed 5 hits, one of which was a crit, but the Anaconda tanked all 6 saves and falls back into cover. I needed that Anaconda down as it was one of the few tools my opponent had to damage the AC2 (as well as being a massive threat to the rest of my army), so I tried moving my Liang Kai-led monk haris across the board to destroy it, but on his first order, Liang Kai lost the F2F against the Anaconda’s last panzerfaust and failed all his saves.
I reorganized the haris around Lei Gong to at least give him a burst bonus on the next turn.
With the last group 2 orders, the engineer picked up the Lu Duan, which unfortunately stood it back up in view of the Taagma.
The Anaconda tried once again to shoot the Blue Wolf, but its shots bounced and Lei Gong managed a cross-board SMG hit… which the Anaconda failed on a 1. The Anaconda pilot was safely ejected, and - still armed with a spitfire - peeked out to take a shot at the Blue Wolf - the Blue Wolf had been on 1 wound this entire time and a single failed save would have been all it took. Unfortunately for her, the Blue Wolf won the exchange and knocked the pilot out.

With the Lu Duan still blocking the Draal, the Taagma shot it down again.
The haris’d Kriigel then moved up and launched smoke to isolate the middle lane so the Draal could move up. Unfortunately, the smoke didn’t quite completely cover the gap, so the Draal advanced, tanked a mine with its Symbiotemate, then moved up onto high ground and began engaging the Blue Wolf. The Blue Wolf successfully dodged the AP marksmen twice and then tanked any remaining hits.
I spent my remaining command token to move the engineer to group 1 for the regular order.
With the Digger close to a panoply, the Blue Wolf spent its TacAware order hosing it down and knocked it out. Lei Gong then moved out and engaged the Draal at 0 range with his SMG. The Draal took a hit and failed its save, but this allowed it to guts into cover behind a railing. With the central gap covered by the Taagma sniper, I pushed Lei Gong forward in an attempt to dodge him as far into the gap as possible, then rely on his 6” move to get him up the stairs and into line of sight of the Draal, but he failed his dodge. Down to my monks’ irregular orders (since Liang Kai wass down), and out of command tokens, I reshuffled my monks to make approaching the AC2 more difficult.
With the AC2 too well-guarded, my opponent instead shifted focus to secondary objectives. He spent his remaining command tokens moving his Taagma/Kriigel/Kaeltar link into group 1. He then moved his Delegate forward to the Panoply. She successfully pulled something out, but died immediately to the overwatching Blue Wolf.
On the other side of the map, the Taagma/Kriigel/Kaeltar pushed out, eating a few flash pulses on the way, then climbed up the building with the panoply. The Blue Wolf took a few long-range spitfire shots, but didn't manage to stop the Tohaa from plundering the objective.
With more items acquired from the panoply and the HVT secured, this became a:
2-0 Spiral Corps victory!
Her armor shredded, plates sloughing off from the effects of alien weaponry, and servos and cybermuscle sparking and crackling, Lt Pei Zhi managed to limp back to the Reliquary with the help of some of her unit’s attached Shaolin Monks. While her trial as a Daofei went poorly enough, the facilities remained free from sabotage, and she was still alive. As far as she was concerned, that was a win.
Battle Report Author

Army Lists Used In This Battle
Recommend Commander For Commendation
Share this battle with friends
HenshiniWins

Very well laid out report! Thank you for such a nice clear opening.
Very well done report, Commander.