Fought At Raveneye Port Battery: Port Fire Control Module
645 days 16 hours 14 minutes ago
NC Uh-Oh
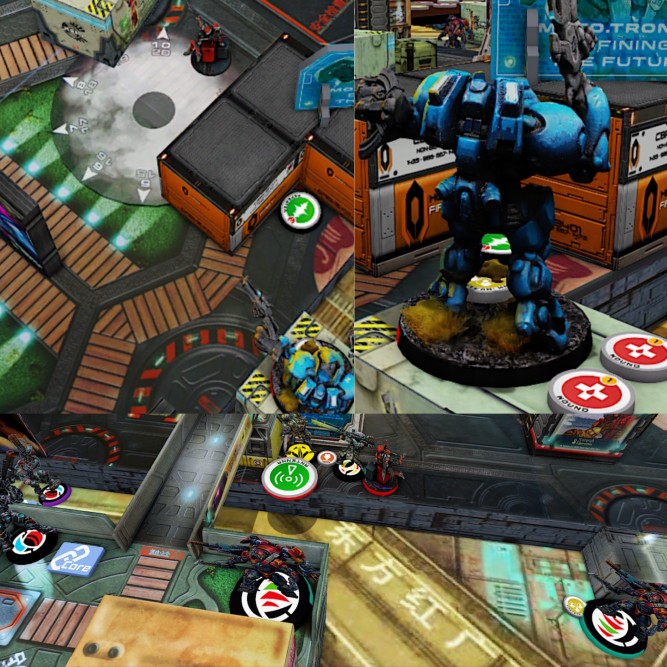
View Linked Report - CLICK HERE 400 POINTSPictures are at the bottom and should be in order, 1 pic per player turn except t1 CJC which has 2!
Top of Turn 1: Morat Aggression Force
The Bultrak starts the turn taking down the Wildcat HRL to clear the way for the Hungries. With the HRL down they move to maul both Morans, dodging all koalas with a +3 due to the scenario. However, Jazz and Valerya proceed to spotlight the entire haris throughout their attack run.
A BSG Rindak moves up the flank to reveal both the Intruder and the Sombra with Sensor. He’s forced to engage the Intruder who is covering the Beacon and puts him unconscious. This puts him in sight of three other models who shoot in response to the Rindak, with Lupe landing a wound on him and putting him into NWI. Luckily he is able to retreat on top of a building and is relatively safe.
A second Multi Rifle Rindak pushes up the other flank, first engaging the Sombra, who dodges his shots. It’s clear there isn’t enough orders to claim the beacon Turn 1 so he retreats. Before doing so he takes 1 order to attempt a long range shot on Senor Massacre that luckily sends him unconscious.
Bottom of Turn 1: Corregidor
Senor Massacre Regenerates and rejoins the Haris team. Daktari attempts long range medikit on Intruder after joining the core team. One hit lands but unfortunately the PH roll is a miss!
Valerya lands a repeater for Jazz to Carbonite a Rindak, immobilizing him.
The Gecko team moves forward to sweep up an Oznat team in the distance.
Jazz lands a pitcher to Carbonite another Rindak, with the Wildcat Lt revealing to finish him off.
Top of Turn 2: Morat Aggression Force
Both hackers are pinning down the remaining Rindak so the Bultrak moves forward to HRMC Jazz, who fails to land a pitcher in ARO and dies to the shock ammo. The TAG then moves to the middle of the table to fire at Valerya, who crit dodges out of the way as Senor Massacre drops an eclipse grenade to foil his attack run for the moment. The Bultrak jumps into repeater range to take another shot at Valerya around the Eclipse who total controls in response. The Bultrak and Valerya both crit, pushing the F2F roll. As the Bultrak jumps back to the center to cover for the Rindak, both parties repeat the roll, throwing another crit-to-crit roll. This does break the haris but Group 2’s orders are spent.
The Multi Rifle Rindak retreats from repeater range successfully, and pushes forward to retrieve the beacon. As he moves forward, the Sombra fails a dodge and gets hit and crit several times dying outright. The Raveneye succeeds a dodge and stands, and the Daktari seeks better cover. As the Rindak reaches and grabs the antenna, the Raveneye drops an E/M mine while the Evader dodges. The Rindak retreats, dodging two E/Marats and an E/M mine from the Raveneye.
The Morats reposition at the end of the turn, failing to land a pitcher near the Gecko.
Bottom of Turn 2: Corregidor
A Hellcat Spitfire lands on the first order and surveys his target rich environment. After several salvos the Bultrak guarding the antenna remains unscathed, totaling 12 shots fired.
Daktari fails to medikit a Wildcat HRL, putting the Daktari at two kills for the game.
The Gecko pops out of eclipse and grievously wounds the Bultrak, leaving it limping.
Lupe Hits 2 panzerfaust shots into the back of the Bultrak and blows it sky high. Meanwhile, the inner structure of this section prevents the Heavy Rocket Launchers from returning the favor by only half an inch. (Restricted Range)
Top of Turn 3: Morat
The Kurgat Engineer, escorted by a pair of Kaitok, throws Drop Bears to harass the Hellcat. The Chain Rifle Kaitok then takes point to blast the Hellcat, who fails his dodge, and two of the resulting saves.
With the way cleared, the Rindak makes a run for it, dodging multiple shots from both the Gecko and the Raveneye, getting the Beacon into his DZ. The core team advances to cover the Rindak, but Anyat gets caught in repeater range and takes a spotlight while a Dartok lands a Repeater. He attempts to trinity Valerya with a crit, but she lands her third crit of the game on her Reset.
Bottom of Turn 3: Corregidor
Senor Massacre Eclipses for a hail mary dive on the beacon, landing a second as he continues up the board.
A Kaitok’s flamenspeer manages to burn the Gecko down to a single structure point, though he remains standing.
After throwing several heroic eclipse smoke grenades to pave his way, Massacre makes a heroic last stand diving for the beacon and dies in a blaze of fiery glory.
Postgame Score:
Having held the Corregidor beacon for two turns and returning it to their DZ, the Morats score a total of seven points. Massacre’s final stand would have scored Corregidor two points and docked the Morats a point, should he have survived the impending 8 template saves. Each of the player’s classifieds required an unconscious Morat trooper, but the Corregidor team’s fervor removed every model they wounded from the board.


Battle Report Author

Army Lists Used In This Battle
Recommend Commander For Commendation
Share this battle with friends
MetalWins

seemed like a great game
Crazy Morat list. I never run anything like this but I will try.
Nice job on the win for the good cause!
Nice win. Taht seemed like a bloody battle. The Bultrak did some work for you though
So many Rindaks, so many Kaitoks and a Bultrak to boot! Valeria MVPs though.
Coool !
rip nomads