Fought At Darpan Xeno-station: Max-Sec Vault
637 days 17 hours 18 minutes ago
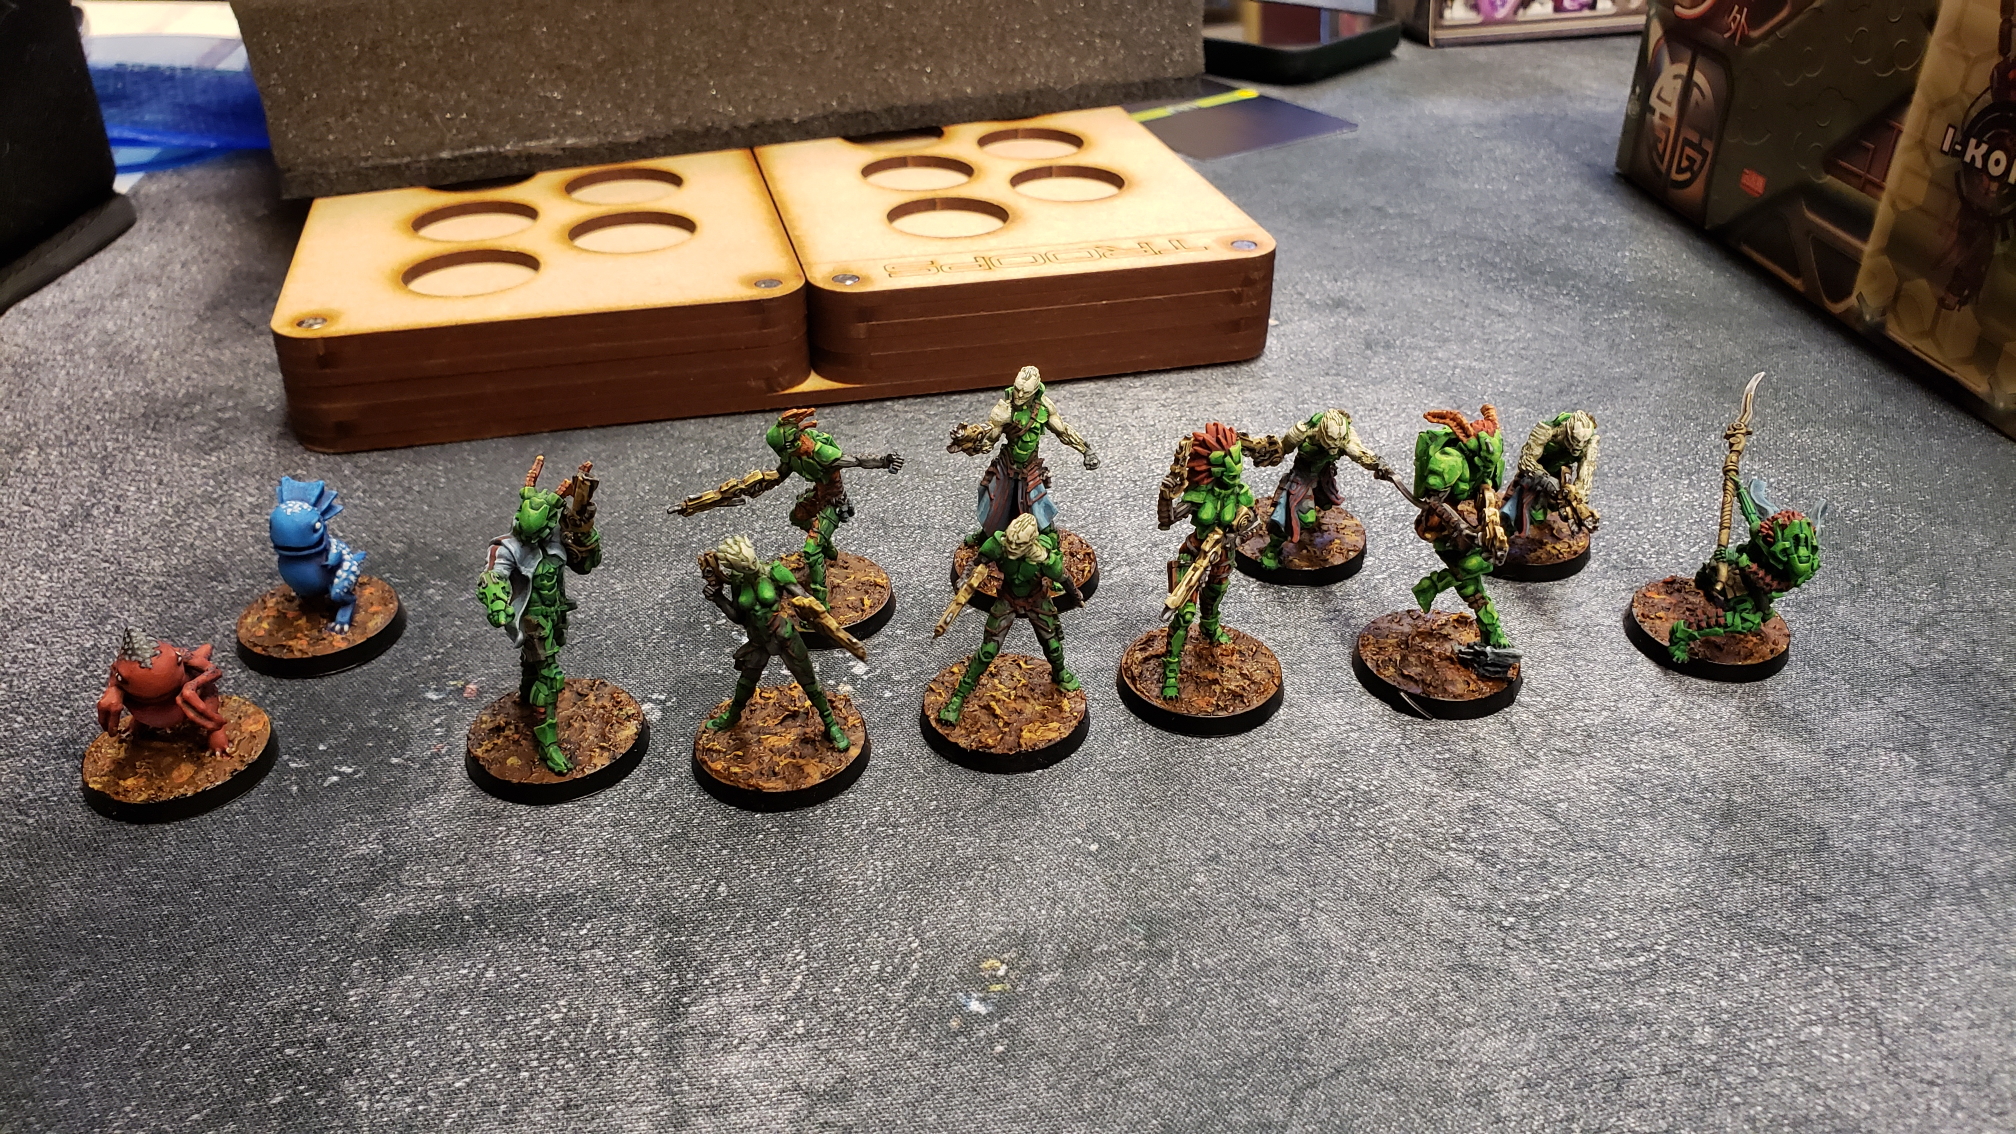
Those are MY symbiotes!
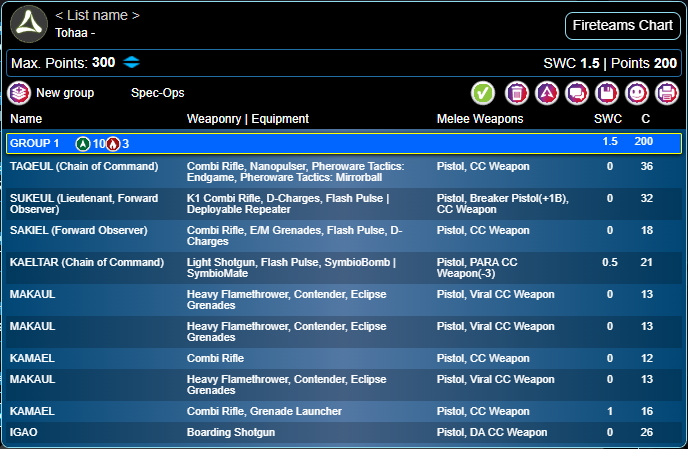
200 POINTSHaving a duty to High Command as well as the orders of the Soruşturma Bölümü, the remaining Sugar Eaters assets steel themselves for another push into the Darpan Xenostation. Having regrouped after battling both Yu Jing and JSA contingents, what was left finds that the way into the facility is clear. Finding no resistance whatsoever, the investigatory force walks unknowingly into a trap -
As the unit proceeds into the now-seemingly-defenseless facility, signs of odd biology are everywhere. The plants in display cases are very clearly of xeno origin, and there are more disturbing signs of bio-meddling on the occasional wrecked body - symbiotes. The Soruşturma Bölümü contingent marches onward towards the vault at the center of this facility, all the while with the sensation of being watched. Just before arriving at the Max-Sec center, Ghulam Doctor Burcu Ozdemir notes movement and calls out to the troop. Her alarm sets on them the attention of multiple symbiote-creatures... and a host of Tohaa warriors.
{Note: I've updated the posting to include my opponent's ITS handle instead of the name provided within our small community. This is to explain the discrepancy between "Wheeman" and "Brridder"}
We elect to play a smaller game, 200 points. This has become the standard of our weekly gaming group, to allow for swifter matches that can wrap up before our FLGS closes on Infinity Night.


We roll off for first turn, and roll the same number twice in a row before I get the win.
Haqqislam will take first turn.
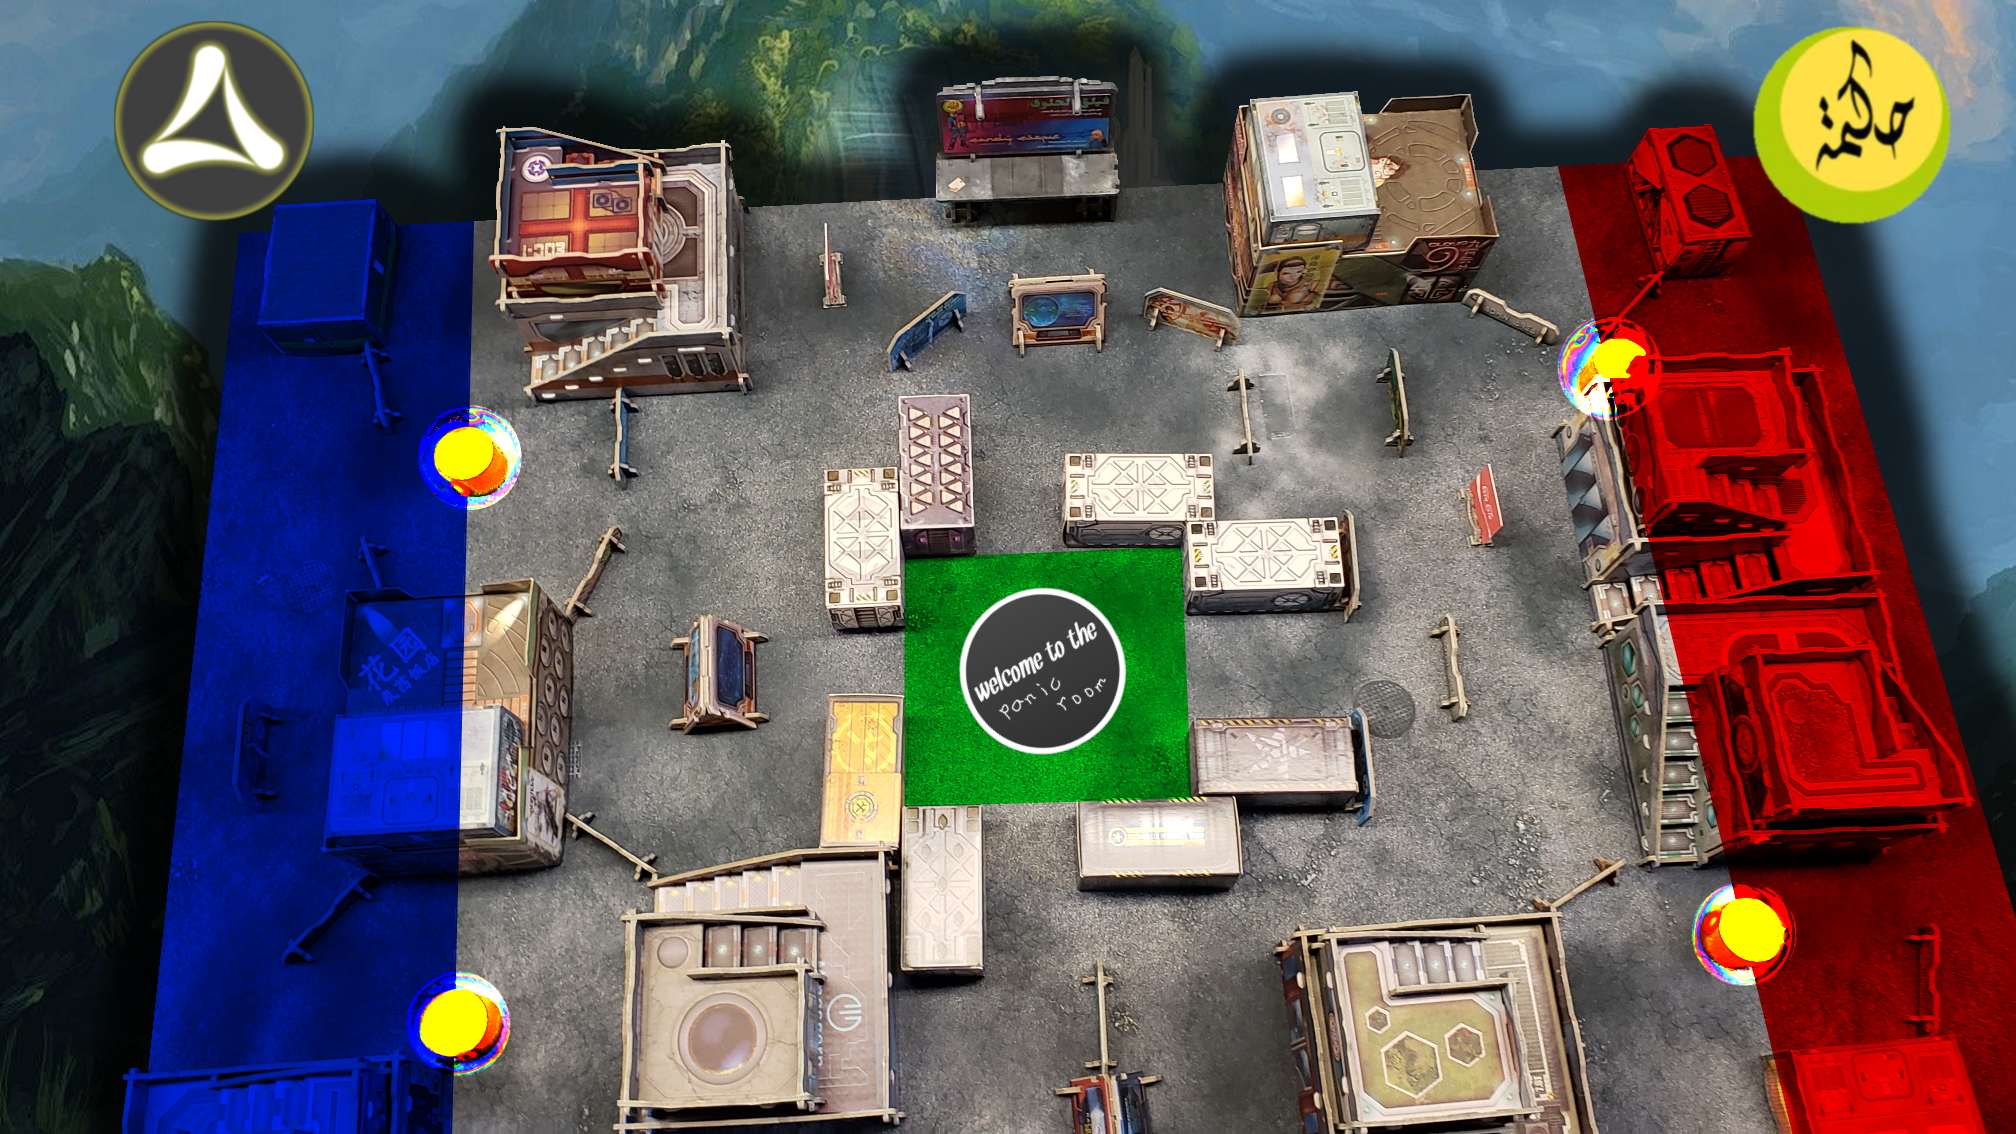
Tohaa forces Haqqislam to deploy in the red deployment zone.
Brridder attempts an infiltration outside of the blue deployment zone, and succeeds on a 3
A command token is spent to strip two orders from Haqqislam
[- Top Turn 1 -]
* I start my turn with an impetuous order on my Kum biker, who charges forward without any threat of ARO from the enemy.
* Wanting to get into the panic room with as many ARO pieces as possible, I elect to use three command tokens this turn - allowing me to make 12 individual move/move orders among my forces.
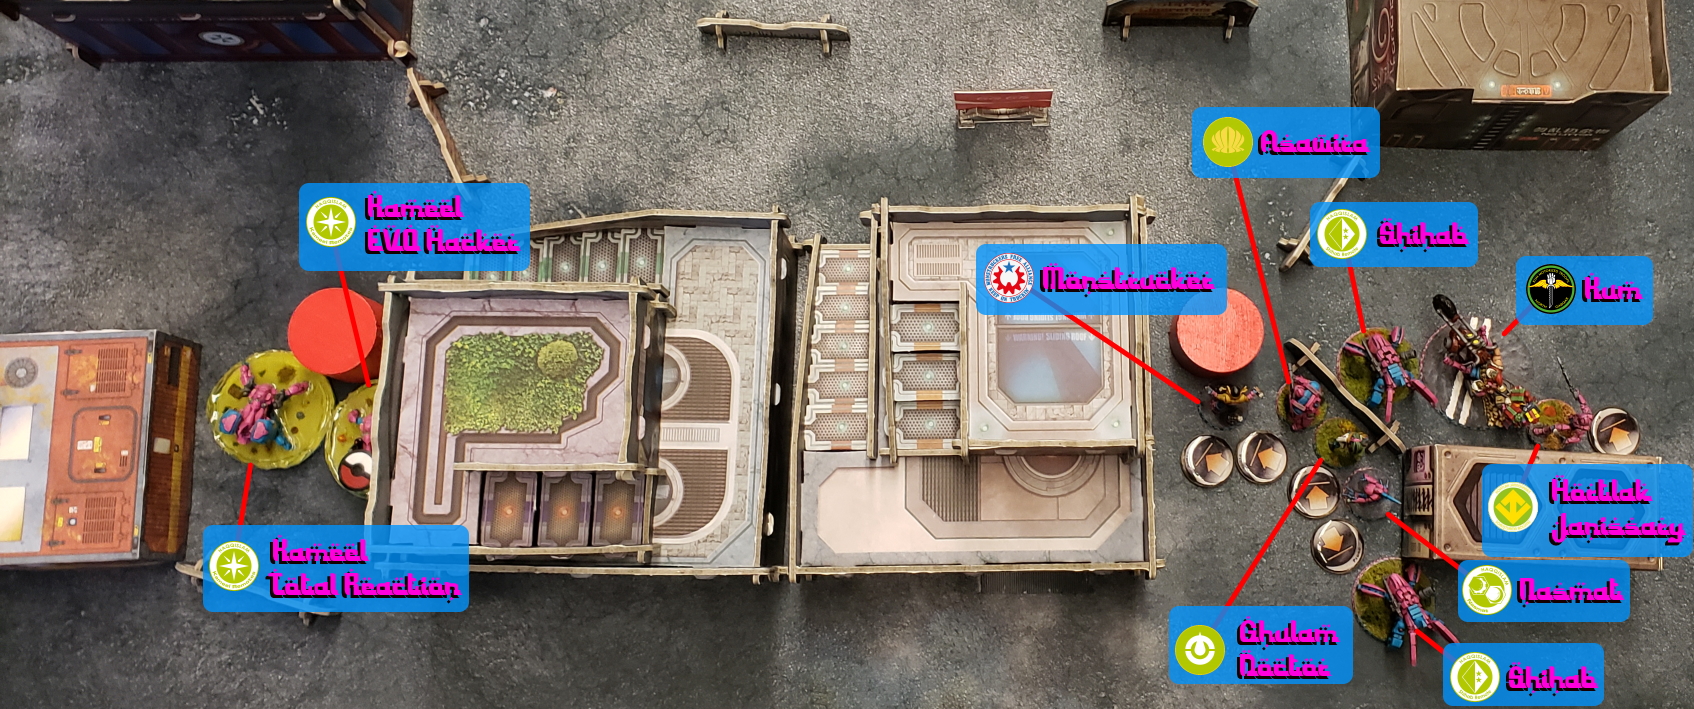
The Shihabs end up watching the right flank, my Hortlak Janissary makes it into the Panic Room, and I watch the far entrance with a Ghulam Number 2, my Asawira, and the Kameel Total Reaction REM.
* I use my final regular order to boot up Supportware on my Total Reaction Kameel, imbuing it with Marksmanship.
* With the final action on this first turn, I reveal my Lieutanant to put the Asawira into suppressive fire state.
[- Bottom Turn 1 -]
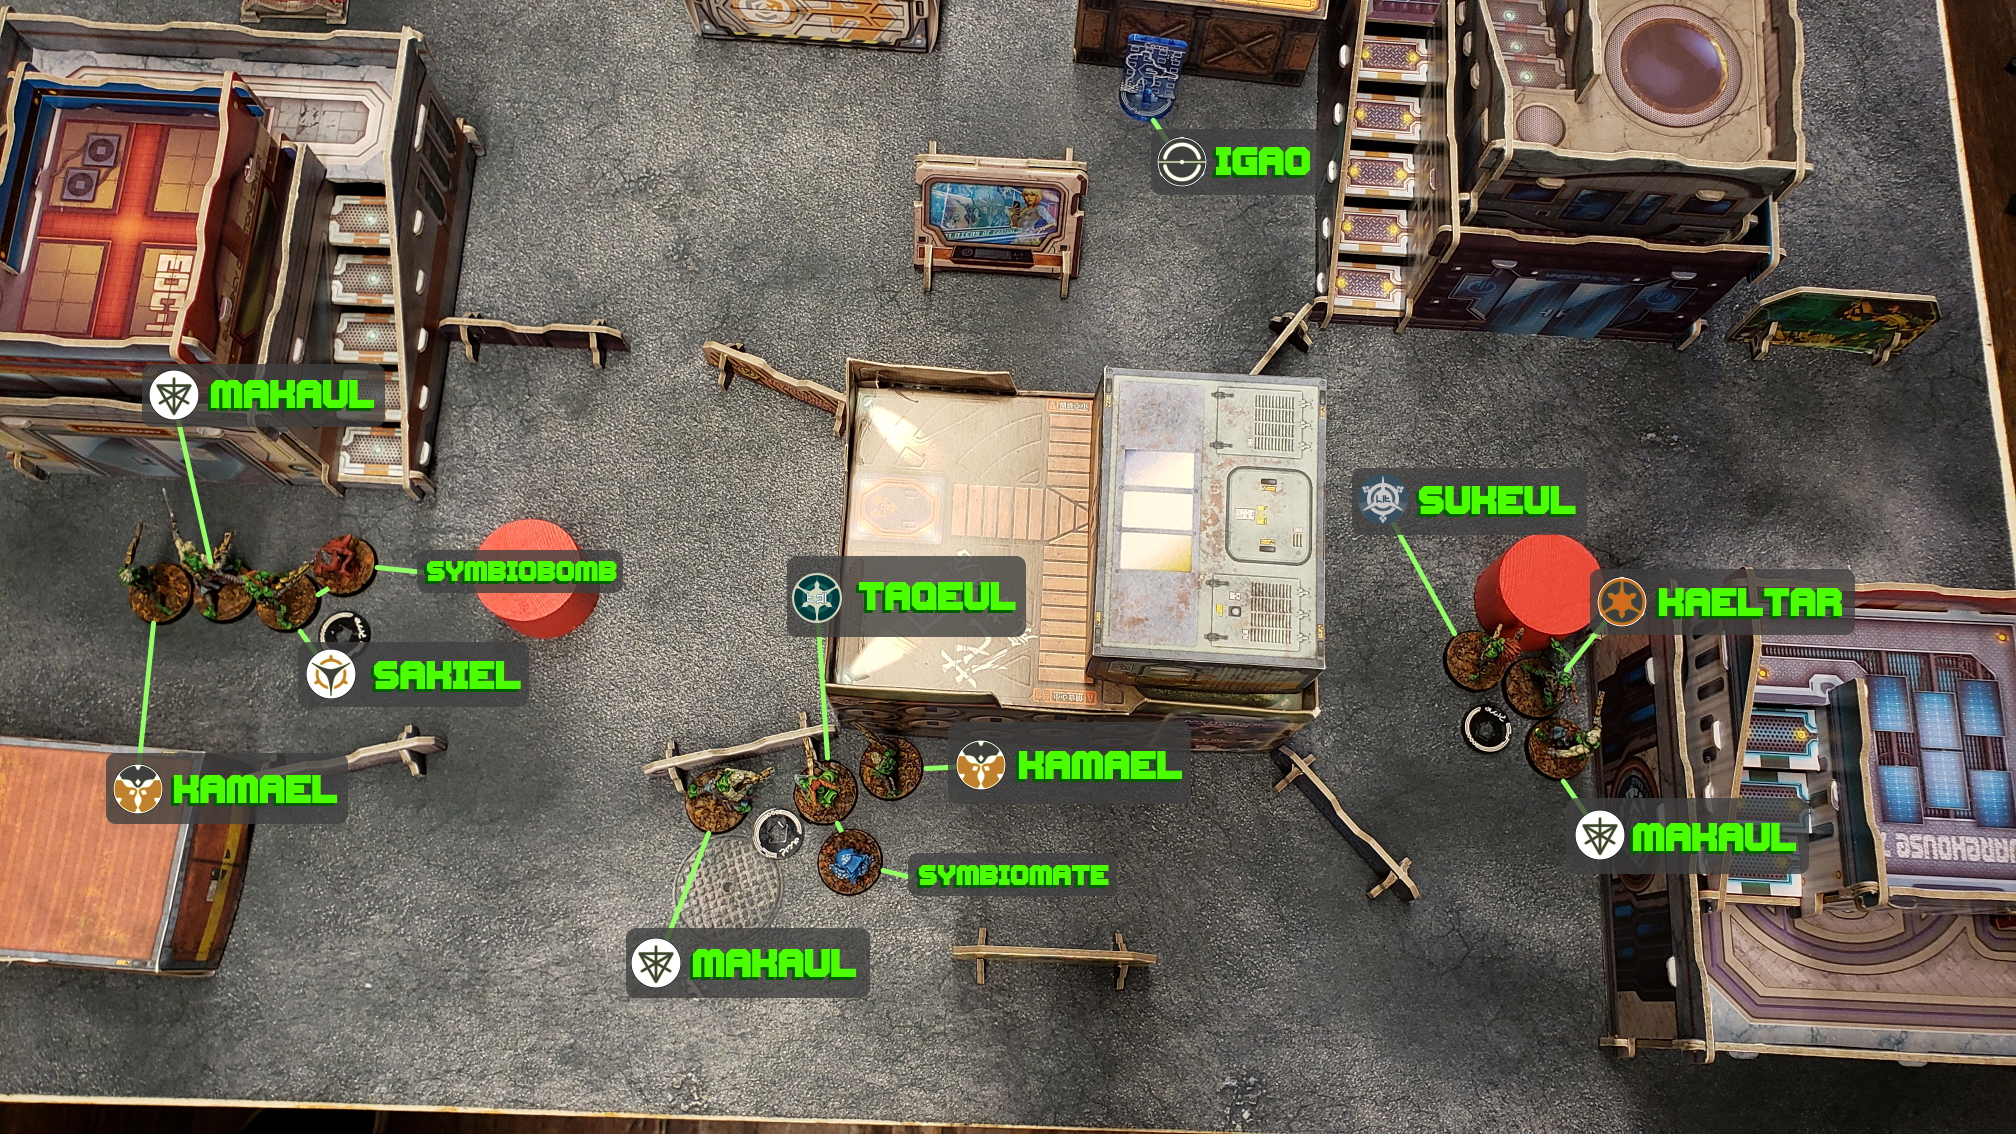
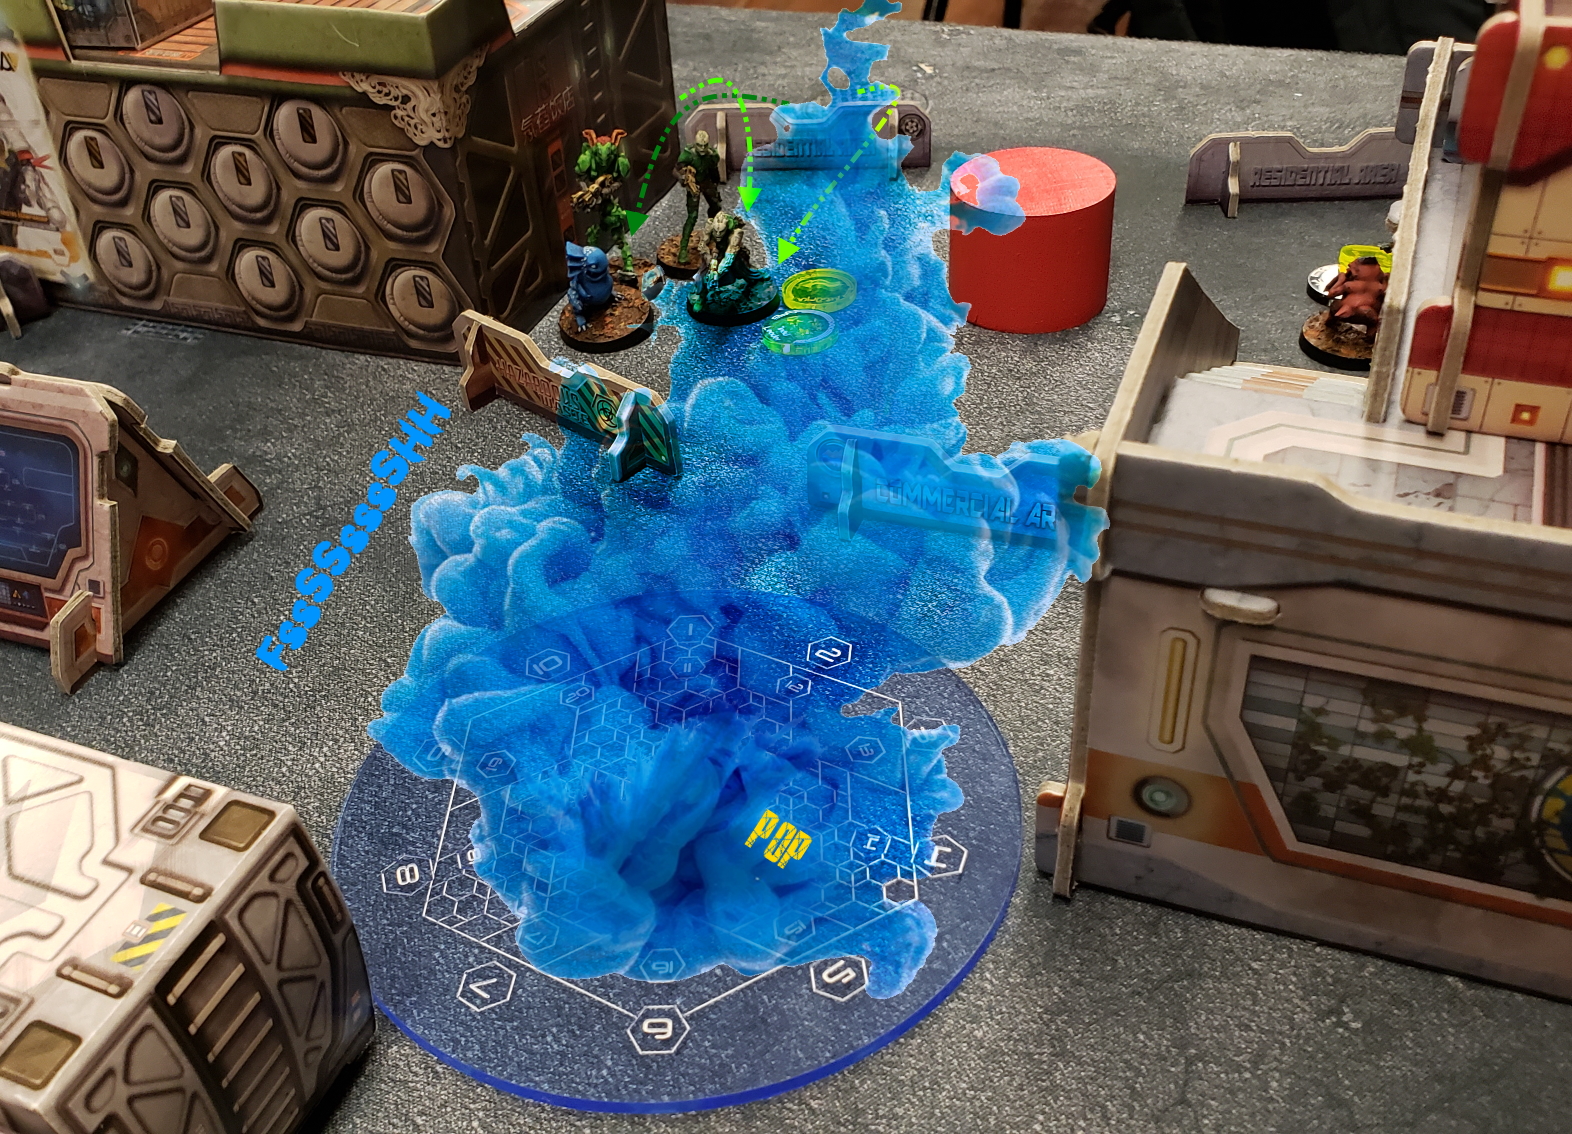
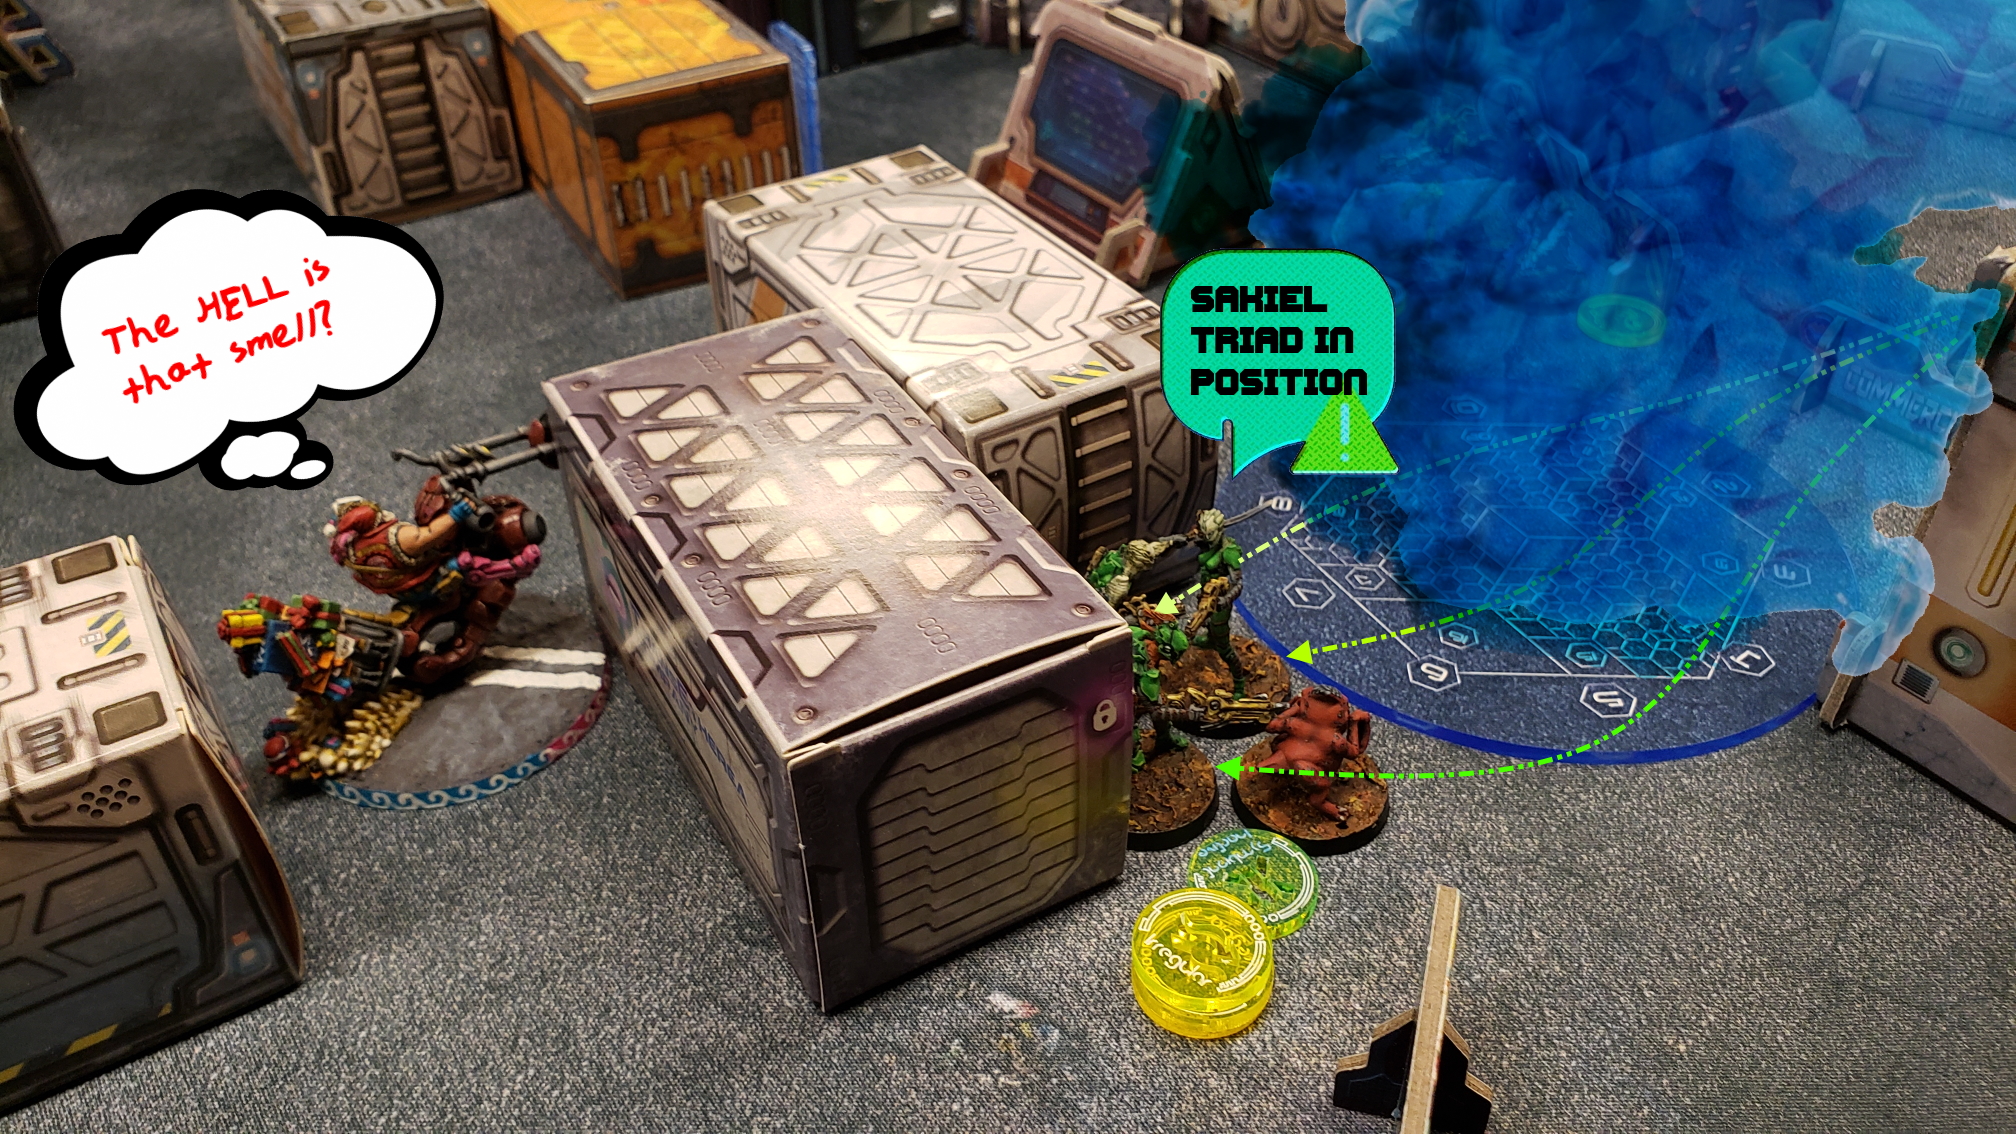
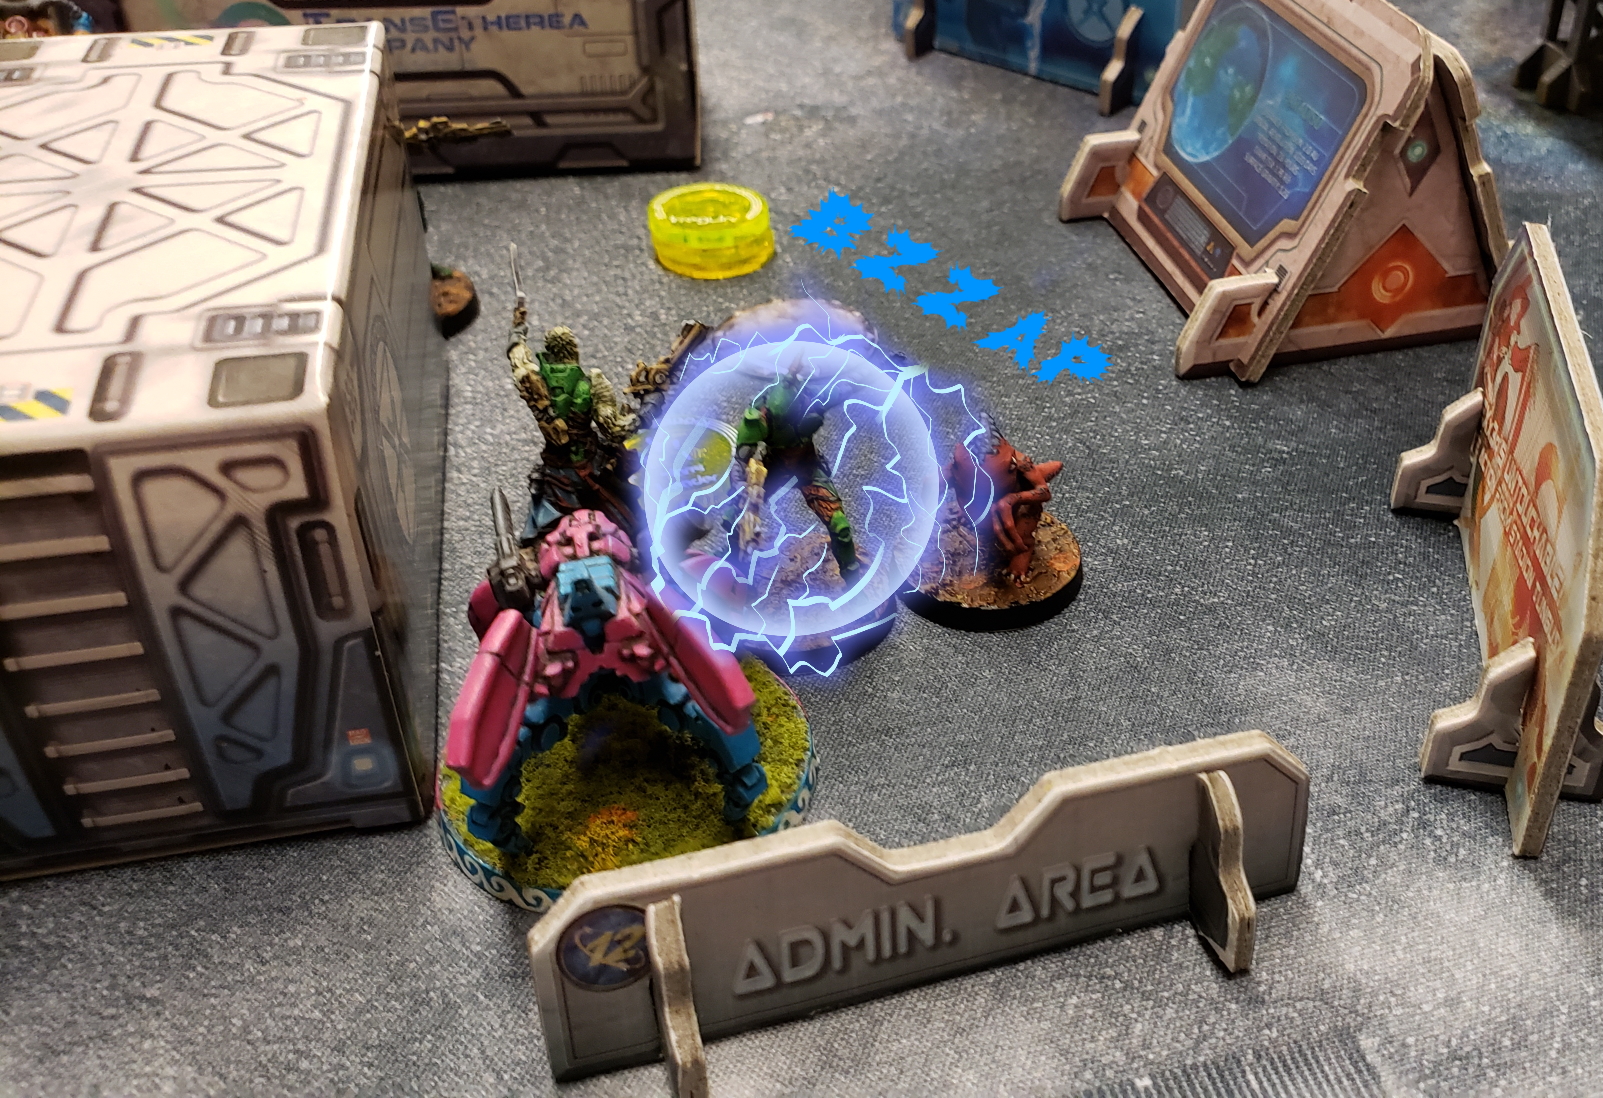
* Opening with mobile cover, Brridder opts to move up the Taqeul's Triad first. With the Makaul taking lead, he moves forward and pitches an Eclipse Grenade in front of thier advance.
* Now enjoying total cover to any potential threat, the Sakiel Triad uses two orders to close the distance to the outer wall of the Panic Room - fearing pheroware, my Kum biker tries to do a ZoC Dodge and fails.
* The Taqeul takes lead of his Triad and pushes forward, tossing cover in the form of Mirrorball into the opening of the Panic Room
* Ready to strike, he continues into the newly created cover and declares Endgame versus my Kum biker. I roll a 6 vs his 2 and 3.
* Undeterred, the Taquel strikes again, this time attacking both the Kum Biker and my Hortlak Janissary. The Kum falls unconscious but the Hortlak tanks the save.
* With no reason to change the approach, the pheroware assault continues - this time killing the Hortlak with two wounds.
* Taking full advantage of my weakness here, the Taquel tosses another Mirrorball down to push towards my Asawira.
* With the final order, the Taquel moves into total cover from my vantage and strikes out at my Lieutenant with yet another Mirrorball. I make the mistake of trusting in my BTS 9(+1), and take a wound.
End of Turn 1, and 2 OP to Brridder for dominating the Panic Room with Essential Personnel inside.
[- Top Turn 2 -]
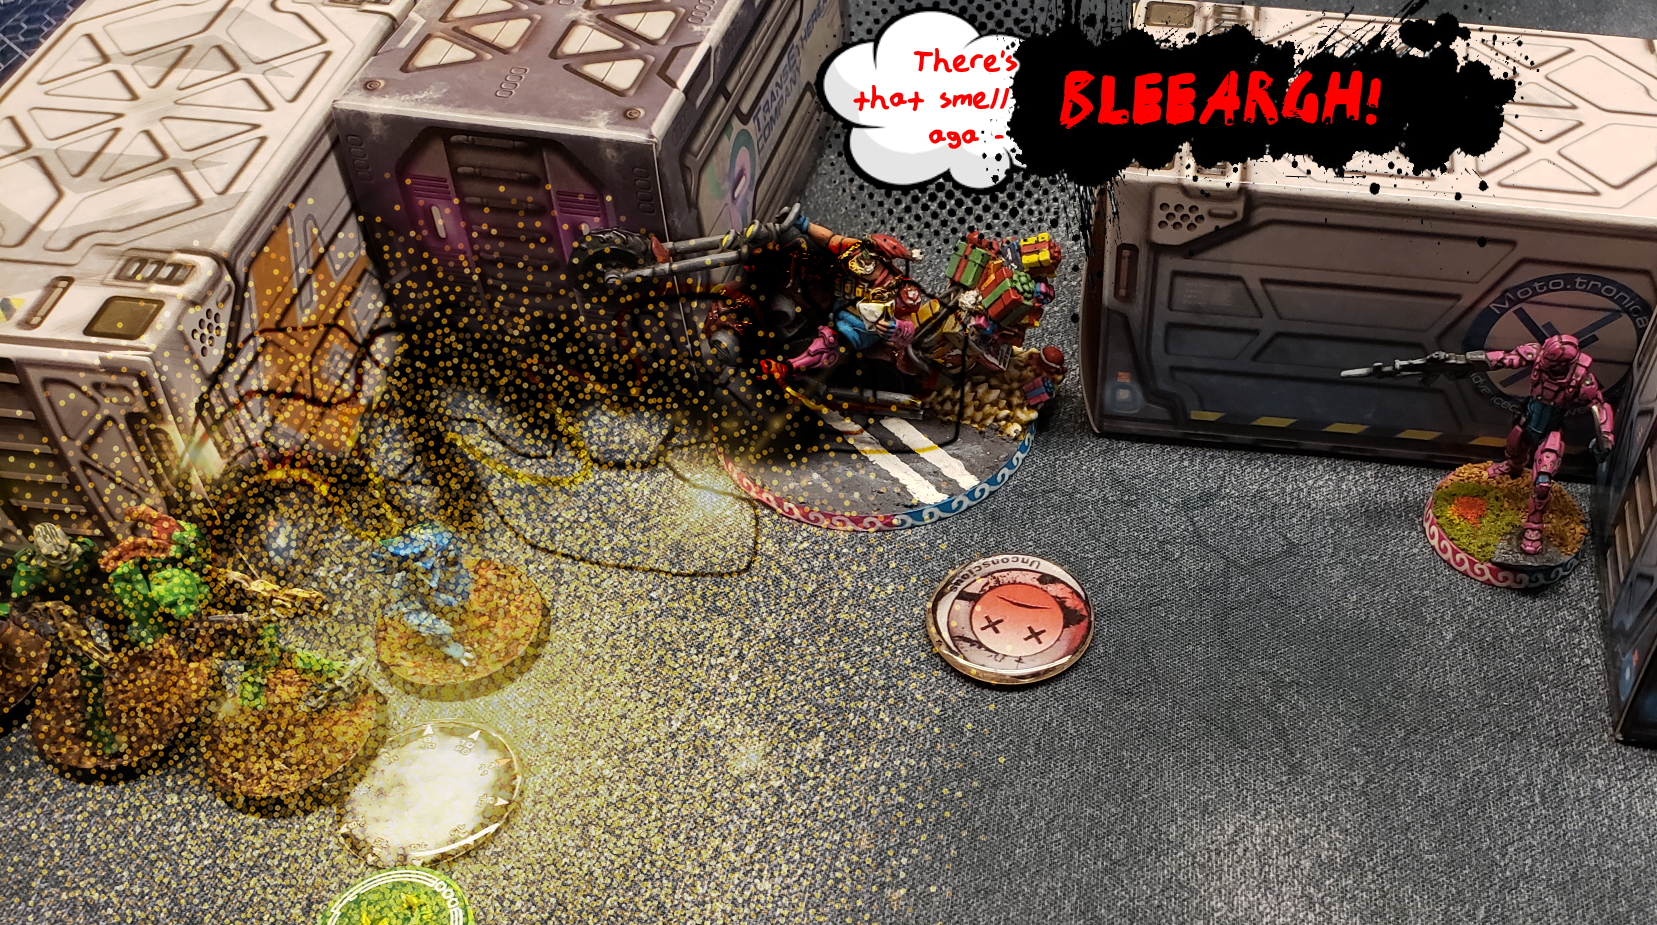
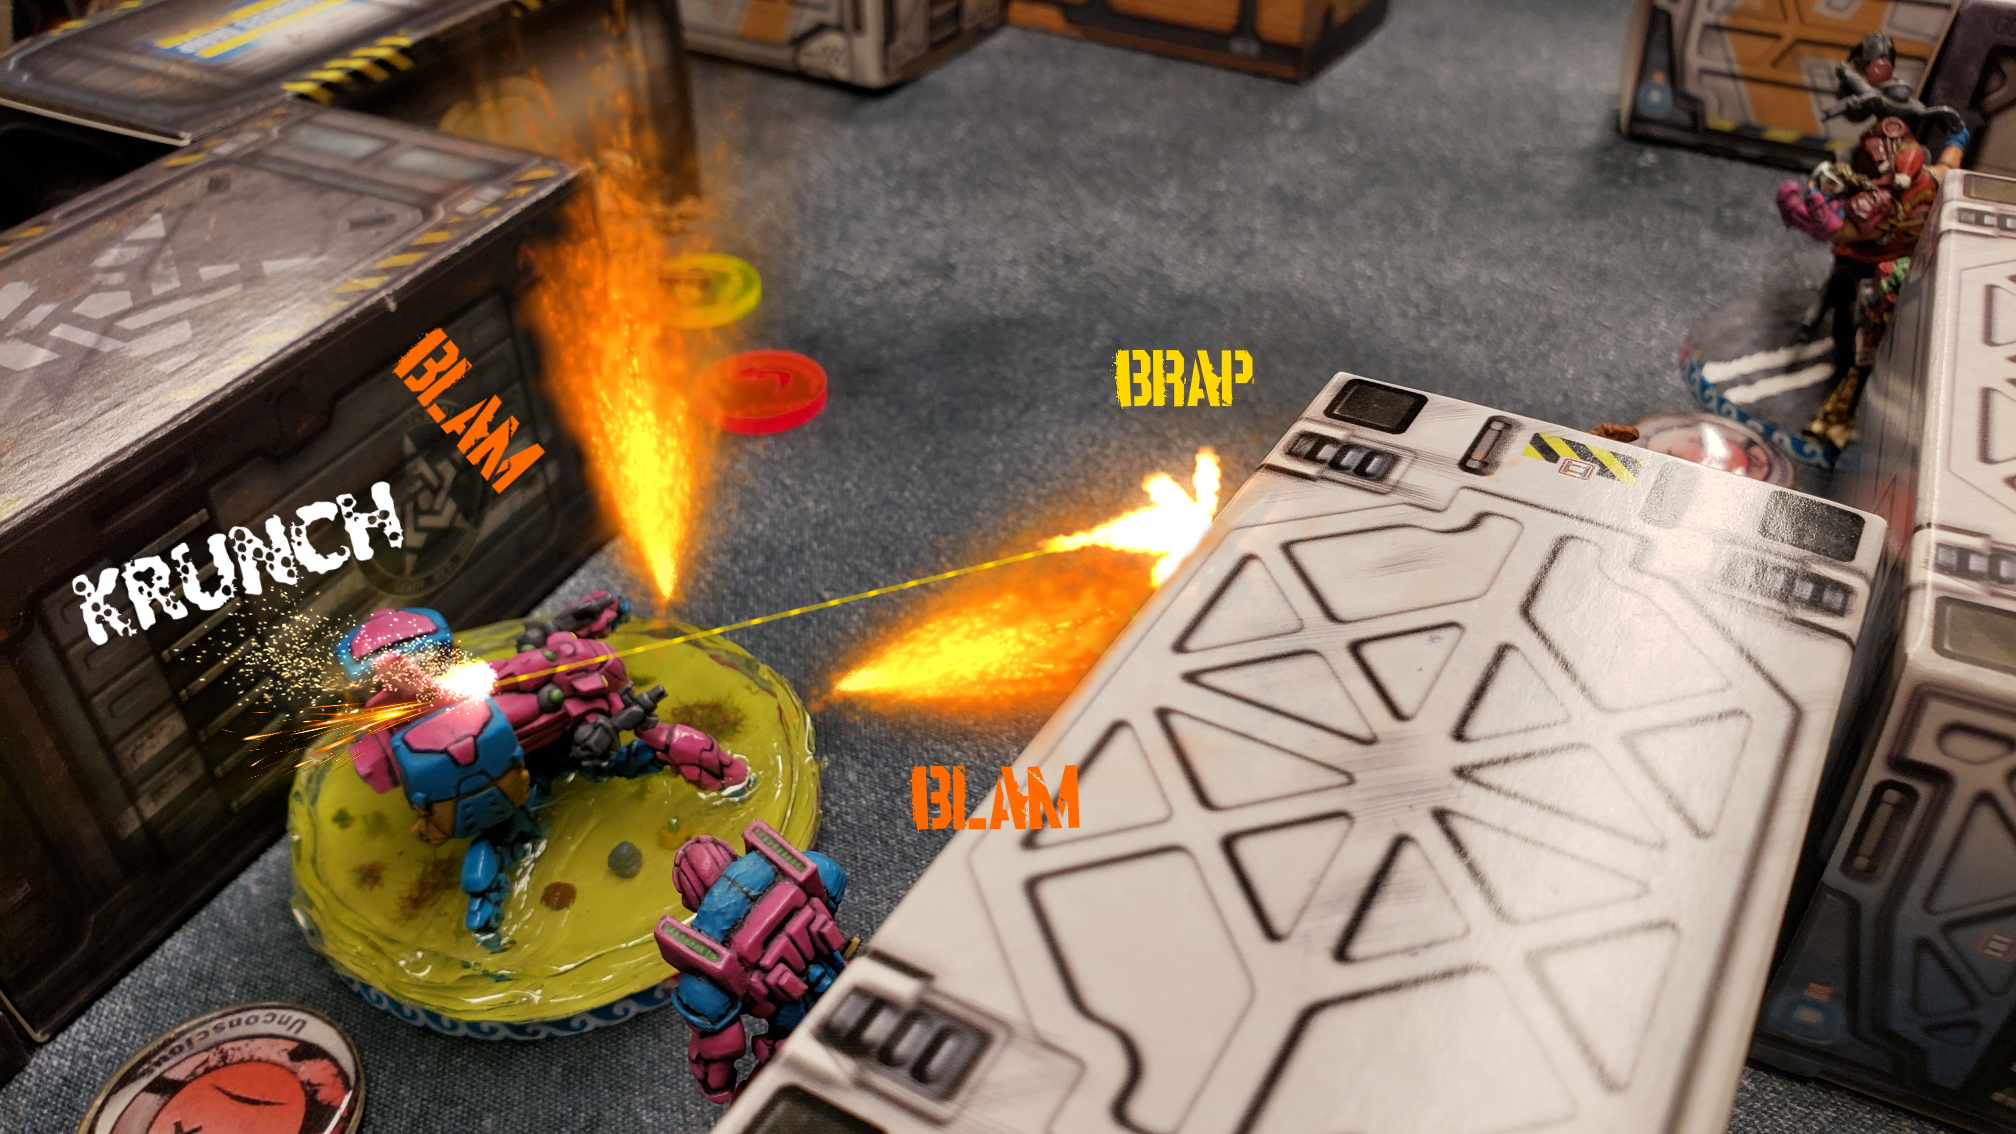
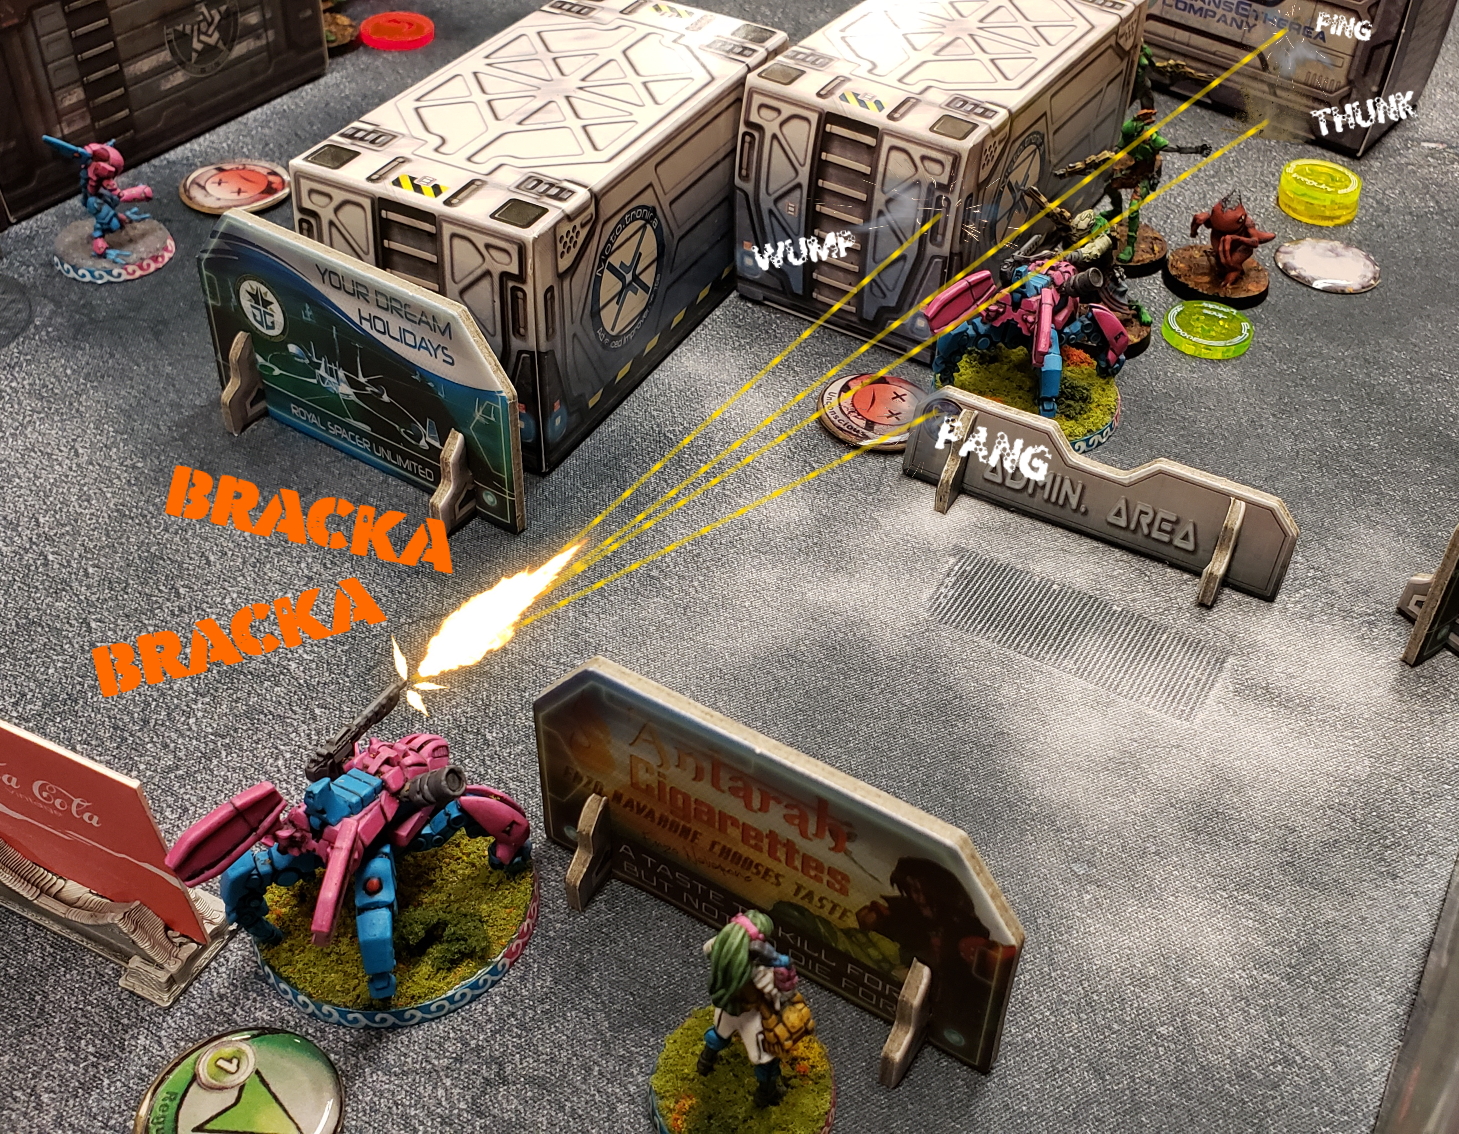
* Reeling from my losses and mis-steps, I need to take care of this pheroware user. My Kameel takes the first order and pushes up to see the Taqeul. We trade shots between my Light Shotgun and the Symbio-Warrior's Combi Rifle - I manage one hit, but it simply sets off the SymbioMate and does no damage.
* Falling back into total cover, the Kameel shoots again as it goes - but the Taqeul makes both saves.
* Pushing my luck, I move back into danger close to attempt one more shot at killing this problematic phero-user. This time, I take two hits from the linked Combi Rifle, failing one of the saves and fall unconscious.
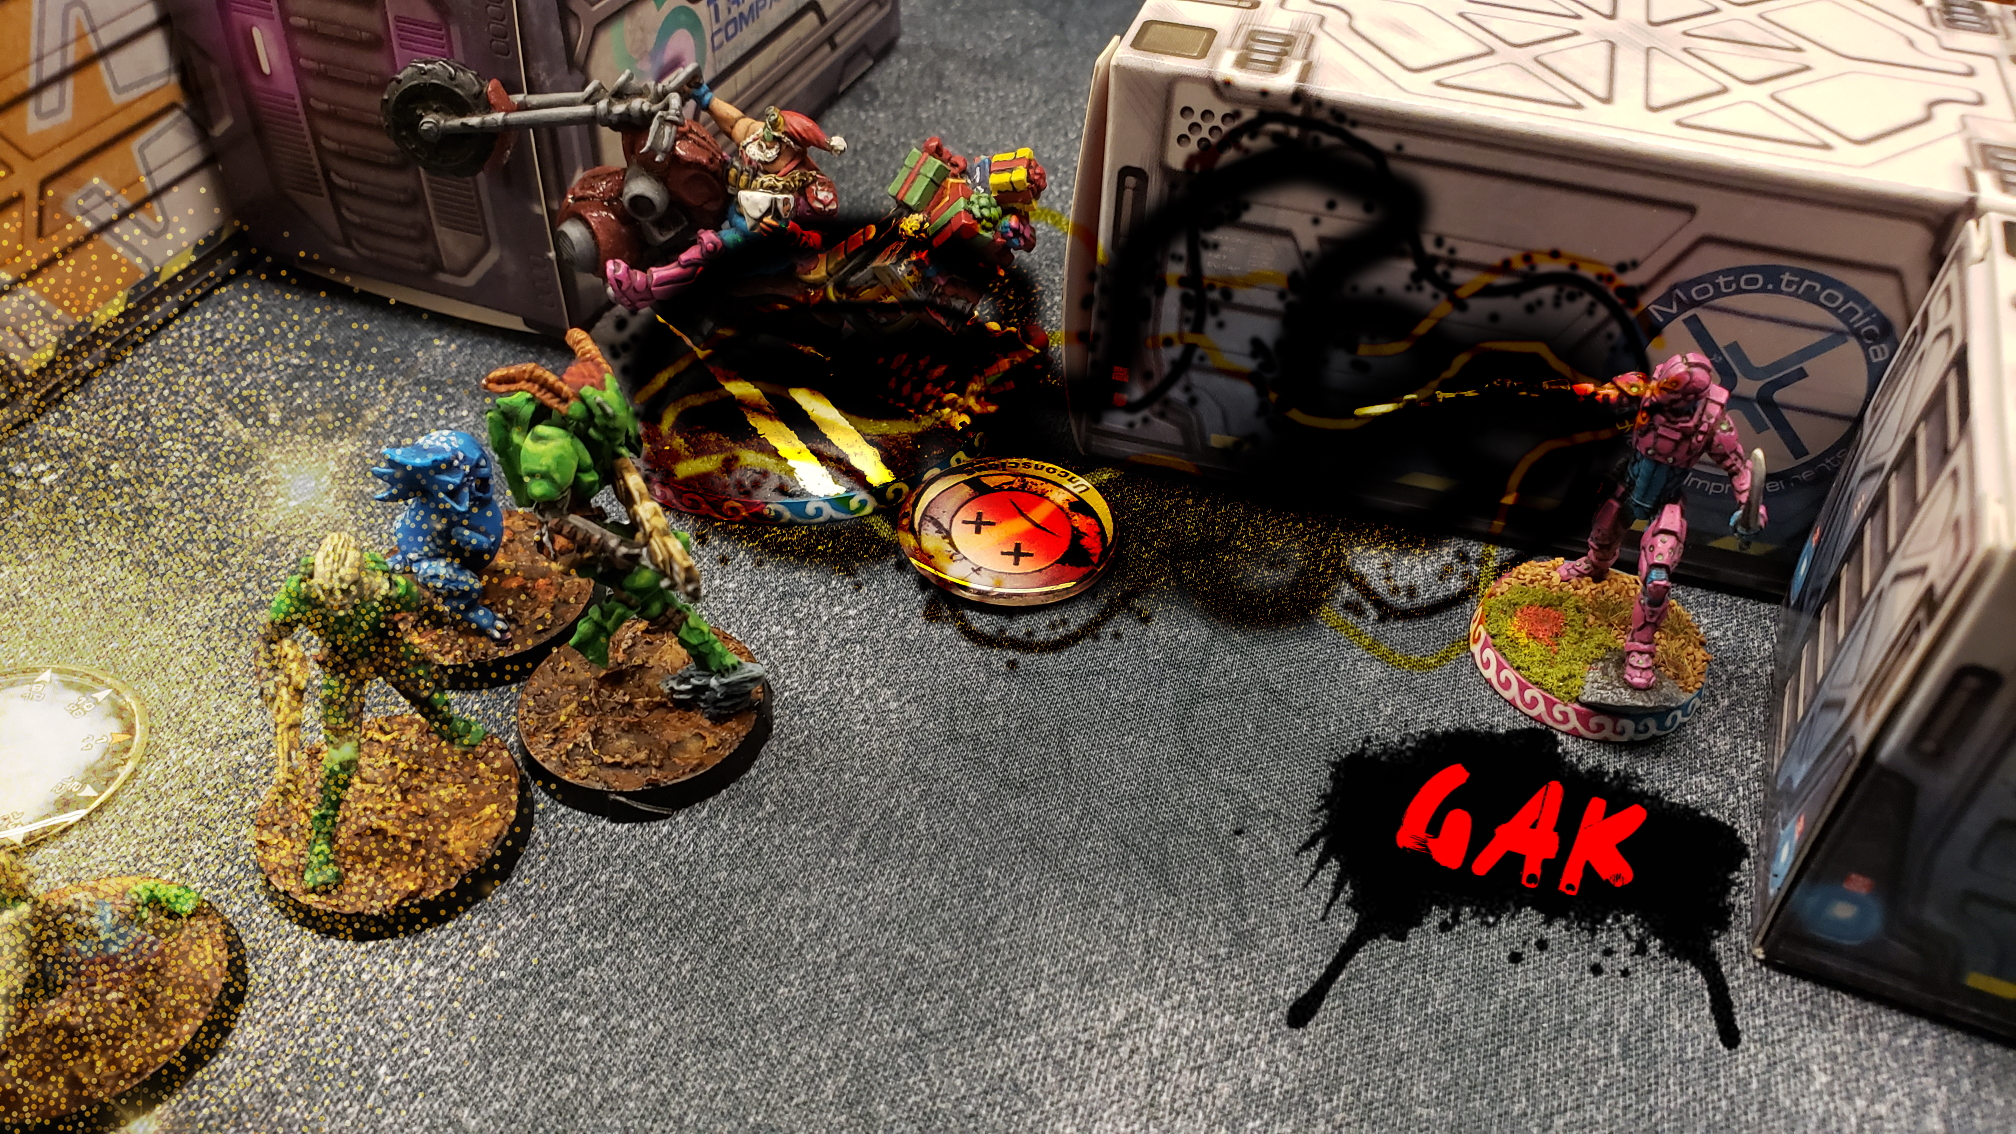
* Without another option, I push my Asawira up into the line of fire, electing to split the burst between the Tohaa warriors inside. I fail to hit anyone and take a wound, falling unconscious.
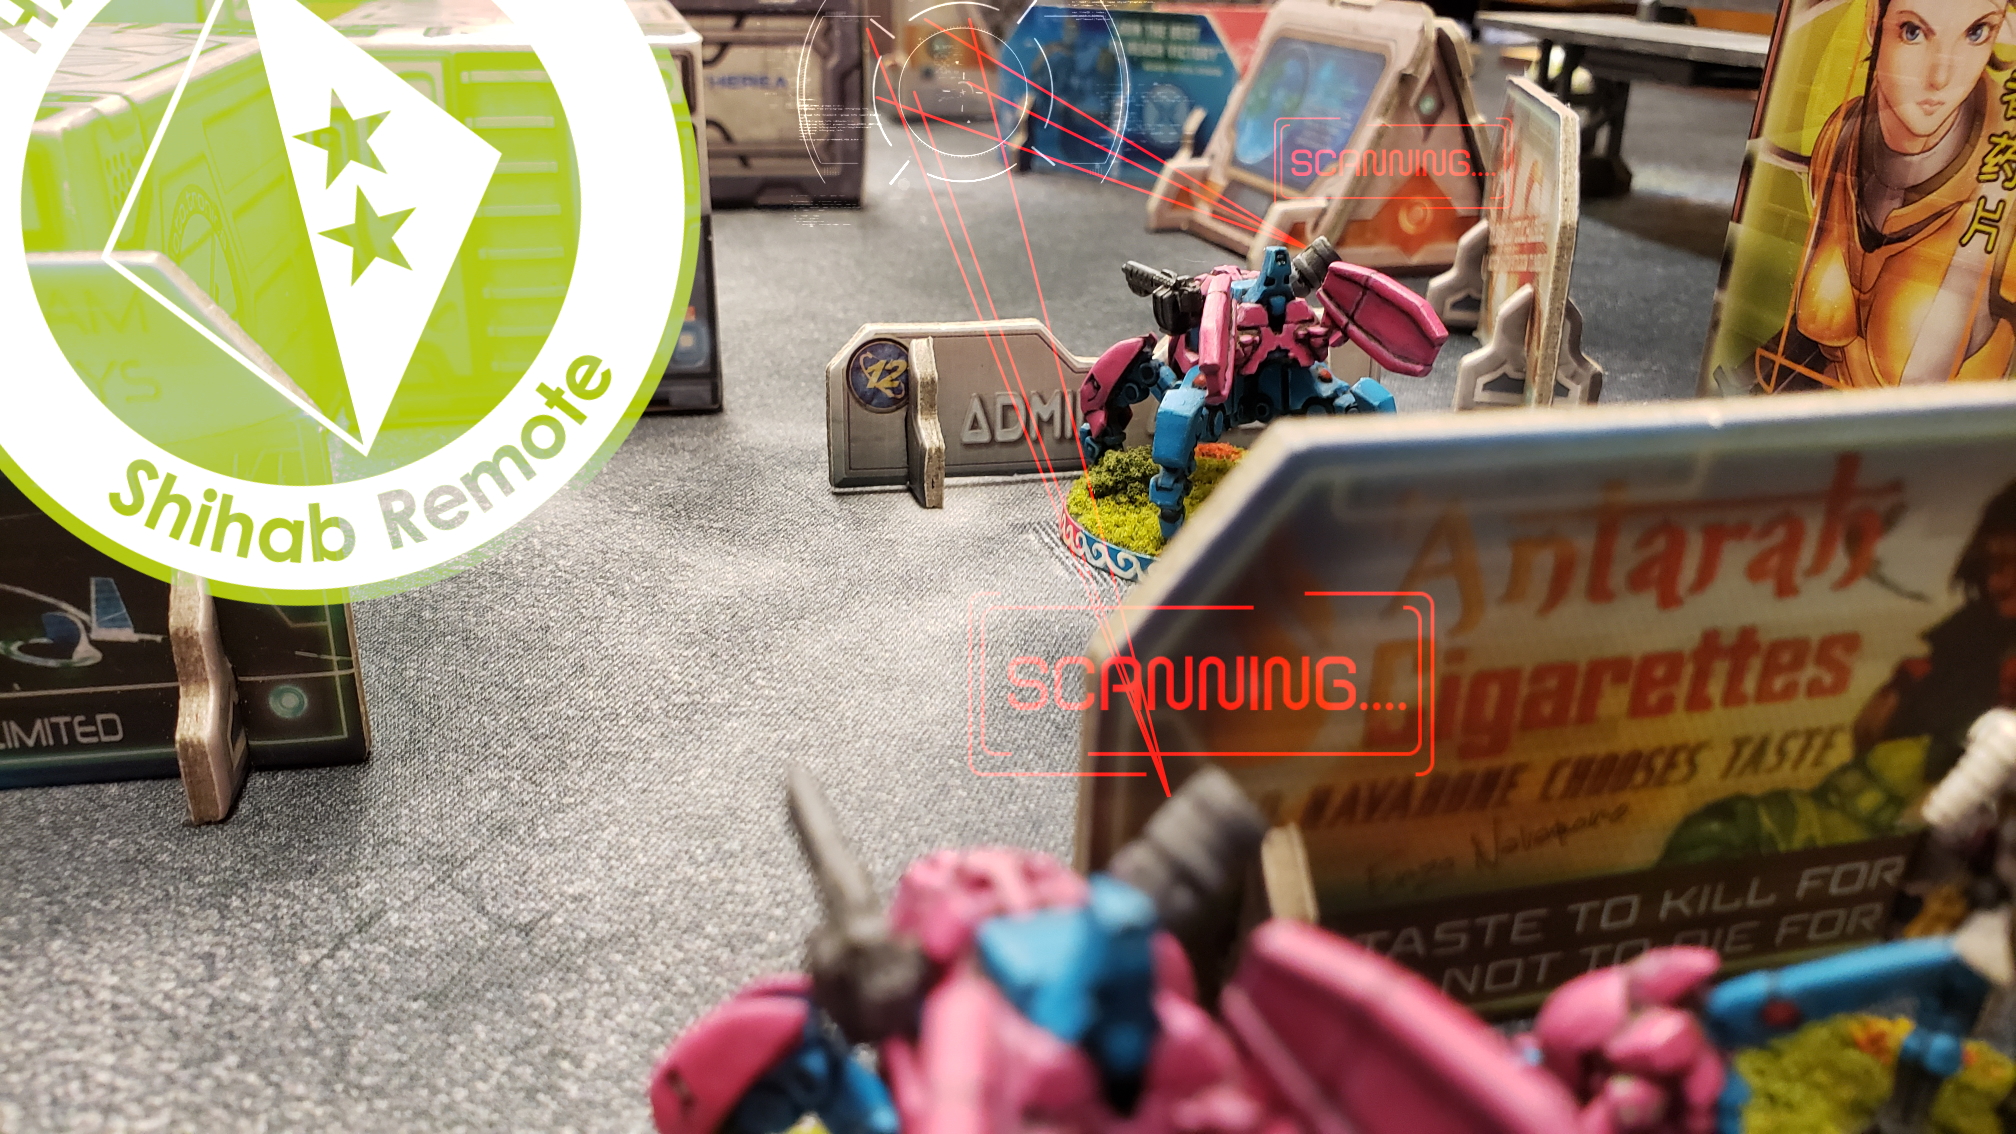
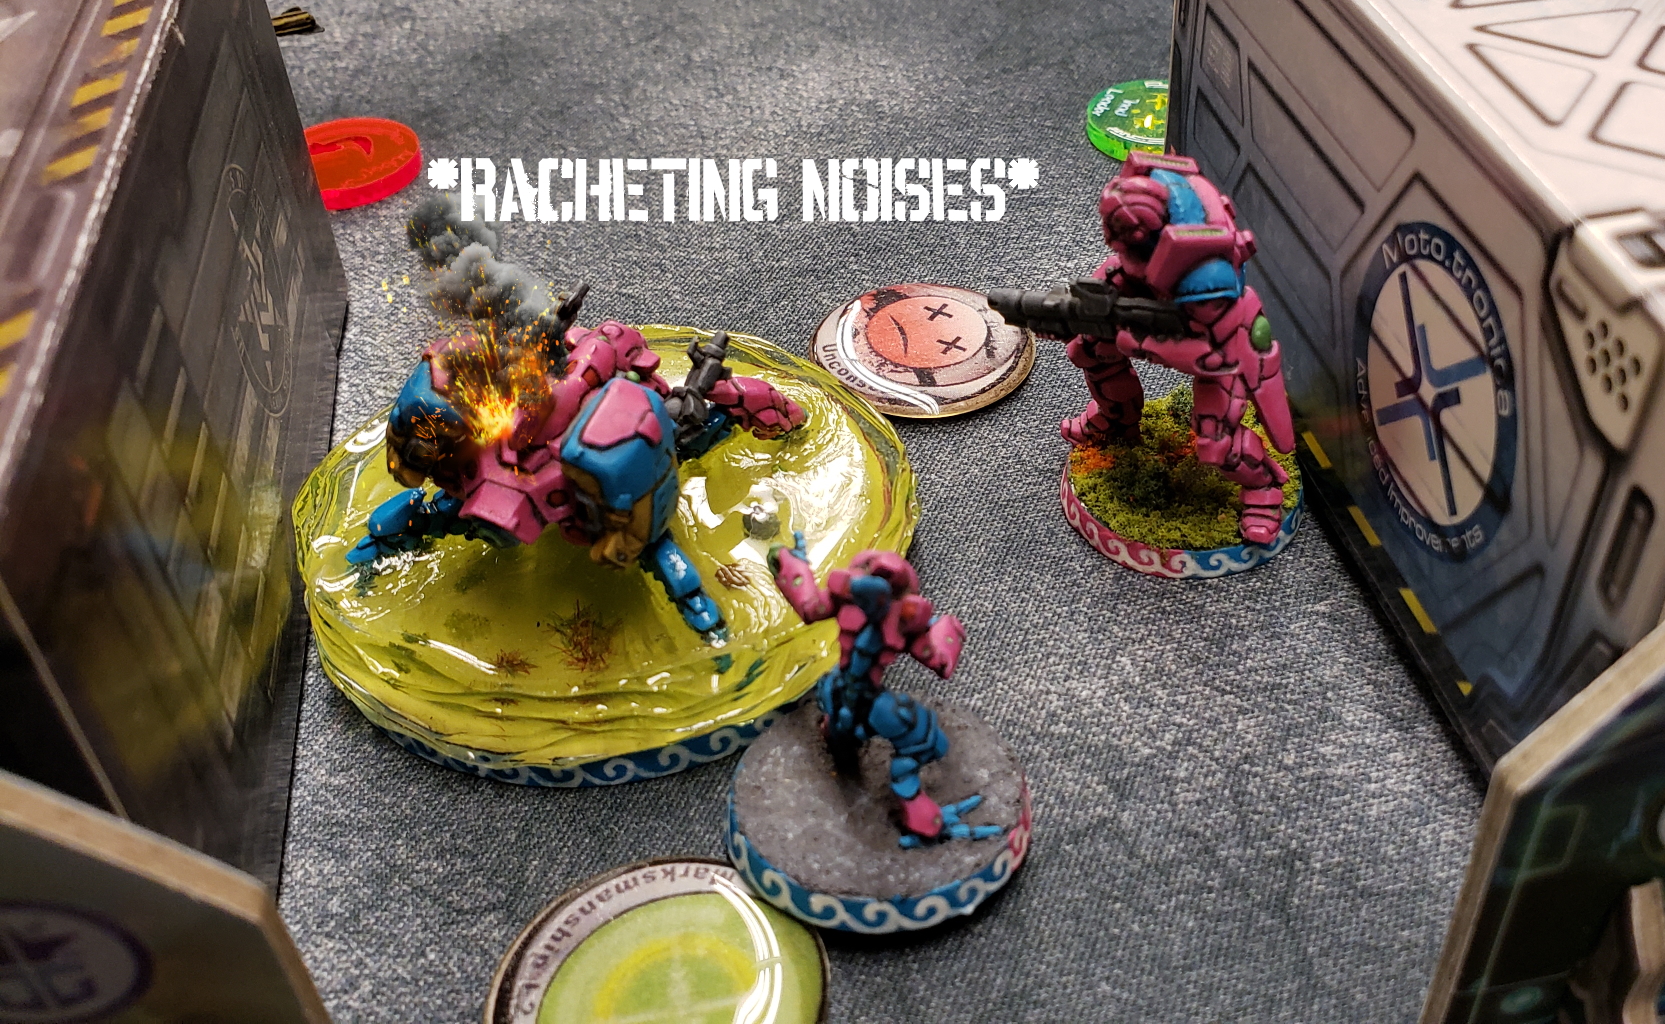
* Fully frustrated, I move up one of my Shihab Remotes to try and do some more damage. It takes a full move/move order and a move/shoot to get shots on any of the Tohaa - but I manage to render a Kamael unconscious.
* With the third combatant down, I see a play that might yield results. If I can manage to bring the Kameel back with my Nasmat, I could use my last order (with some lucky rolls) to take out the Makaul and wound the Taqeul. Going with this plan, I move the Monstrucker's Nasmat up and roll a 14, failing by one.
* Spirit broken, I use my last order to try again, and manage to get the Kameel back.
Insult to injury this turn, and I fail my Asawira's Regeneration roll during the States Phase with a 15 - the Lieutenant dies and is removed from the table.
[- Bottom Turn 2 -]
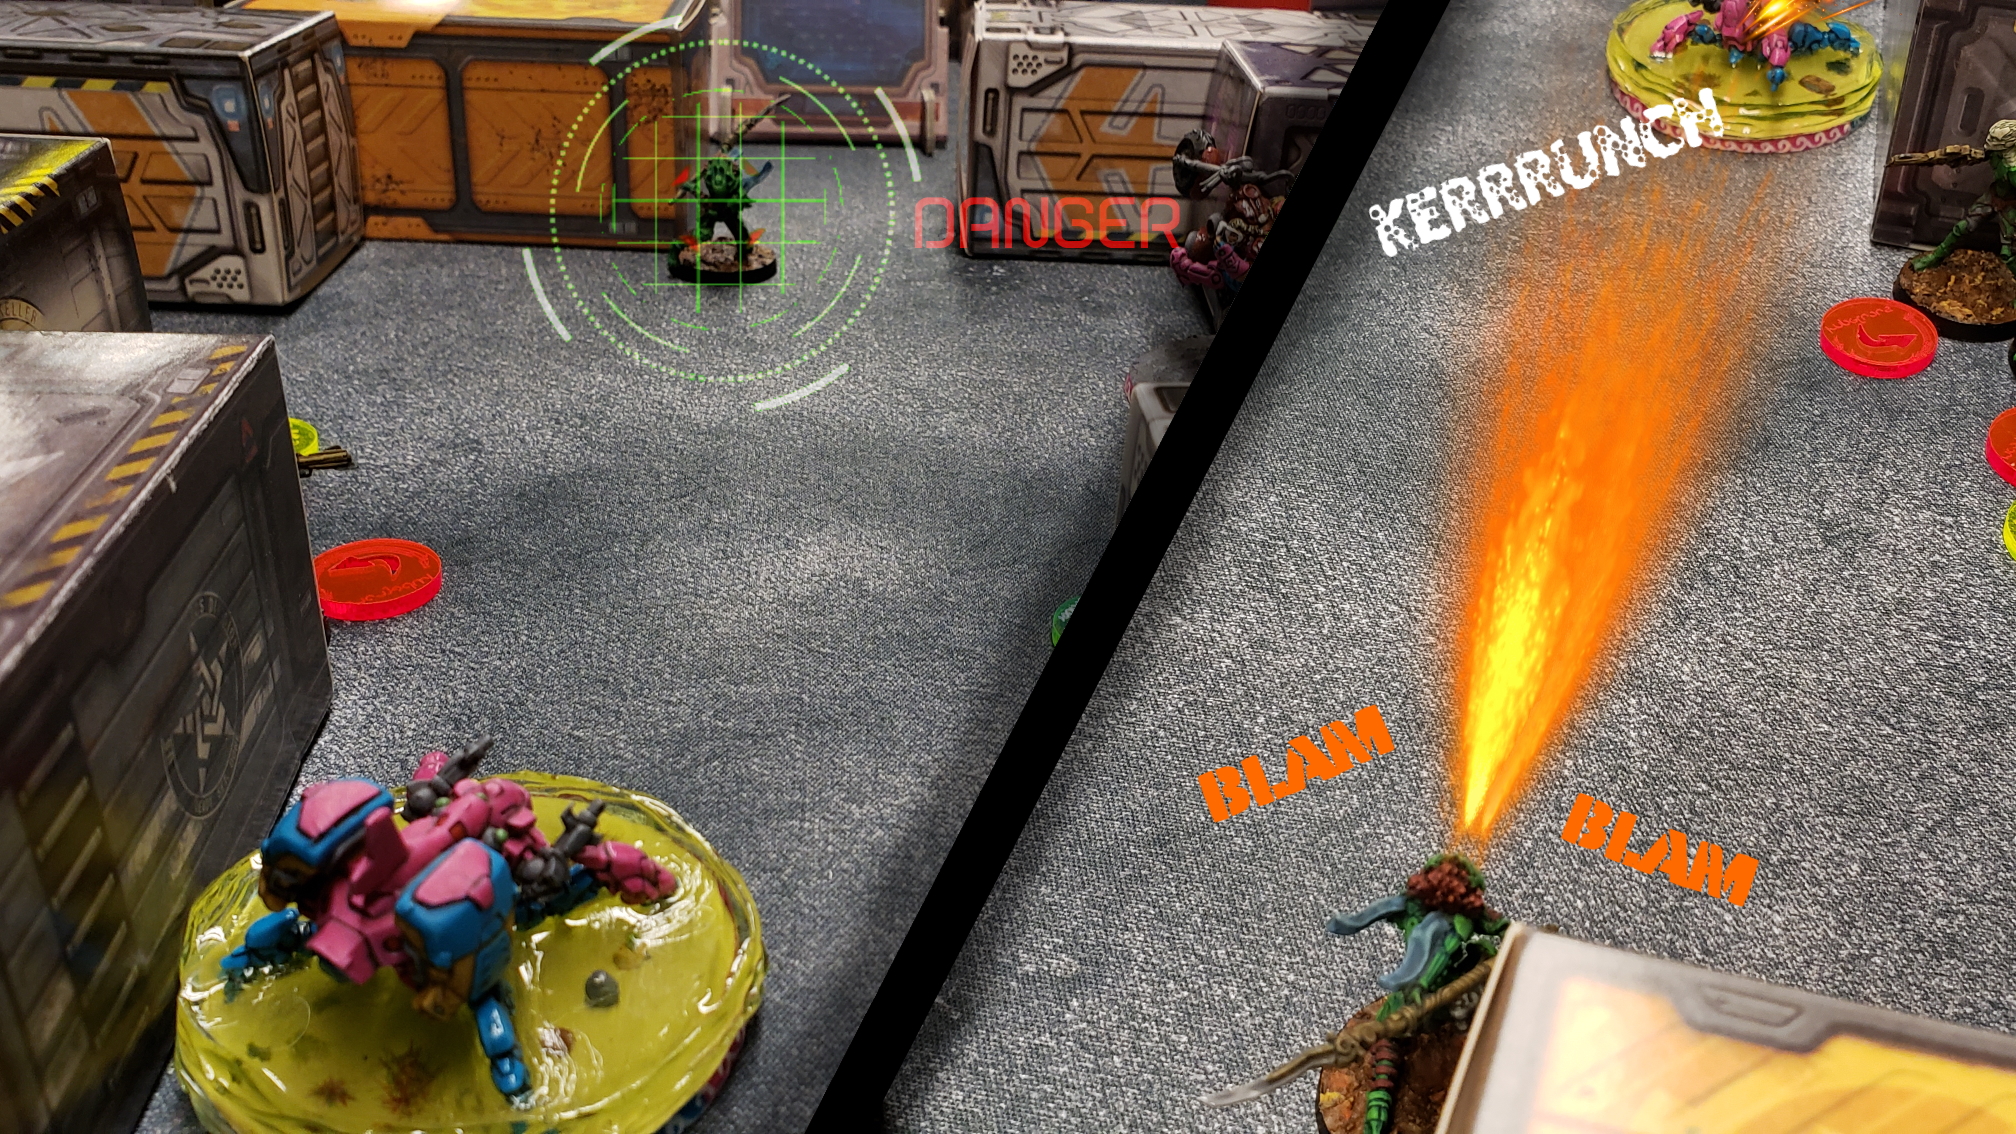
* Needing to remove the REM threat, Brridder elects to attack with his Taqeul. He peeks the corner and shoots at my TR bot - and we push with a mutual critical hit!
* Once more the same attack vector; this attempt yields a poor result for Tohaa - and the Taqeul ends up taking a wound.
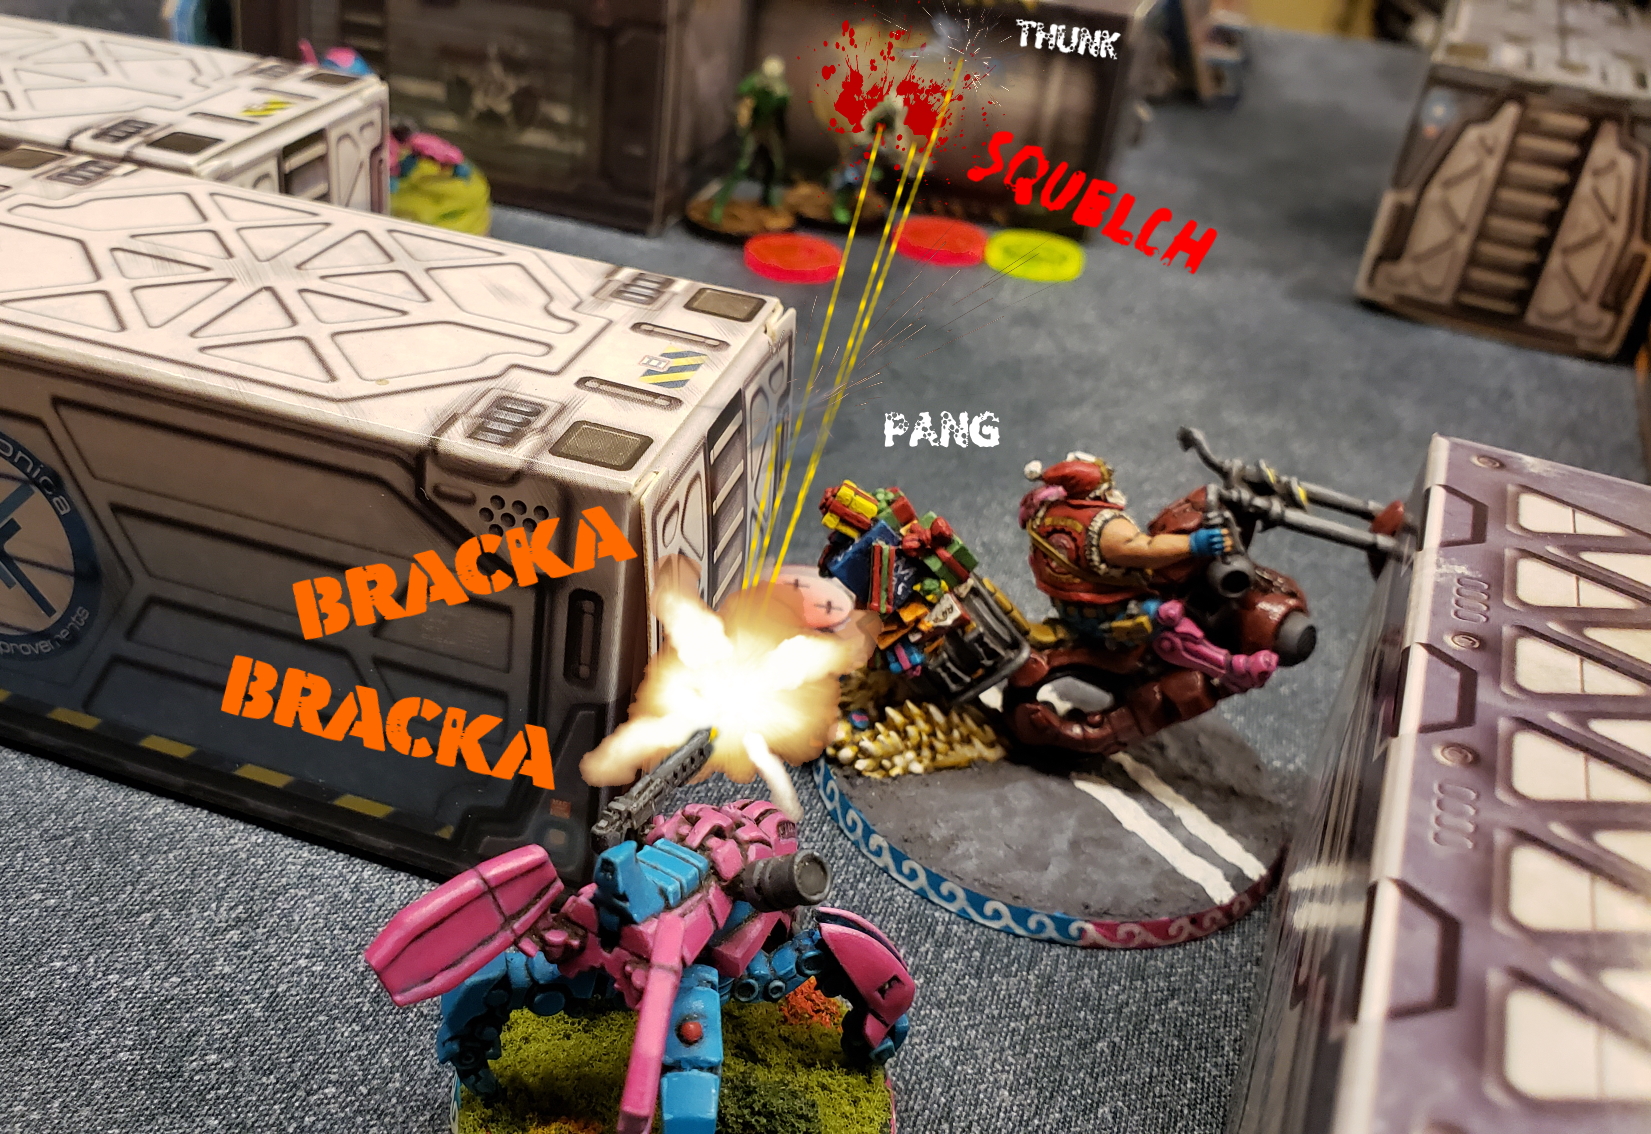
* Taking a different approach (and not wishing to risk the essential personnel), a camo token pushes into the room. I throw a discover with my Ghulam and a delay with the Kameel. Responding by "striking while the iron is hot", the Igao fires two boarding shotgun slugs into my Kameel - who falls into unconscious level 2 state.
* Opting to create some safe cover for his Sakiel Triad, the Taquel uses Mirrorball but also allows my Shihab REM a chance at a ZoC Dodge, which succeeds.
* The Sakiel team moves up and engages the Shihab in Silhouette contact with the Makaul as link lead. The REM chooses to strike the Sakiel instead of fighting back.
Brridder's Makaul scores a critical hit and another hit for a total of five saves - and my Shihab passes all five!
In addition, my Shihab scores a hit on the Sakiel with its PARA CC Weapon(-3), which leaves the target in IMM-A state.
* Pushing the melee further, the Makaul attacks again, this time managing to wound the Shihab into unconscious state.
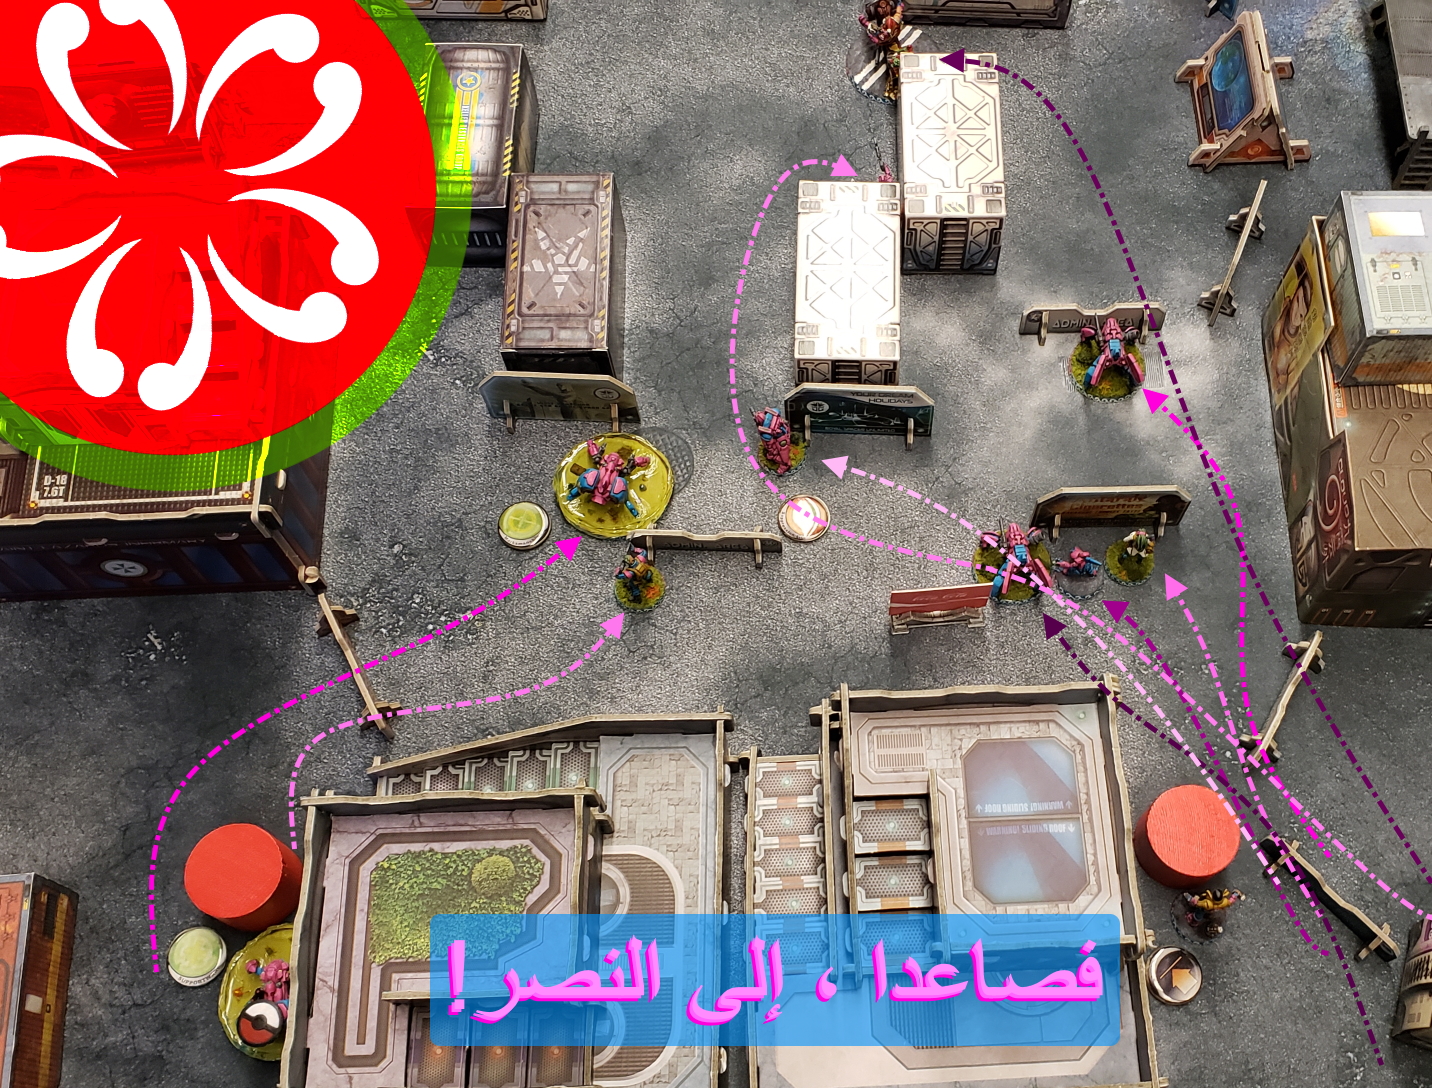
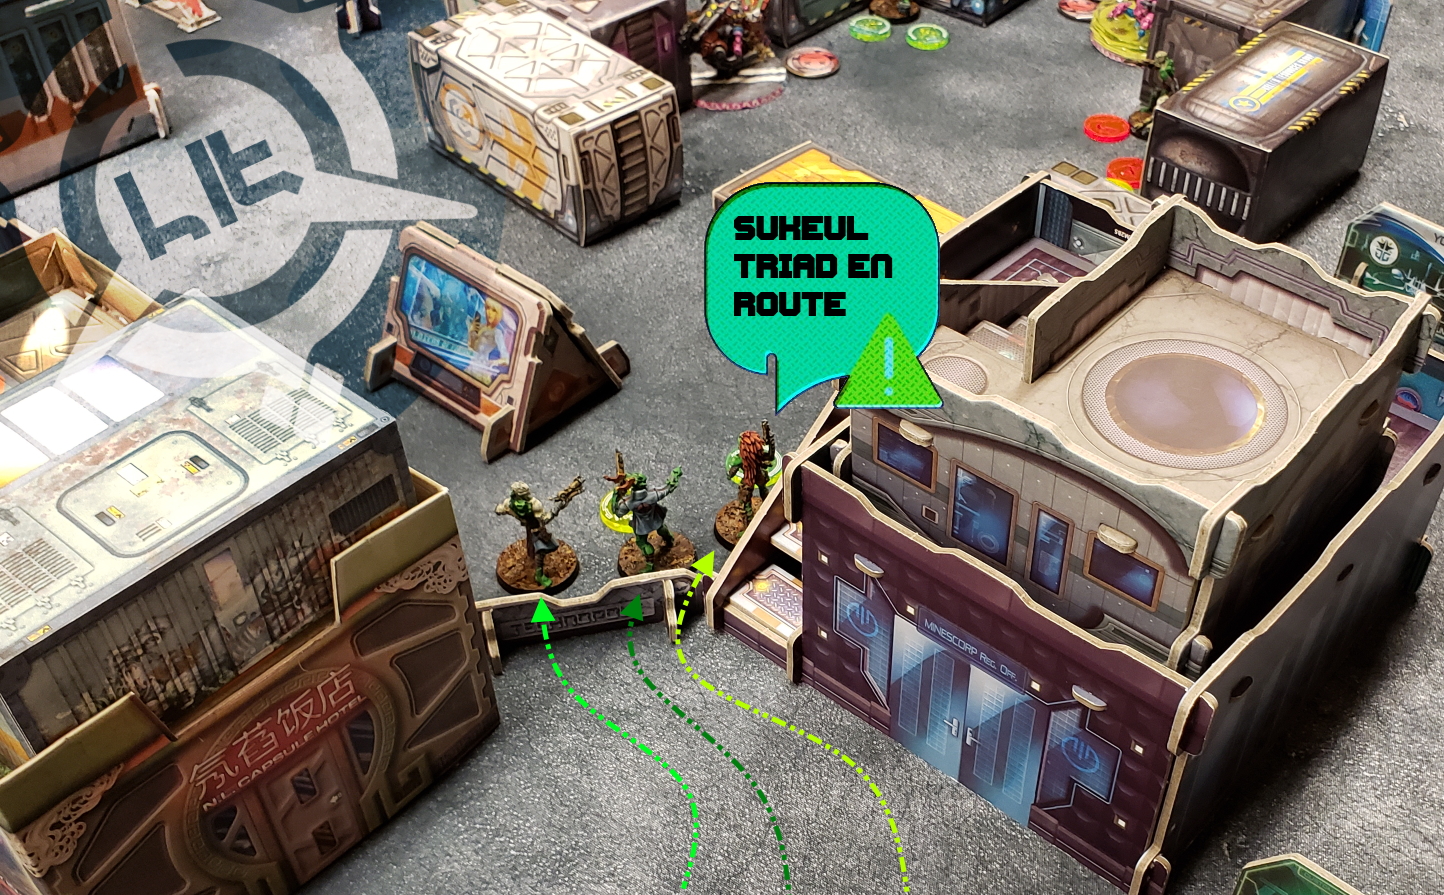
* With an eye on the objective, the Sukeul Triad spends two orders moving into the Panic Room as well.
* The final order sees the the Makaul/Sakiel team dodging, and the Immobilized warrior breaks free despite the -6 PH roll.
End of Turn 2, and again 2 OP to Brridder for dominating the Panic Room with Essential Personnel inside.

[- Top Turn 3 -]
I begin the turn in Loss of Lieutenant.
* My Shihab starts the turn off by shooting at the Sakiel/Makaul team, fruitlessly.
* I activate my Monstrucker, and attempt to revive the unconscious Shihab - and fail.
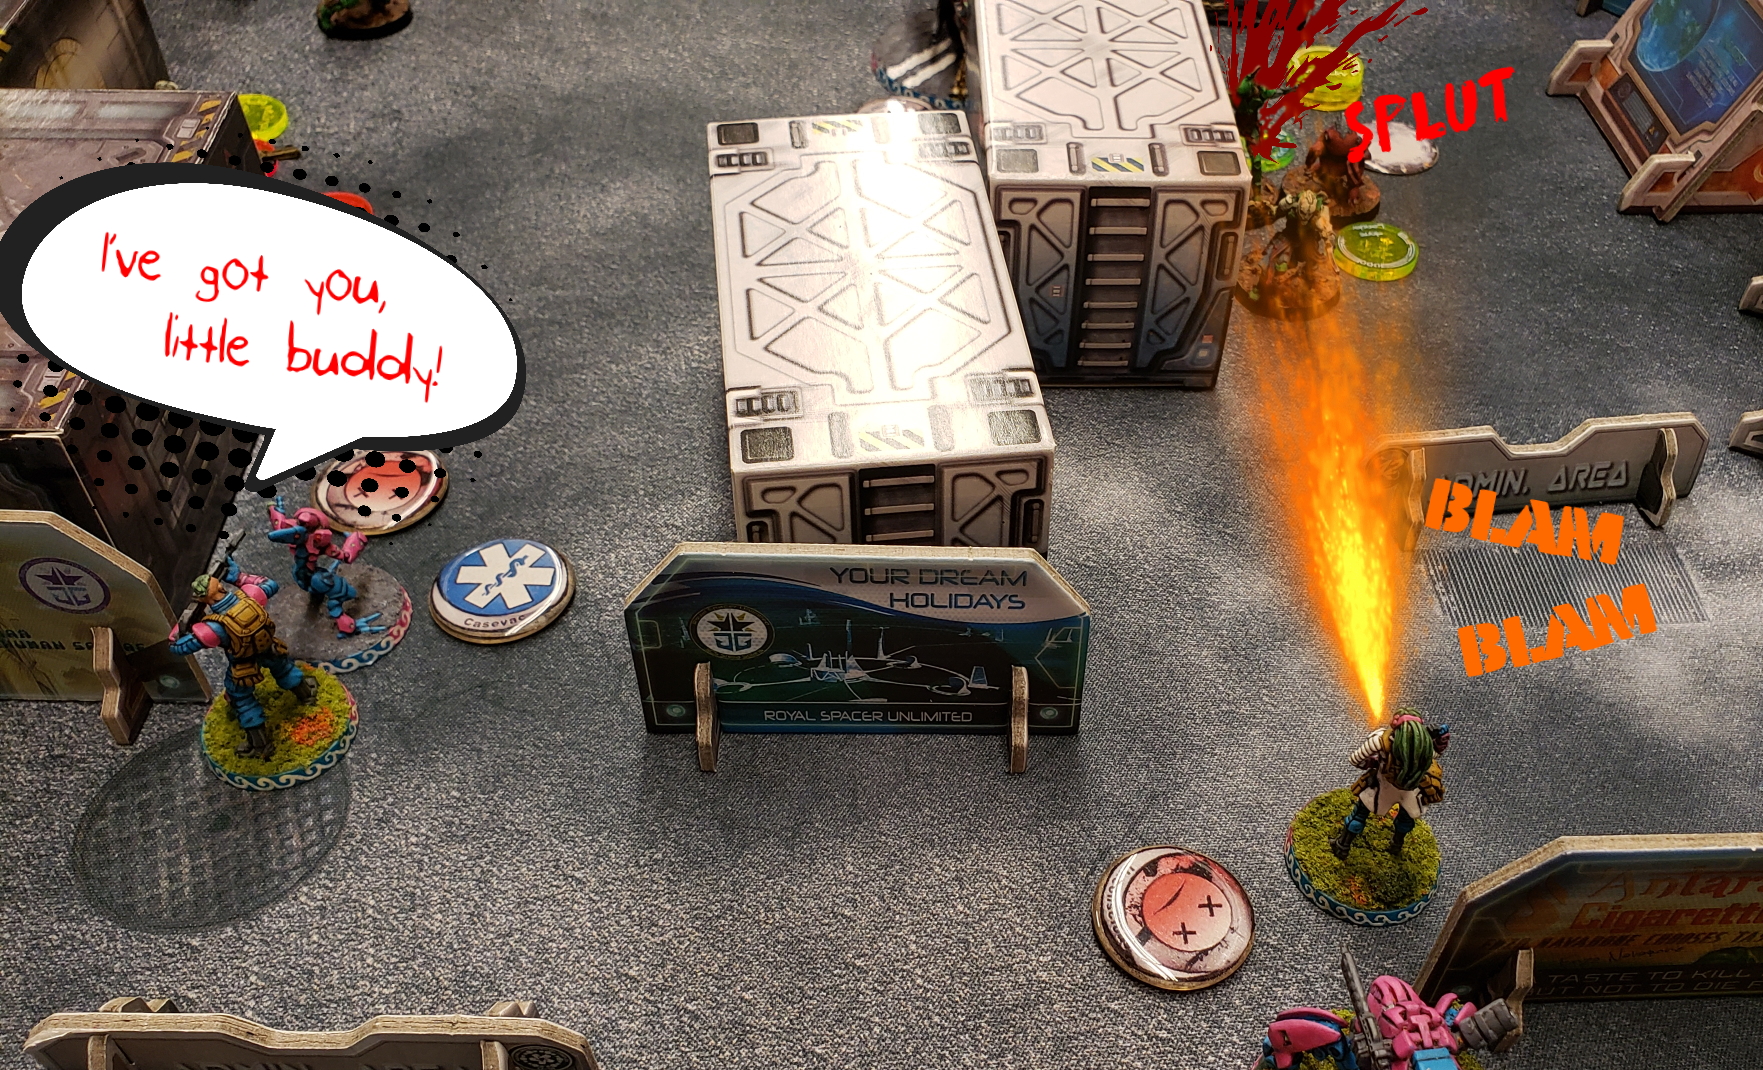
* My Ghulam Doctor rushes forward and trades her life to down the Sakiel
* No other options left, I use my Ghulam Number 2 and enter Casevac state with the unconscious Nasmat (hoping to score at least one point this game).
[- Bottom Turn 3 -]
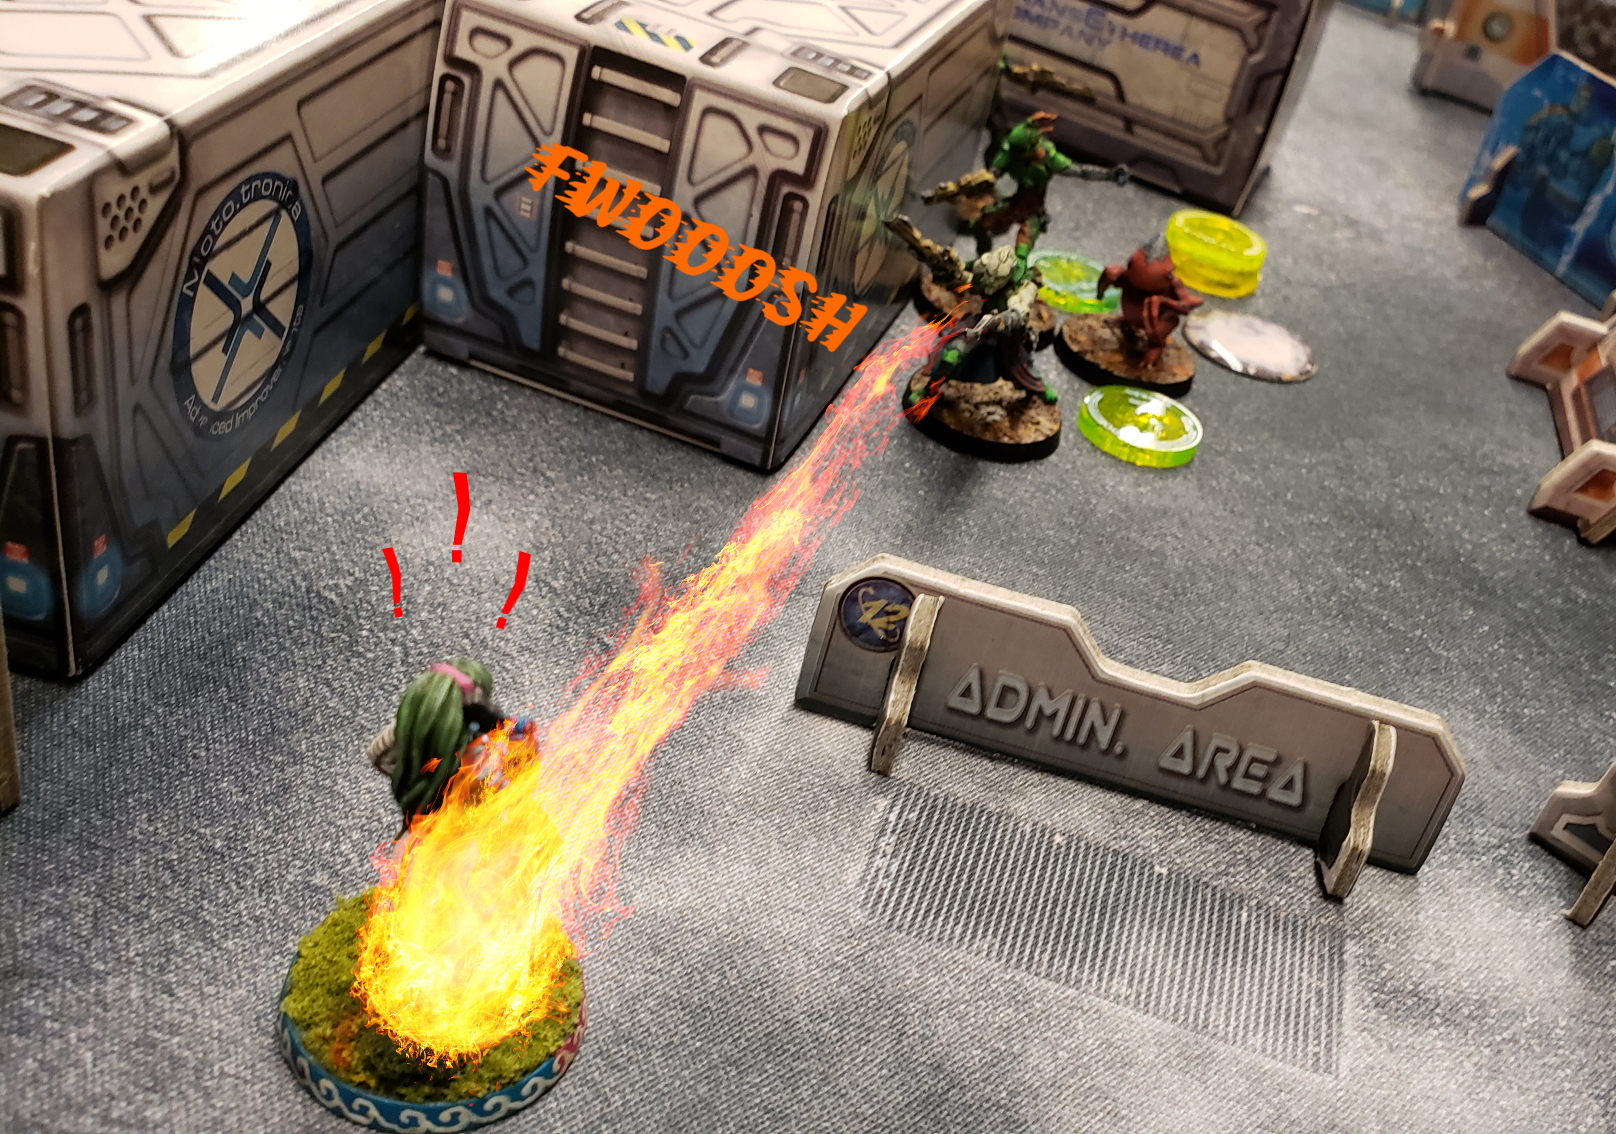
* The f****ing Taquel kills yet another model, rendering my last Ghulam unconscious and denying me any points this game.
* Tohaa is unable to score the classified and idles out the turn.
End of Turn 3, and yet again 2 OP to Brridder for dominating the Panic Room with Essential Personnel inside.
[- Game End and Scoring -]
Remaining forces:
Haqqislam - 27 VP
Tohaa - 157 VP
At the end of the game, Tohaa has more Victory Points than Haqqislam, awarding 3 OP to Brridder
Final Score:
Haqqislam - 0 OP
Tohaa - 9 OP
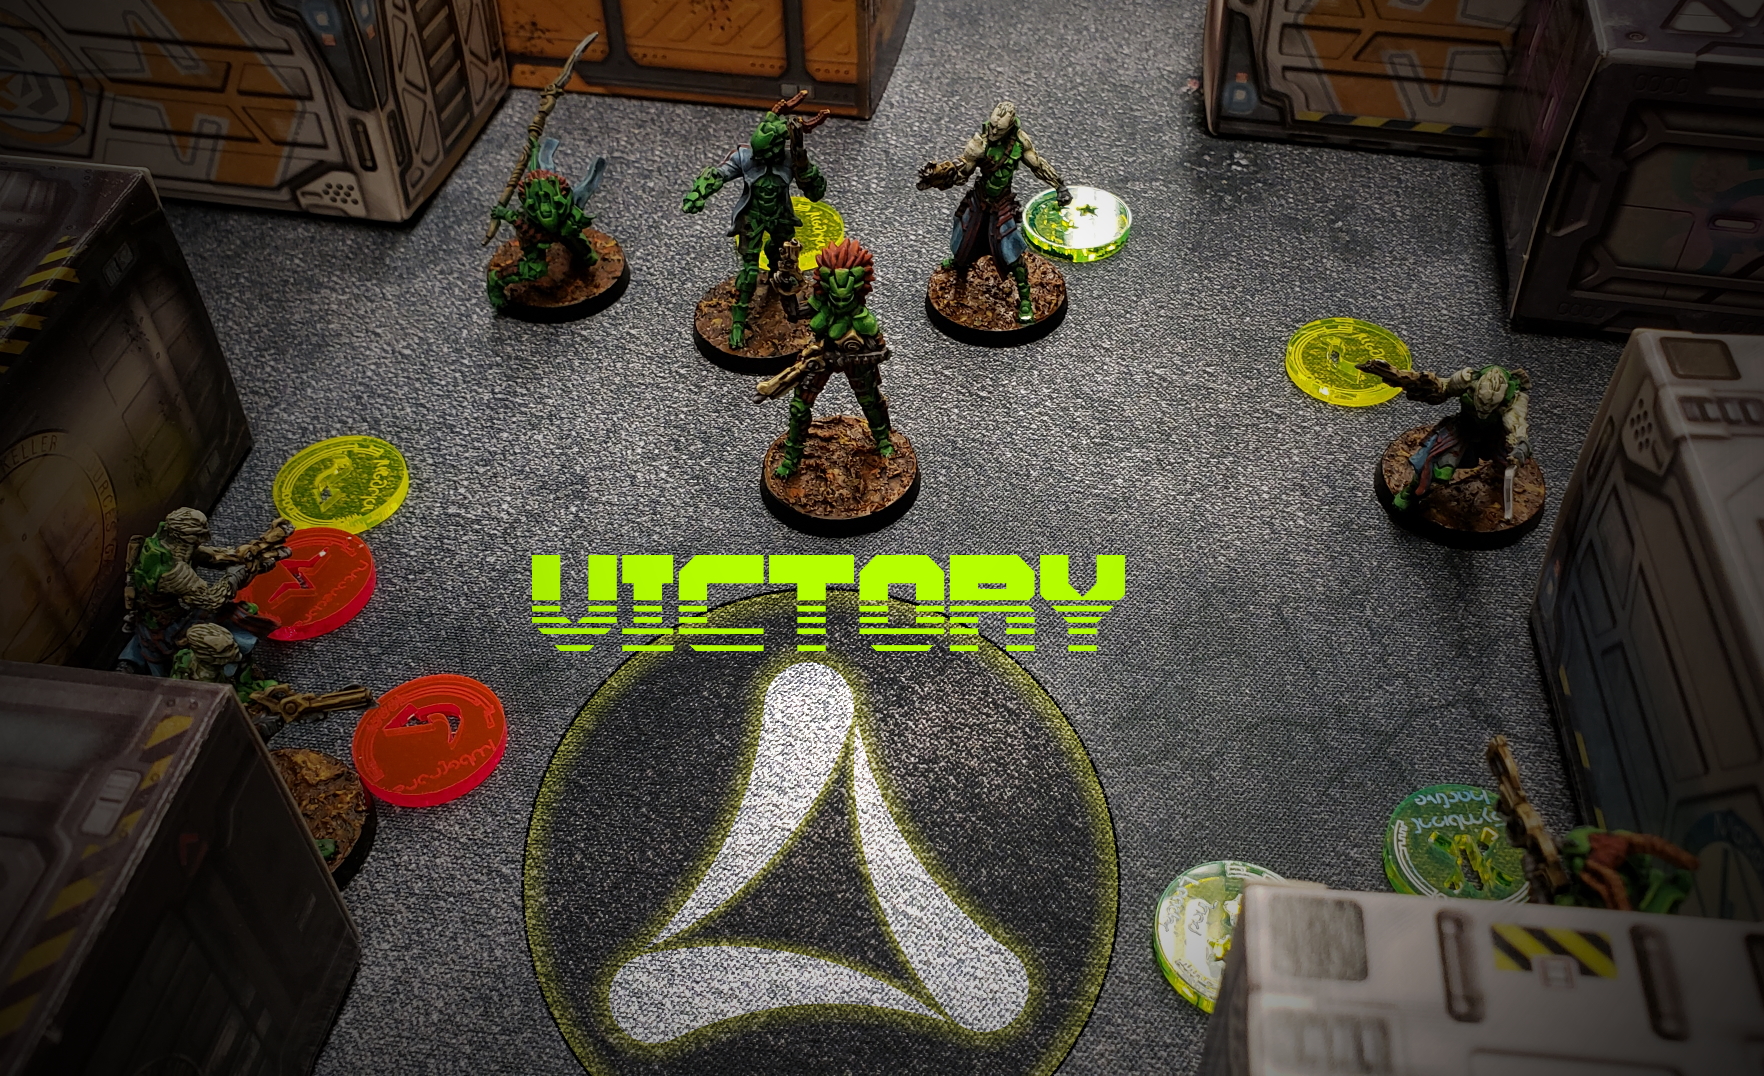
With the destruction of the remaining Sugar Eaters, the Candy Corps' Soruşturma Bölümü attaché is left completely out of the loop. Not only were these agents unable to verify the allegations made by Ms. Candy Double, they were unable to report back to the Sultanate. Though there was indeed development of bioweaponry at the Darpan XenoStation, the truth of the matter shall remain shrouded in mystery - for now.
Battle Report Author

Army Lists Used In This Battle
Recommend Commander For Commendation
Share this battle with friends
BrridderWins

Amazing report! With that said: Pheroware should be banned by the Concilium Convention!
Great report! And so colorful 😀
Excellent report and eventhough it was not the deadliest unit, the Kameel probably is one of the deadliest I have seen so far!
Tu nombre me da hambre! XD jajajaja
Really nice graphics. Your effort shows.
@Vanderbane now that’s an inside joke if ever I’ve seen one 😉
Fantastic report commander!!
Don’t recognize the table…
Awesome report, nice narrative and great editing of your pictures. Love to read reports like this.
Fantastic report, and amazing models!