Fought At Darpan Xeno-station: Xenofarm Gamma
651 days 2 hours 45 minutes ago
What are YOU doing here?
300 POINTSRumors abound throughout the MayaNet regarding the mystery that is the Darpan Xeno-Station. Most commonly heard is the surface-level accepted story: O-12 is using xeno plant material to develop more efficient crops for a brighter, more equitable future. Big deal, right? Scientists have been genetically enhancing crops regularly since the early 21st century. What isn't as commonly known is the allegation of bio-weaponry development using alien genetic material gathered from the mess on Paradiso. Lesser known still, is that some of these rumors have indeed been confirmed by informants from the Equinox Group - that being said, official actions and sanctions cannot be undertaken without stronger proof than secondary witness statement.
It is with that preamble that I bring you to the current situation. As representatives of the Soruşturma Bölümü, we find ourselves executing a search order brought forth by allegations asserted by one Candy Double. Though she did not reach out to us directly, these claims are as alarming as they are publicly available - so it falls upon our Hortlak officers to "get boots on the ground", if you will. The office is hoping to find that Ms. Double's claims are completely without merit, in which case we are intent to move forth with prosecution and censure. That said, the story has never changed, not even the smallest detail; and I balk at accepting these allegations as truth. If indeed bioweapons are being developed, even with the intent to combat alien physiology, the potential for system-wide calamity is very real.
With that, we will head out as early as 0400 hours. We're hoping to get this insertion done with as fast as possible, so that we may return our efforts to preparing for action elsewhere. Though the expectation is that of a bloodless engagement, it is still possible (as always) to encounter trouble. There are a fair few skirmishes happening around the region. I've requisitioned a few clandestine operatives as well as requested the unit be led by Khair ad-Din of the Asawiras. I suspect a direct line to the Sultanate will speed any dissemination of findings. Oh, and one last note, I've managed to requisition the Nazarova twins' service for this operation. Hopefully this will quiet activity by the Kum, at least until the operations are concluded. Quiet on the homefront would be a nice shift of pace, allowing for a greater share of manpower directed in the proper direction.
- Agent Rayyan
{Note: I keep hearing the men talking about a problem with Durians. I'm sure it's nothing, but I believe that some further inquiry is warranted}
It is no surprise, that Yu Jing forces would have a presence here. Candy's allegations insist that they have been developing bio-weapons with no real indication of intent. Supposed communiques claim that these terror weapons would be used to strike the alien menace, but it's a slippery slope to go down. Bio-warfare has been considered heinous for ages, and that's not going to change now. It would be quite easy to use these terror tools to subjugate the Human Sphere - and that decision seems like a choice the Empire of Yu Jing might just make. That they are here does not bode well.
--[ MISSION: Highly Classified ]--
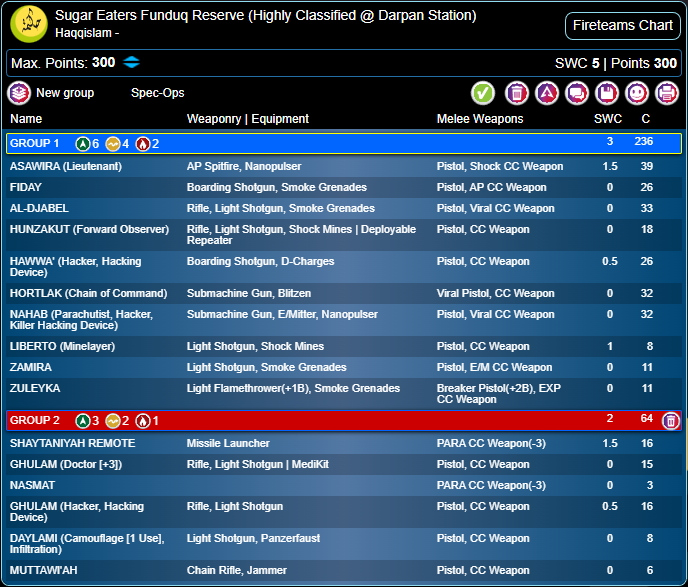
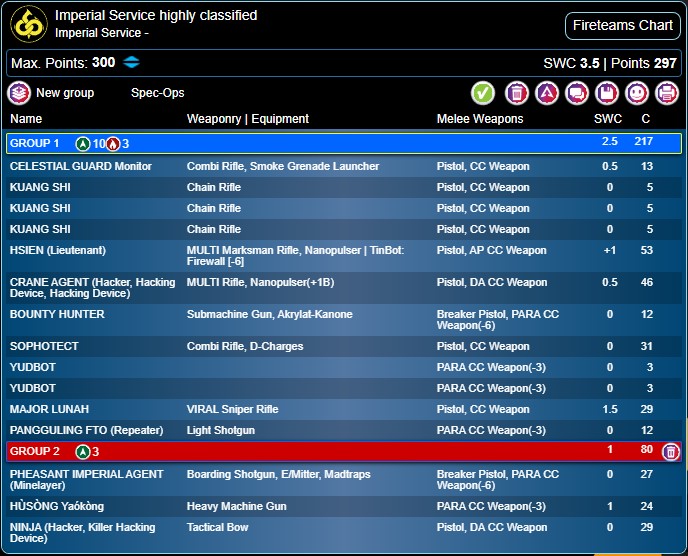
300 Points, Vanilla Haqqislam vs. Imperial Service
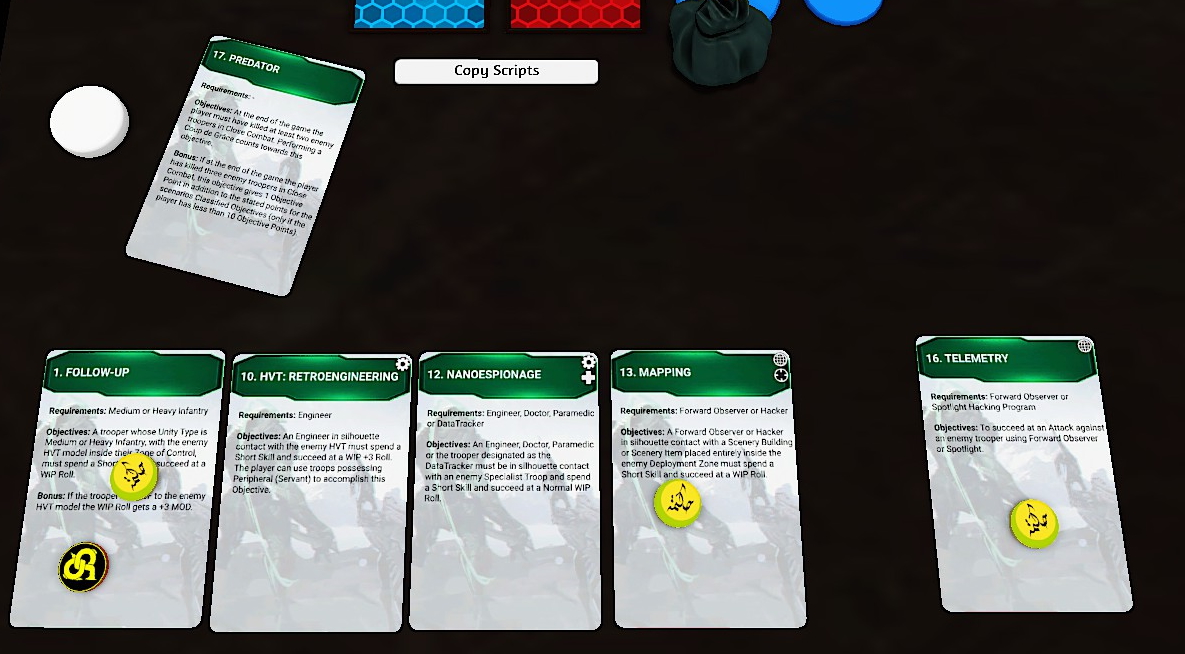
Our game begins with the following classified objectives:
Follow-Up , HVT: Retroengineering , Nanoespionage , Mapping
Haqqislam Secondary Objective: Telemetry
Imperial Service Secondary Objective: Predator
We roll off for first turn:
Imperial Service wins with a 12, Haqqislam loses with a 15
Imperial Service opts for deployment, making Haqqislam deploy first on the red side.
During deployment, Imperial Service rolls booty for the Bounty Hunter and gets Mimetism (-6)
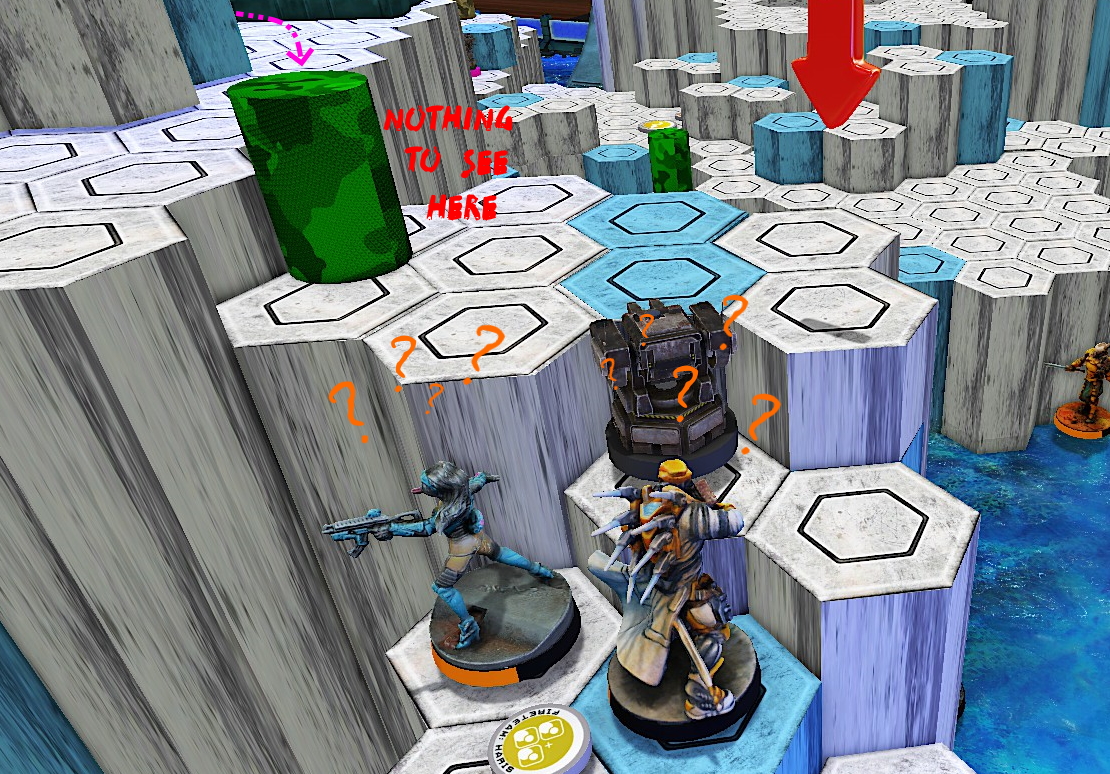
Al-Djabel attempts to roll for deep Impersonation deployment, and fails on a 19. He is forced to the deployment zone outside of Impersonation state, though the nature of the terrain as well as the 4" extension in this mission allows for a decently safe placement.
My opponent chooses to sap two orders from group 2, reducing the regular order count to only 1.
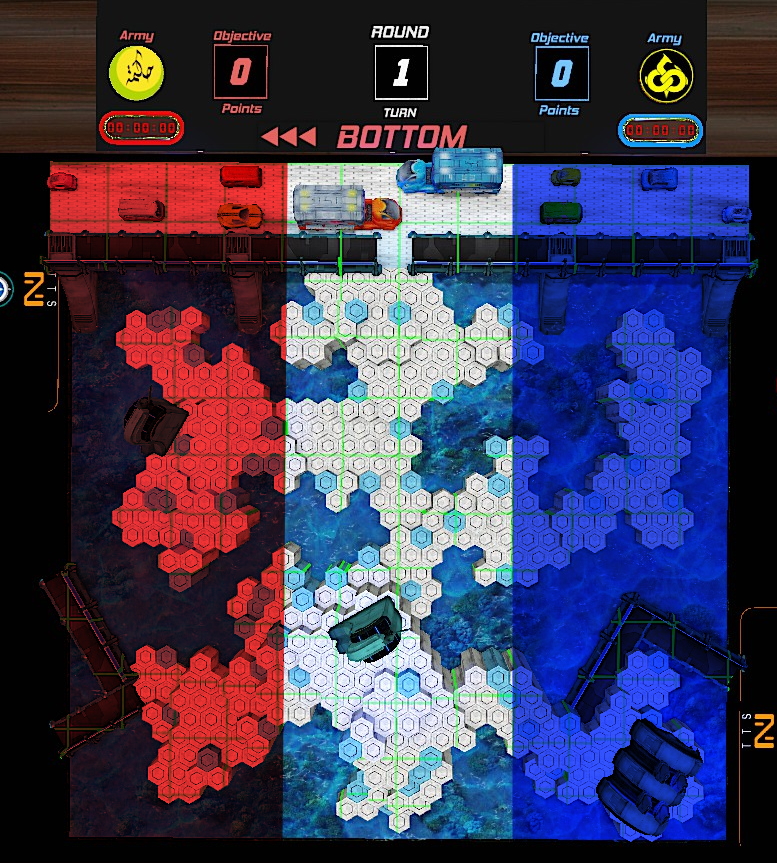
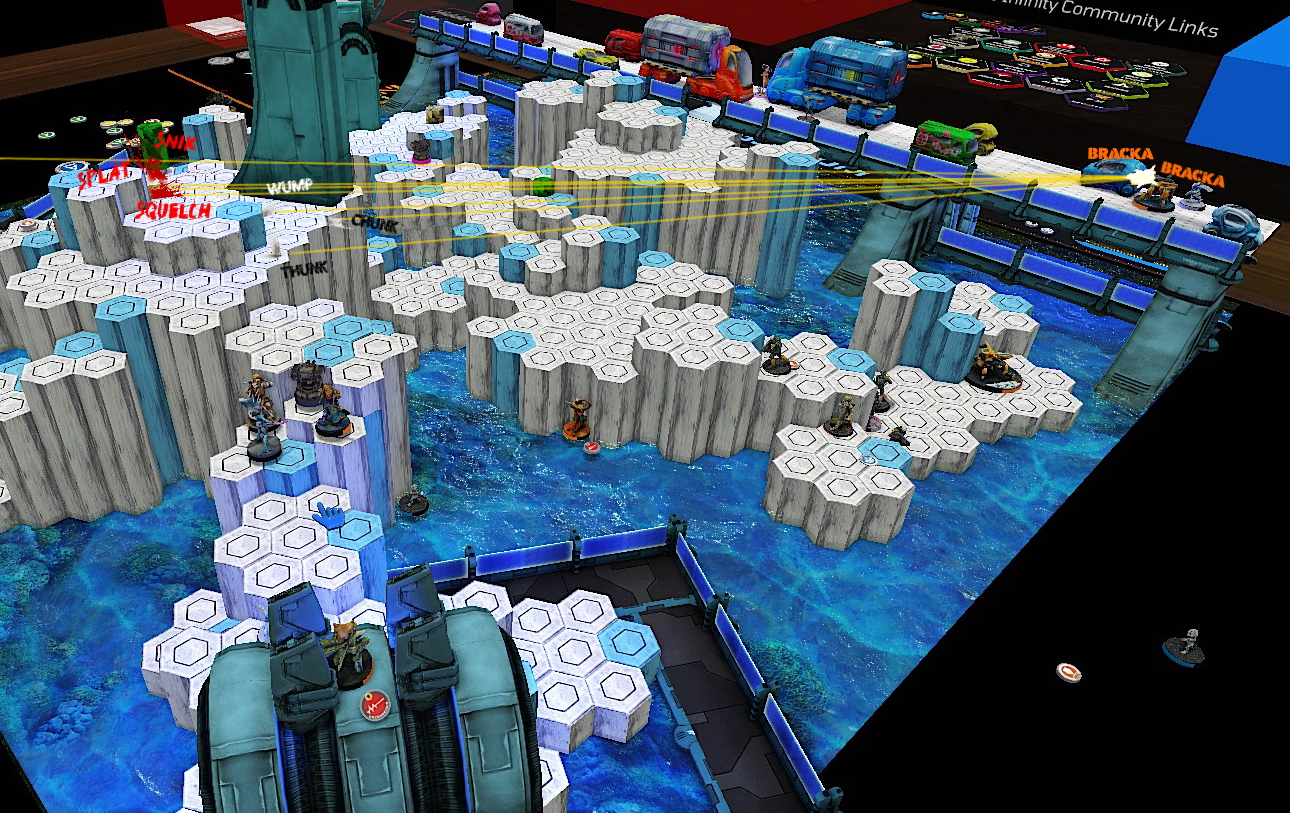
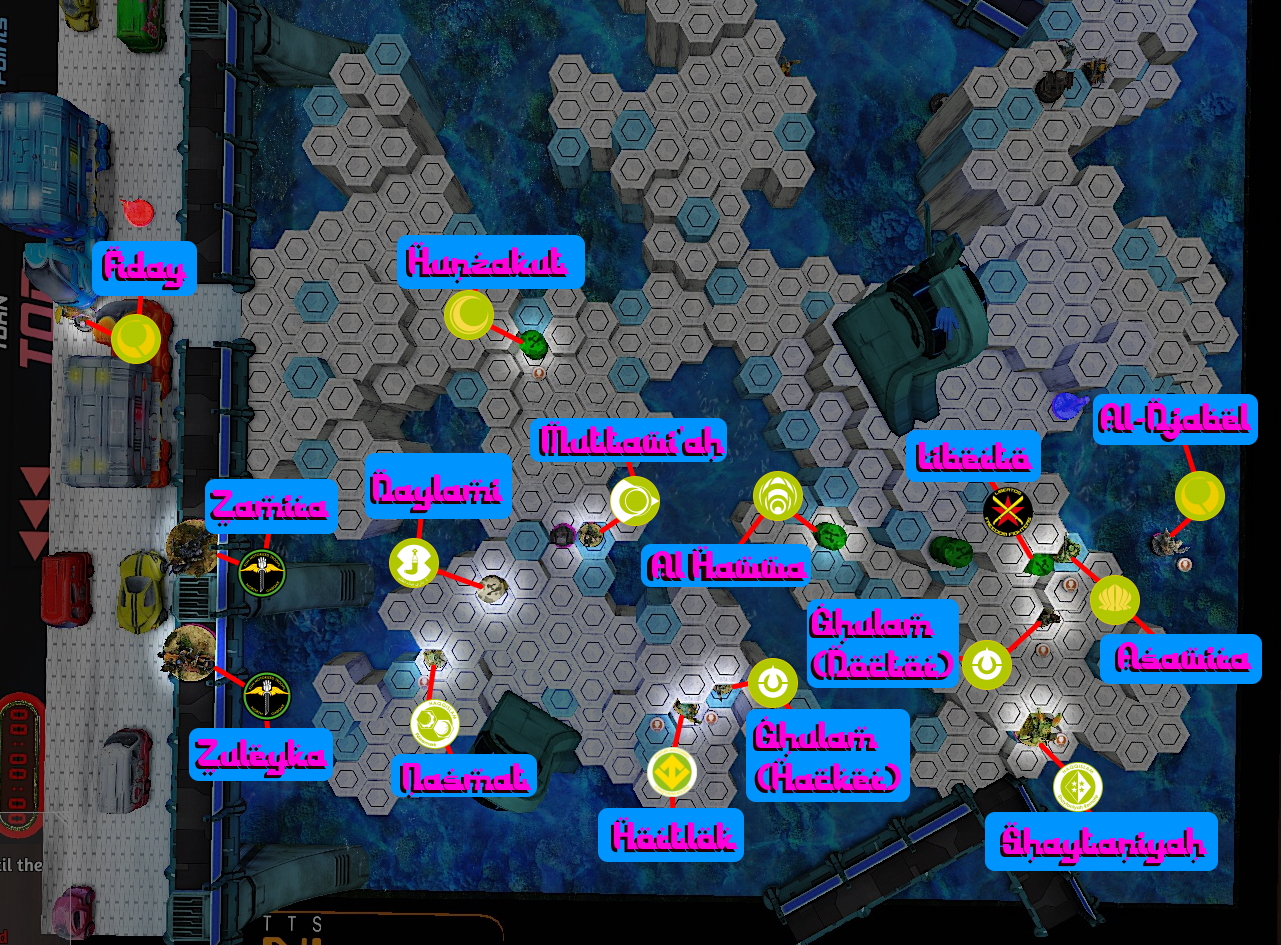 Haqqislam deploys with multiple camo tokens, one of which is a mine placed by the liberto. Djabel's failed impersonation deployment leads to a position behind the coral cliffs.
 Imperial Service deploys a Pheasant with a Mad Trap on the lower level, and a hidden Ninja near the board half.
[- Top Turn 1 -]
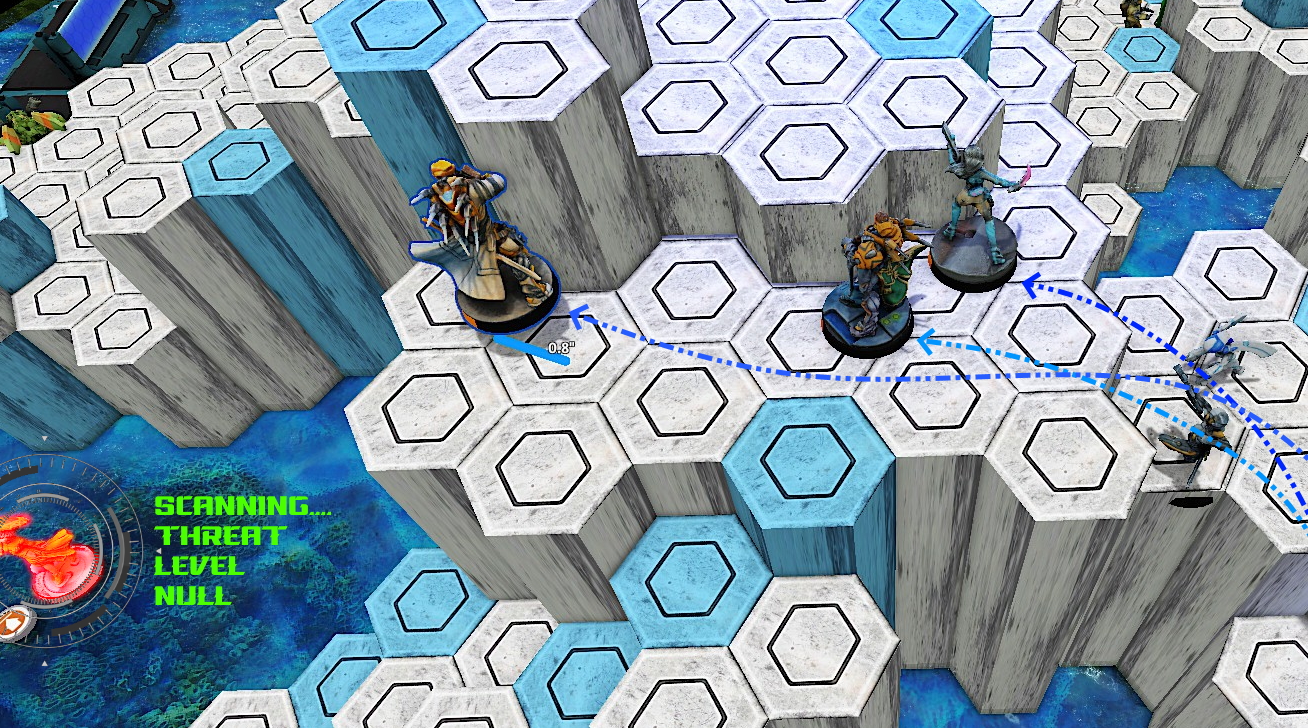
* Muttawi'ah uses Impetuous order to advance towards the Kuang Shi core team. A second movement would bring undue danger, so he opts to dodge - failing.
* On the offensive, but attempting to protect her sister, Zamira rushes forward into the LoF of the Hùsòng. The REM fires with Total Reaction, hitting once while Zamira fails to throw a smoke grenade. She goes dogged.
* Hoping to avoid a repeat of the last move, Zuleyka moves forward. Since she is blocked by Zamira's silhouette, she throws a smoke grenade in an attempt to free her sister for an attack vector. Success on a 9!
* Zamira charges further forward, towards the dangerous Hùsòng. This time the push goes better, and she is able to get a smoke grenade off.
* Zamira roars forward, managing to be outside of the LoF of the Hùsòng. A Kuang Shi sees her as she goes, choosing to dodge. She chooses to shoot at the Kuang Shi - @ 16.6" she needs a 9, and rolls two 20s.
* Again, Zamira rushes into the fray, this time reaching silhouette contact with the Hùsòng as well as the Yudbot {Player note: big mistake}. The Hùsòng fires with Total Reaction but Zamira manages a hit with E/M CCW. Hùsòng unconscious Lvl 1 as well as Isolation and IMM-B. Unfortunately for the Nazarova twin, the Yudbot manages a PARA CCW hit, and she ends up in IMM-A.
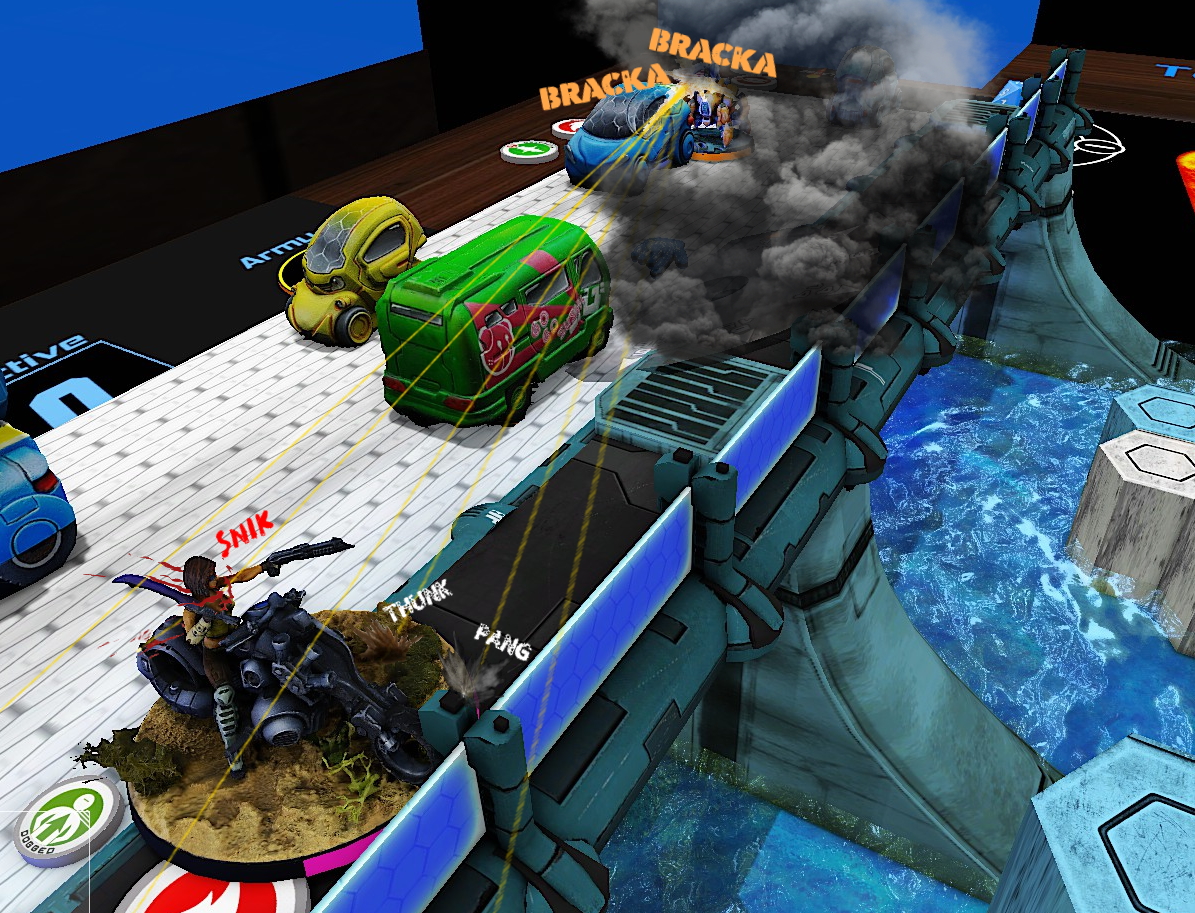
* The Asawira, Khair ad-Din, pushes forward and fires a full AP Spitfire burst vs a Kuang Shi's dodge roll, and loses the f2f.
* Enraged, ad-Din moves a bit further forward, Major Lunah reveals to shoot back. Splitting the burst as follows: 2 into the Pheasant Imperial Agent, 1 into the Turret, and 1 into Lunah. Only hit is on Lunah, and she makes her armor save, there's nowhere to go with Guts.
* Again, the Asawira fires a split burst from cover: 2 into the Pheasant Imperial Agent and 2 into Lunah. One hit on the Pheasant, and one failed save. Two hits on Lunah, and two saves made.
* Yet again, the Asawira continues shooting - this time, 4 shots into Lunah. Two hits on Lunah, and two saves made.
* Fully seeing red, ad-Din fires at hit target one last time. The full burst hits, and Lunah finally fails one armor save. Frenzy will activate during the states phase.
* With no threats in view, the Asawira elects to enter Suppressive Fire.
* Al-Djabel spends the last order to re-enter Impersonation State
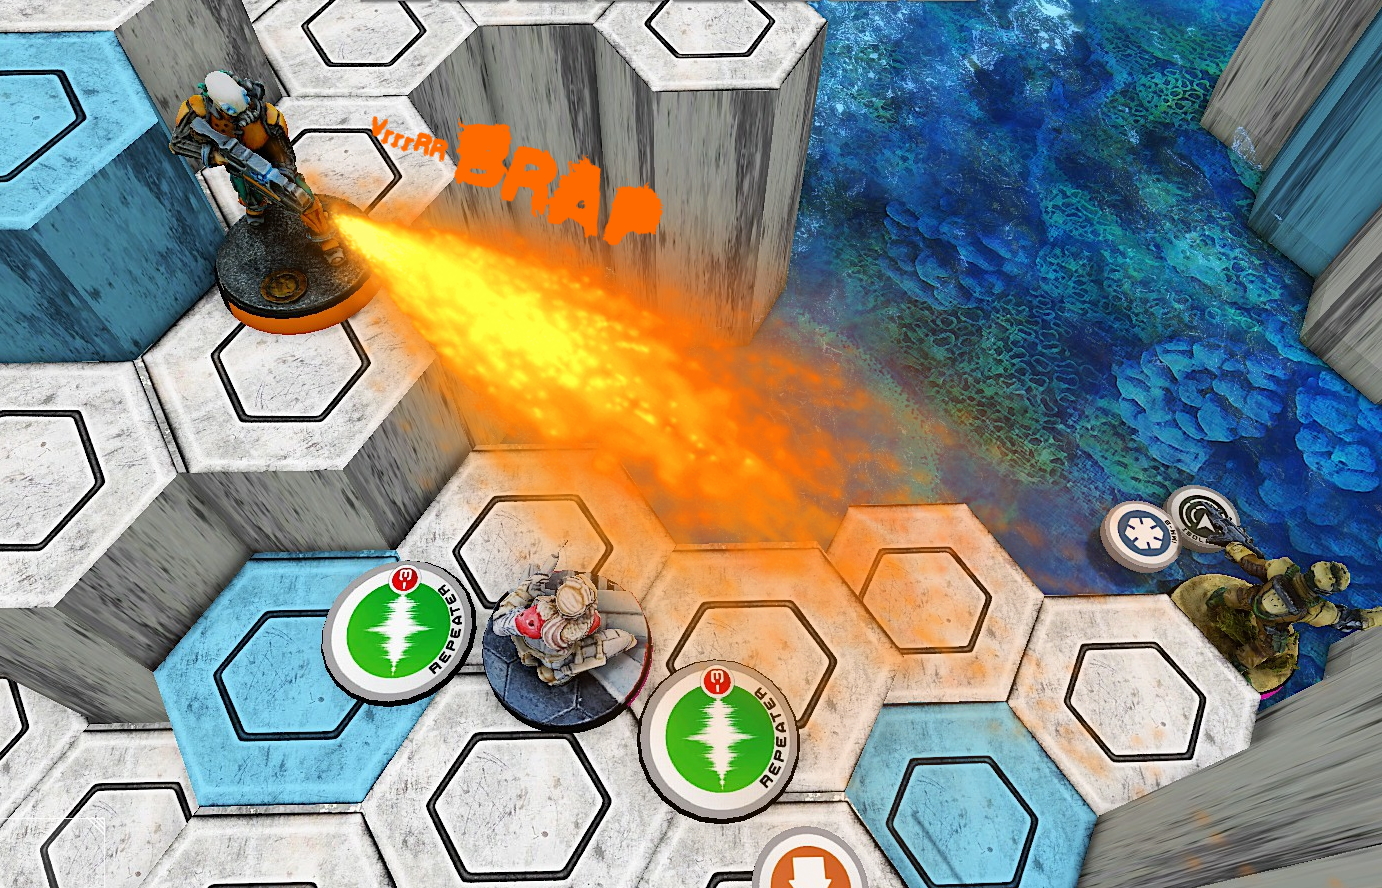
* Finally, the Muttawi'ah rushes forward to attempt a Jammer attack on the Celestial Guard. He ends up 9.9" away, and misses. The Pheasant's Mad Trap is activated, and glues the Muttawi'ah in place.
[- Bottom Turn 1 -]
* The turn begins with the Sophotect activating several times to remove the negative states from the Hùsòng Total Reaction REM, undoing the efforts of Zamira - but wasting precious orders on the task.
* The Crane Agent takes lead of the Haris, moving forward. Seeing the Muttawi'ah, he elects to shoot the impetuous trooper, who fails two armor saves and proceeds directly to the dead state.
* Wishing to move the Haris forward, the Celestial Guard tries to lob a speculative smoke grenade to cover the Haris team's approach, failing.
* Without another option to attack the Asawira, Talkno moves his Hùsòng forward towards an attack vector - shooting at Zuleyka as it goes. She fails her smoke attempt but is only hit once, passing the armor save.
* The Hùsòng continues the assault and moves a bit more, shooting a full burst at Zuleyka. She attempts smoke again, but suffers three wounds and is removed from the field.
* One mission in mind, this Total Reaction REM moves into a dangerous position with view on my Asawira. Khair ad-Din elects to dodge, losing Suppressive Fire state. He's hit once but is confident in holding the position, so holds.
* With the final order, Talkno's Hùsòng fires a full burst at the Asawira. Failing another dodge, the Asawira also fails another two armor saves and enters dead state; disallowing a regeneration attempt.

[- Top Turn 2 -]
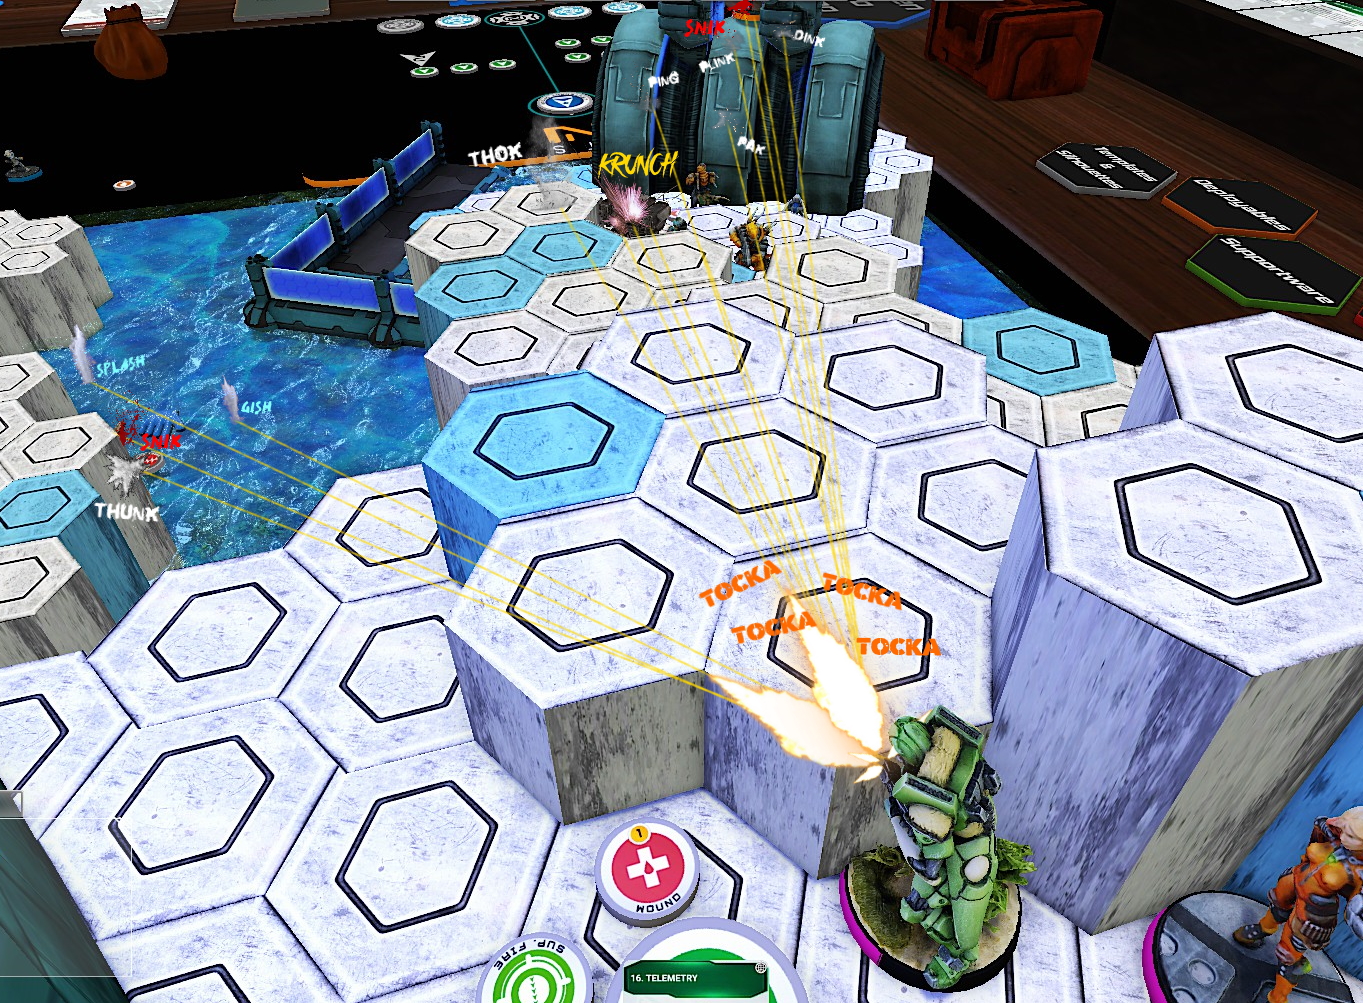
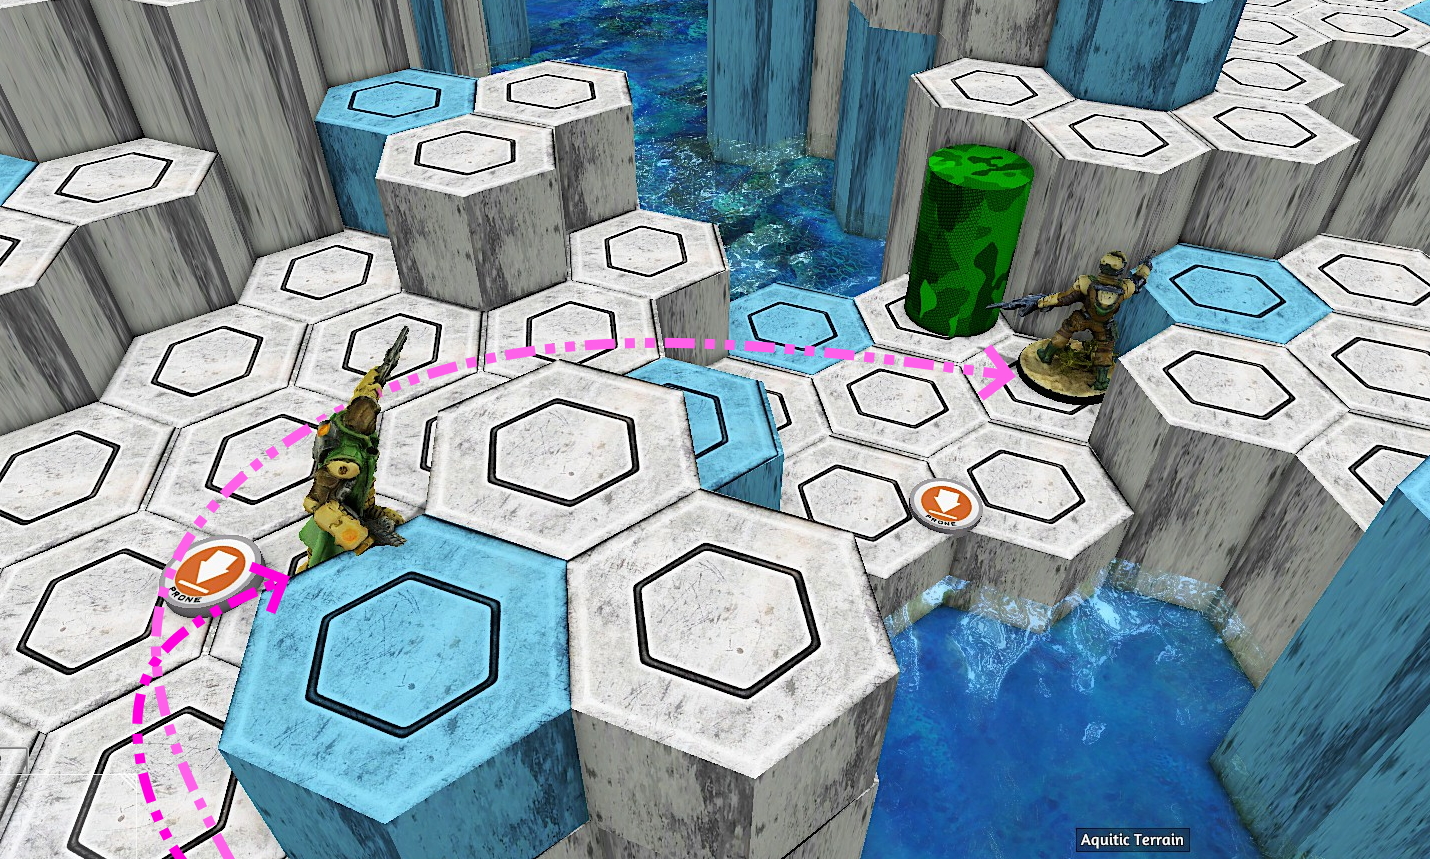
* My Fiday uses two orders to move forward along the bridge towards the Hùsòng. With a third order, she engages the REM and renders it unconscious.
* The Nahab hacker uses Parachutist to walk on the side of the board just outside the Yu Jing deployment edge, ready to attempt a classified next turn.
* Ready to hold the coral ridge, my Liberto moves forward towards the Hsien Haris and takes up an aggressive template ARO position.
* With an eye on achieving my secondary objective, I elect to move up the Ghulam Hacker for an attempt next turn.
* Still focusing the mission, I spend my Lieutenant orders on my Hortlak Janissary (Chain of Command). Agent Rayyan trusts in his No Wound Incapacitation and Mimetism (-3) to allow for some safety next turn.
{Player note: Talkno pointed out how quiet this turn was, but the real action was about to begin!}
[- Bottom Turn 2 -]
* Talkno reveals his hidden Ninja and walks up to my camo token, which declares delay. The Ninja opts for a discover, and the Liberto fires a shotgun template, hitting the whole Haris as well as the infiltrator. He gets some really unlucky rolls and ends up with both the Ninja and Bounty Hunter unconscious, as well as a wound on Crane Agent.
*Seeking retribution, the Celestial Guard shoots his combi rifle at the now-revealed Liberto, who responds by placing a mine... and surviving the armor save.
* As this will not do, once more the Celestial guard shoots at Liberto, who fails the enhanced dodge but survives two hits.
* Now fully done with this nonsense, the Hsien takes charge of the situation and rushes up towards this over-ambitious Helot scum. The Liberto shoots and mine blows up - declares dodge but the aquatic irregular wins the f2f and renders the Hsien unconscious.
* Frustrated to no end, the Crane Agent pushes up now and manages to kill the Liberto, ending this fluke of a defensive play.
* In a bid to recover from the heavy losses, Talkno spends three orders on the Sophotect and uses her Yudbot to cancel the unconscious state on the Ninja, Hsien, and Bounty Hunter. A command token is spent to reform the broken link team.
* The Hsien moves forward as link lead, and completes Follow Up on the HVT with a critical success.
* Having completed a classified, the Haris moves back into a better defensive position, attempting a failed discover on Al-Djabel while en route.
 The command Haris elects to move back to a safer position from which to launch a turn three assault.
[- Top Turn 3 -]
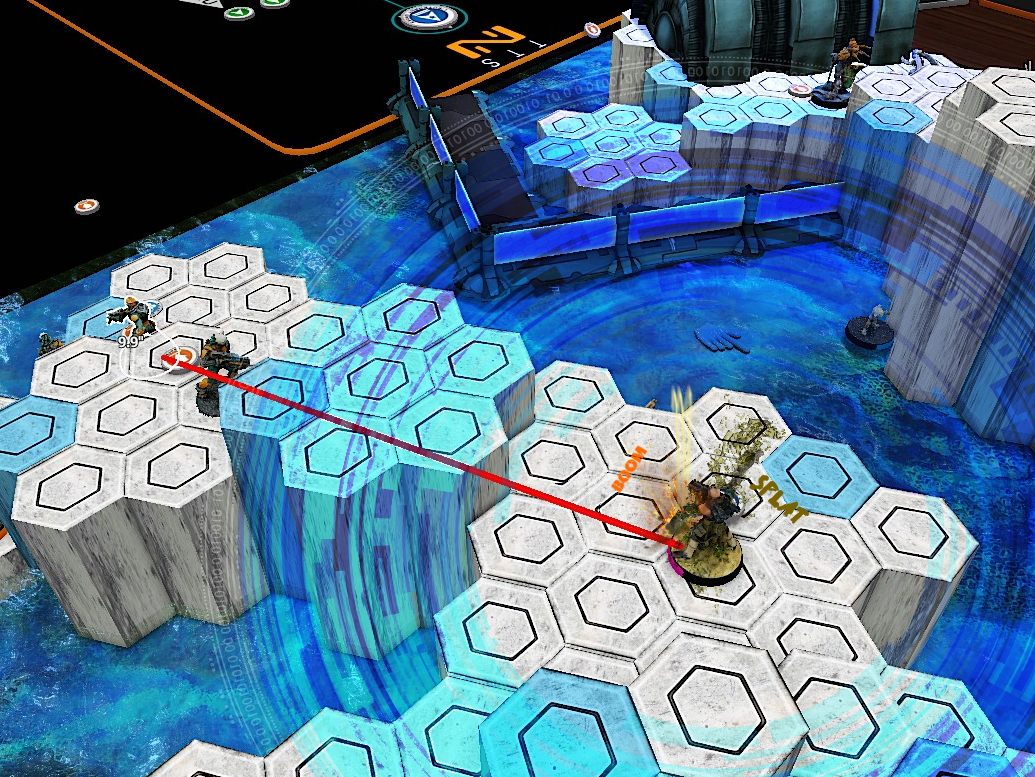
* Having stood around doing nothing, I elect to use the Daylami. He fires a Panzerfaust at the Authorized Bounty Hunter despite the mercenary's acquired Mimetism (-6) and cover. The Bounty Hunter fails a dodge attempt with an 18, and the Daylami hits with a the Panzerfaust on a 4, removing the defender from the board!
* Needing to snag Telemetry this turn, I move my Ghulam Hacker very near the ZoC of the Ninja. It elects to dodge, but I choose to come no closer in favor of staying out of the ZoC of the Crane Agent.
* Ready to execute my plan, I move the Hacker into danger range. The Ninja fails her trinity attempt, the Crane Agent hacks with Oblivion, and the Yudbot dodges. I choose to spotlight the Yudbot, which is a successful attempt, netting targeted state as well as a completed secondary classified objective. The Crane Agent's Oblivion attempt is successful, leaving the Hacker in an Isolated state.
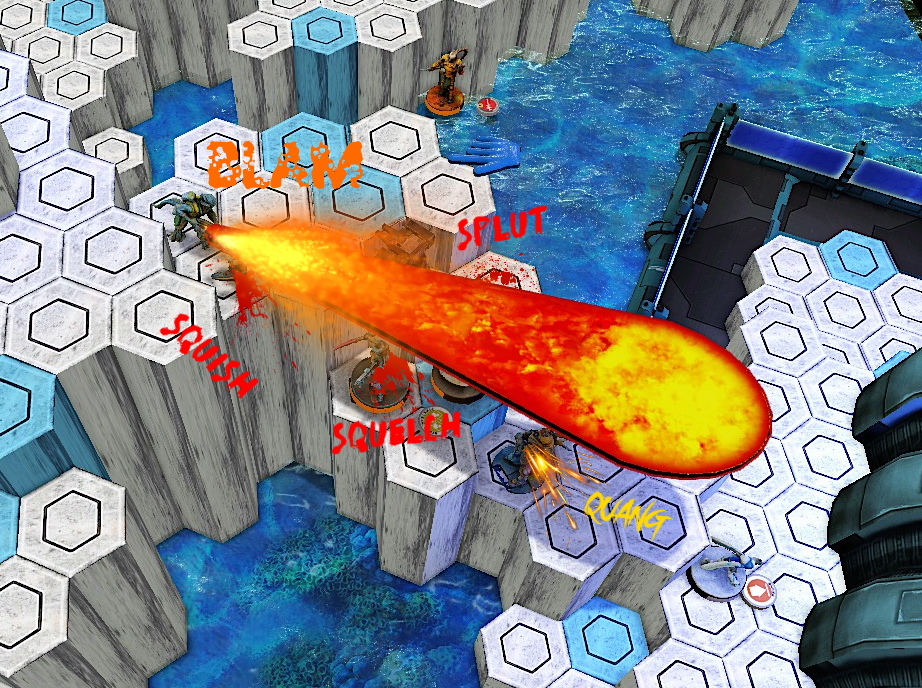
* With the final regular order in group two, my Shaytaniyah REM fires a Guided Missile at the Yudbot, killing the peripheral, the Ninja, and the Defensive Turret F-13.
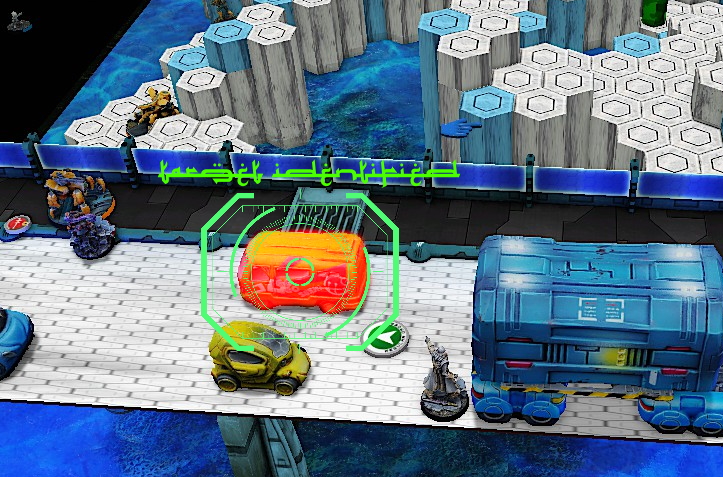
* I move the Nahab into position and complete Mapping on the pickle van just inside of the enemy deployment zone
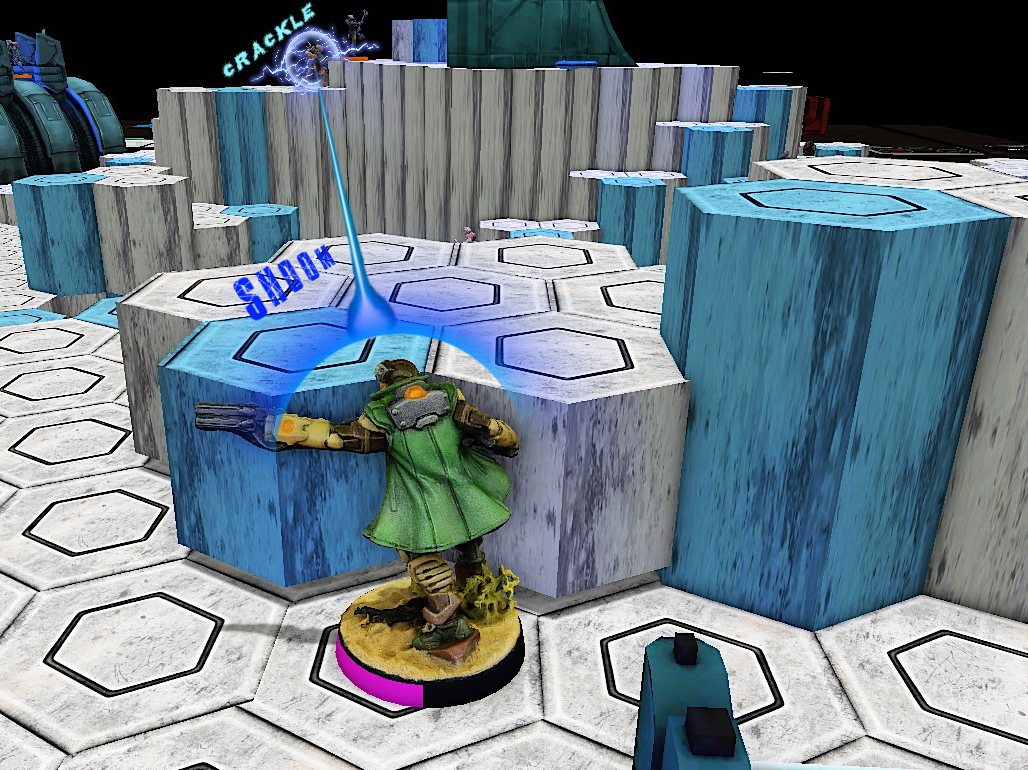
* On a tear, my Hortlak moves towards the HVT - with her in sight and in ZoC, I complete Follow-Up handily. From there, I move into a defensive position and fire a Blitzen at the Celestial Guard, putting this all-too-important piece into Isolated state. This blow renders the all of the Kuang Shi impetuous.
{Player note: I also move up the Hunzakut and drop a repeater, but this was merely to use its order - I probably would have been better off just leaving it in a Camo state - but hindsight is always 20/20}
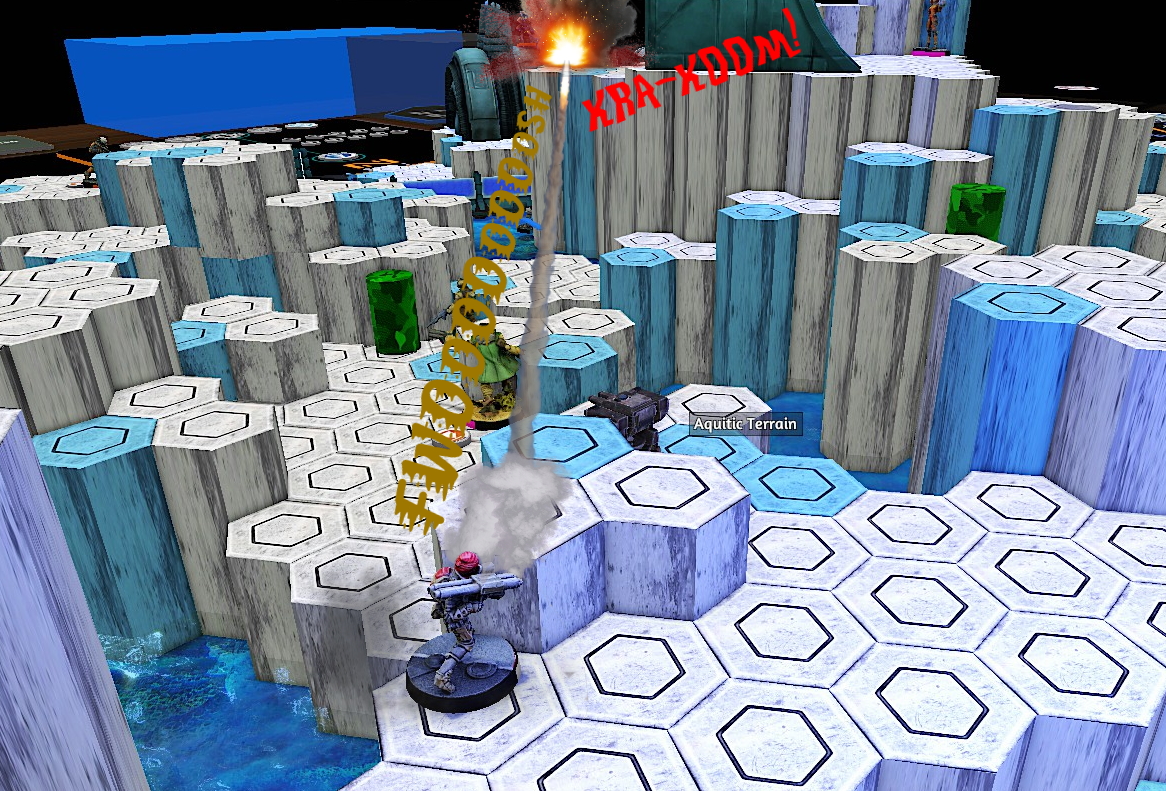
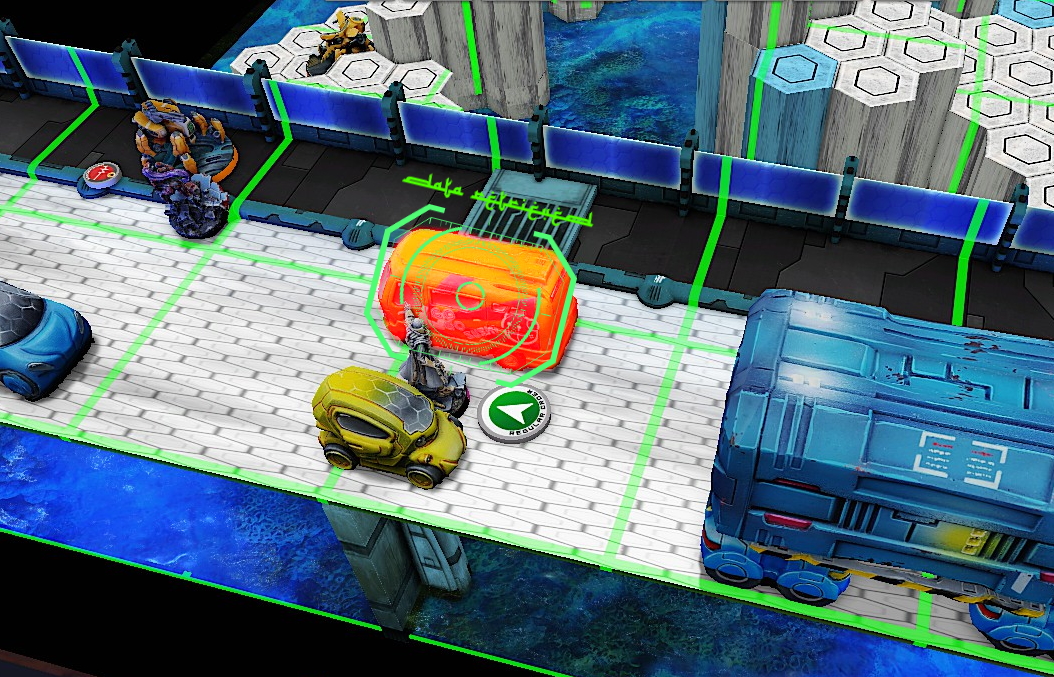 Easy as pie. The Nahab had one purpose, and the bridge made this objective particularly effortless and safe.
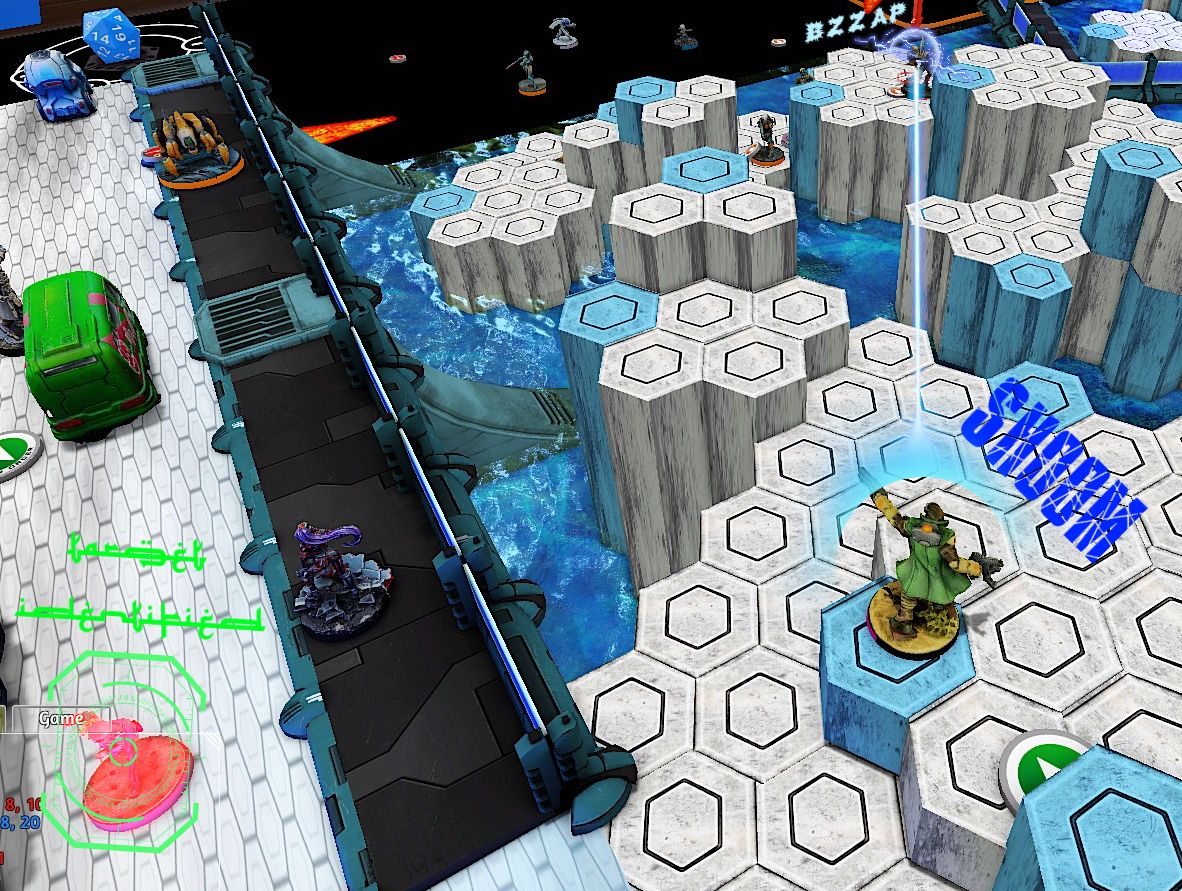 The Horlak snags a classified objective and also deals a blow to the order count of the Imperial Service.
[- Bottom Turn 3 -]
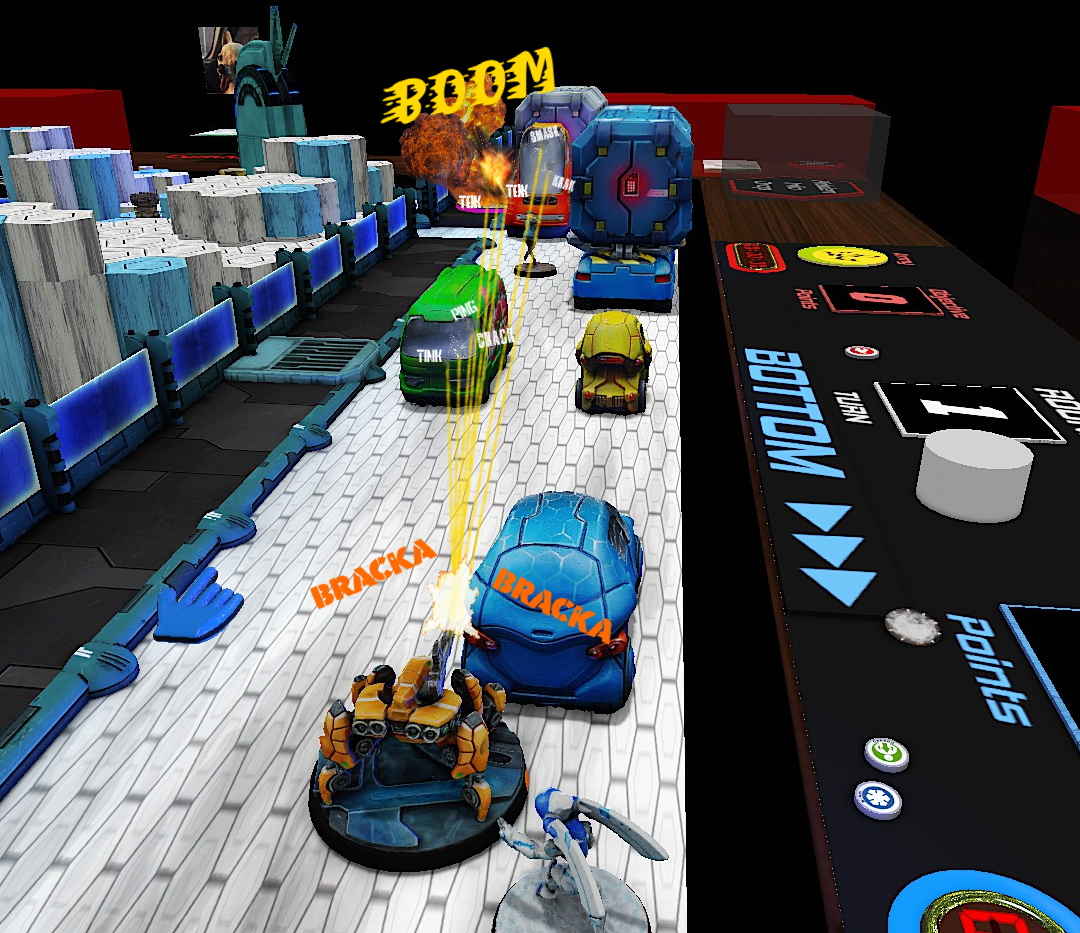
* The closest Kuang Shi charges forward and avoids a Submachine Gun shot from the Hortlak, While the Hunzakut drops another Repeater.
* Now in an offensive position, the Kuang Shi shoots his chain rifle across the immobilized Ghulam Haker, the Hunzakut, and one repeater. Unfortunately for the Imperial Service forces, the Ghulam and Hunza both successfully dodge, the repeater survives, and a Panzerfaust rocket from my Daylami blows up the attacker. The Kuang Shi goes directly to the dead state and fails to explode.
* Incensed, the Celestial Guard moves out and kills my Ghulam Hacker with his Combi Rifle.
* Talkno now moves his command Haris forward and shoots at the Horlak with the Hsien. Agent Rayyan fires back with his Blitzen's final shot... The Hsien rolls a 2, 3, and a 4 versus the Hortlak's 7. The Lieutenant is now Isolated.
* Attempting to snag a desperate secondary classified, the Crane Agent pushes forward under fire and tries to reach two separate close combat encounters with his remaining orders. He reaches silhouette contact with the Ghulam Doctor, attacking with a +7, rolling a 2. The Ghulam's return attack is an 8, losing narrowly, but only suffers one wound - falling unconscious instead of dead from the DA CCW.
* The Crane Agent is unable to achieve Predator and the game ends in a Haqqislam victory.
 With this hit on the Hsien, the Imperial Service forces are denied the bonus Lieutenant order for the mission. Did it make the difference? Perhaps this was the blow that secured victory.
In the end, the positioning on turn 2 proved monumental in snagging victory. I really thought that the game would have been a loss after wasting so many orders on the failed attacks with Zamira and the Asawira. Still, I tried to keep my cool and remember that even when Haqqislam wins, they always have a bloody nose. Talkno is always a cool cucumber and provides excellent feedback and shares strategies while we play. This was perhaps not his best performance, but I am quite elated to snag a victory at this location. Personal lore-wise it falls right in line with some of the outlandish ideas I have as this Candy Corps force, but this mission is also an objective as set forth by Haqqislam High Command.
I was a little bit saddened to play this via Tabletop Simulator as opposed to in-person, but circumstances beyond my control dictated the terms of this game. Still, it was great to get in a match, and even better to go at this versus one of my regular sparring mates. The availability of so many model options is a nice bonus as well (but holy hell how much I wish they were candy-colored).
Digressing,
Our game ends in Haqqislam victory as follows:
-------[- Haqqislam Scoring -]------
»At the end of the game, have accomplished more Classified
Objectives than the adversary (4 Objective Points).
»Accomplish Main Classified Objectives (1 Objective Point
for each one). {2x Objectives for a total of 2 OP}
»Each player has 1 Secondary Classified Objective
(2 Objective Points)
Haqqislam - 8 OP
Forces Remaining - 175 VP
----------------------------------
---------[- Yu Jing Scoring -]--------
»Accomplish Main Classified Objectives (1 Objective Point
for each one).
Yu Jing - 1 OP
Forces Remaining - 168 VP
----------------------------------
With the failure to achieve their victory conditions, as well as the fried communications equipment, the Imperial Service forces move to withdraw and regroup from this position. The forces now under direct command of Agent Rayyan, Hortlak Janissary, have proven that there is indeed Yu Jing involvement surrounding whatever the hell is going on at the Darpan Xeno-Station. Despite not confirming the allegations made by Ms. Double, circumstances seem to be pointing in that direction. With the death of the Asawira Khair ad-Din, the direct line to the Sultanate is severed, so perhaps any inconvenient findings can be sheltered from High Command.
Still, an uneasy feeling settles into the pit of Rayyan's stomach. What if Candy is right? Would Yu Jing truly develop an indiscriminate bio-weapon? He shudders at the implications before starting a push towards the facility proper.

Battle Report Author

Army Lists Used In This Battle
Recommend Commander For Commendation
Share this battle with friends
CamaronesWins

I LOVE LO OCHENTOSO DE TUS VIDEOS
Great report and great work!
Nice report !
The game was cool !
That looks like a hell lot of work you put into this report! Thank you your effort, always nice to read about wictories!
Consistent quality! Congratulations on your victory!
I apologise for any misundestanding with forces deputized by the DIU. If you obtain any Durian samples that need investigating, please have them sent to us forthwith.
Anyone else having trouble with YouTube links overwriting image slots in the formatting?
Excellent write up. I love the work you put into editing the photos.
Excellent report and a great exampel for the great come-back Haqq-troops can show!
A fantastic report, Commander!
Awesome report!
what an excellent report and well done on the win! I am sure it was a….SWEET victory 😀
Again, awesome report!
Very nice report. Love it.
ʕ♡˙ᴥ˙♡ʔ great
Cool report!
Great writeup!
Great report. Thx.