Fought At Raveneye Bow Section: Comms Room
639 days 23 hours 27 minutes ago
Shasvastii Operatives Intercept Perusing PanOceanian Forces!
View Linked Report - CLICK HERE 300 POINTSSo, this game was part of both a local campaign which we had here in Halifax, Nova Scotia Canada, and obviously the global campaign.
Trying to keep in in line with both; the local campaign you unlocked upgrades each round. These upgrades could include things like Soldiers of Fortune, or, more relevantly, access to Sectoral armies.
Going into this, I was beholden to either Vanilla or NCA due to the limitations of what I had unlocked for the Local Campaign, but I really wanted to use that sweet, sweet Santiago Parachutist armed with Spitfire, so... Vanilla it is!
I tried to detail as much as I can in the report for order expenditures, but obviously not everything is accounted for. Spending 1 order moving my Helot into a better position isn't mentioned in the report, because it never opened fire, stuff like that.
The ship containing the 57th arrived in orbit around the Raveneye Station.
Sir, it appears we arrived too late to contribute to the battle of the Sensoring Module, but our forces were able to repel the Combined Army advance, and their main forces are in retreat. A bridge hand spoke out.
Send word of our arrival to the Command, let them know that we're moving to persue the retreating main body. Commander Berithh replied.
Affirmative Commander! The bridge hand exclaimed.
The 57th's ship perused the fleeing Combined Army ship to over the planet, where a it was struck down by Orbital Defense batteries. Crashing to the ground, a look of glee crossed Berithh's face.
Deploy our forces, we'll rout the remaining Aliens.
Troop craft begin to break off from the main PanOcenian cruiser, and enter orbit.
The ship hand from before looks up to Berithh, before a concerned look crossed their face. Commander, our ship's sensors are detecting a faint blip. It was only for a moment. But it appeared to be a small Shasvatii contingent moving to intercept!
Ready our forces at once, this will be more than a simple cleanup! Berithh exclaimed.

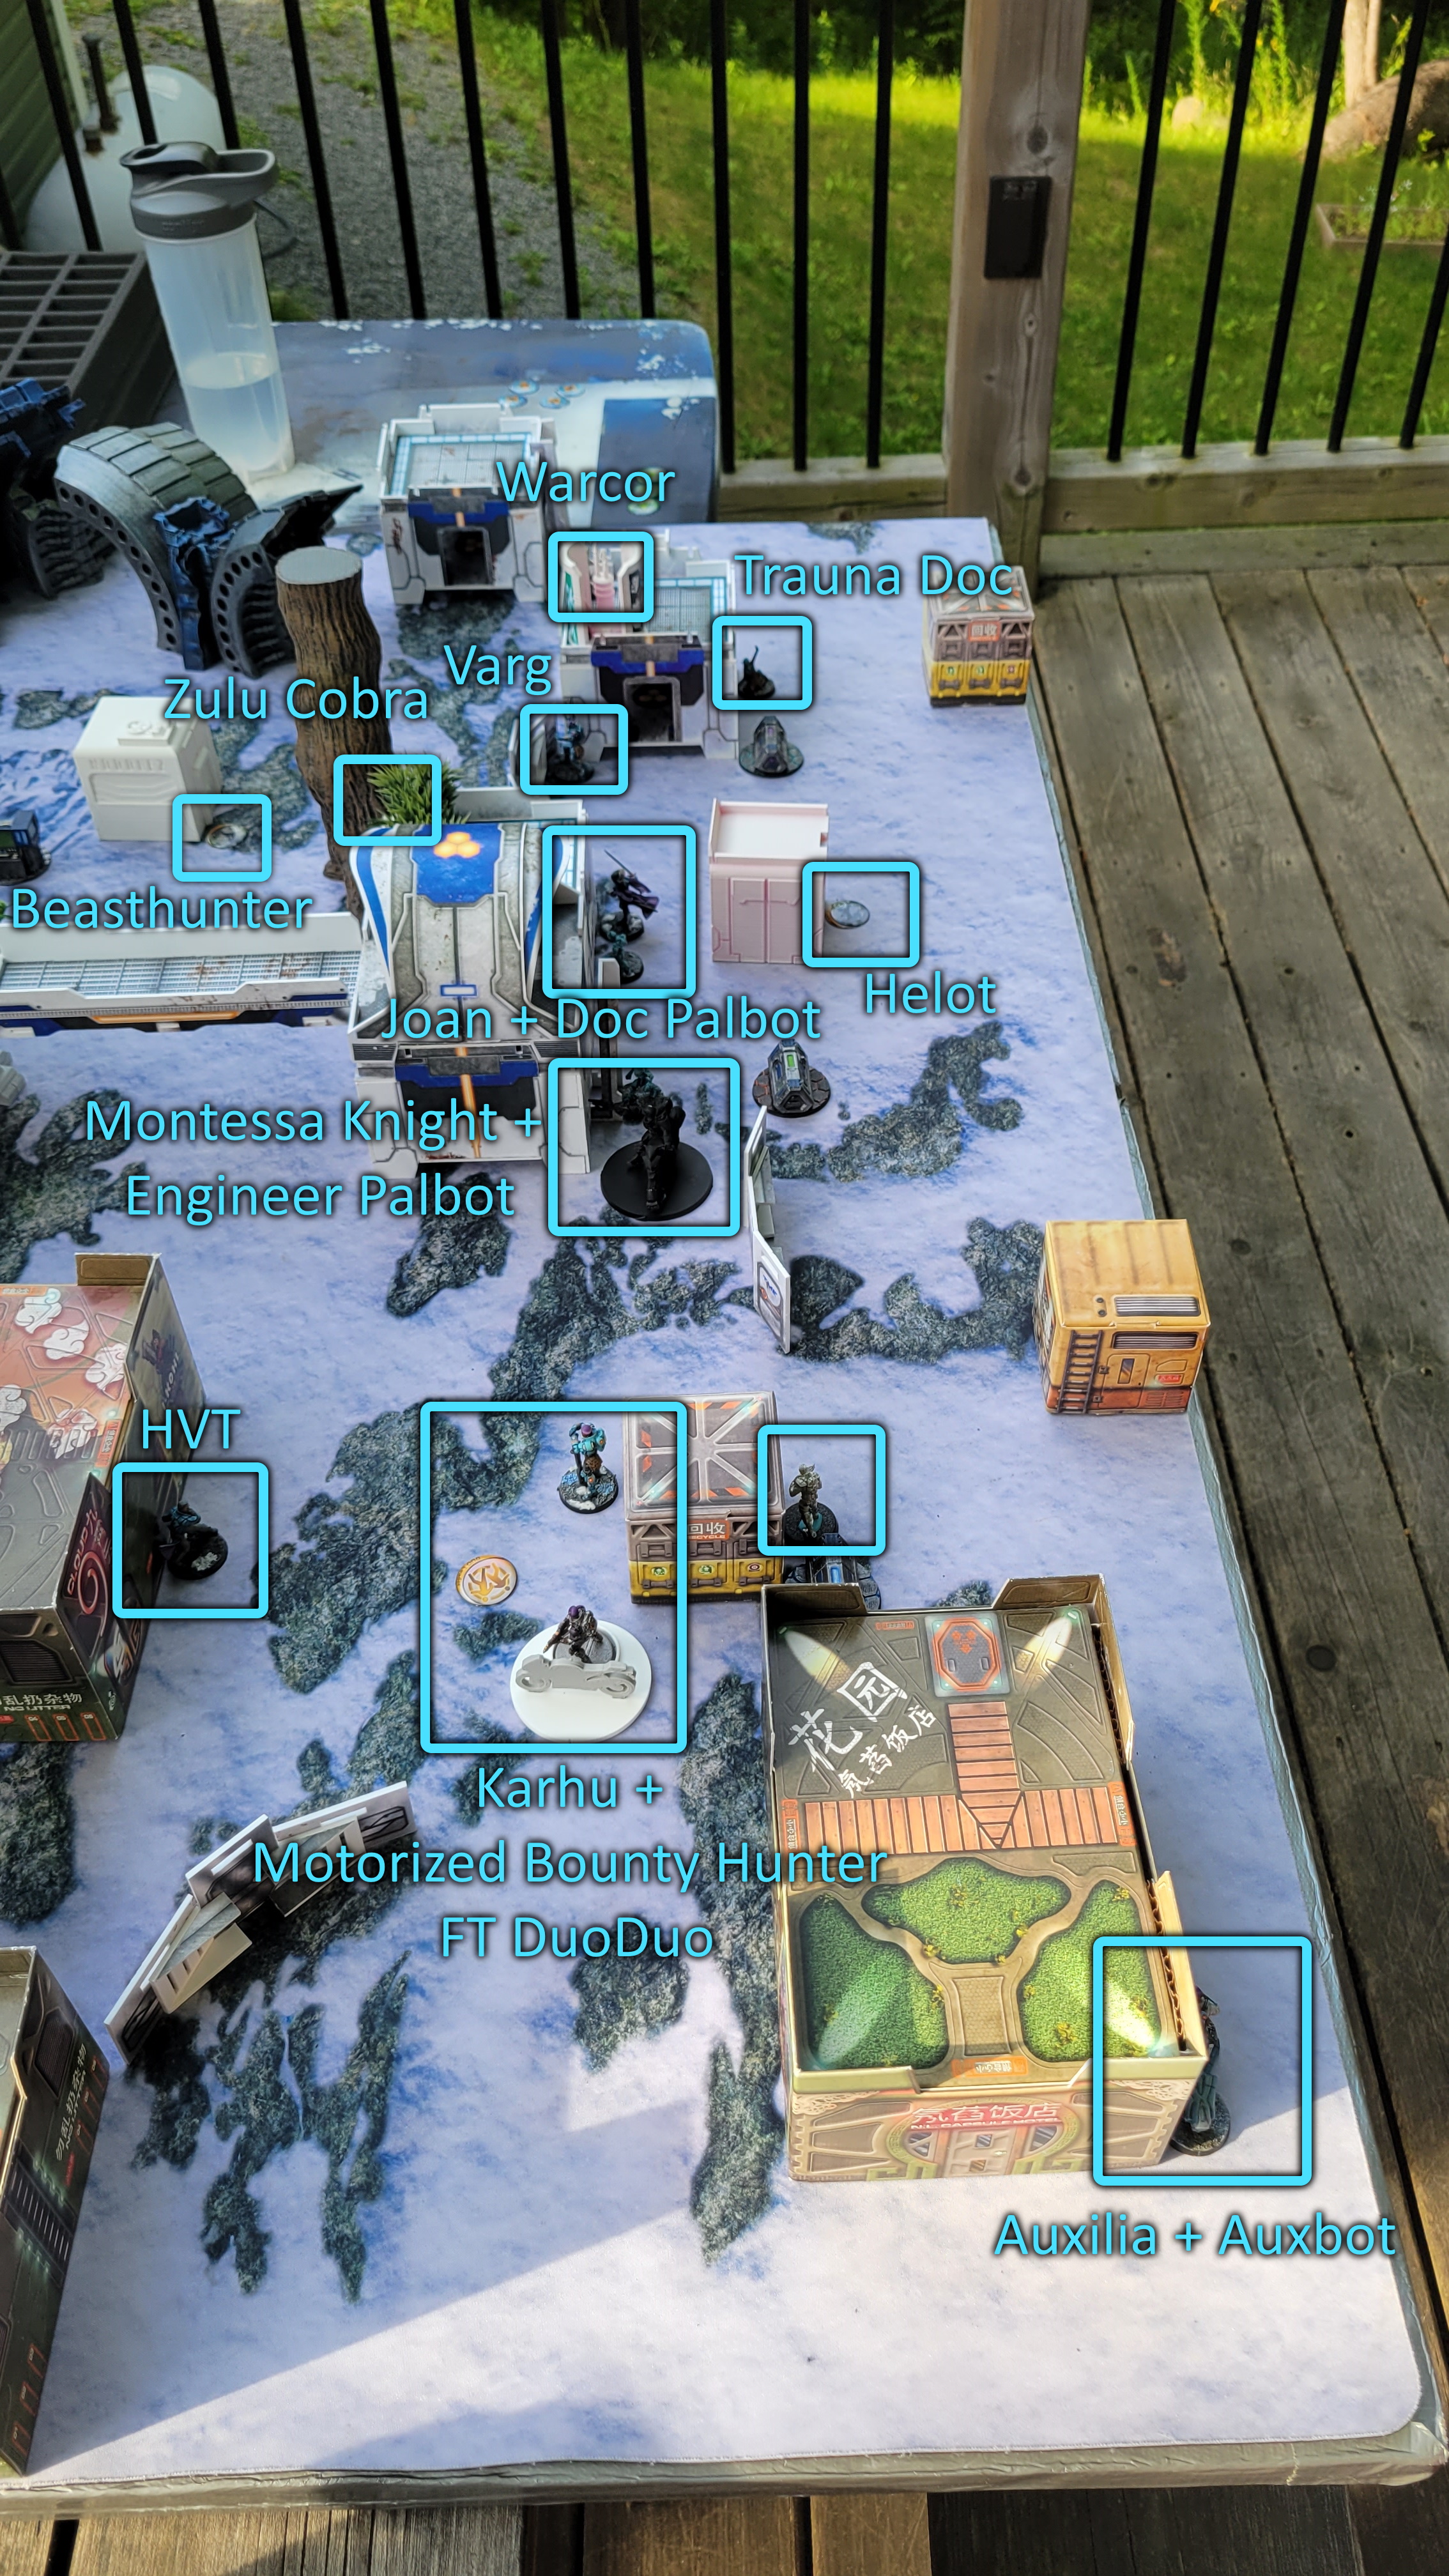
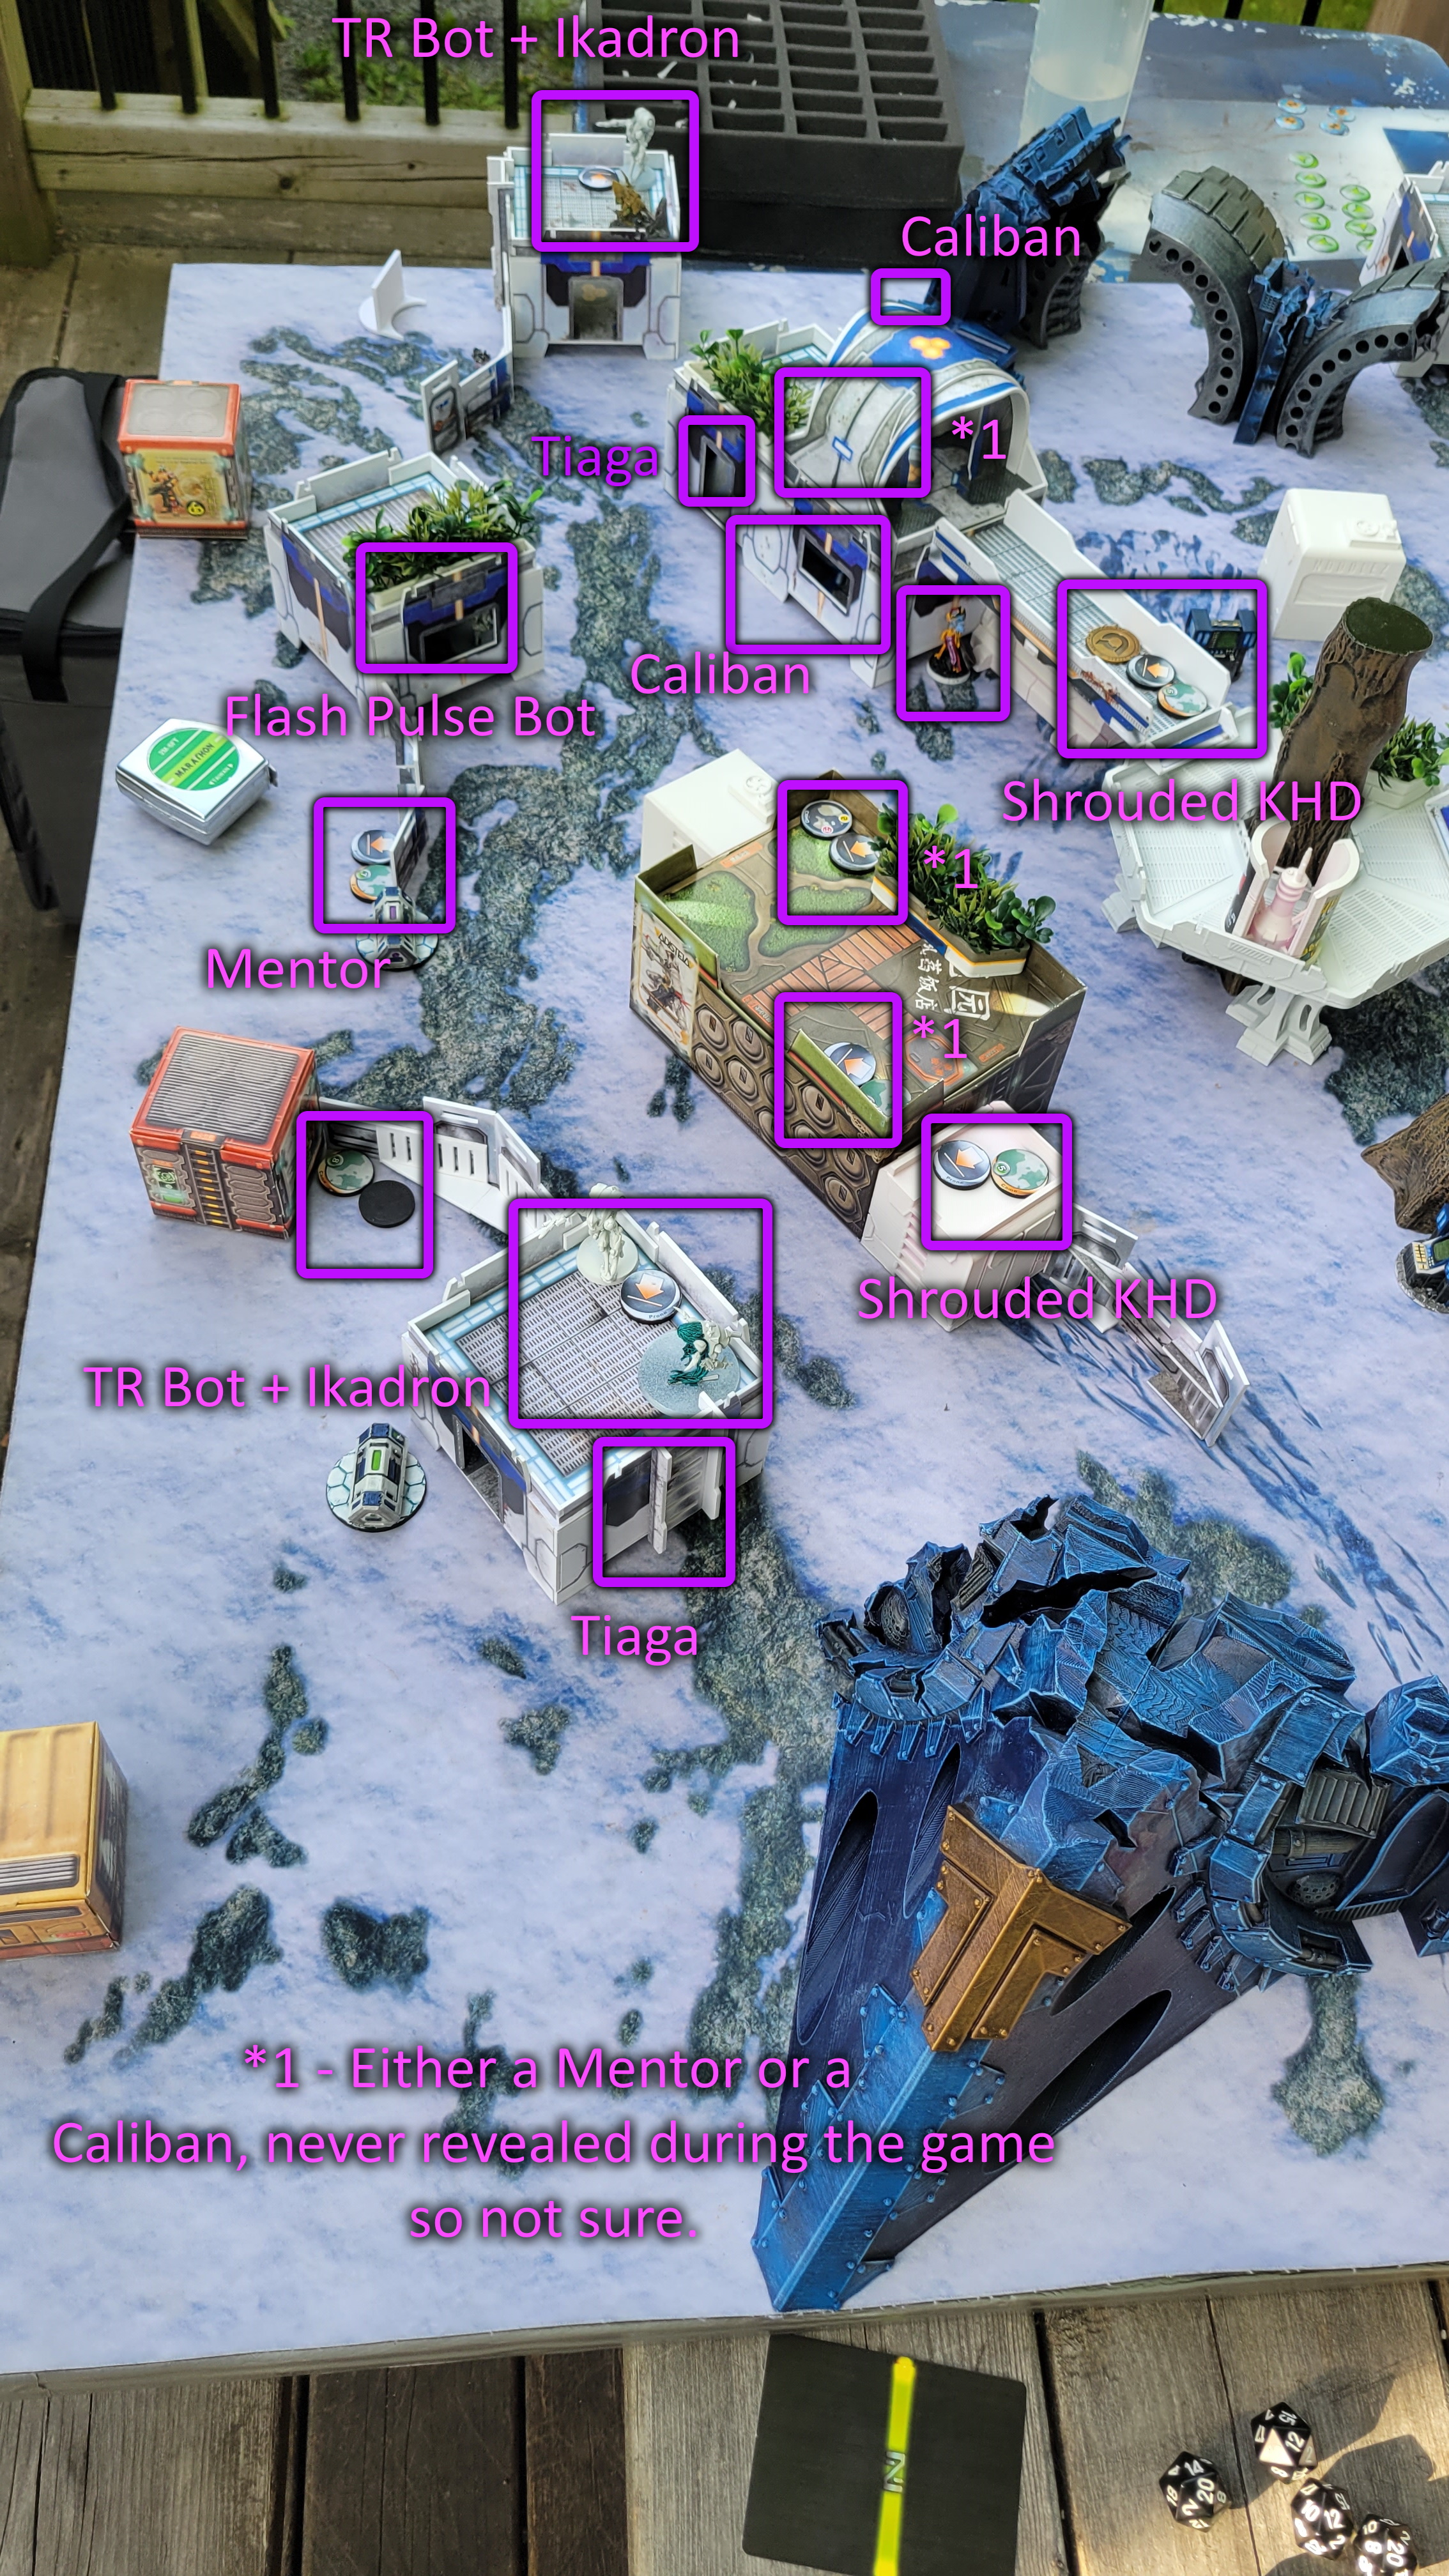 Shasvatii Deployment - EDIT: One of the *1s closer to the camera was definitely the Caliban with D-Charges, I just am not sure which.
The turn begins with the Varg taking pot shots at the TR bot closest to it, but after one round of shooting it gives up, faced with heavy negative modifiers.
On the other side of the board, the Karhu advances, firing at the previous TR bot, and scores a critical. Unfortunately, the TR bot passes all of its saves. The Karhu continues its advance, and climbs atop the building infront of it. He scurried behind cover, and opens fire on the other TR bot. Tragedy strikes, with the TR bot scoring a critical, which kills the Karhu instantly.
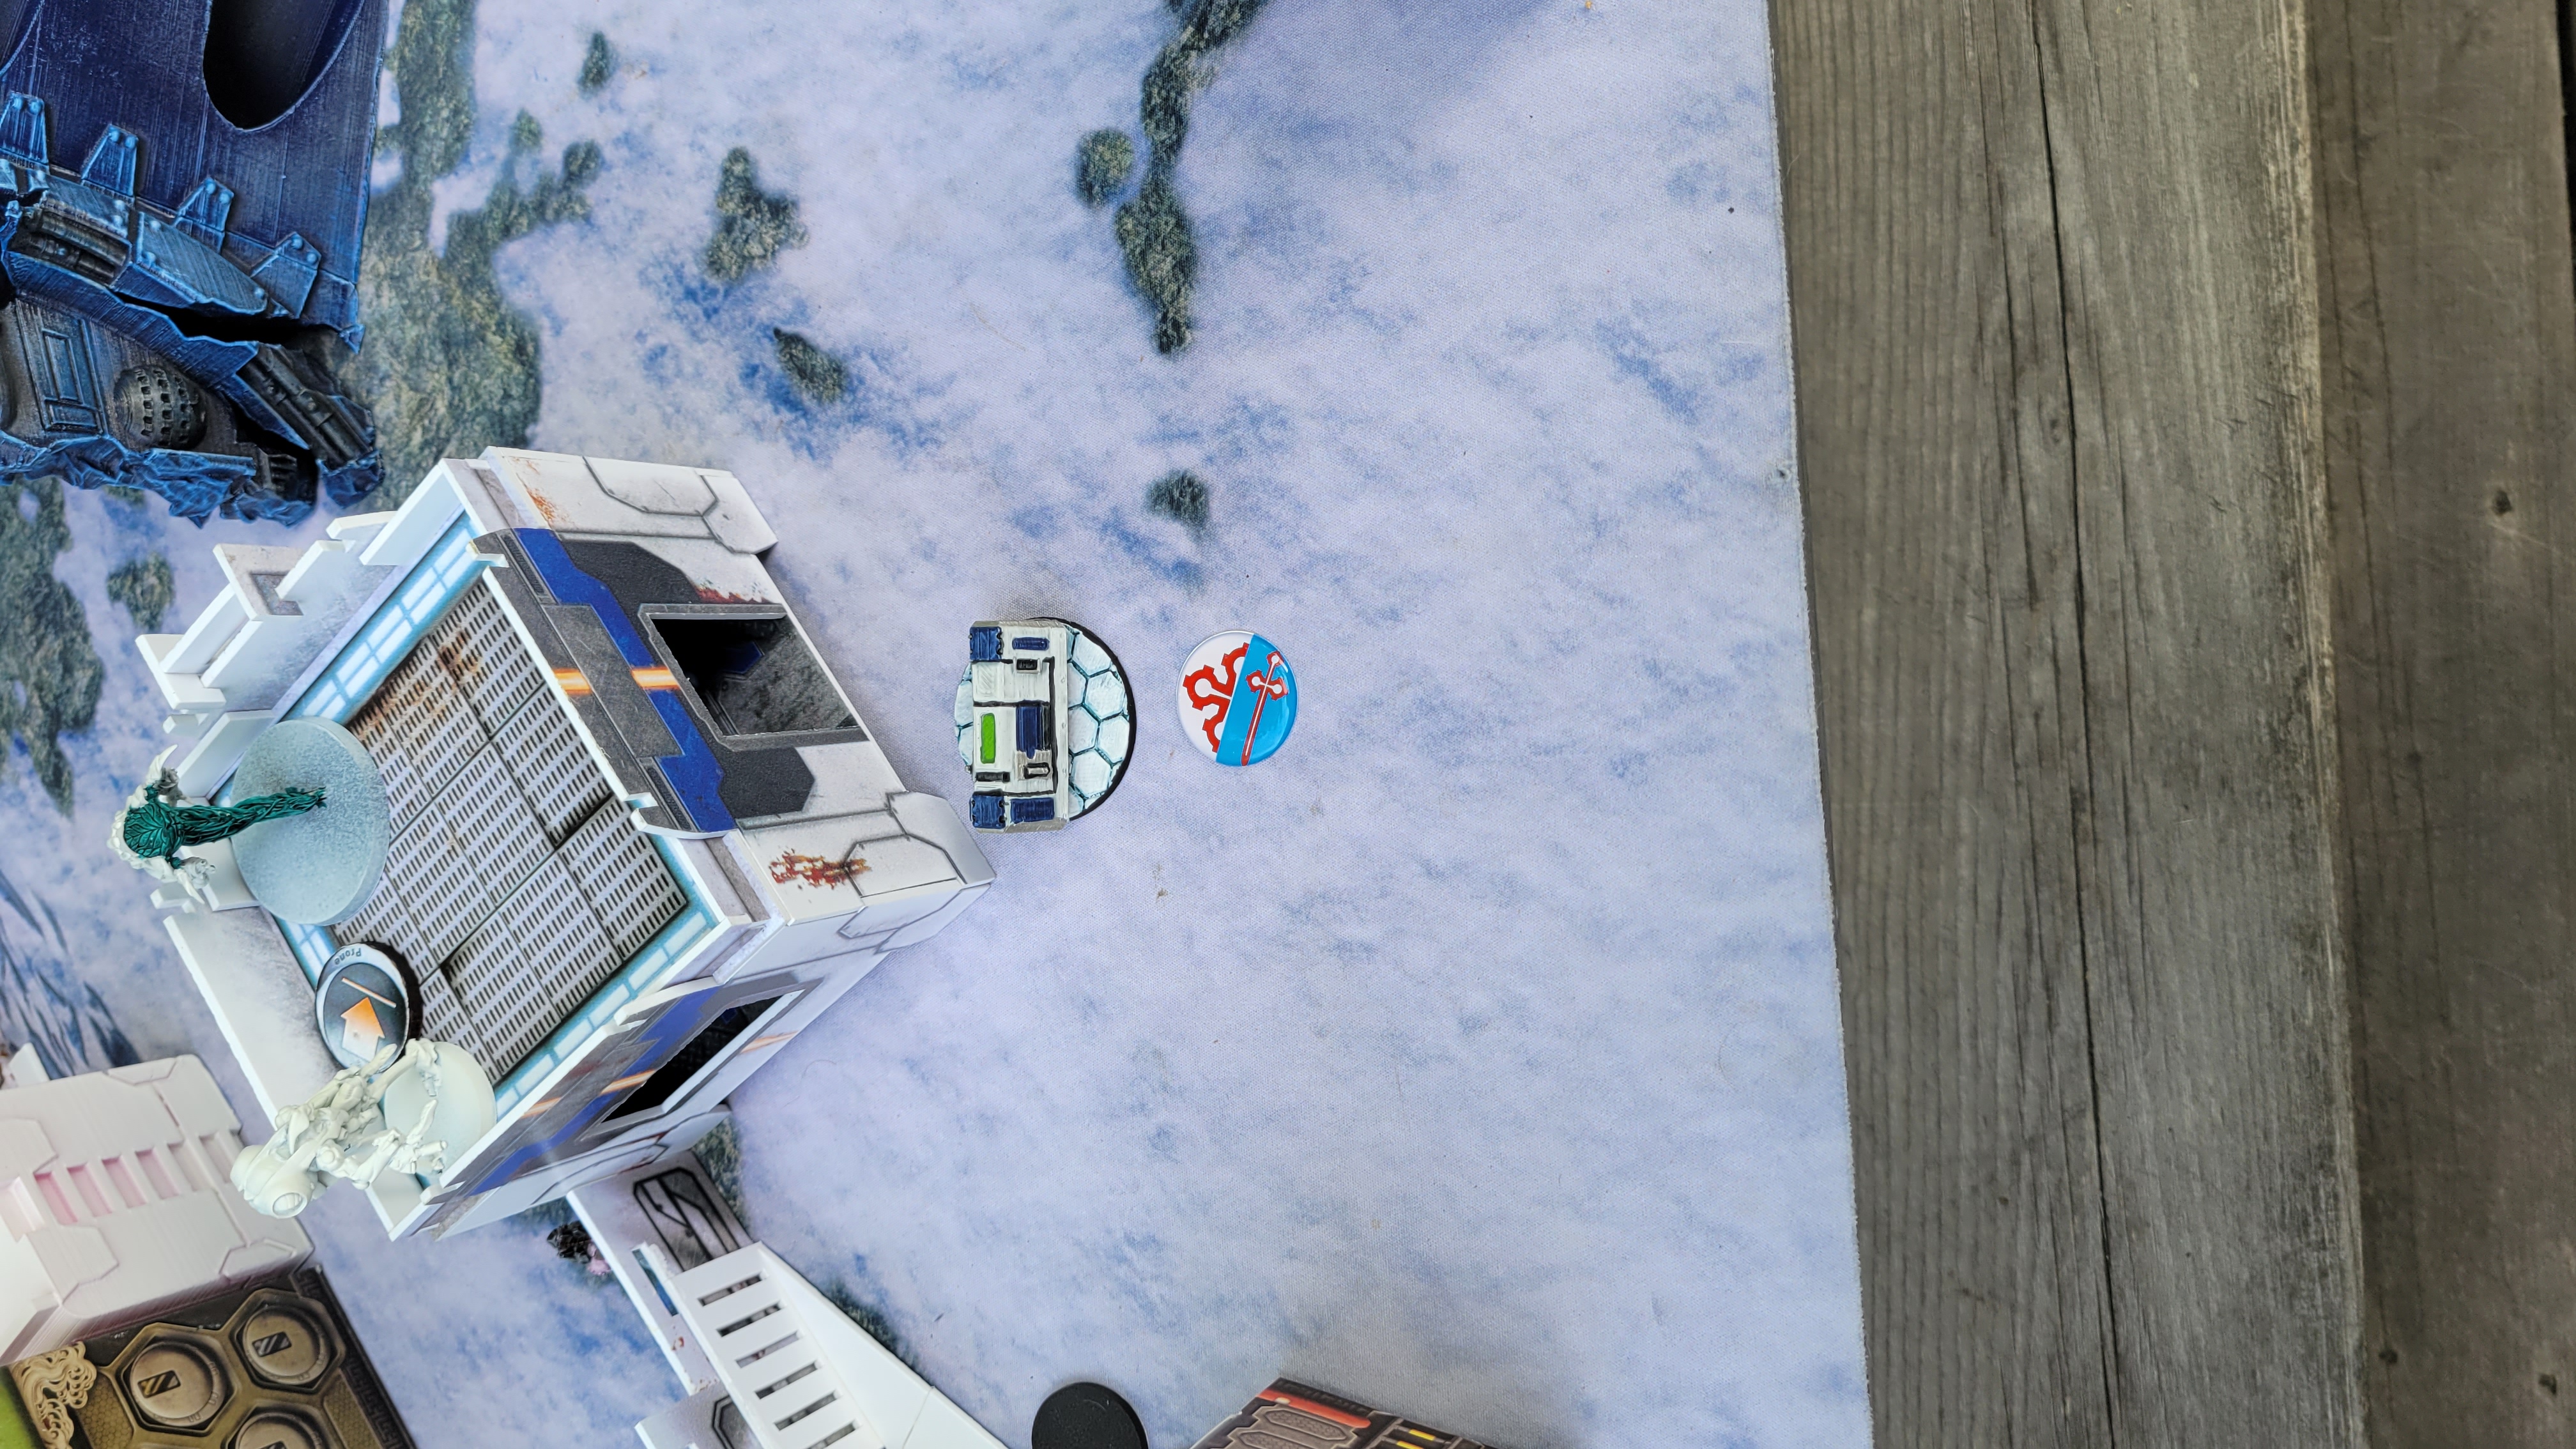
The Zulu Cobra Khd in camo state makes its way towards the right hand flank console, and successfully presses the button. Using a coordinated order from Joan, and its own Uber Hacker order, it falls back into total cover and recamos. Unfortunately, the console is revealed to be on the PanOceanian left flank, the one which is most heavily guarded, and cannot be reached easily with a parachutist.
 The Karhu advances up to the building, and climbs it, while engaging in a firefight with a Combined Army TR bot.
 The Karhu engages in a firefight with the second TR bot, but is killed instantly from a critical hit.
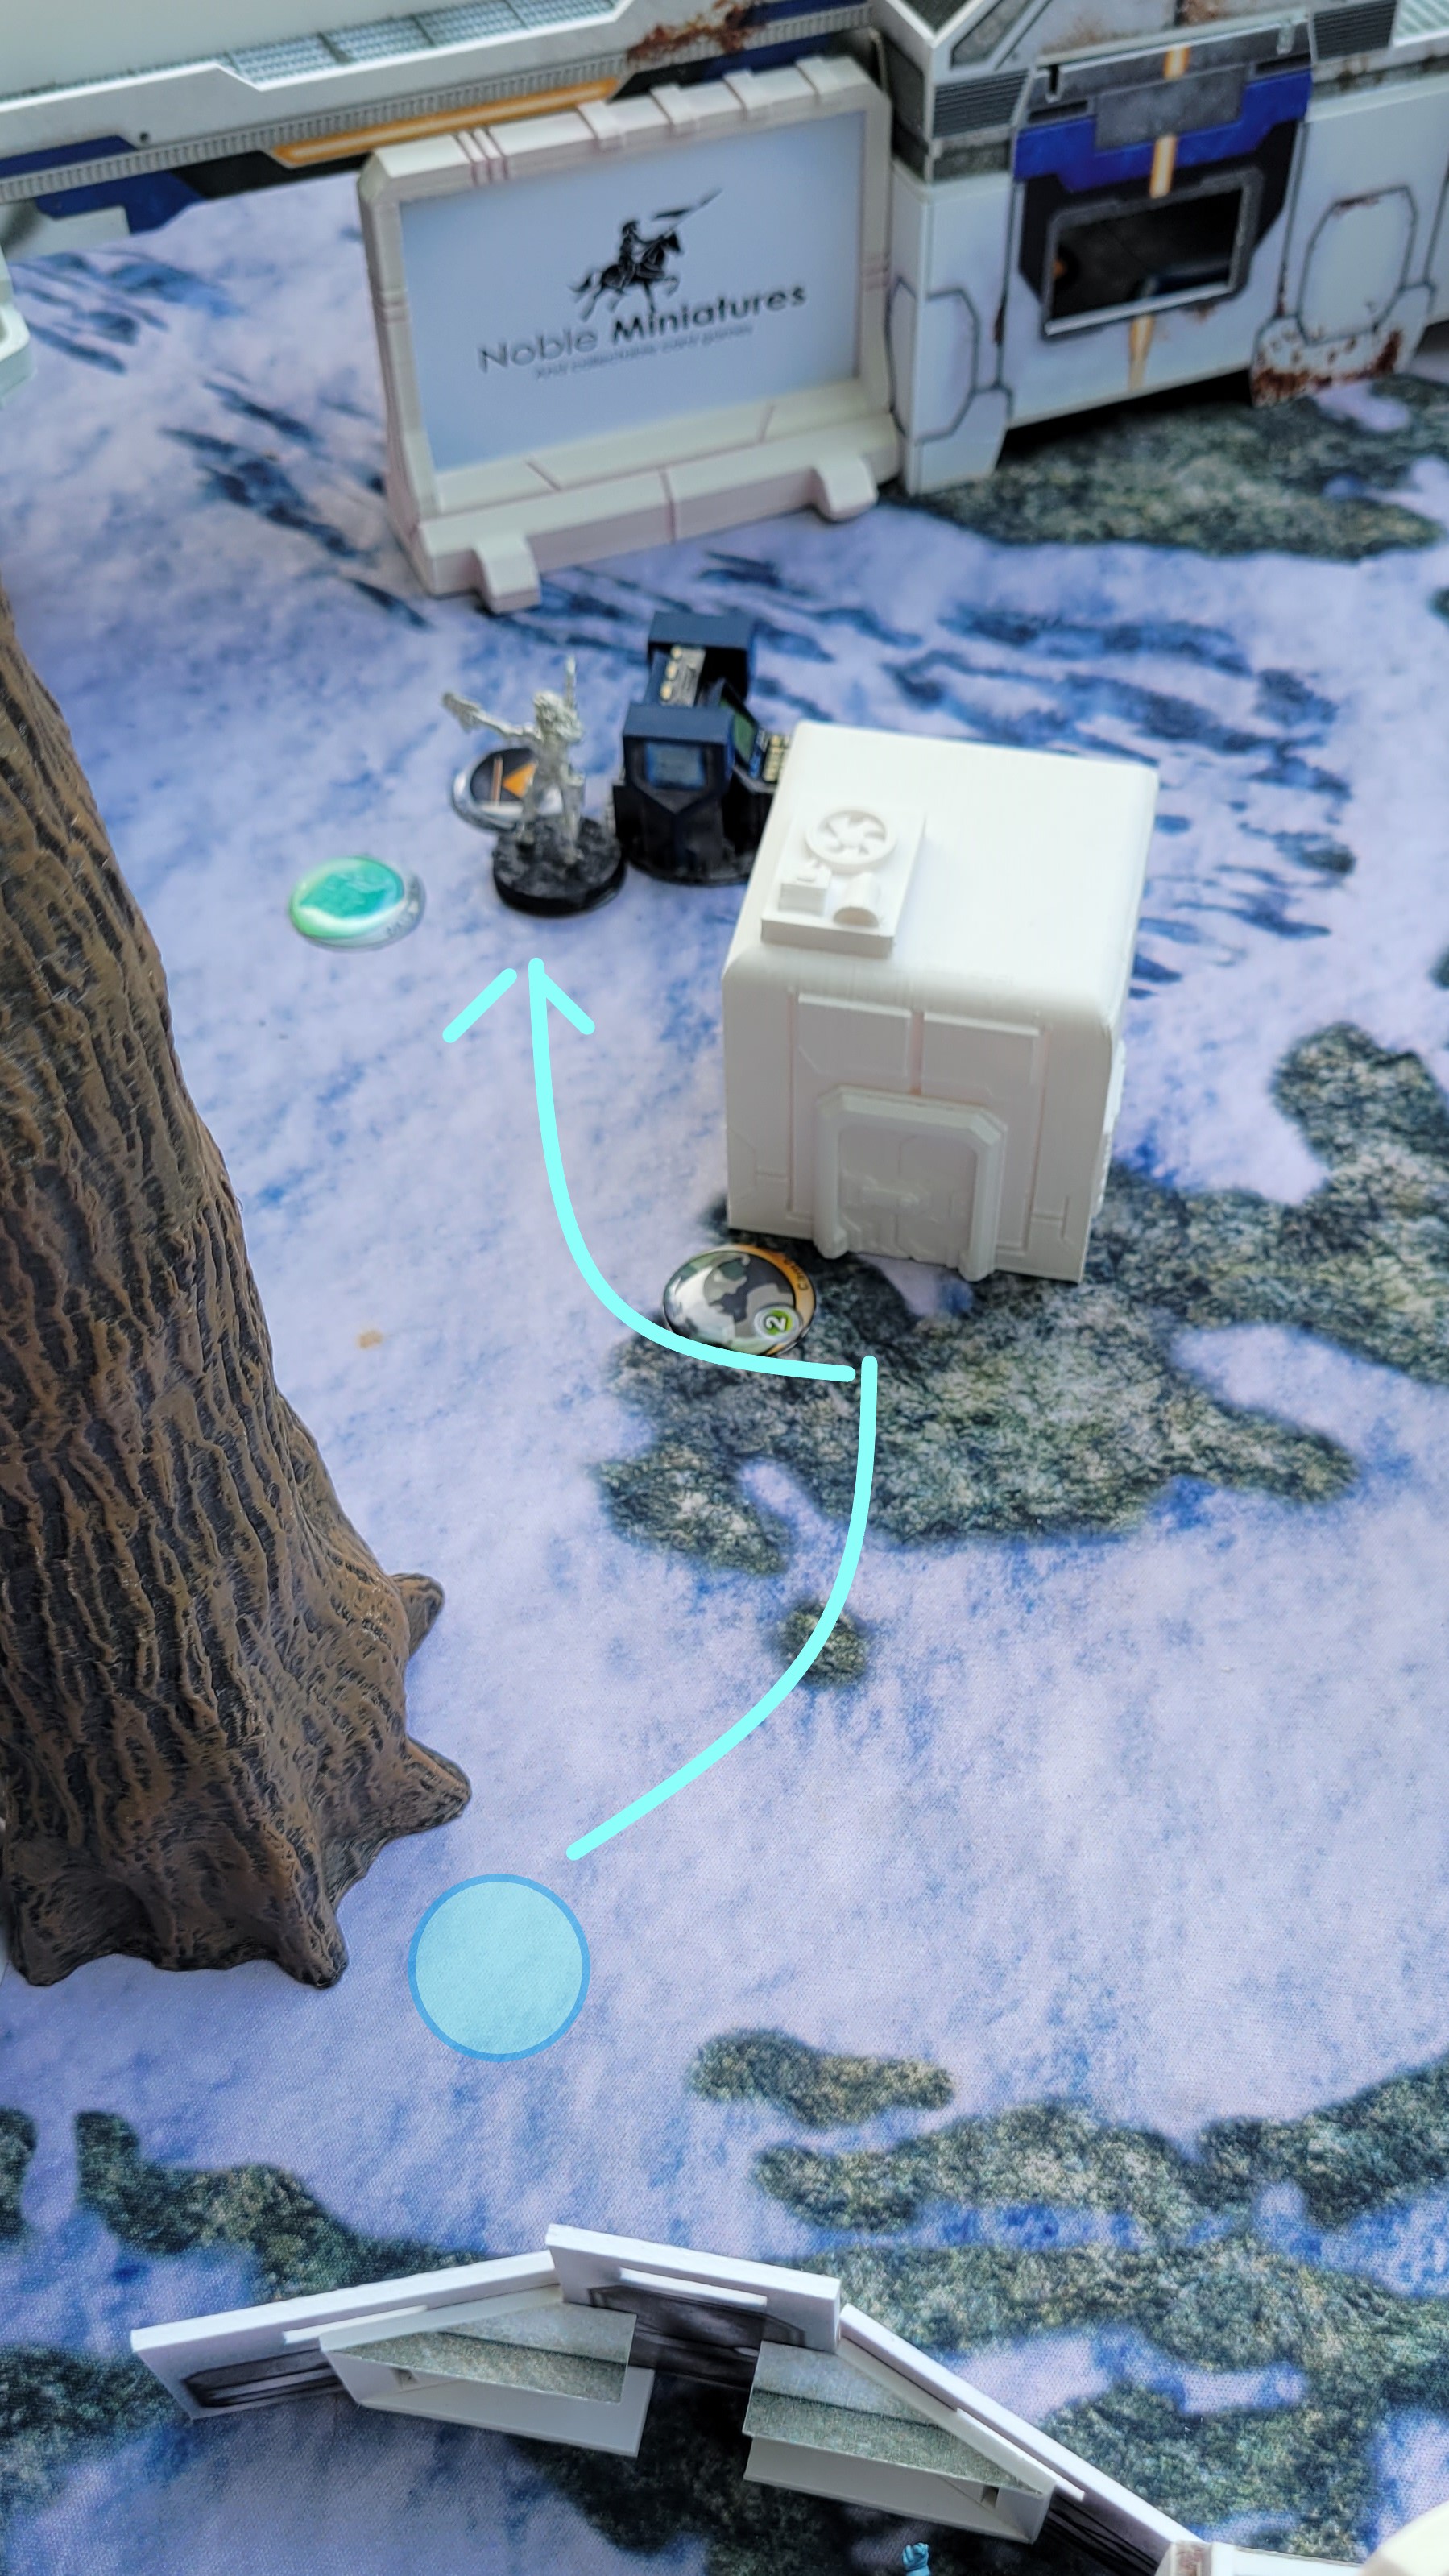
The Shasvatii turn begins with Tiagas running forward, with one being cut down by the Varg.
A camo token advances towards the unclaimed console, and reveals itself to be Shrouded Killer Hacker. Pressing the button, the Shouded is able to take command of the console, revealing the PanO server to be the center one.
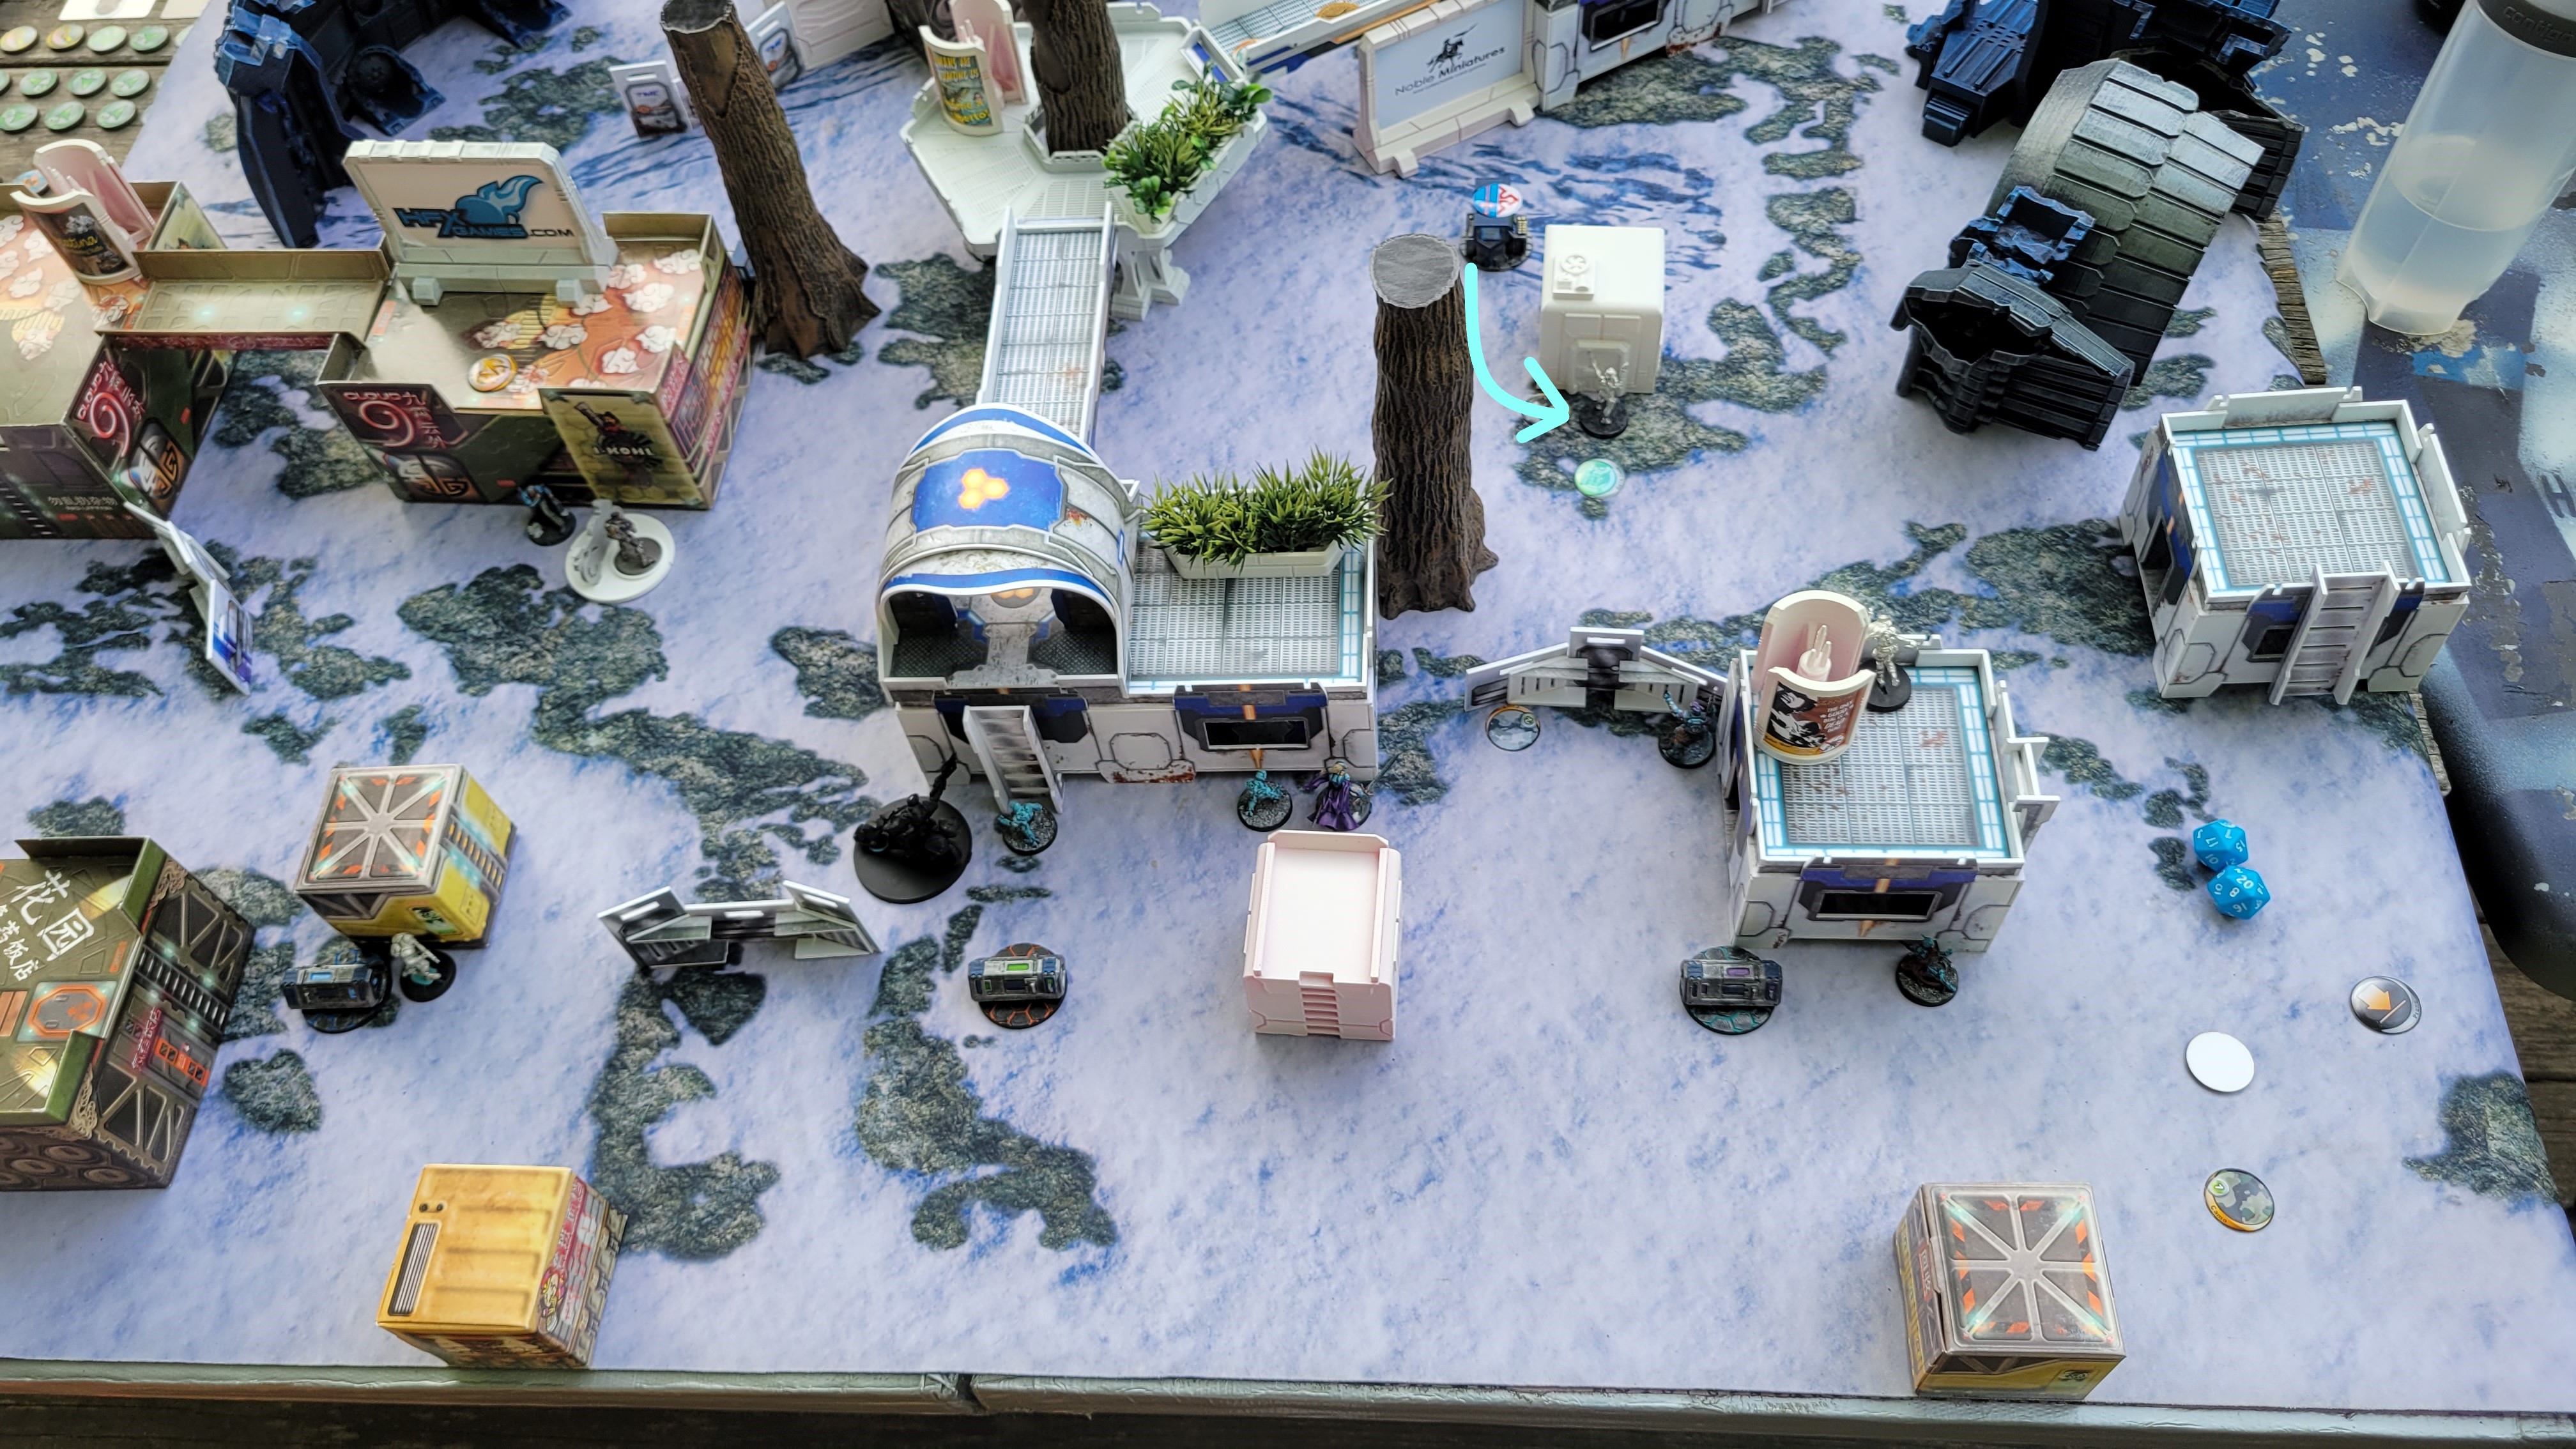
The TR bot which previously felled the Karhu moves, and opens fire on both the Warcor and the Montessa Biker. The Biker dodges back, but not far enough to get fully out of line or sight. The Warcor attempts to flash pulse, but is cut down. The TR bot again opens fire on the Montessa, who fails his dodge. Taking one wound, the Montessa opts to take a guts check, and passes. As such, he falls back 2 inches into total cover.
A Tiaga scurries towards the Motorized Bounty hunter. The Bounty Hunter fires its chain colt, but the Tiaga dodges into close combat with the Bounty Hunter.

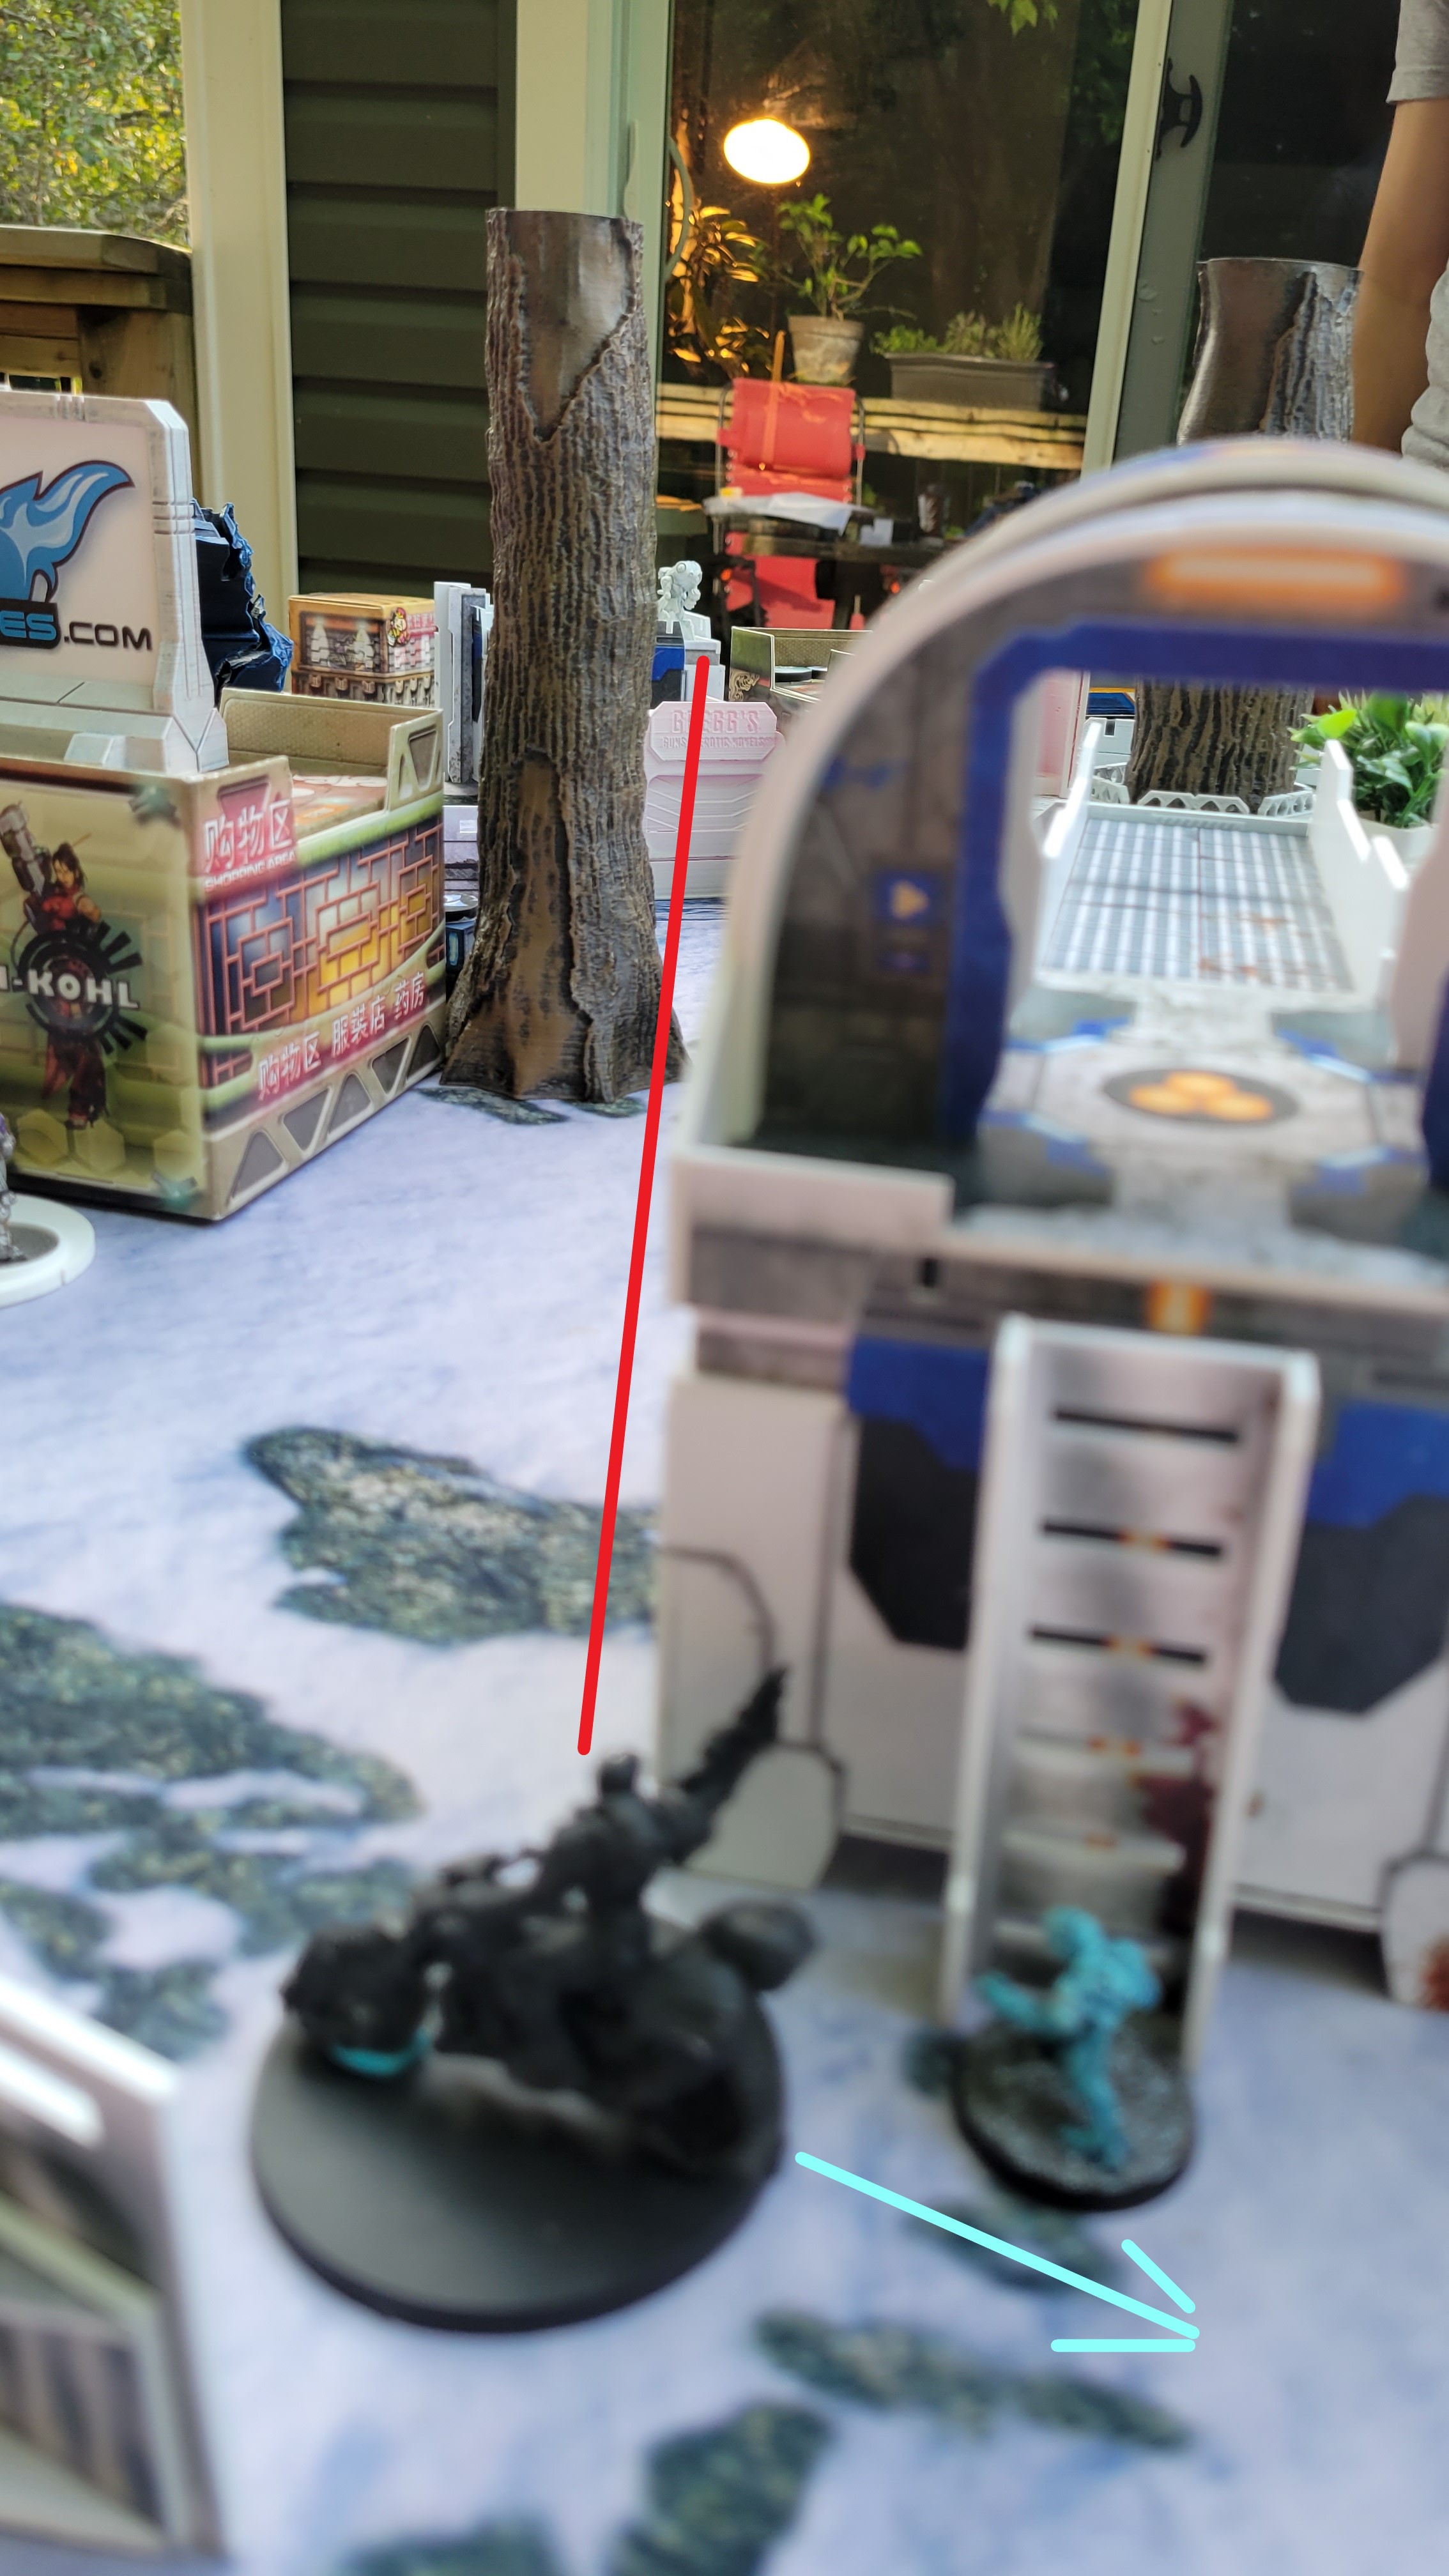
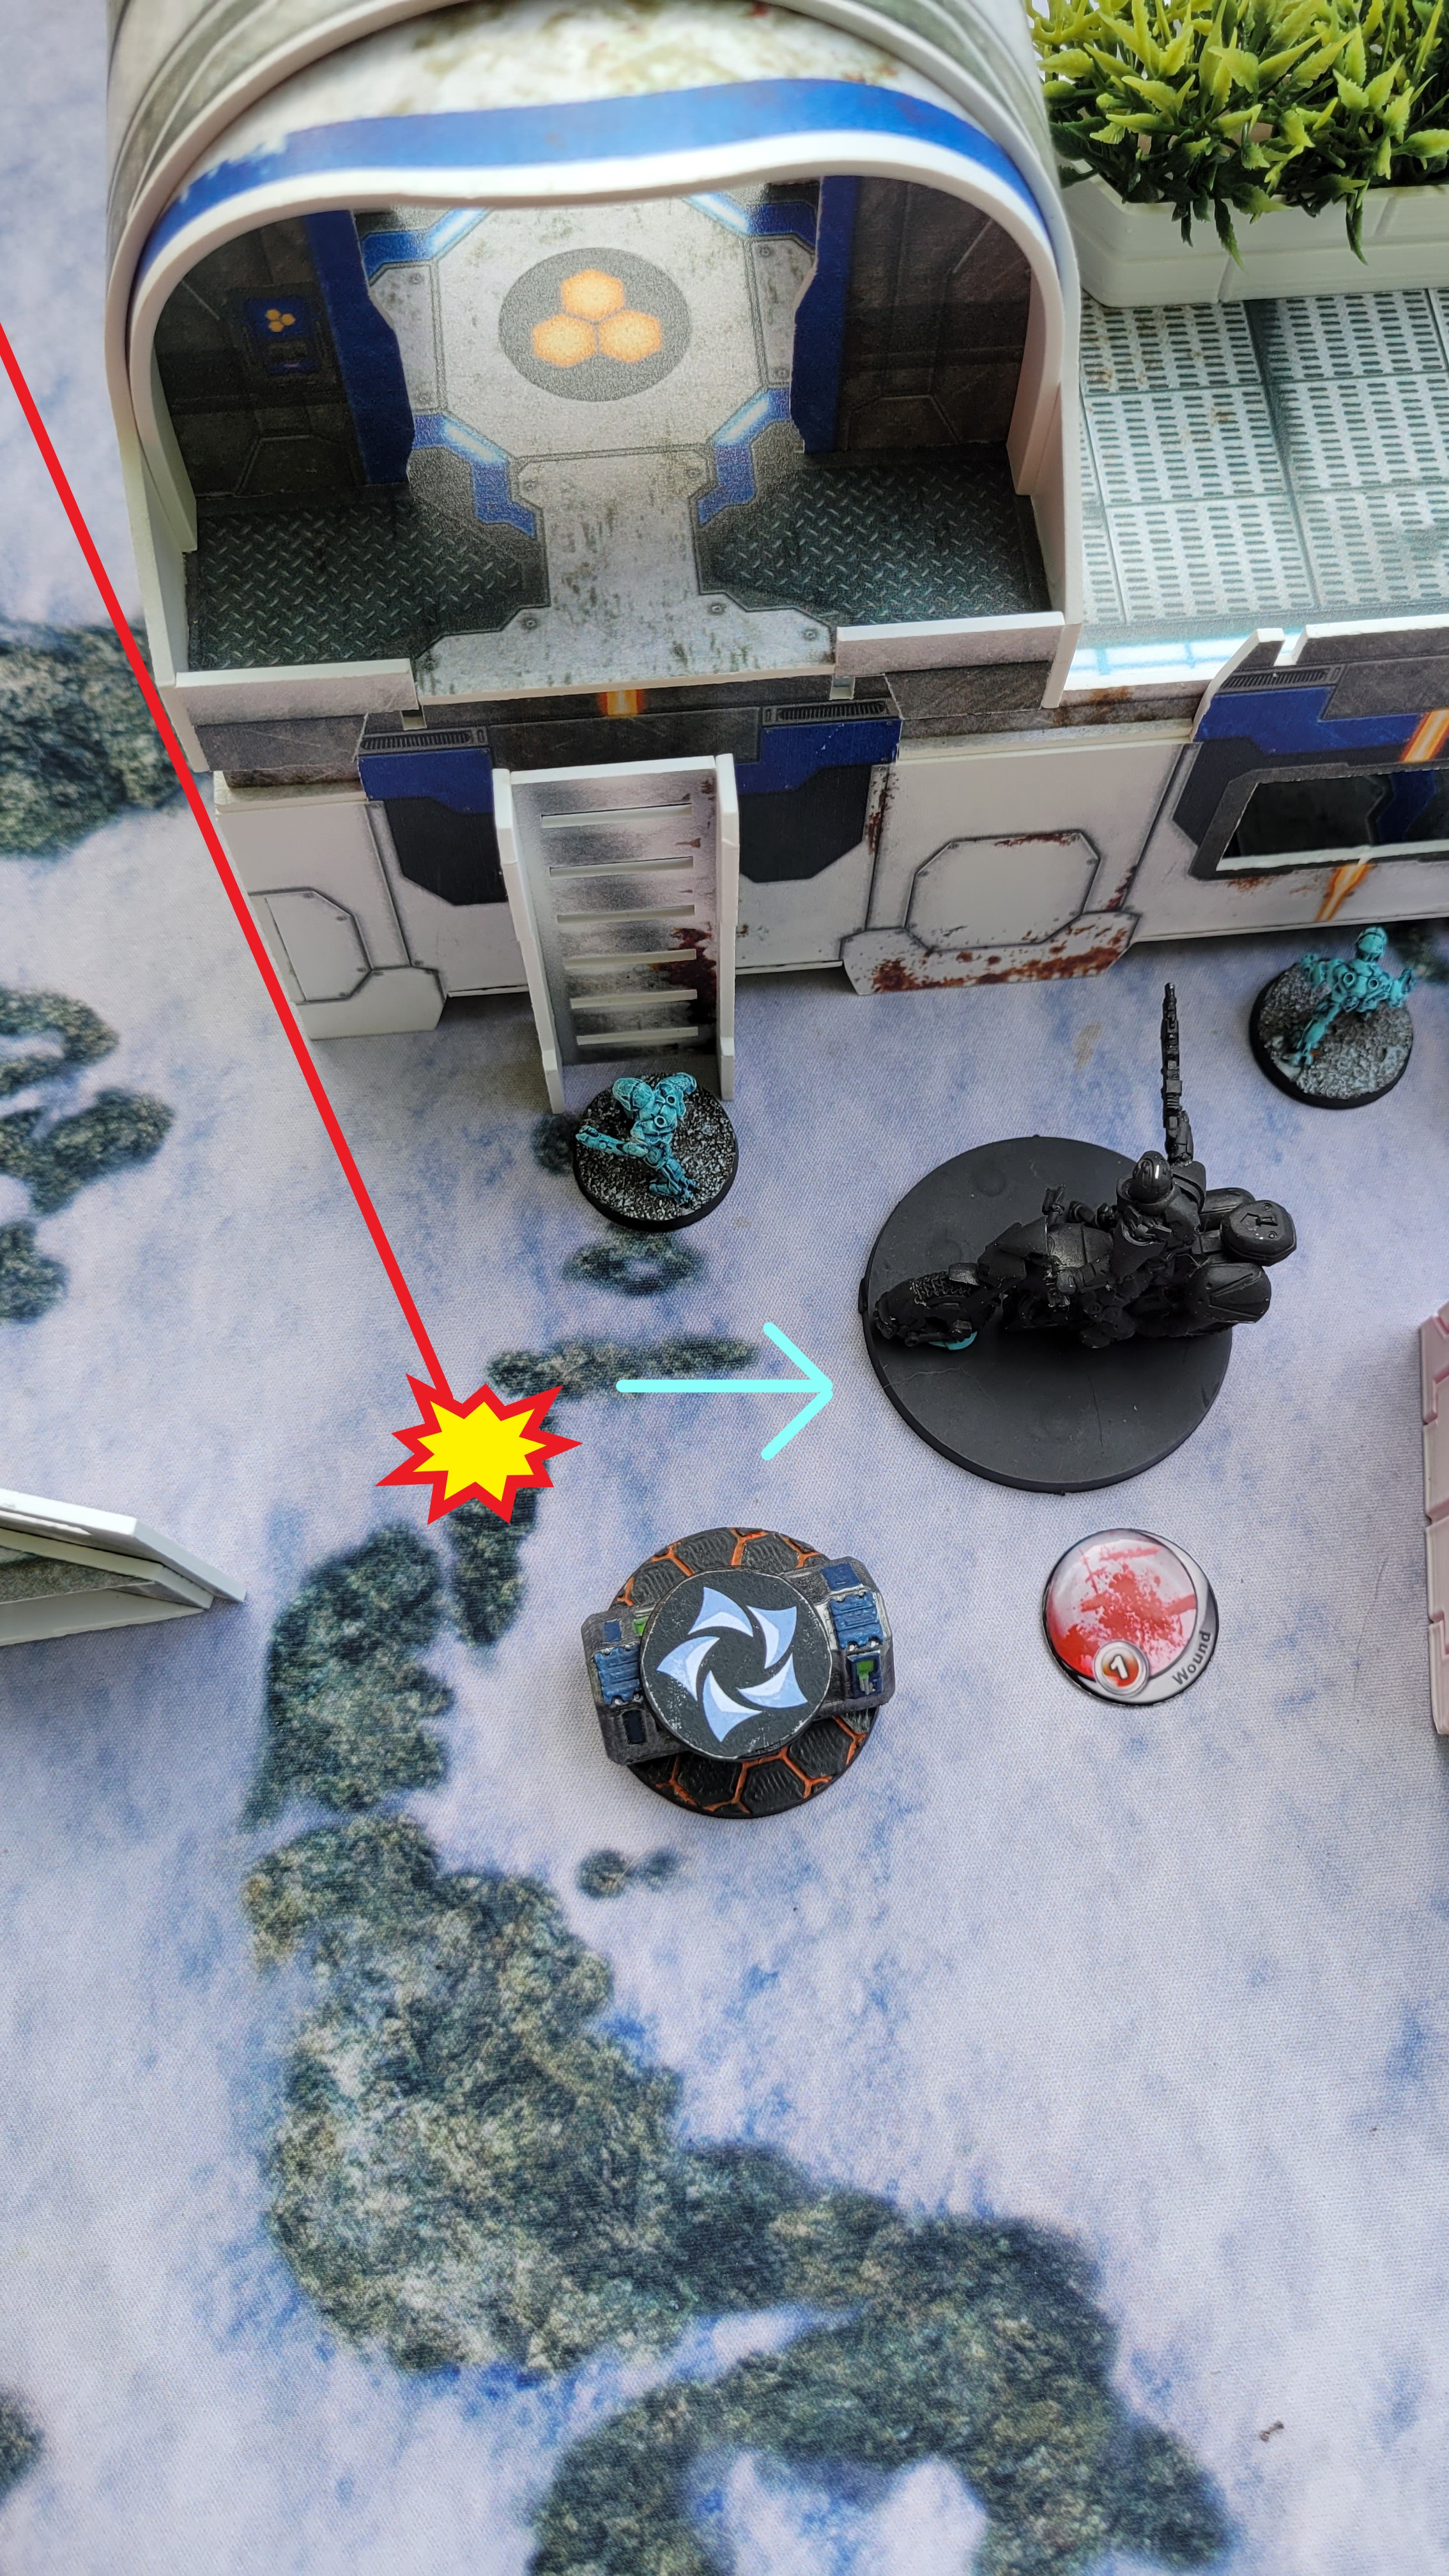 But didn't dodge far enough. The Montessa suffers another round of shooting, and sustains one wound. Opting to take a guts check, the Montessa passes, and is able to fall back into total cover.
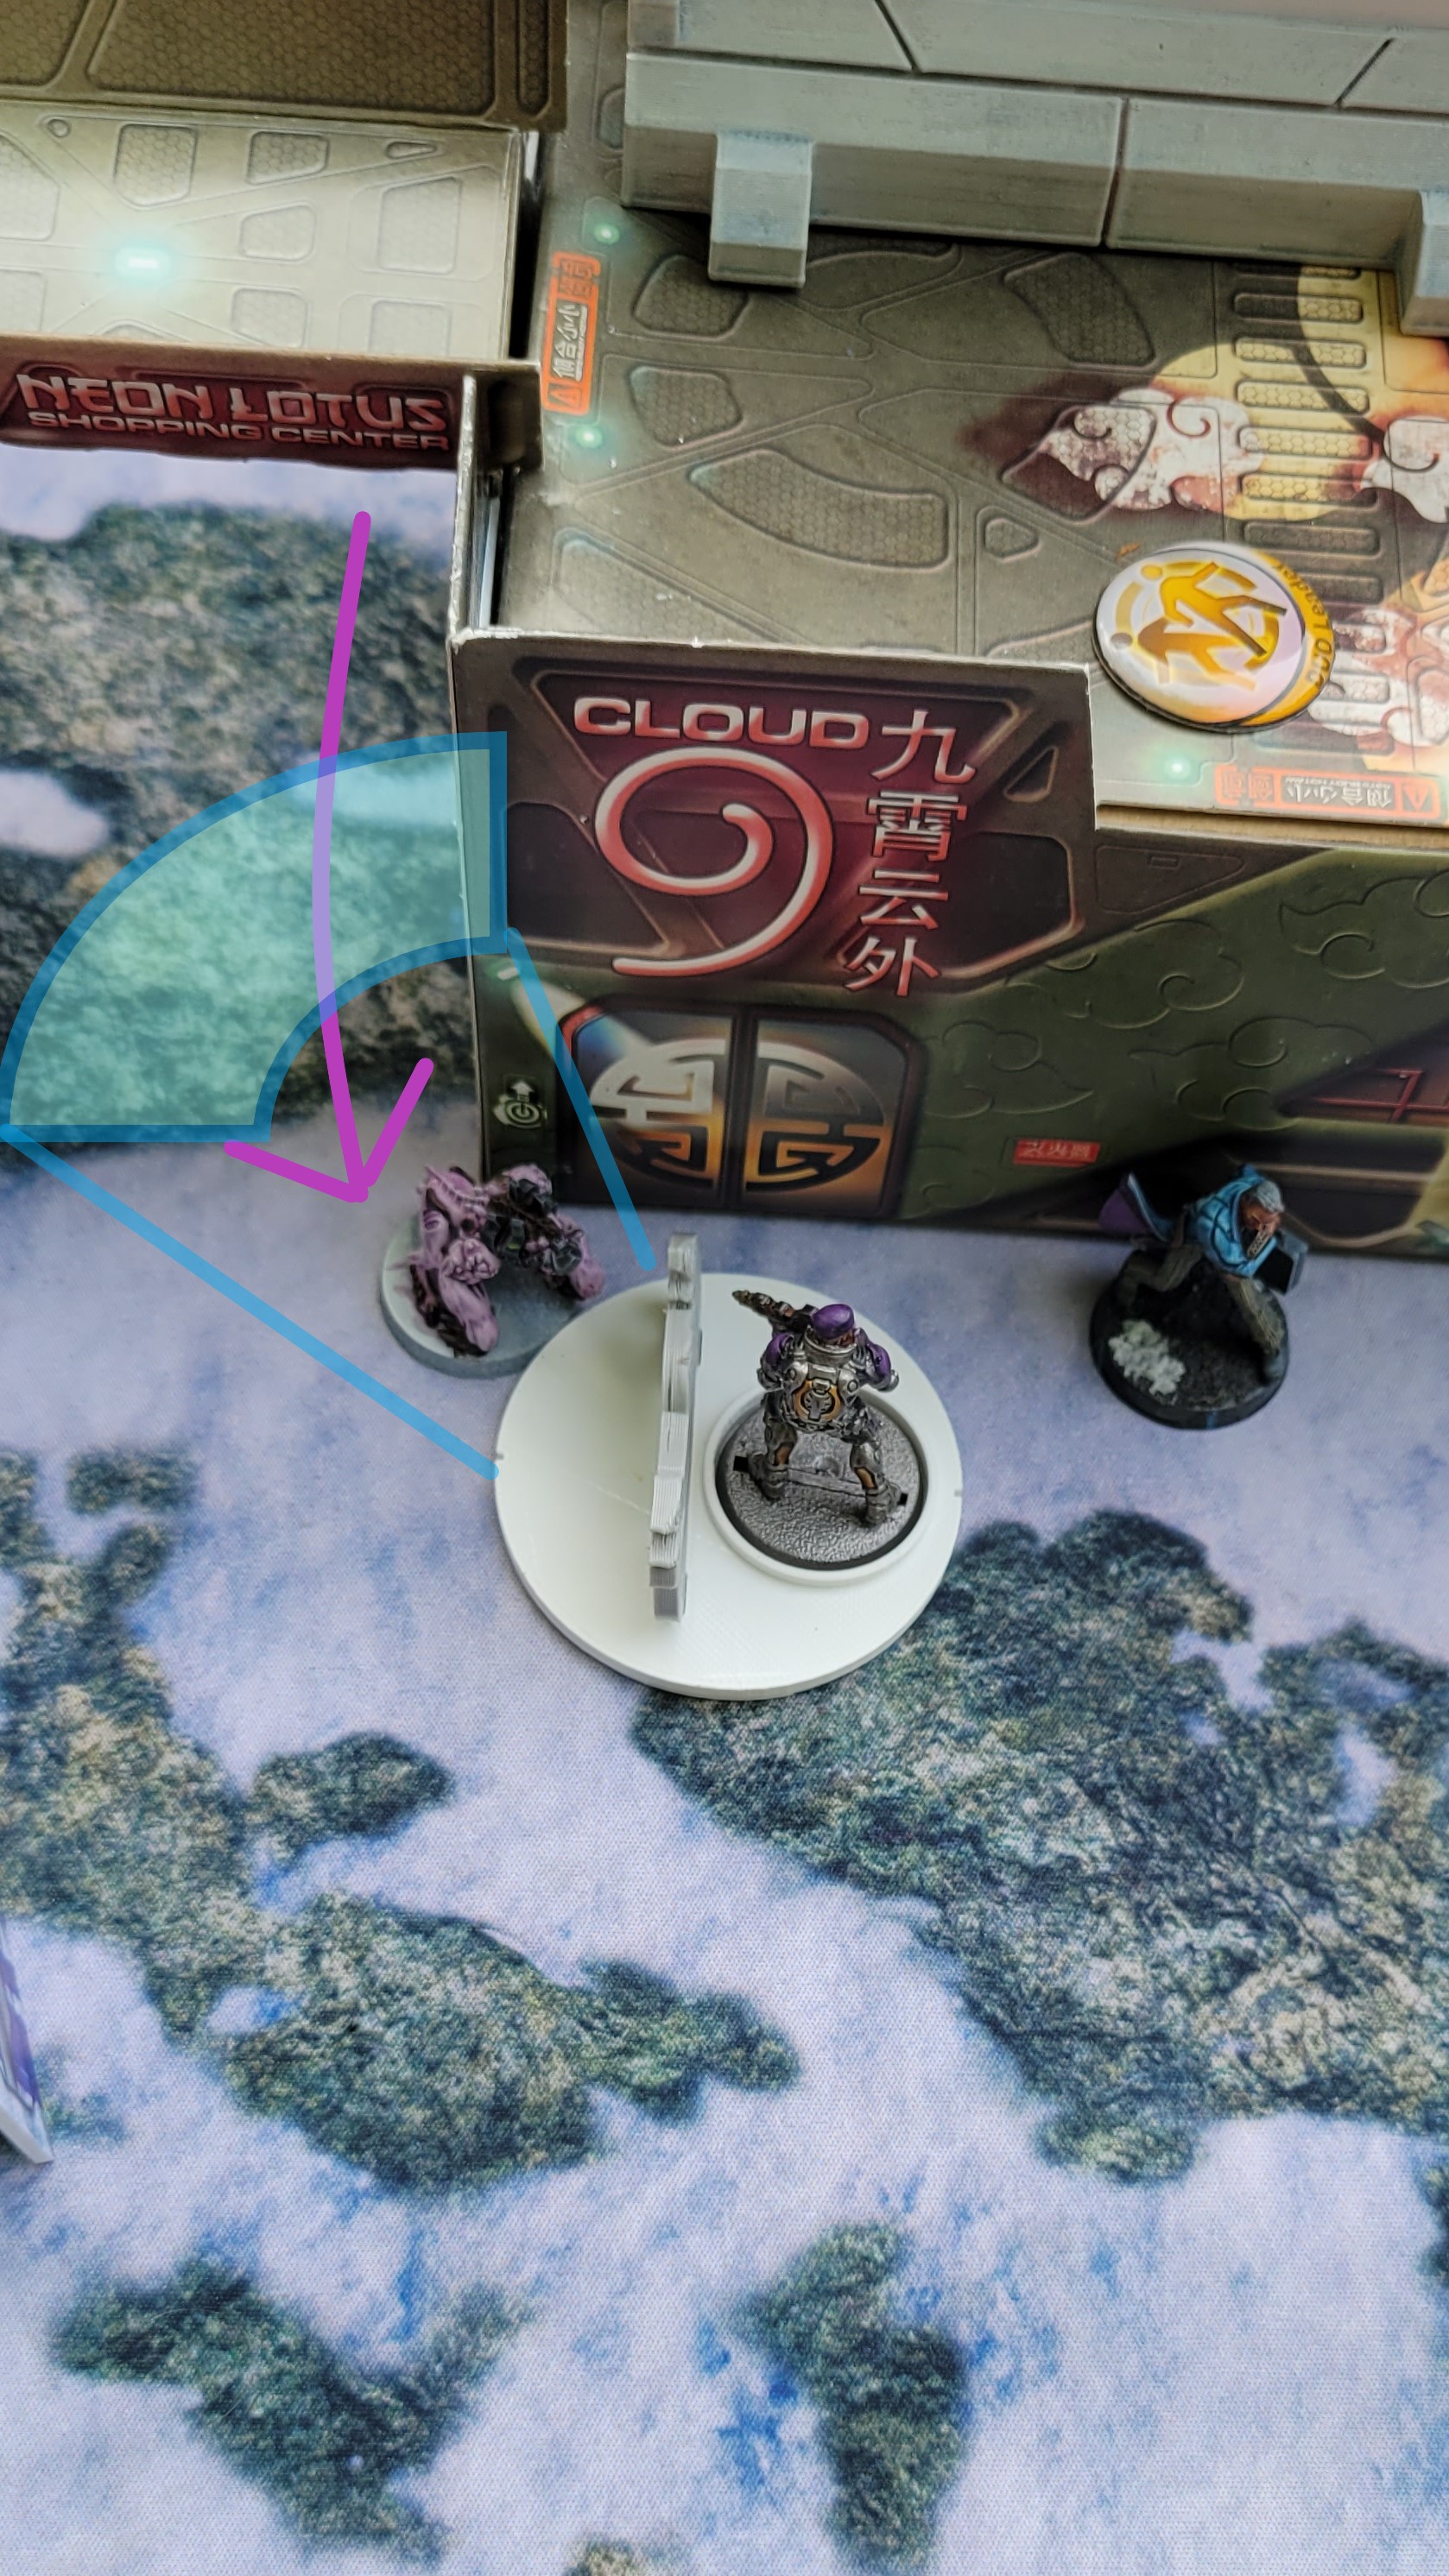 The Tiaga charges at the Motorized Bounty Hunter, who responds by firing his Chain Colt. The Tiaga successfully dodges into base contact.
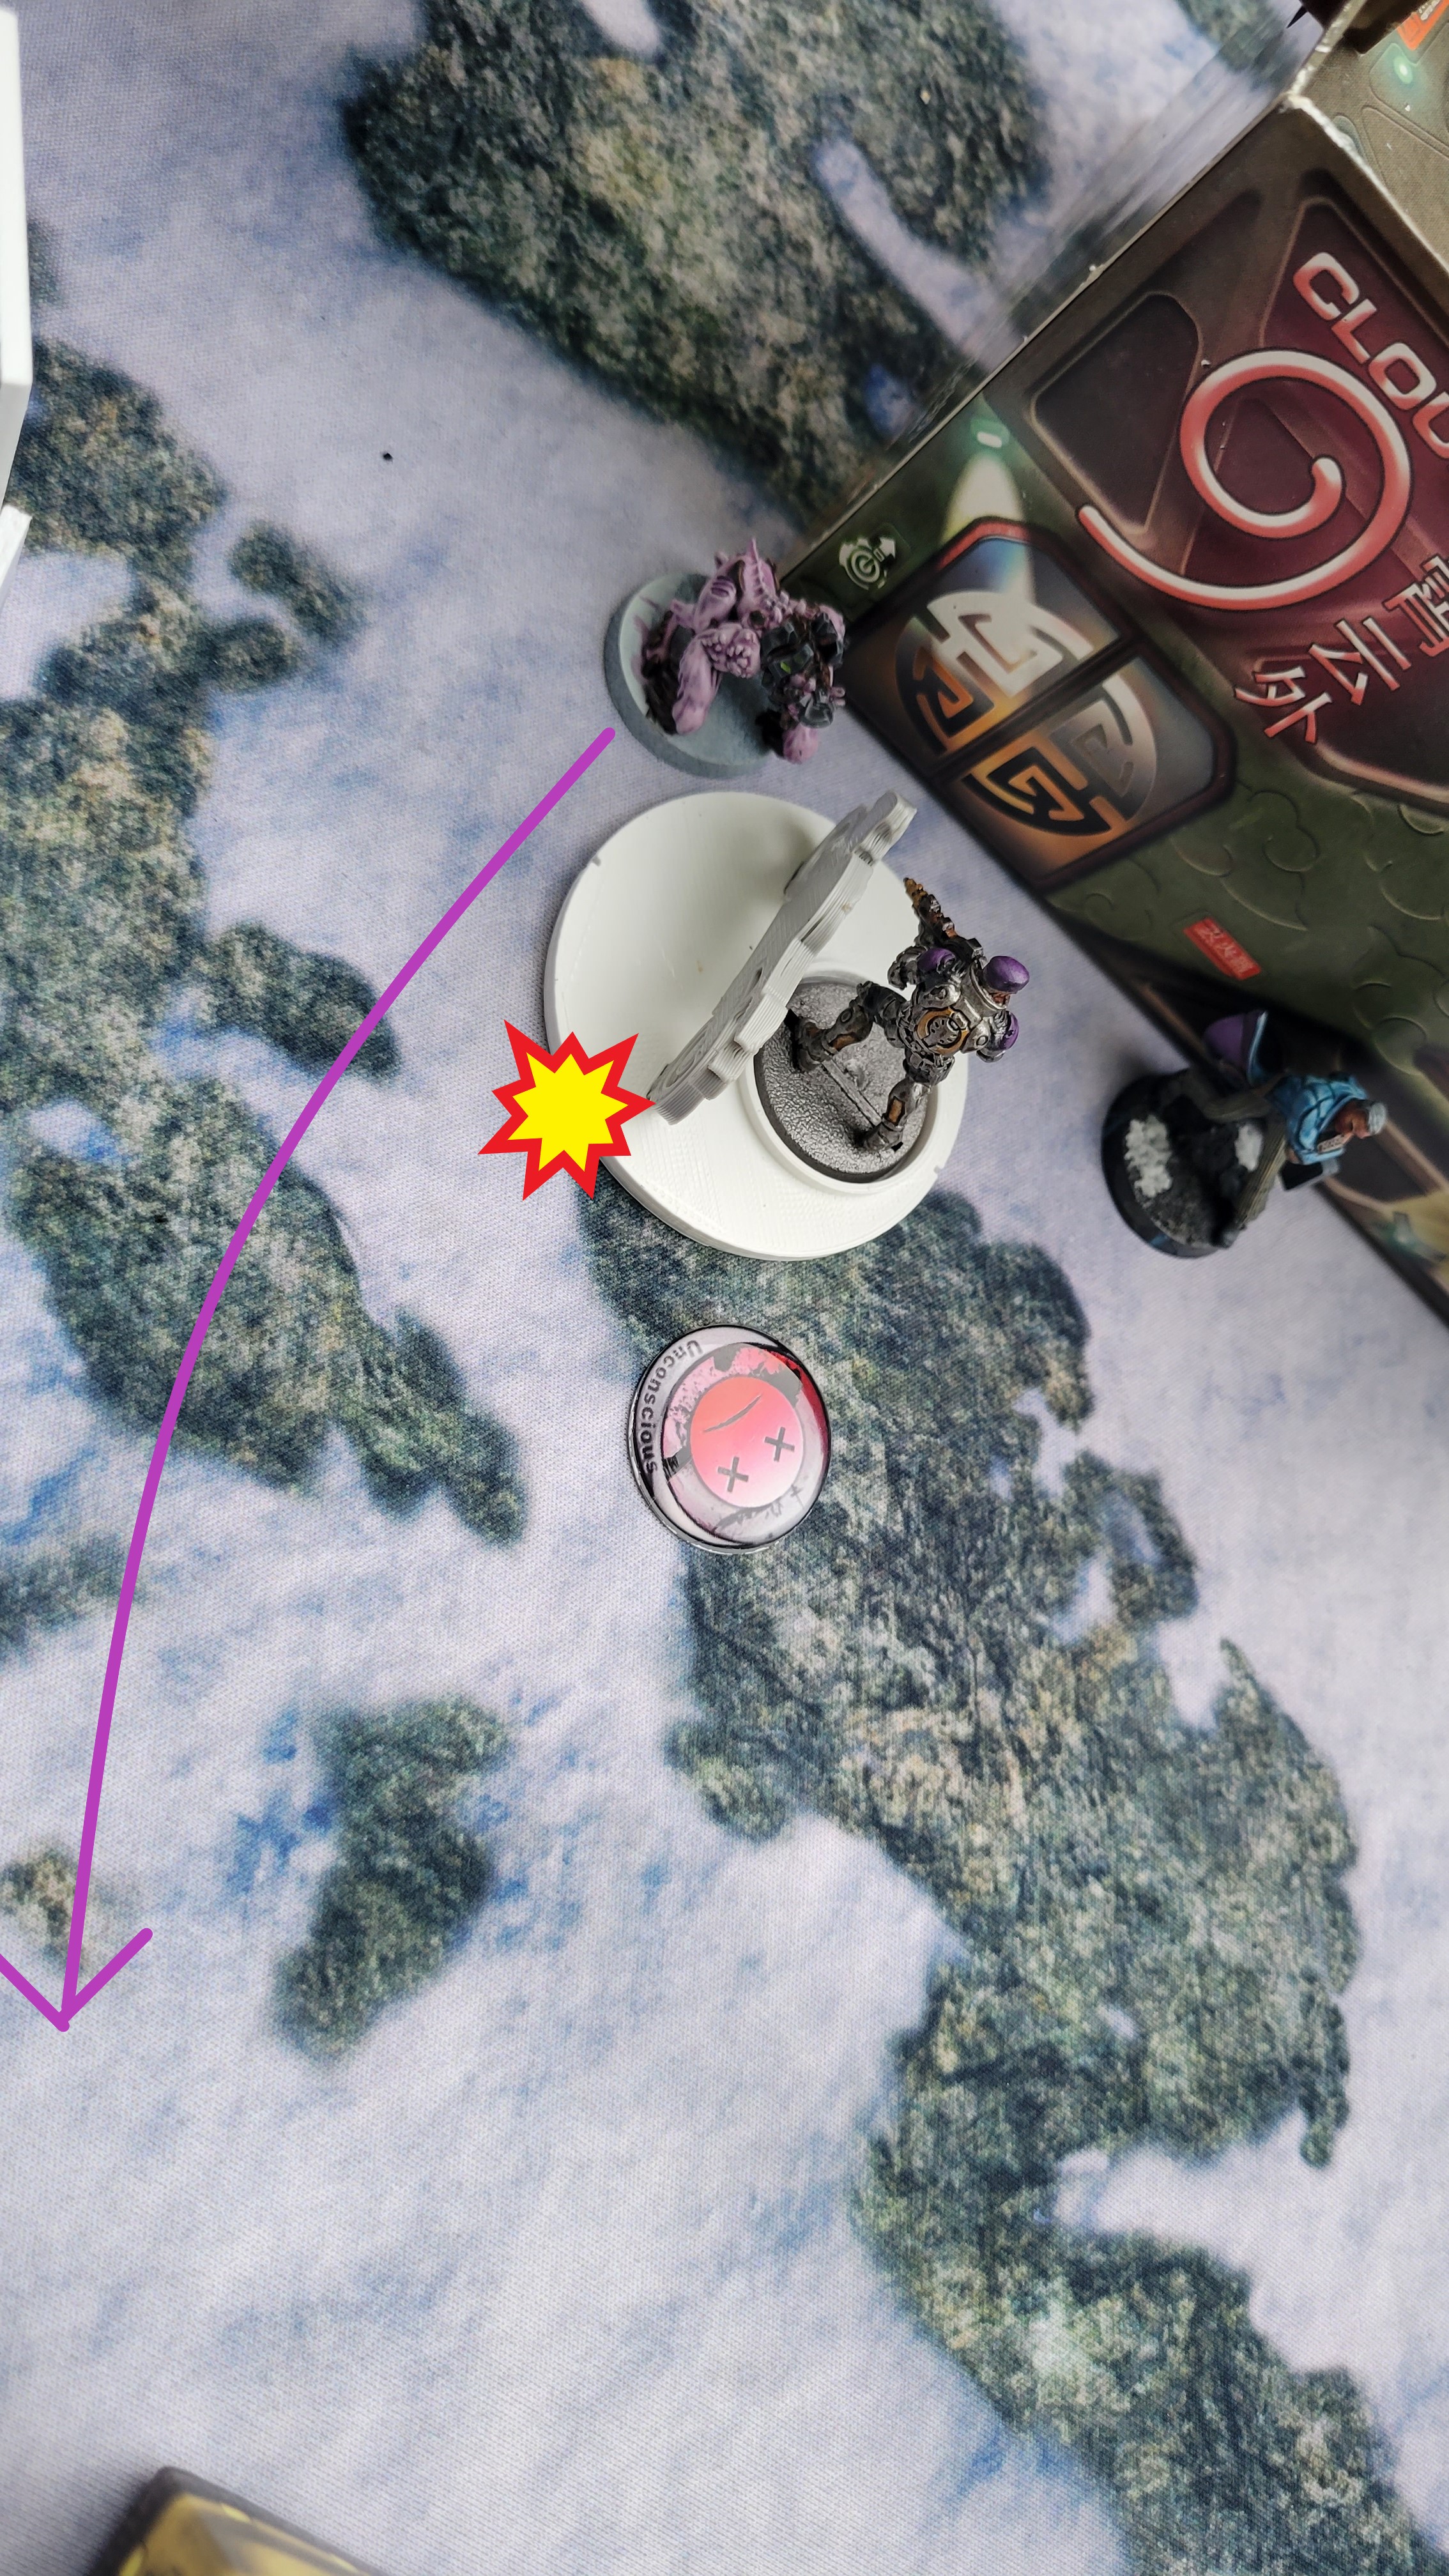
The Zulu Cobra advances up the right flank, into close range with the enemy TR bot. Revealing and stacking heavy modifiers against the TR bot, she is able to render it unconscious. At the same time, a Caliban BSG reveals, and dodges into line of sight with her.
The Beast hunter on the same flank advances to the window where the Caliban is, and unleashes a barrage of flames, immolating the Shasvatii.
The Zulu Cobra advances more, and performs a WIP check. Passing, she completes the classified: Net Undermine. She then re-enter a camo state.
Joan then begins to advance up the board, and nestled away in a corner. Using her coordinated order, she, the Varg, the Montessa enter suppressive fire.
 The Zulu Cobra goes up the flank, reveals, and renders the enemy TR bot unconscious. An enemy Caliban reveals by dodging into line of sight of the Zulu Cobra.
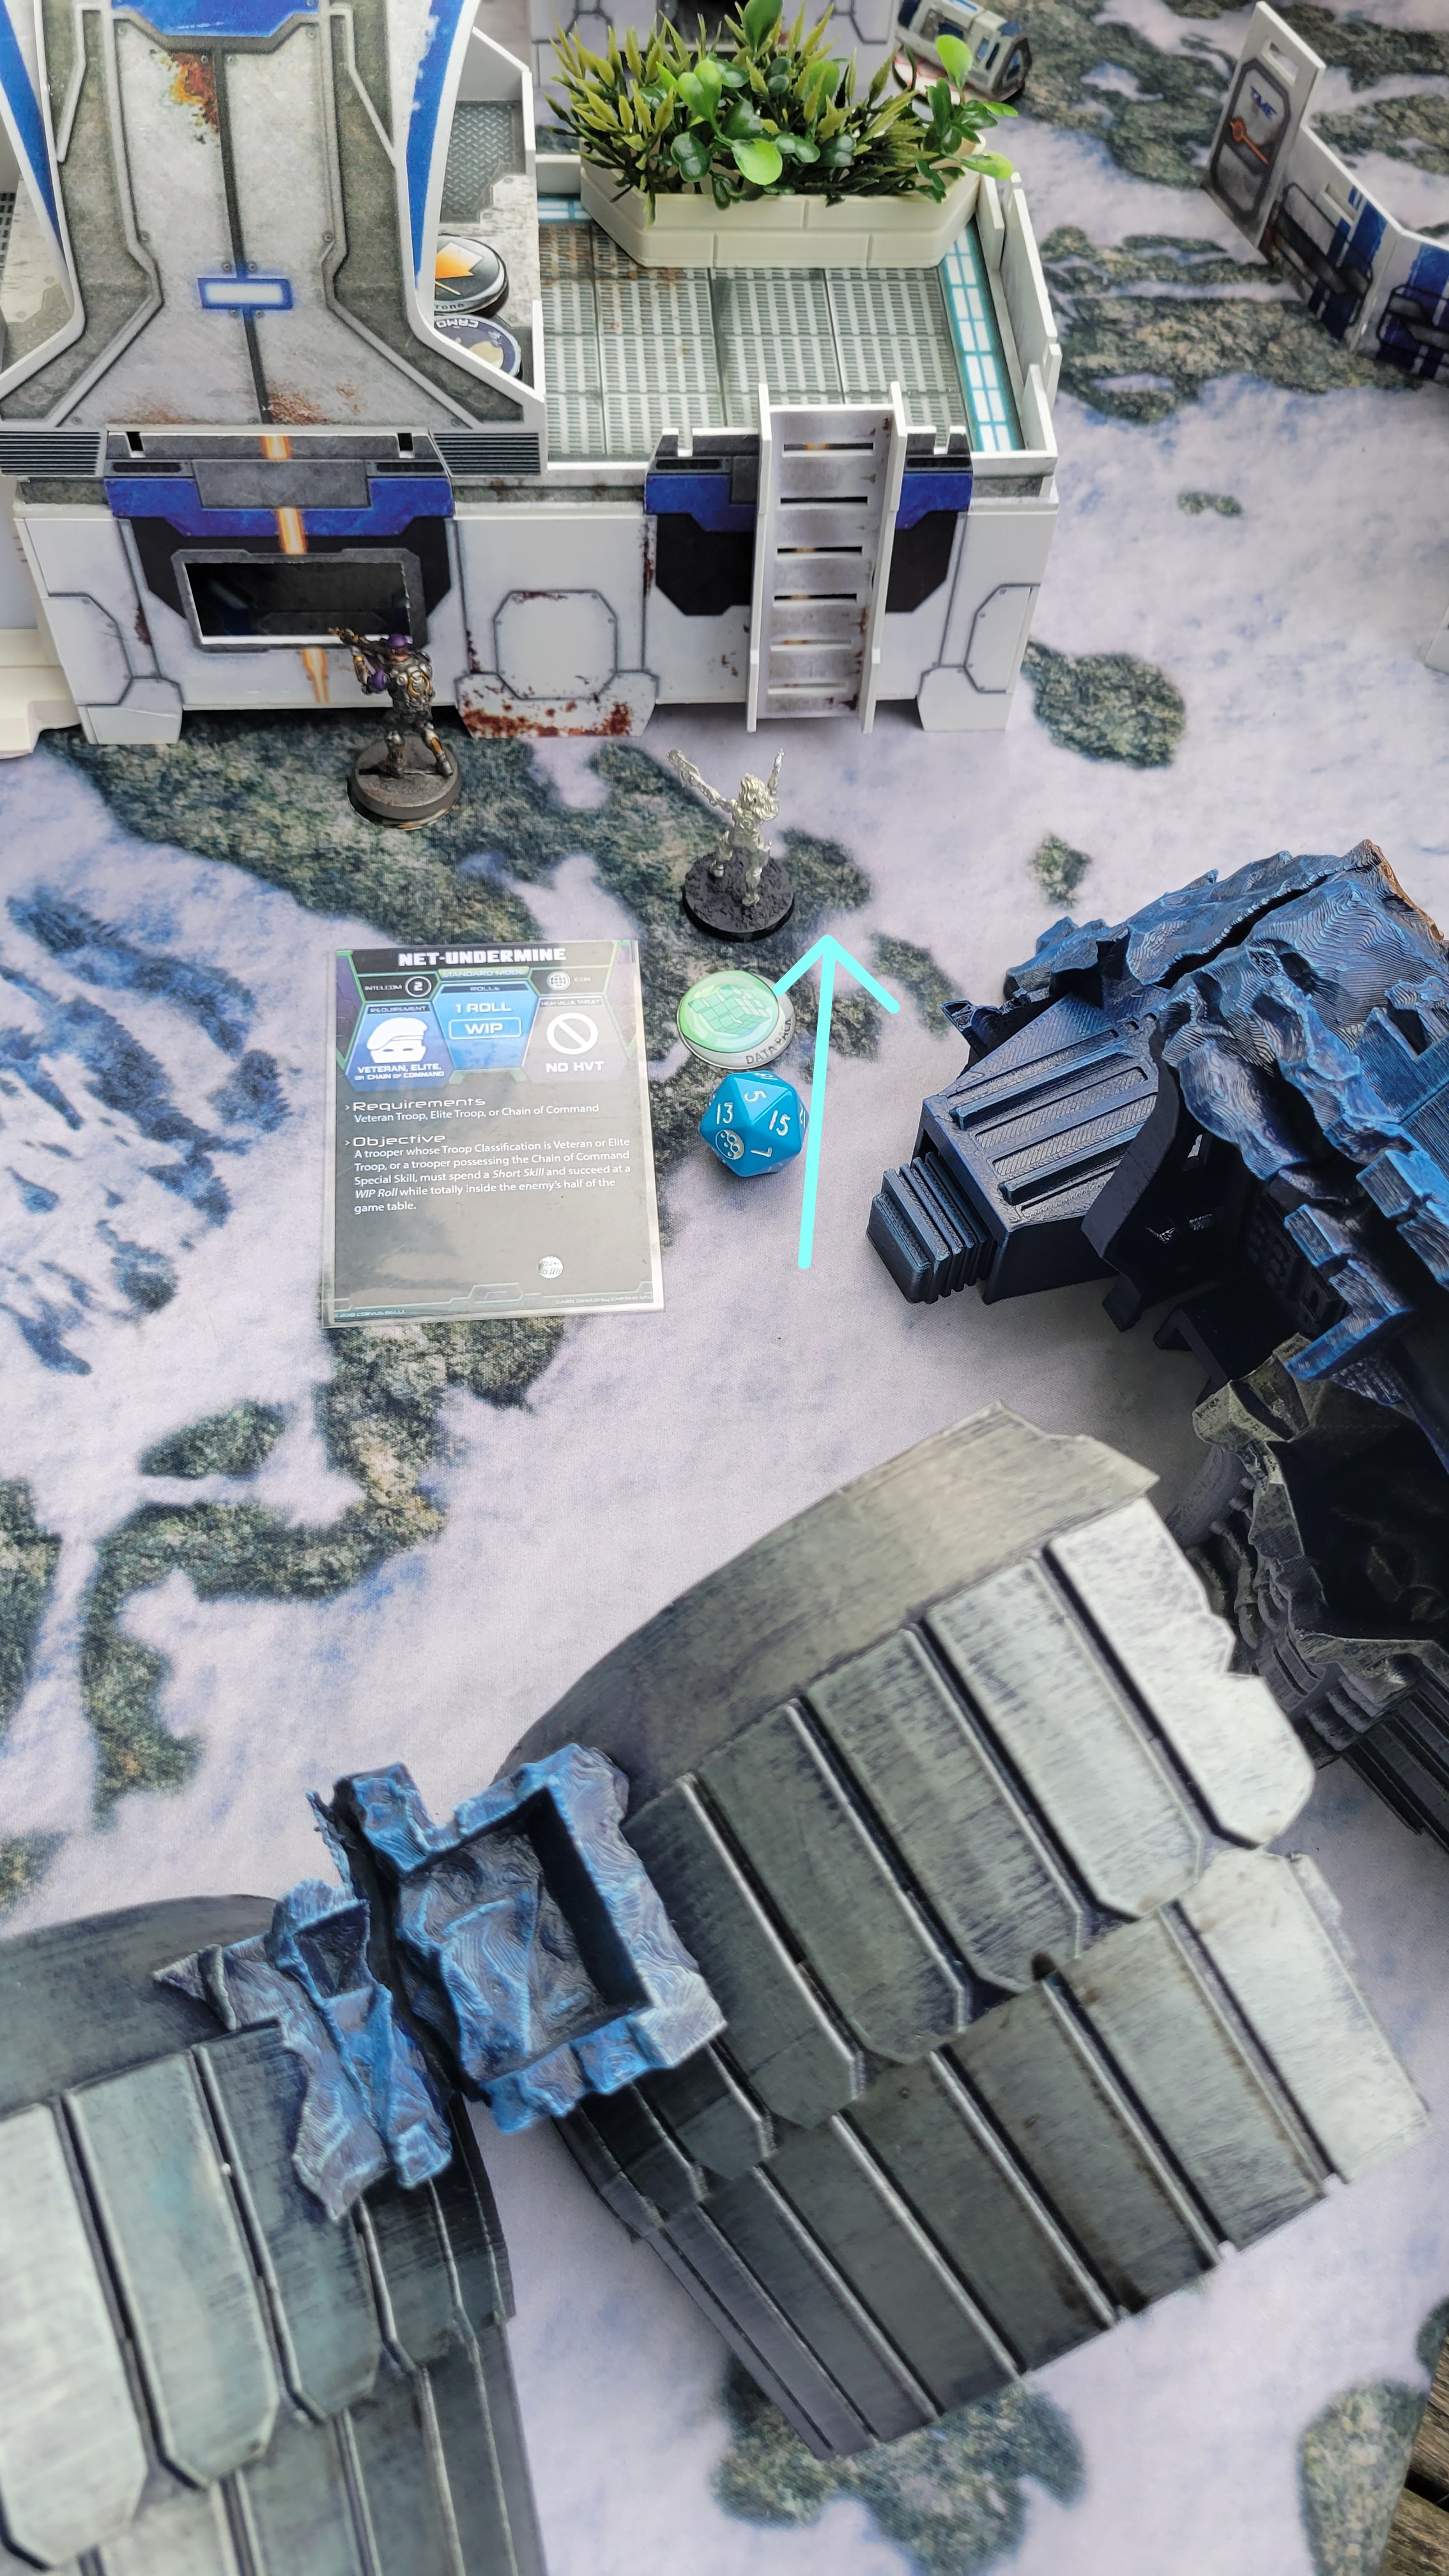 The Zulu Cobra moves forward more, and completes the classified objective, Net Undermine. She then re-enters the Camo State.
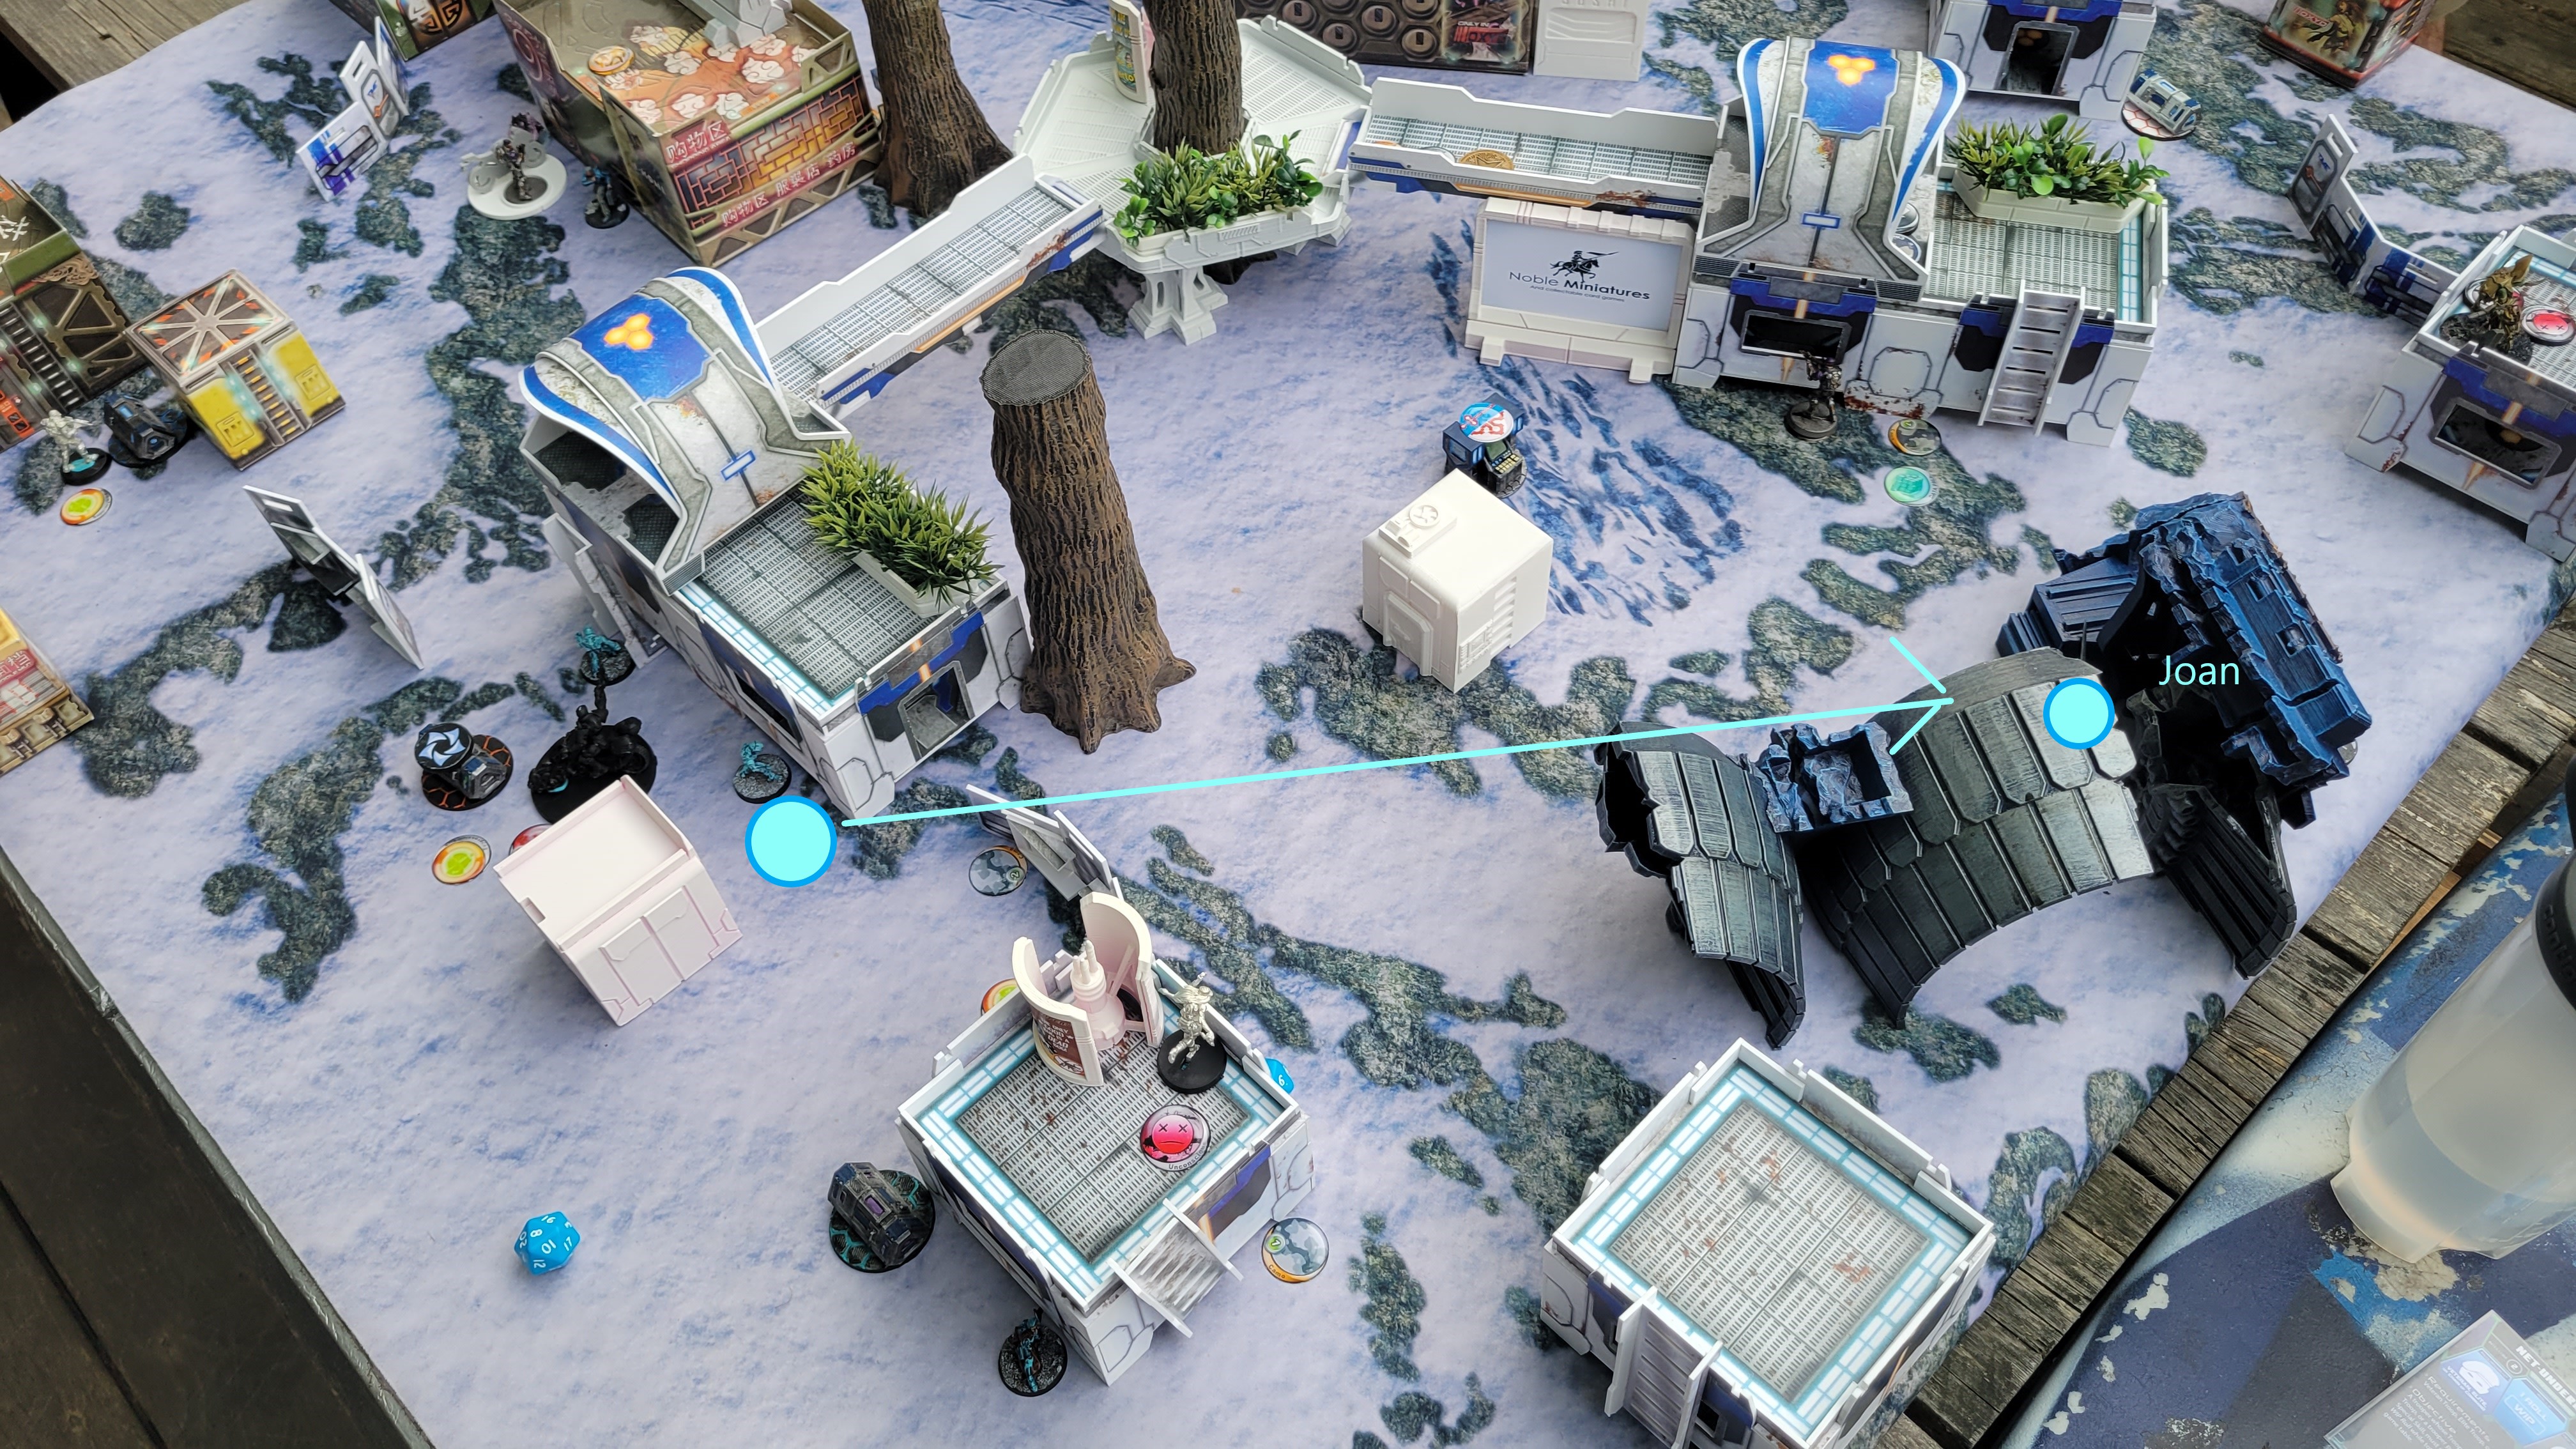
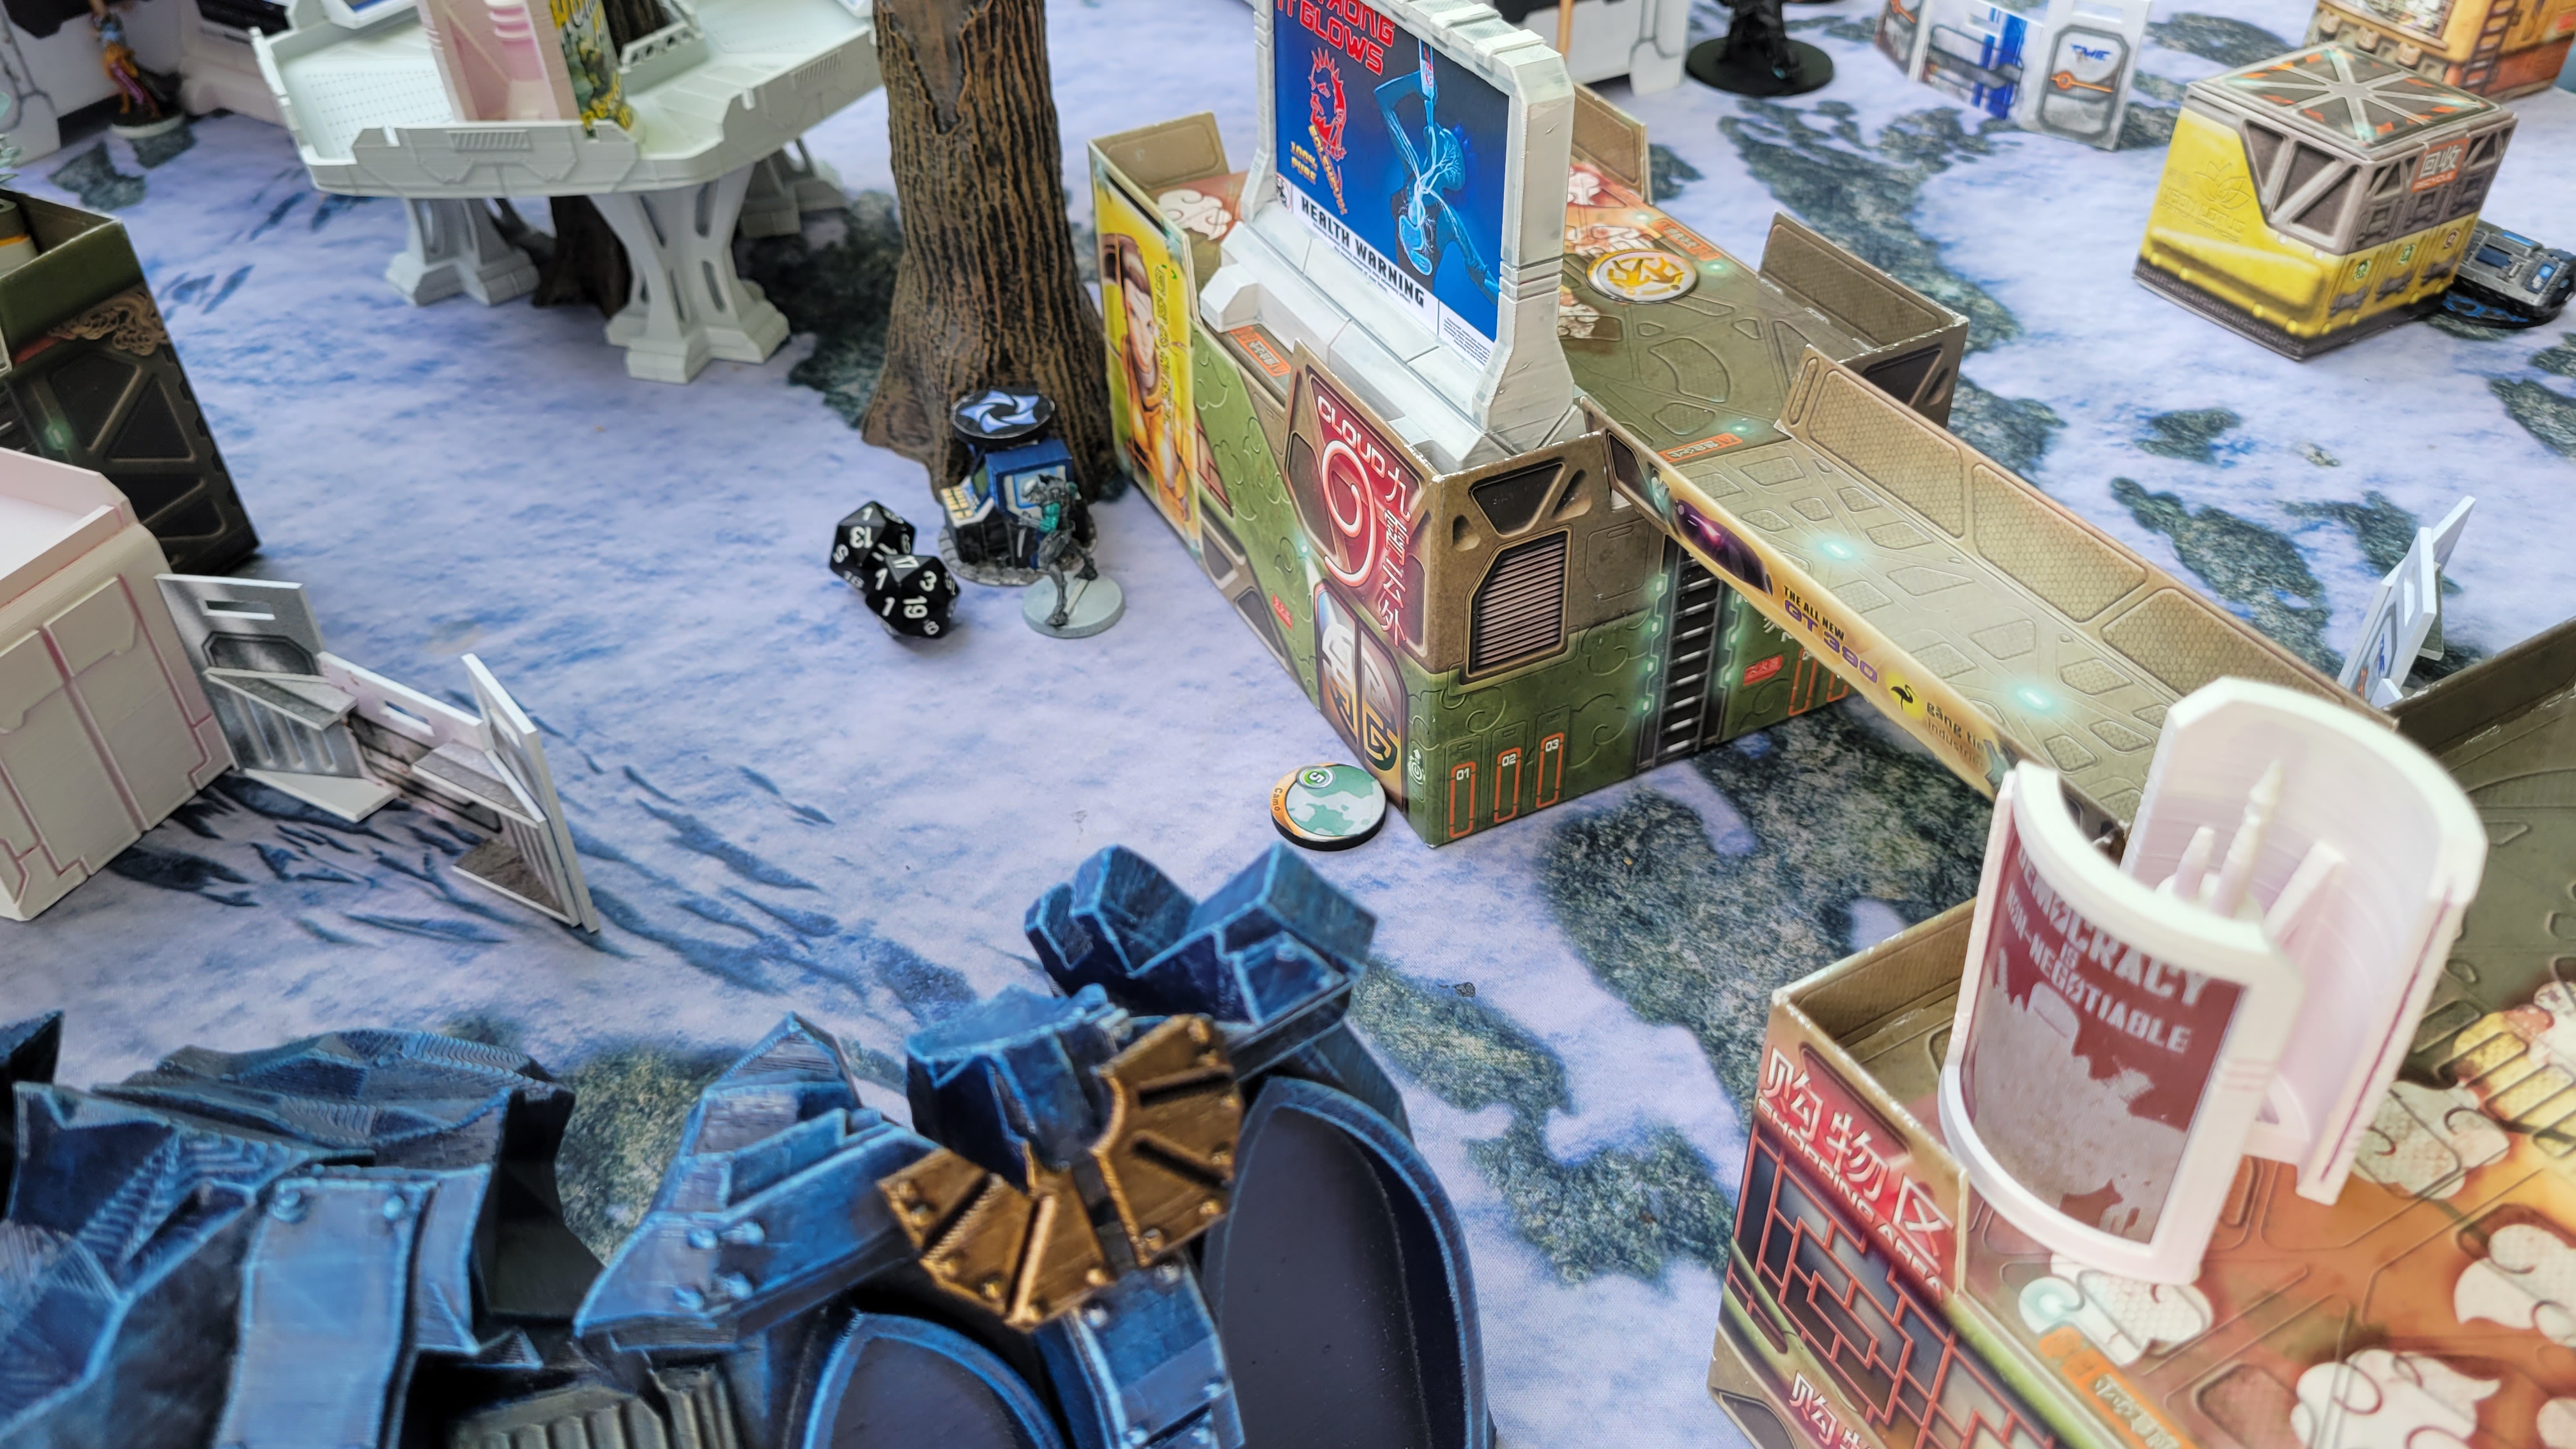
The Shasvatii turn begins with their Uber Hacker moving down the center building. Attempts at discovery are made from several units, but all are unsuccessful. It continues advancing until until it enters Zone of Control of the designated Server, and it reveals to be another Shrouded KHD. It performs the special Hacker skill, and destroys the server.
The Tiaga kills the Motorized Bounty Hunter, then advances towards the Monstrucker. Between the coordinated fire of the Monstrucker and the Montessa, the Tiaga is killed, but not before rendering the Monstrucker unconscious with its Chain Colt.
Another camo token advances on the PanOcenian right flank, and reveals itself to be a Caliban FO. It plants a D charge on a building, and scores the classified Sabotage.
 ... Where it is brought low by the combined fire of the Monstrucker and Montessa Knight. In its death throws, it is able to fire off its Chain Colt, knocking the Monstrucker unconscious.
 Finally, a Caliban moves forward and reveals itself next to a building. Planting a D charge, he completed the Sabotage Classified Objective.
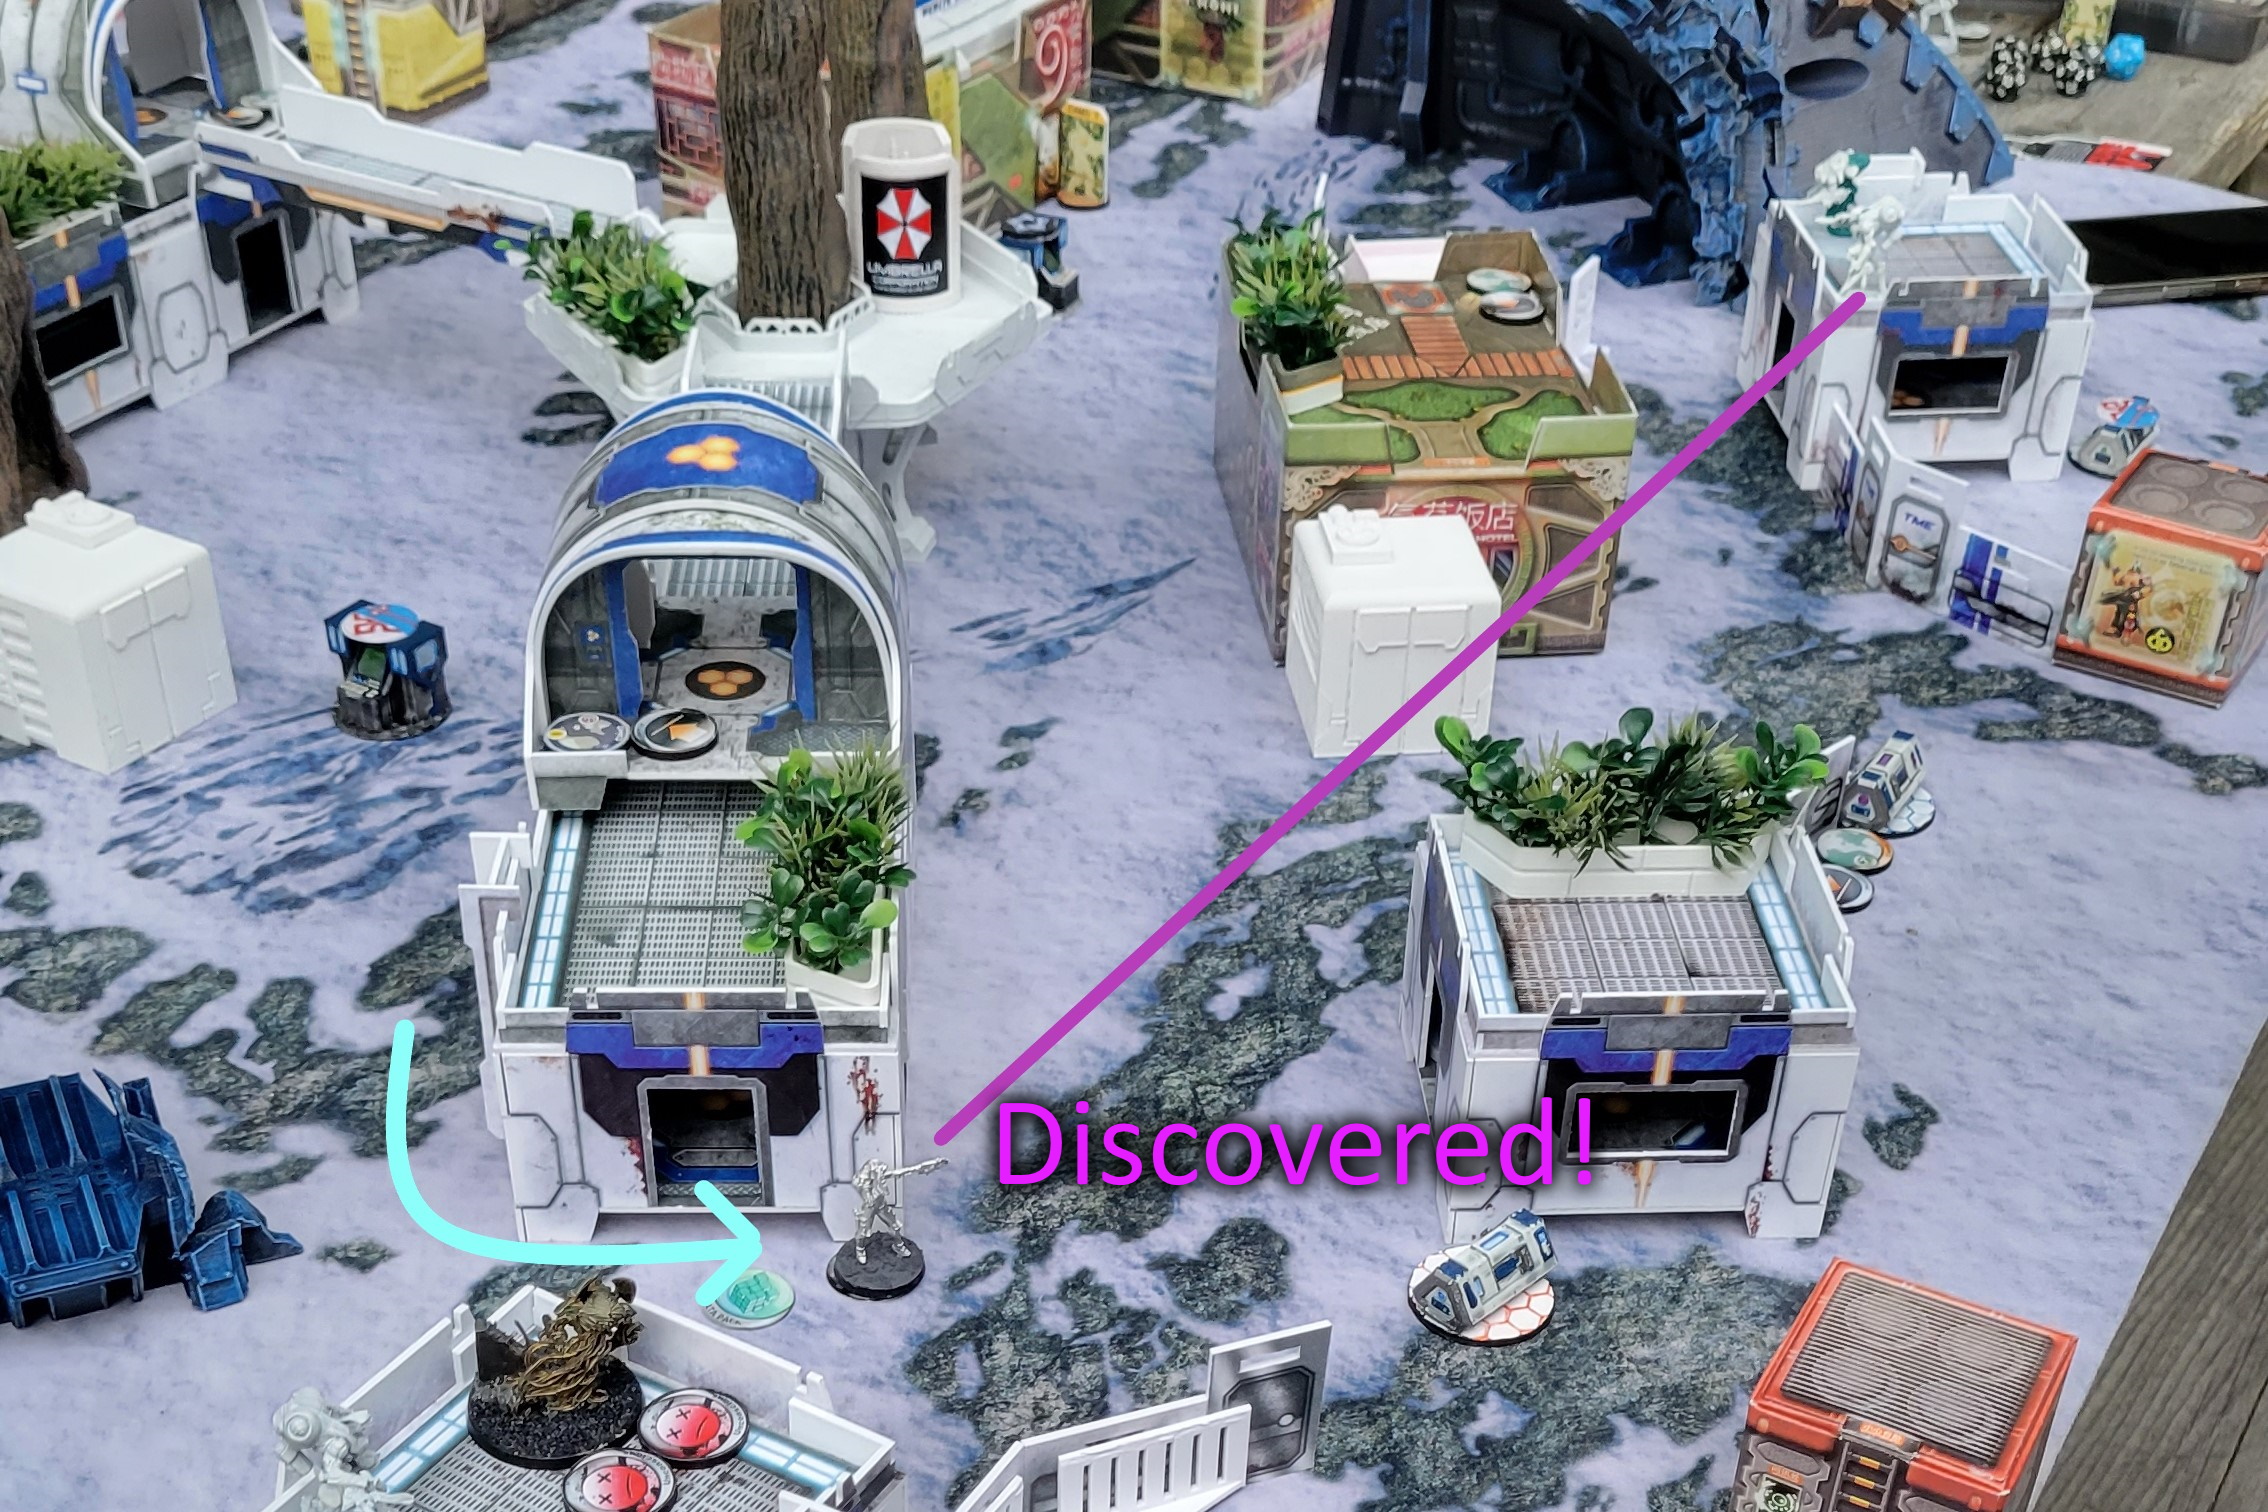
The Zulu Cobra advances, and prepares to attempt a hack on a non designated console. However, she is discovered by a flash pulse bot, so she remains in place.
The Knight of Santiago parachutist enters on the PanOcenian left flank, and shoots down the Shrouded with his Spitfire.
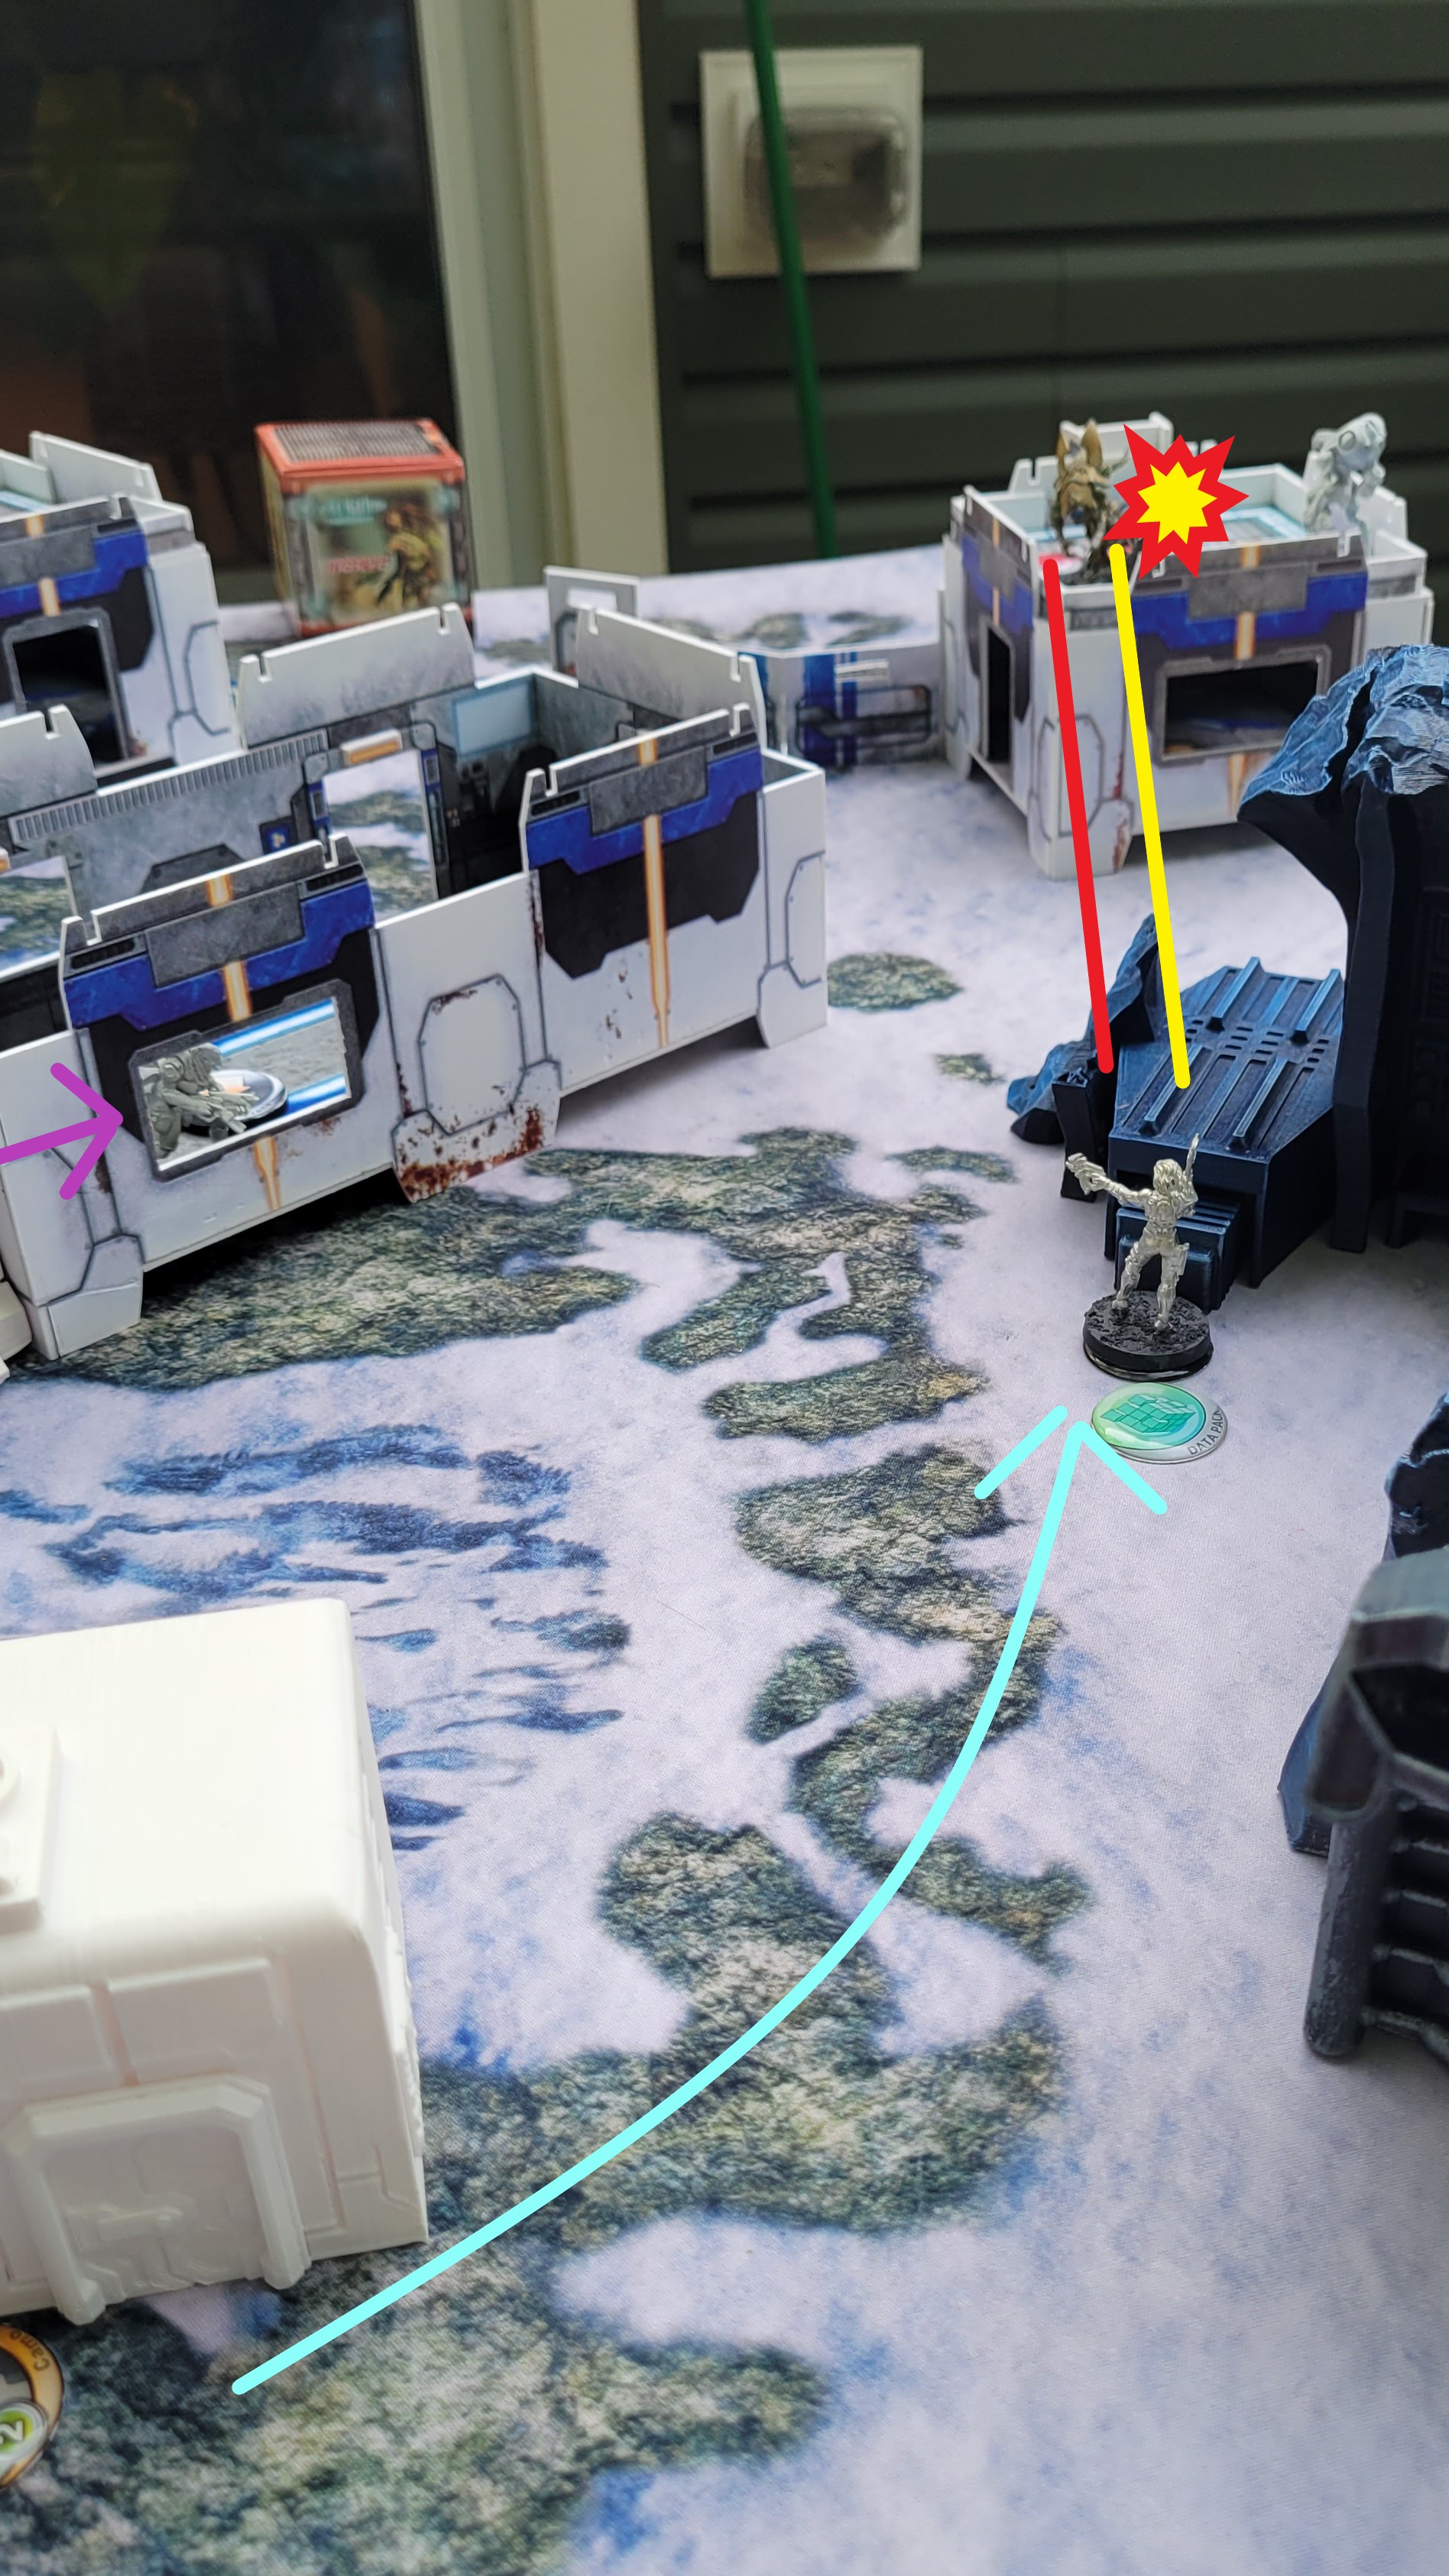
Going back to the Zulu Cobra, she attempts a guts or glory type move, advancing forward using her Uber Hacker order, and attempts to destroy the console with Data Erasure. In doing so, a Caliban reveals and takes a shot with its Pulzar, and while a Flash Pulse Bot takes a shot at her. Unfortunately, she rolls too high for the Erasure program, and while passing her BTS save from the Pulzar, is stunned by the Flash Pulse.
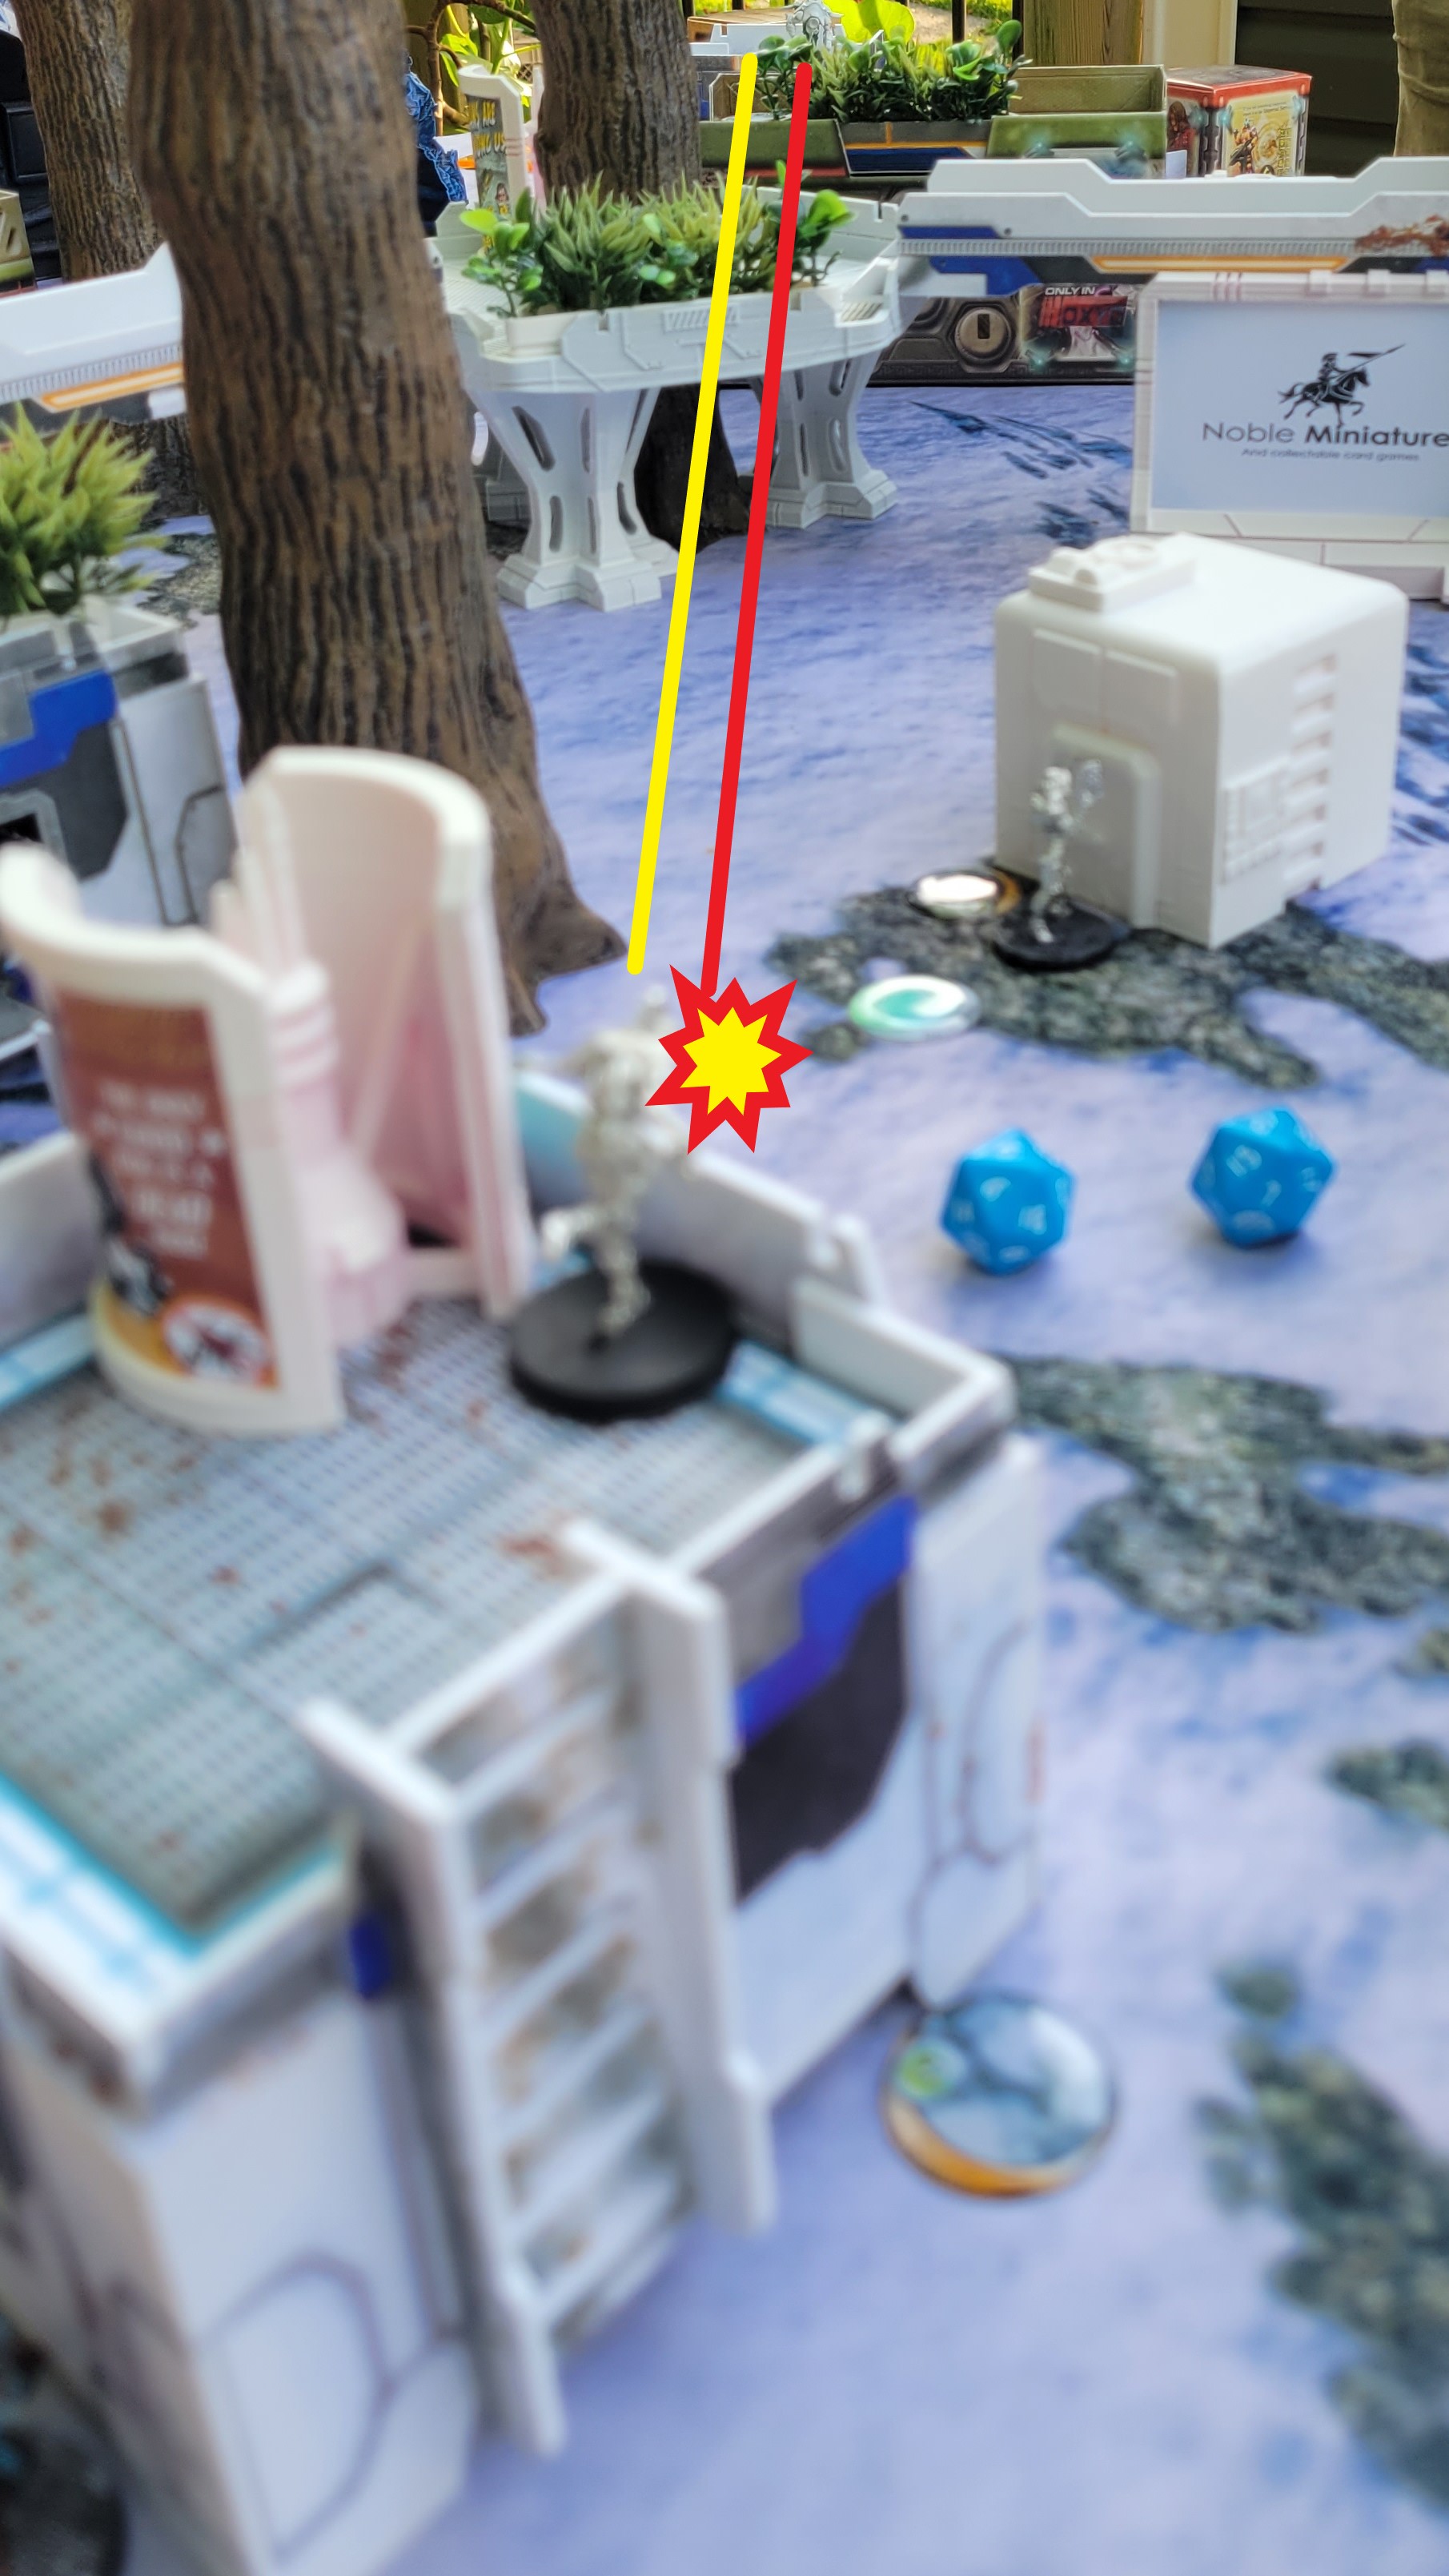
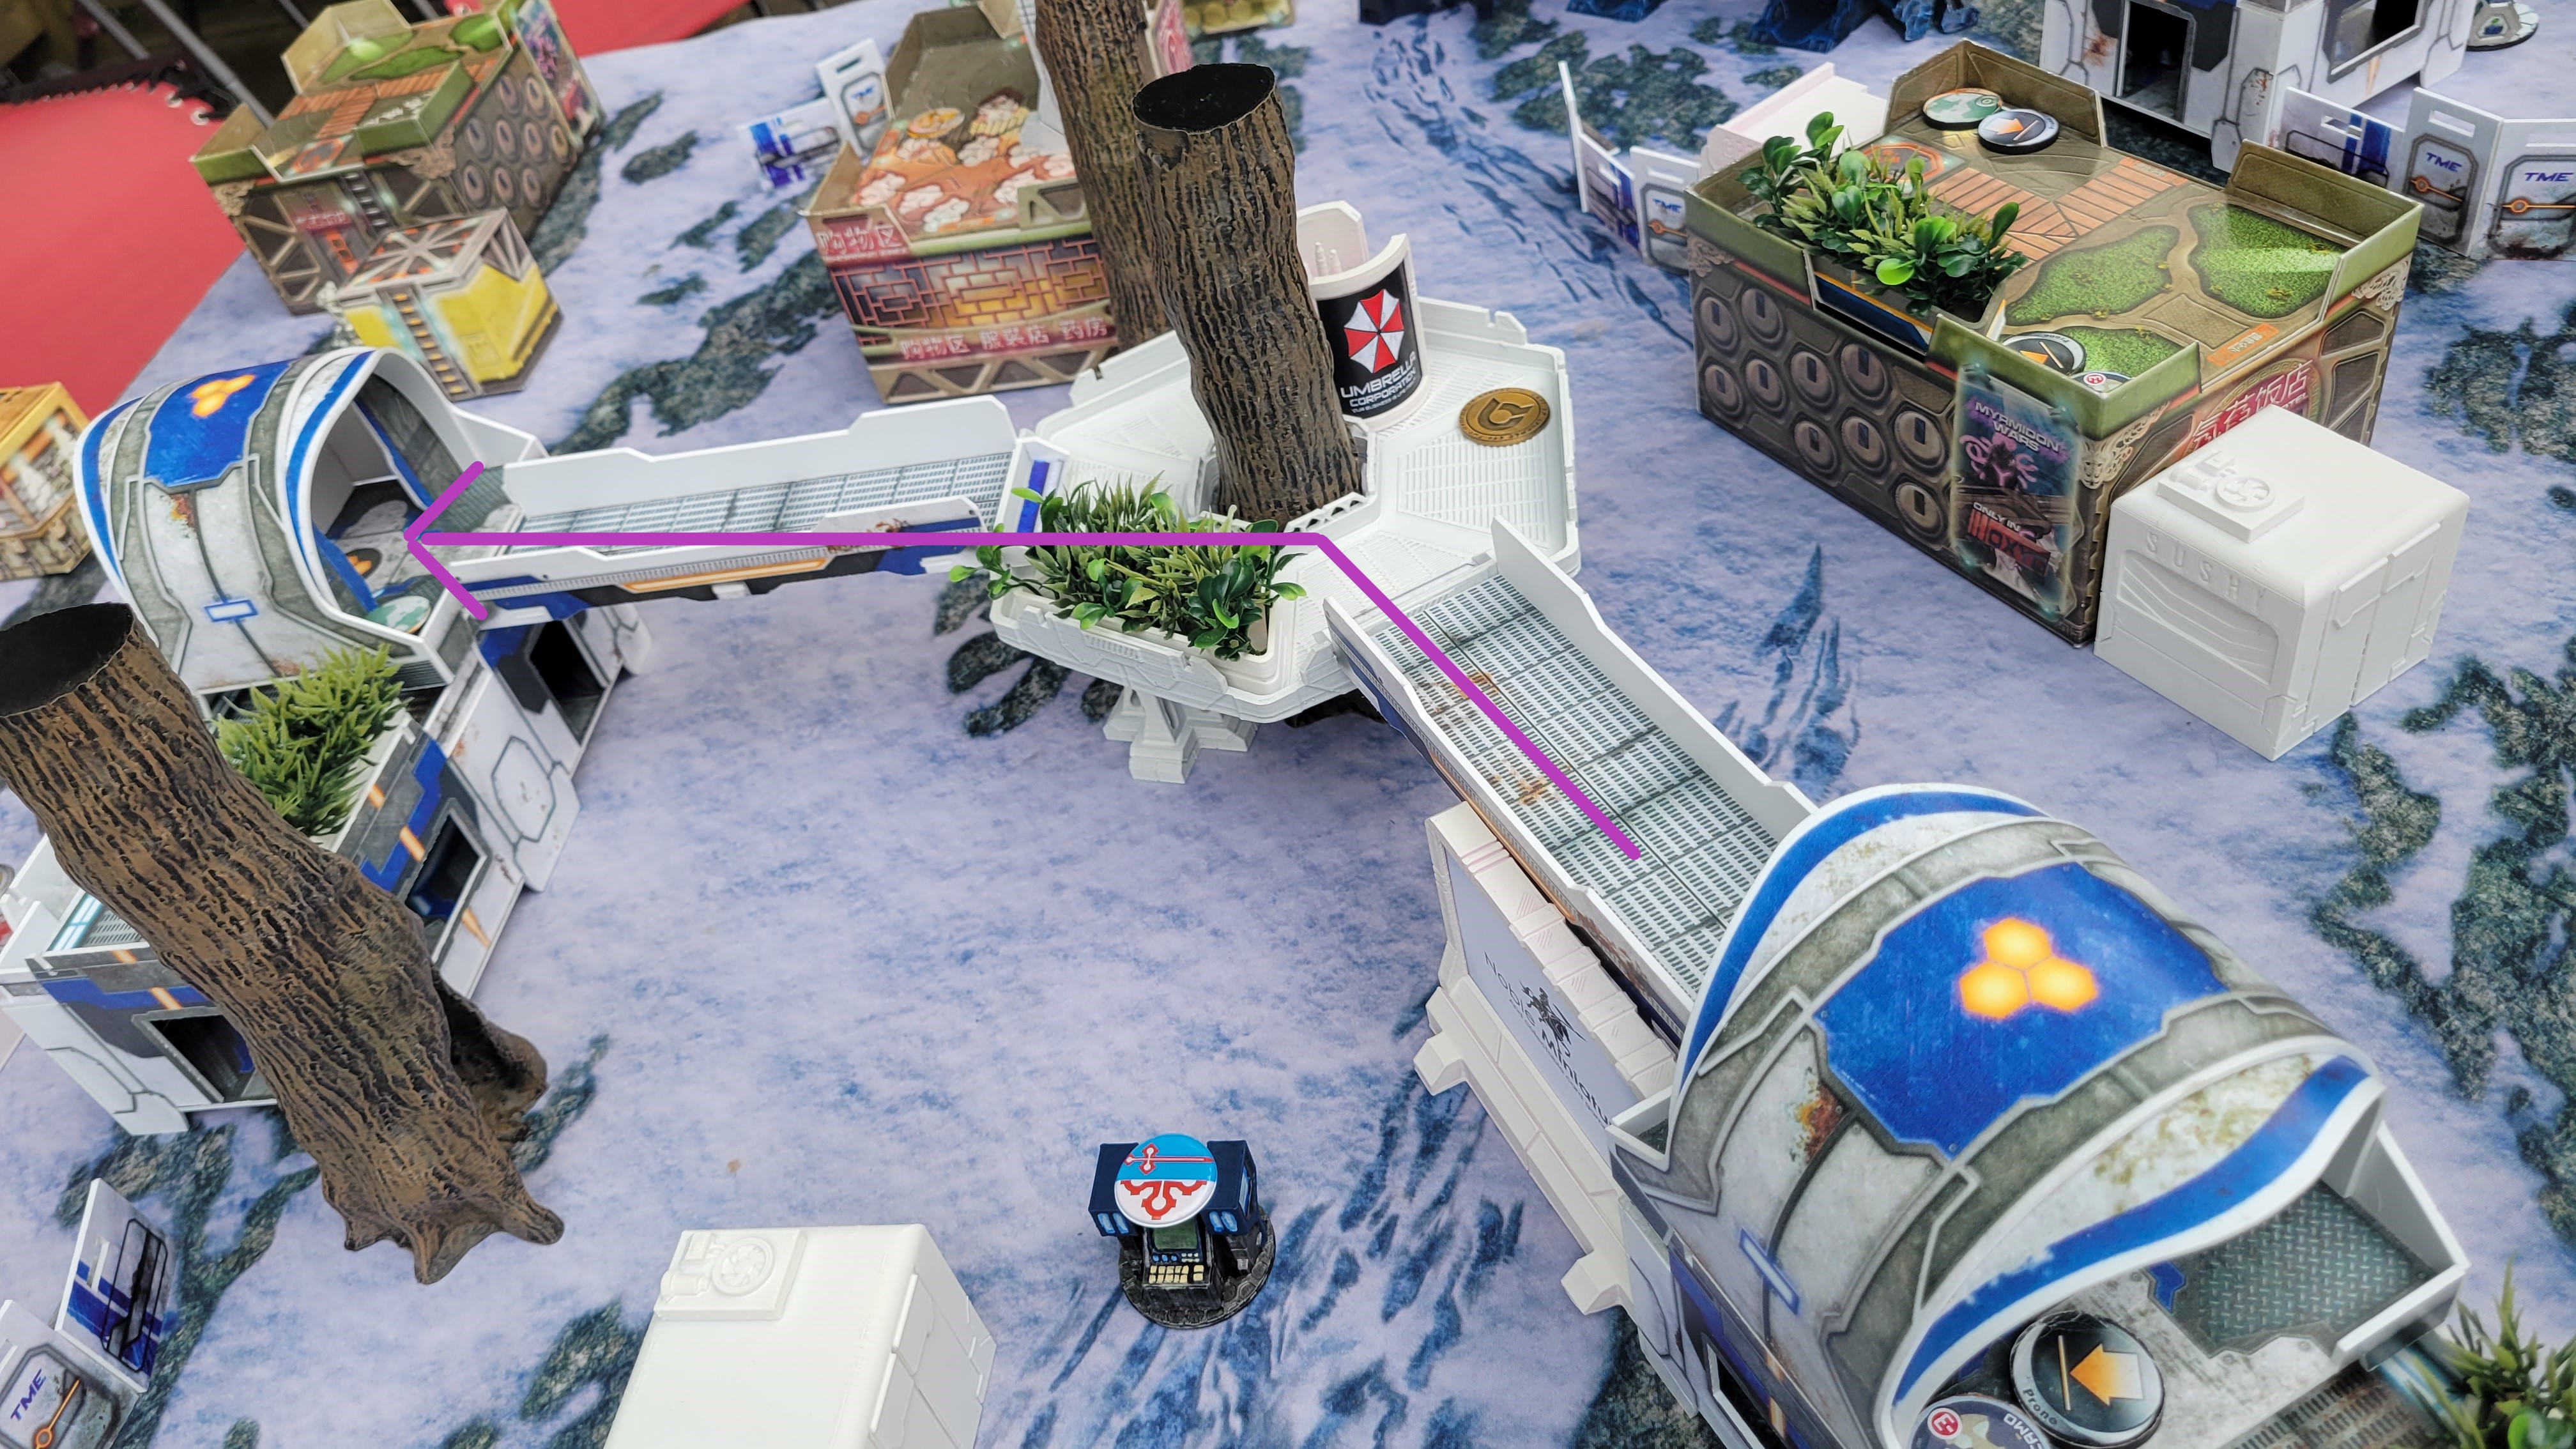
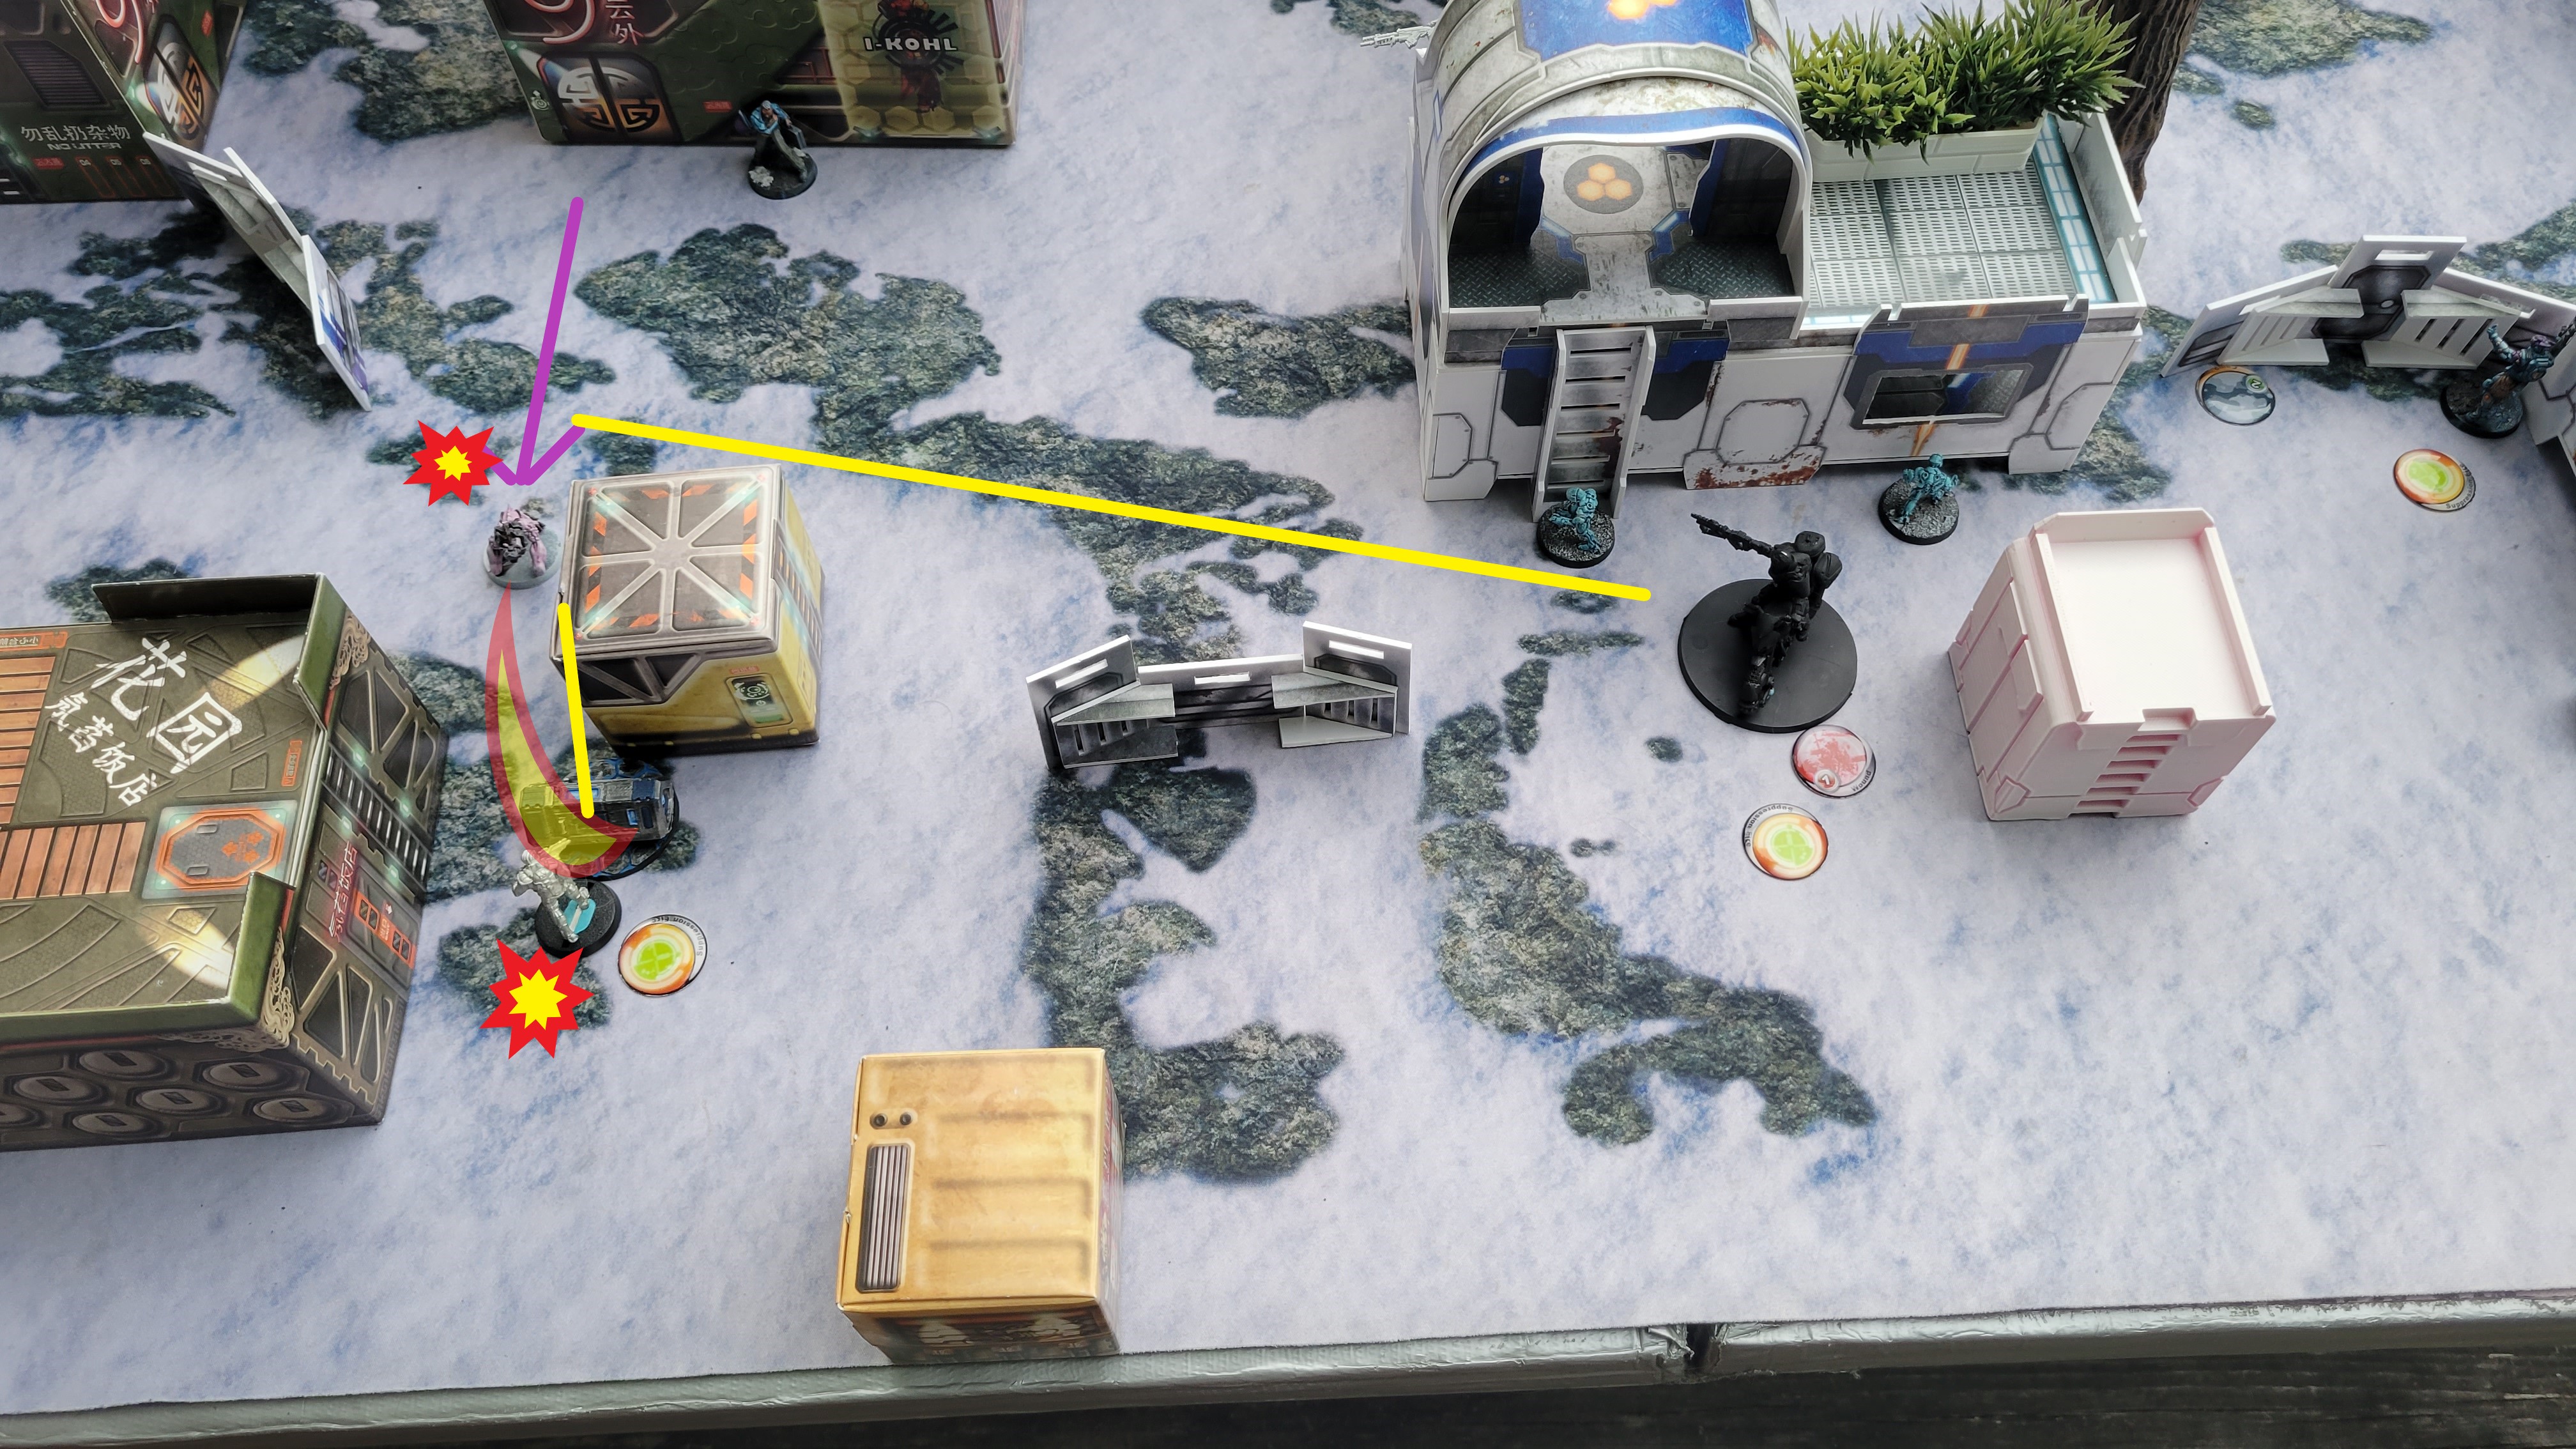
In a coordinated order, Joan, the Montessa, the Santiago, and the Beast Hunter all advance, with the Santiago taking the spearhead. The Montessa and the Santiago try to shoot down the TR bot with the second half of the order. The TR bot opens fire at the Santiago, and they both roll a 10 as their highest, cancelling out all shots. The Montessa misses his shot as well. Concurrently, the Flash Pulse bot fires a flash pulse at the Santiago, who is stunned. On the other side of the board, Joan is hit with the enemy Pulzar, and takes a wound.
Joan rushes forward in an attempt to destroy the Server, but on her next order she enters range of a repeater, and is oblivioned by a now revealed Mentor.
The Beast hunter attempts to cross the threshold to deliver some hits on the server, but is put down by the Flash Pulse Bot.
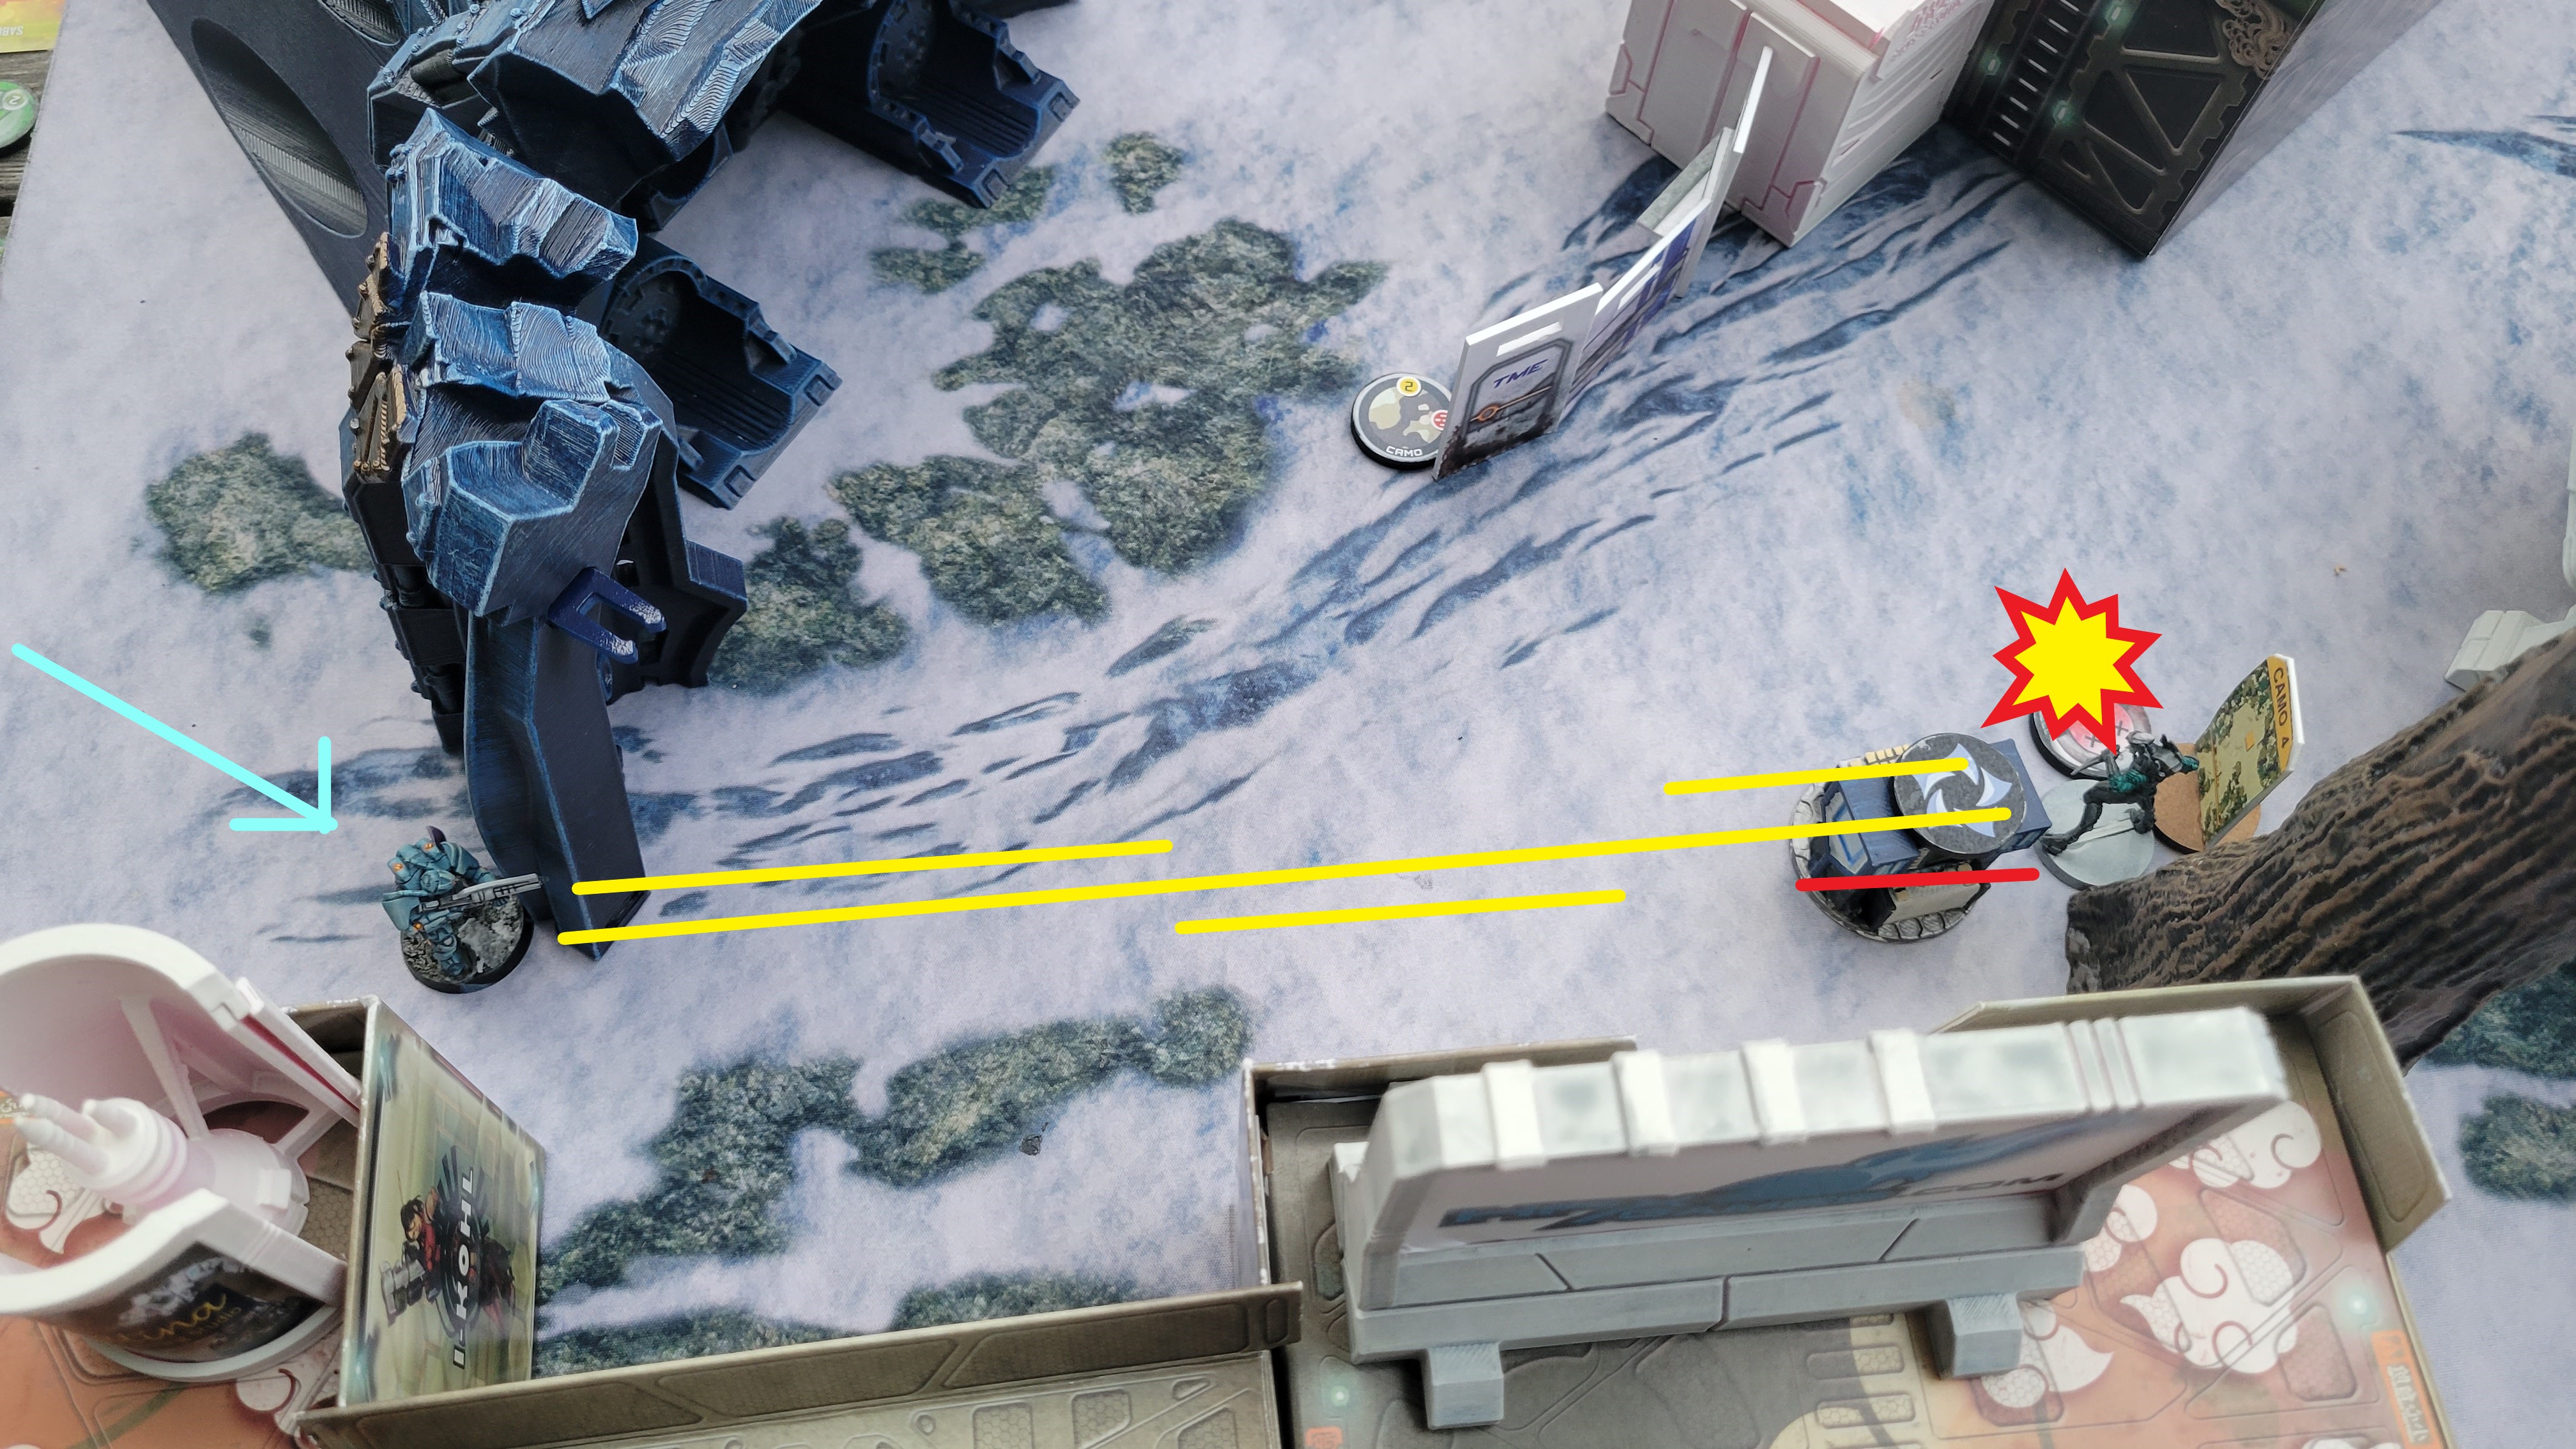 The Santiago Spitfire enters using the mission specific parachutist rule, advances, and opens fire on the Shrouded KHD, rending the Alien unconscious.
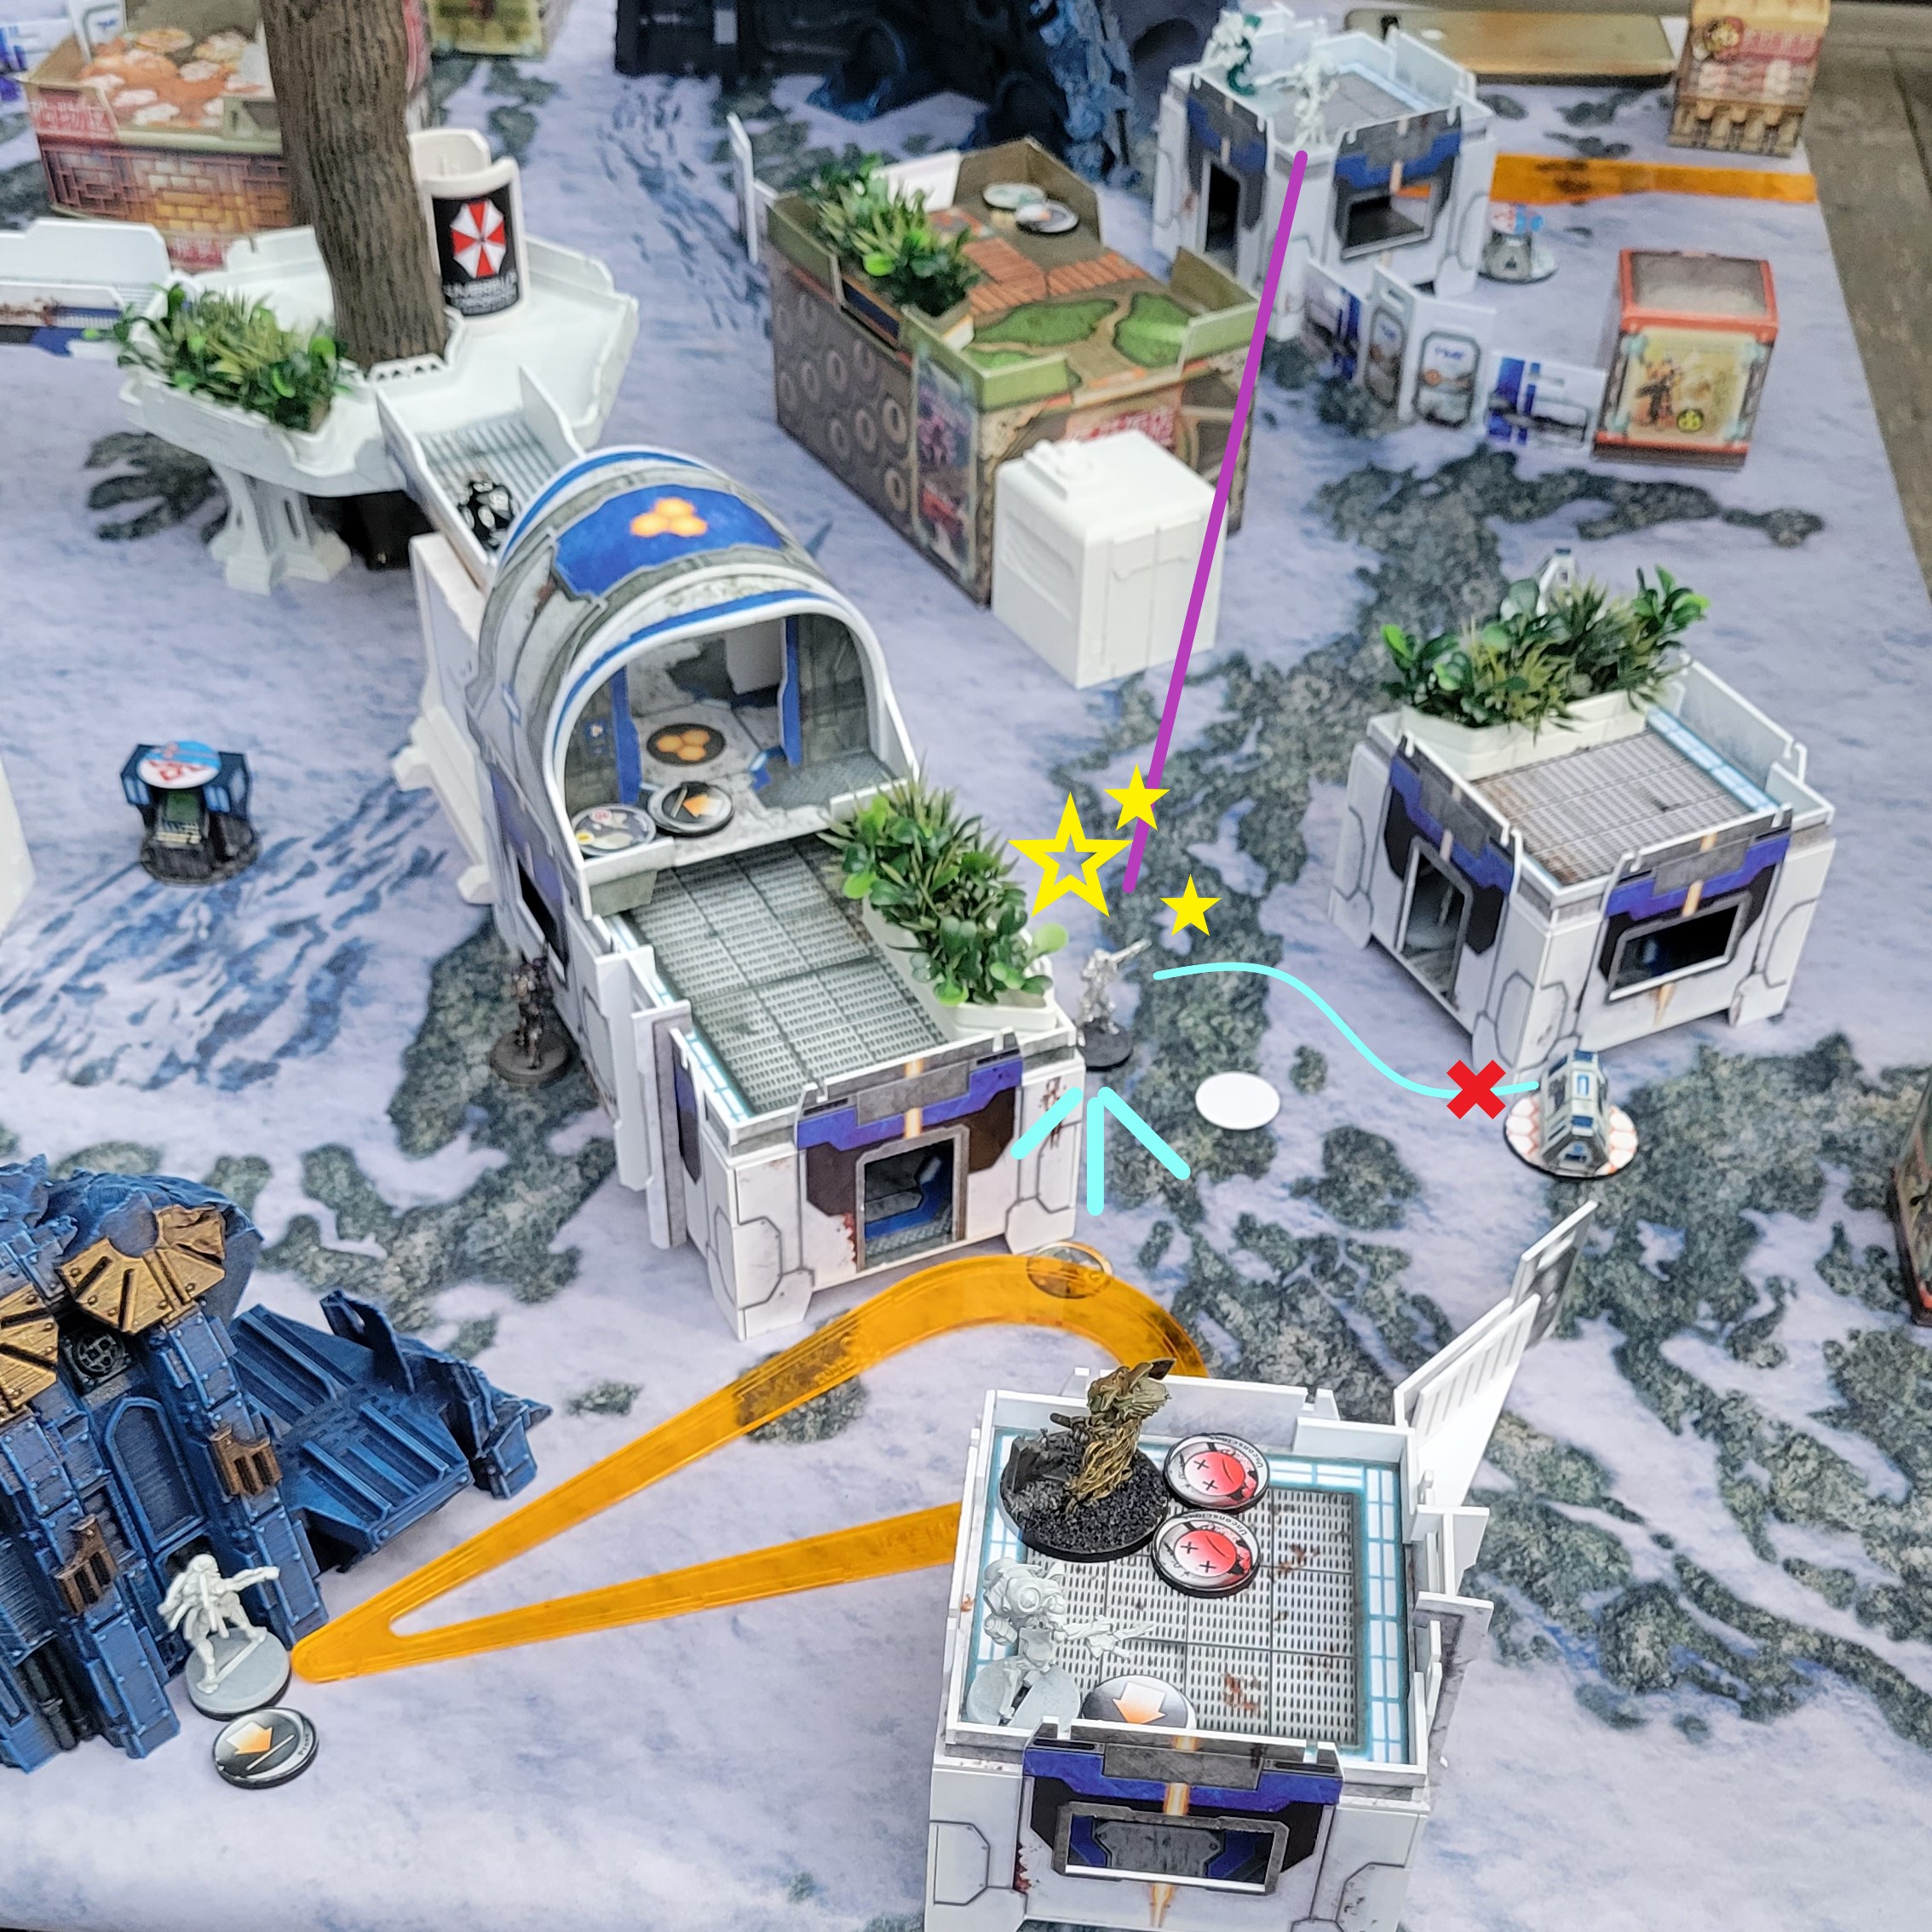 The Zulu Cobra rushes forward, in an attempt to quickly perform a data erasure versus a server. Unfortunately, she fails, and while she survives the Pulzar of the enemy Caliban, she is flash pulsed bot the Ikadron.
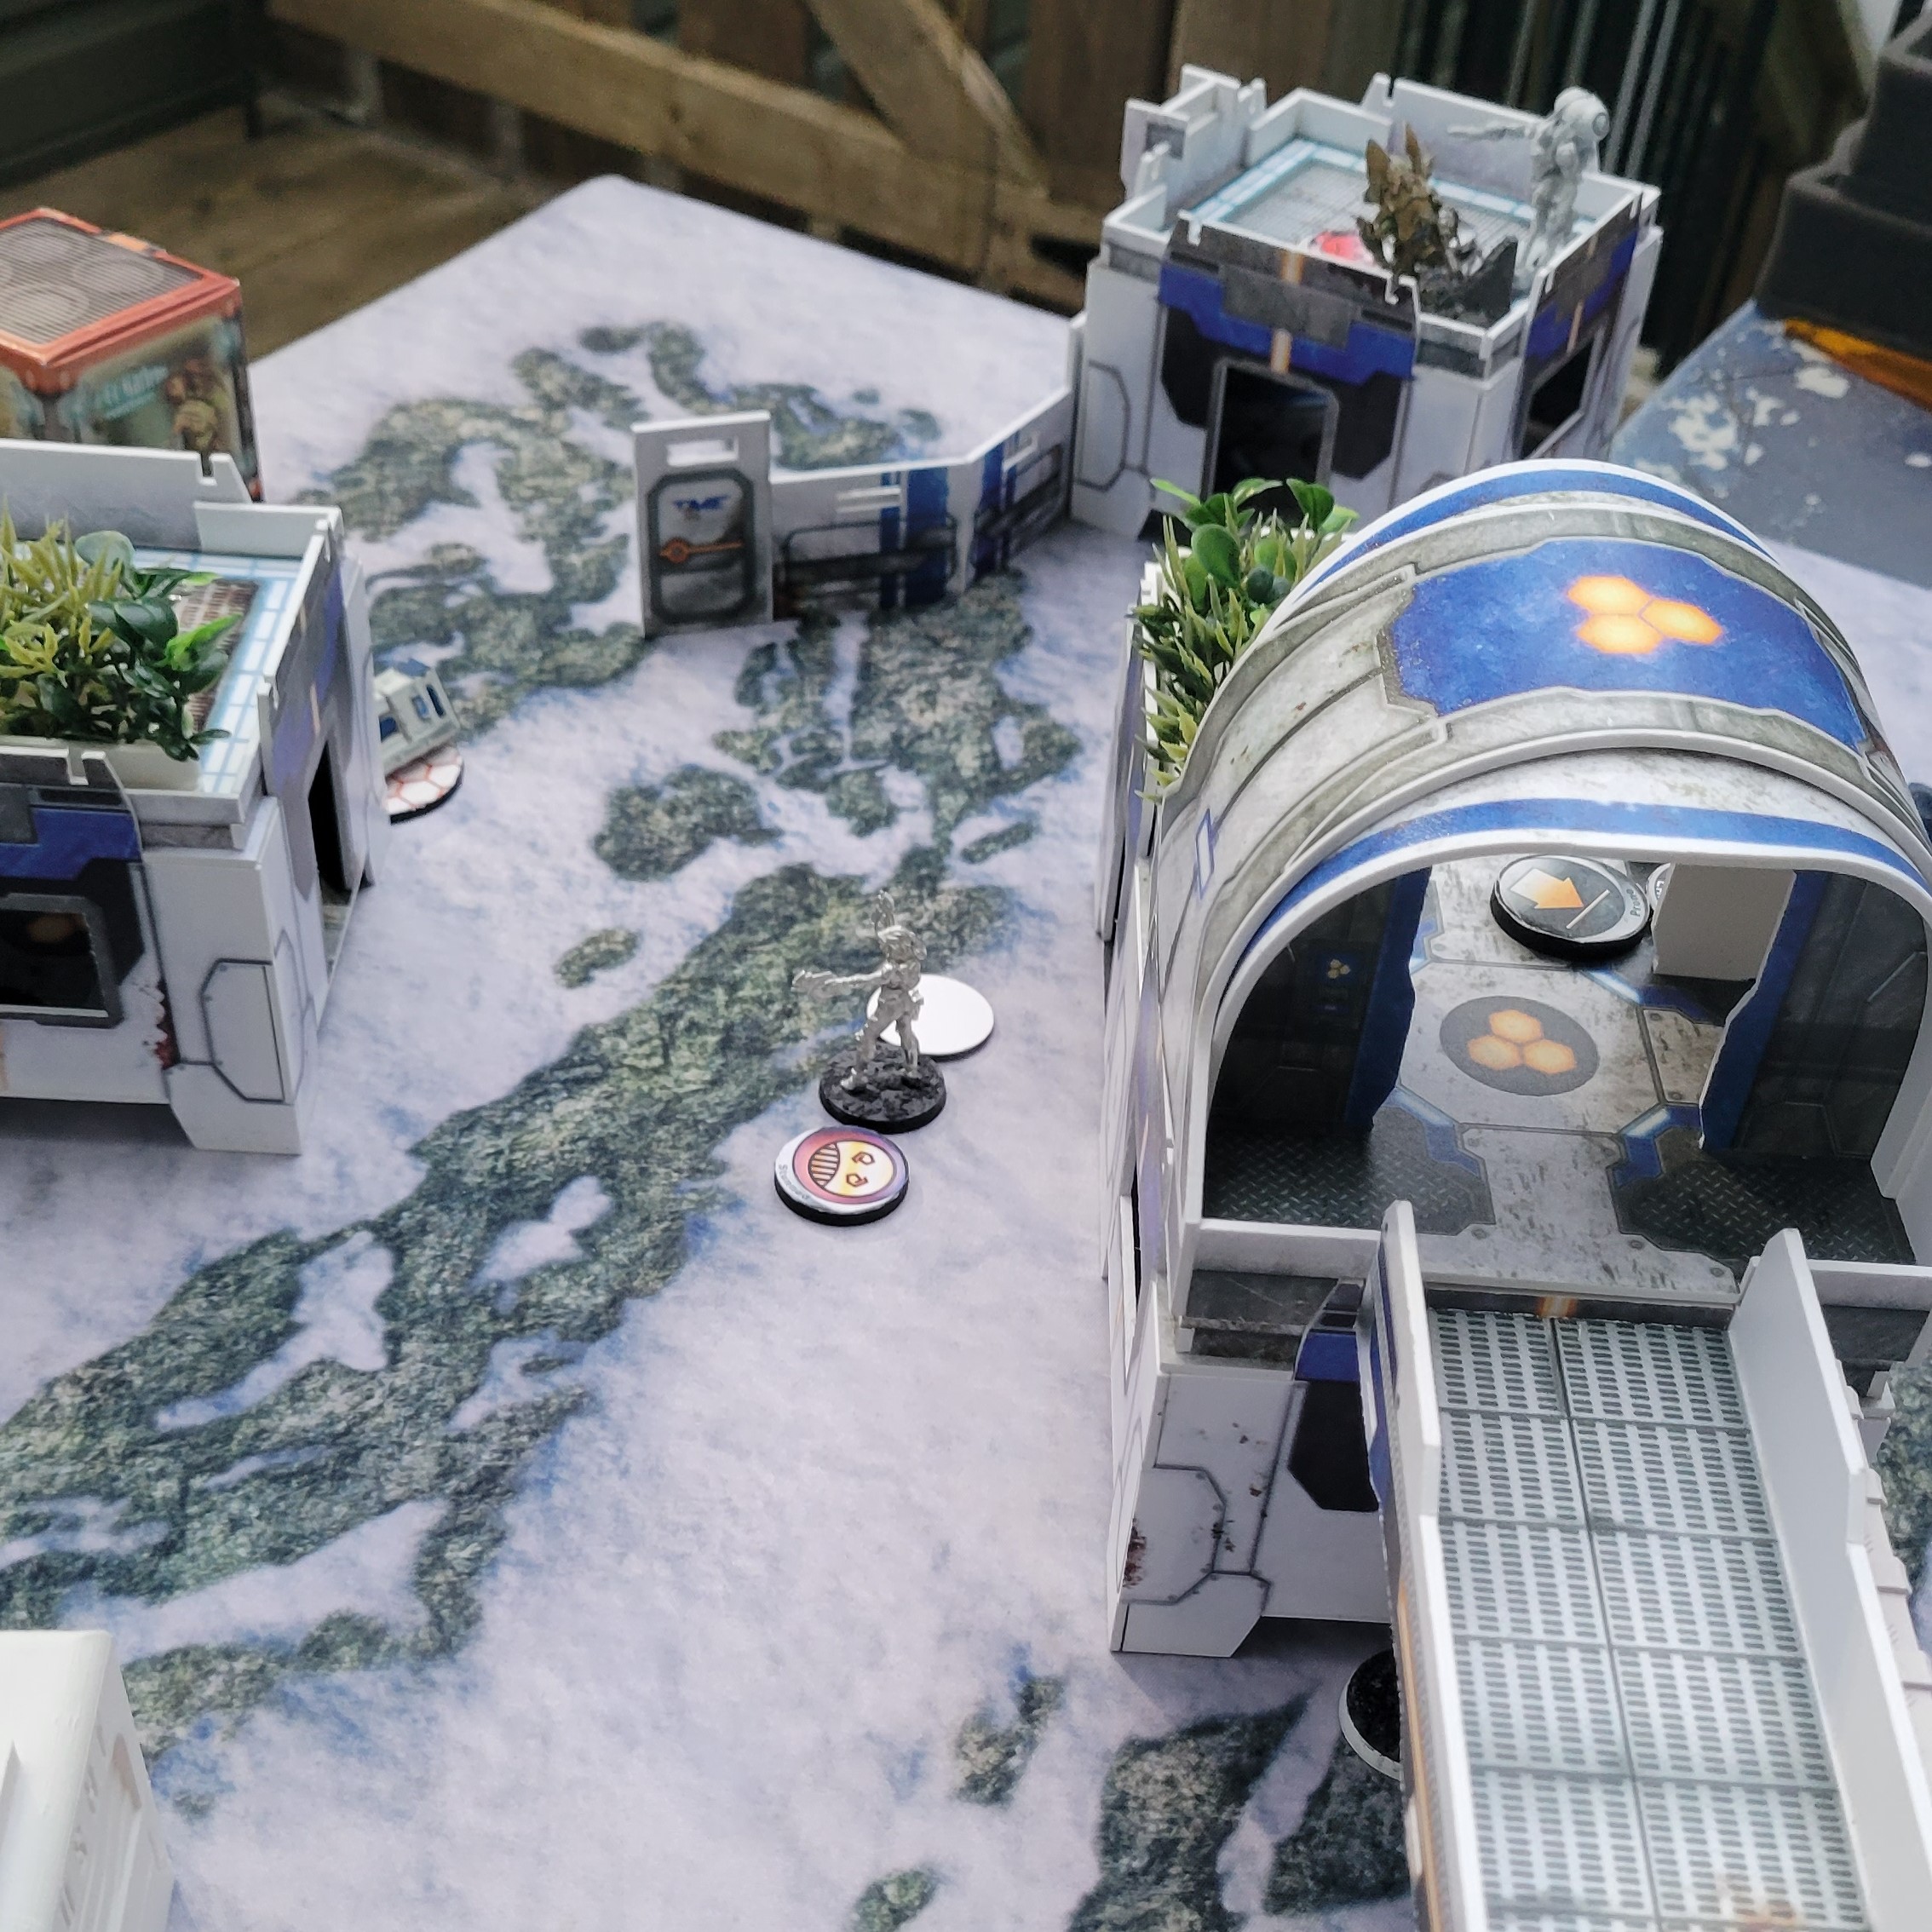
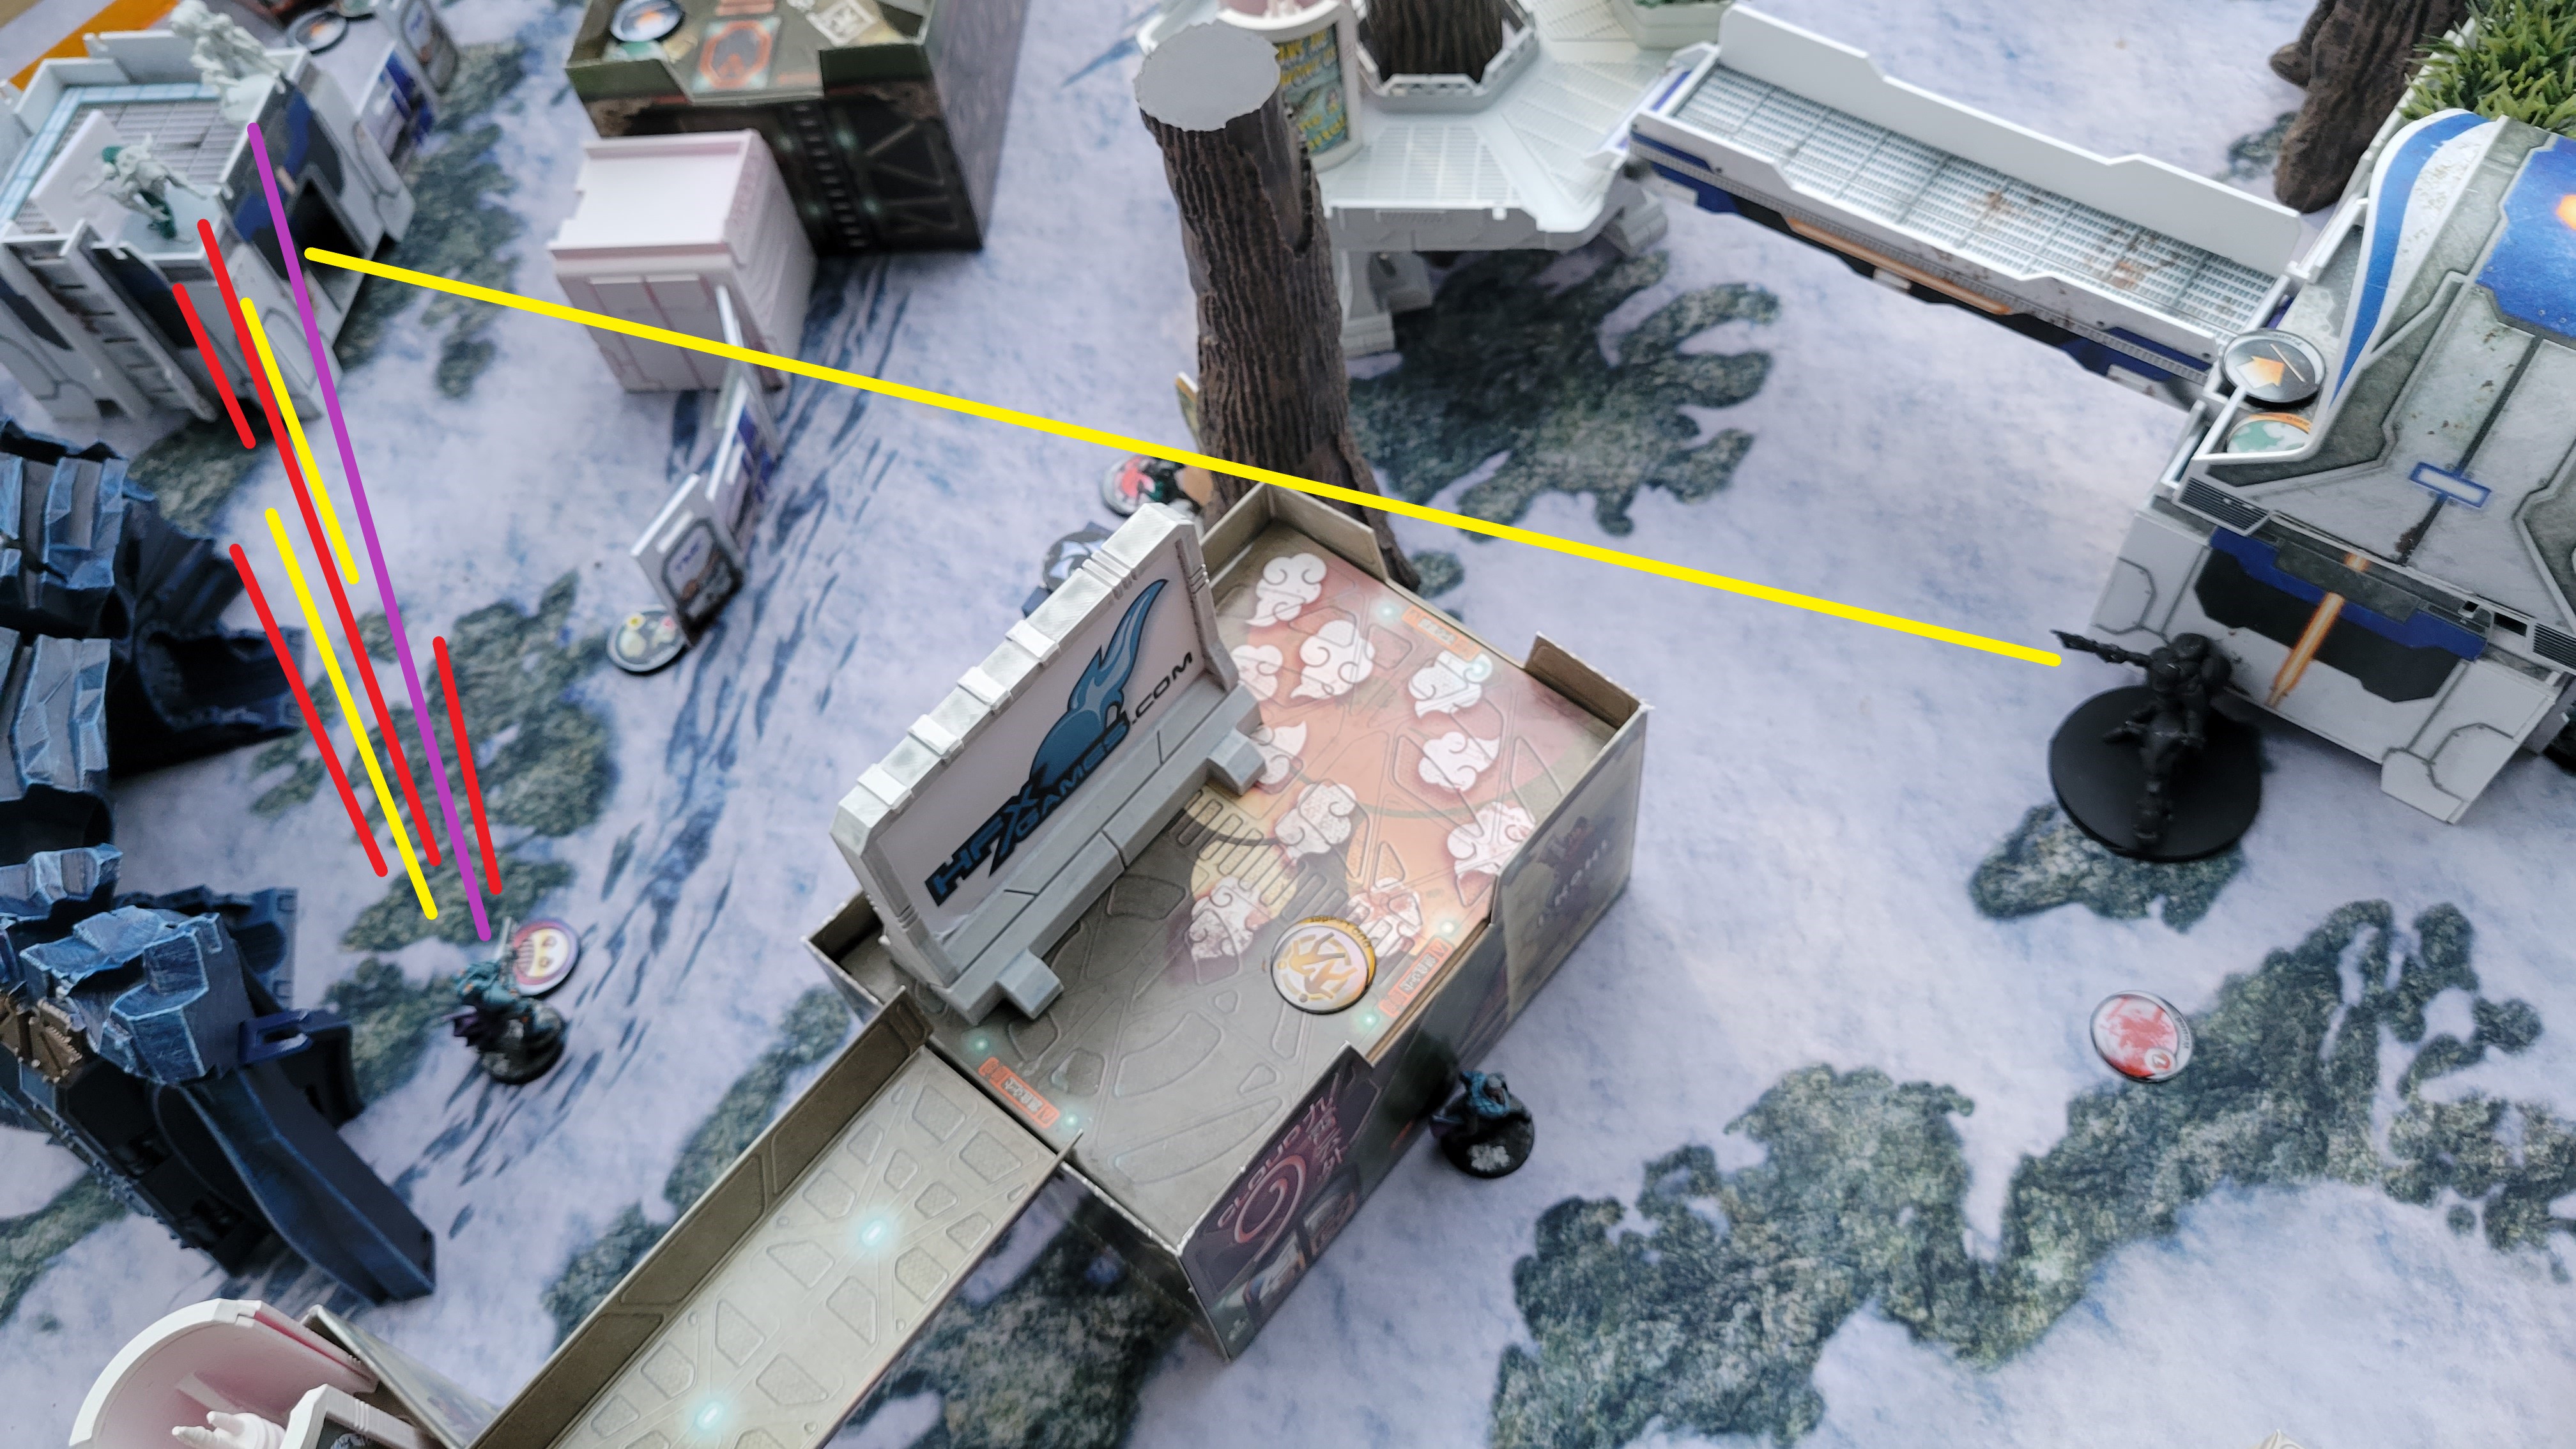 Coordinated Order Pic 1/2 - The Montessa and Santiago engage the TR Bot. While no wounds are delivered to any party, the Flash Pulse Bot is able to Stun the Santiago.
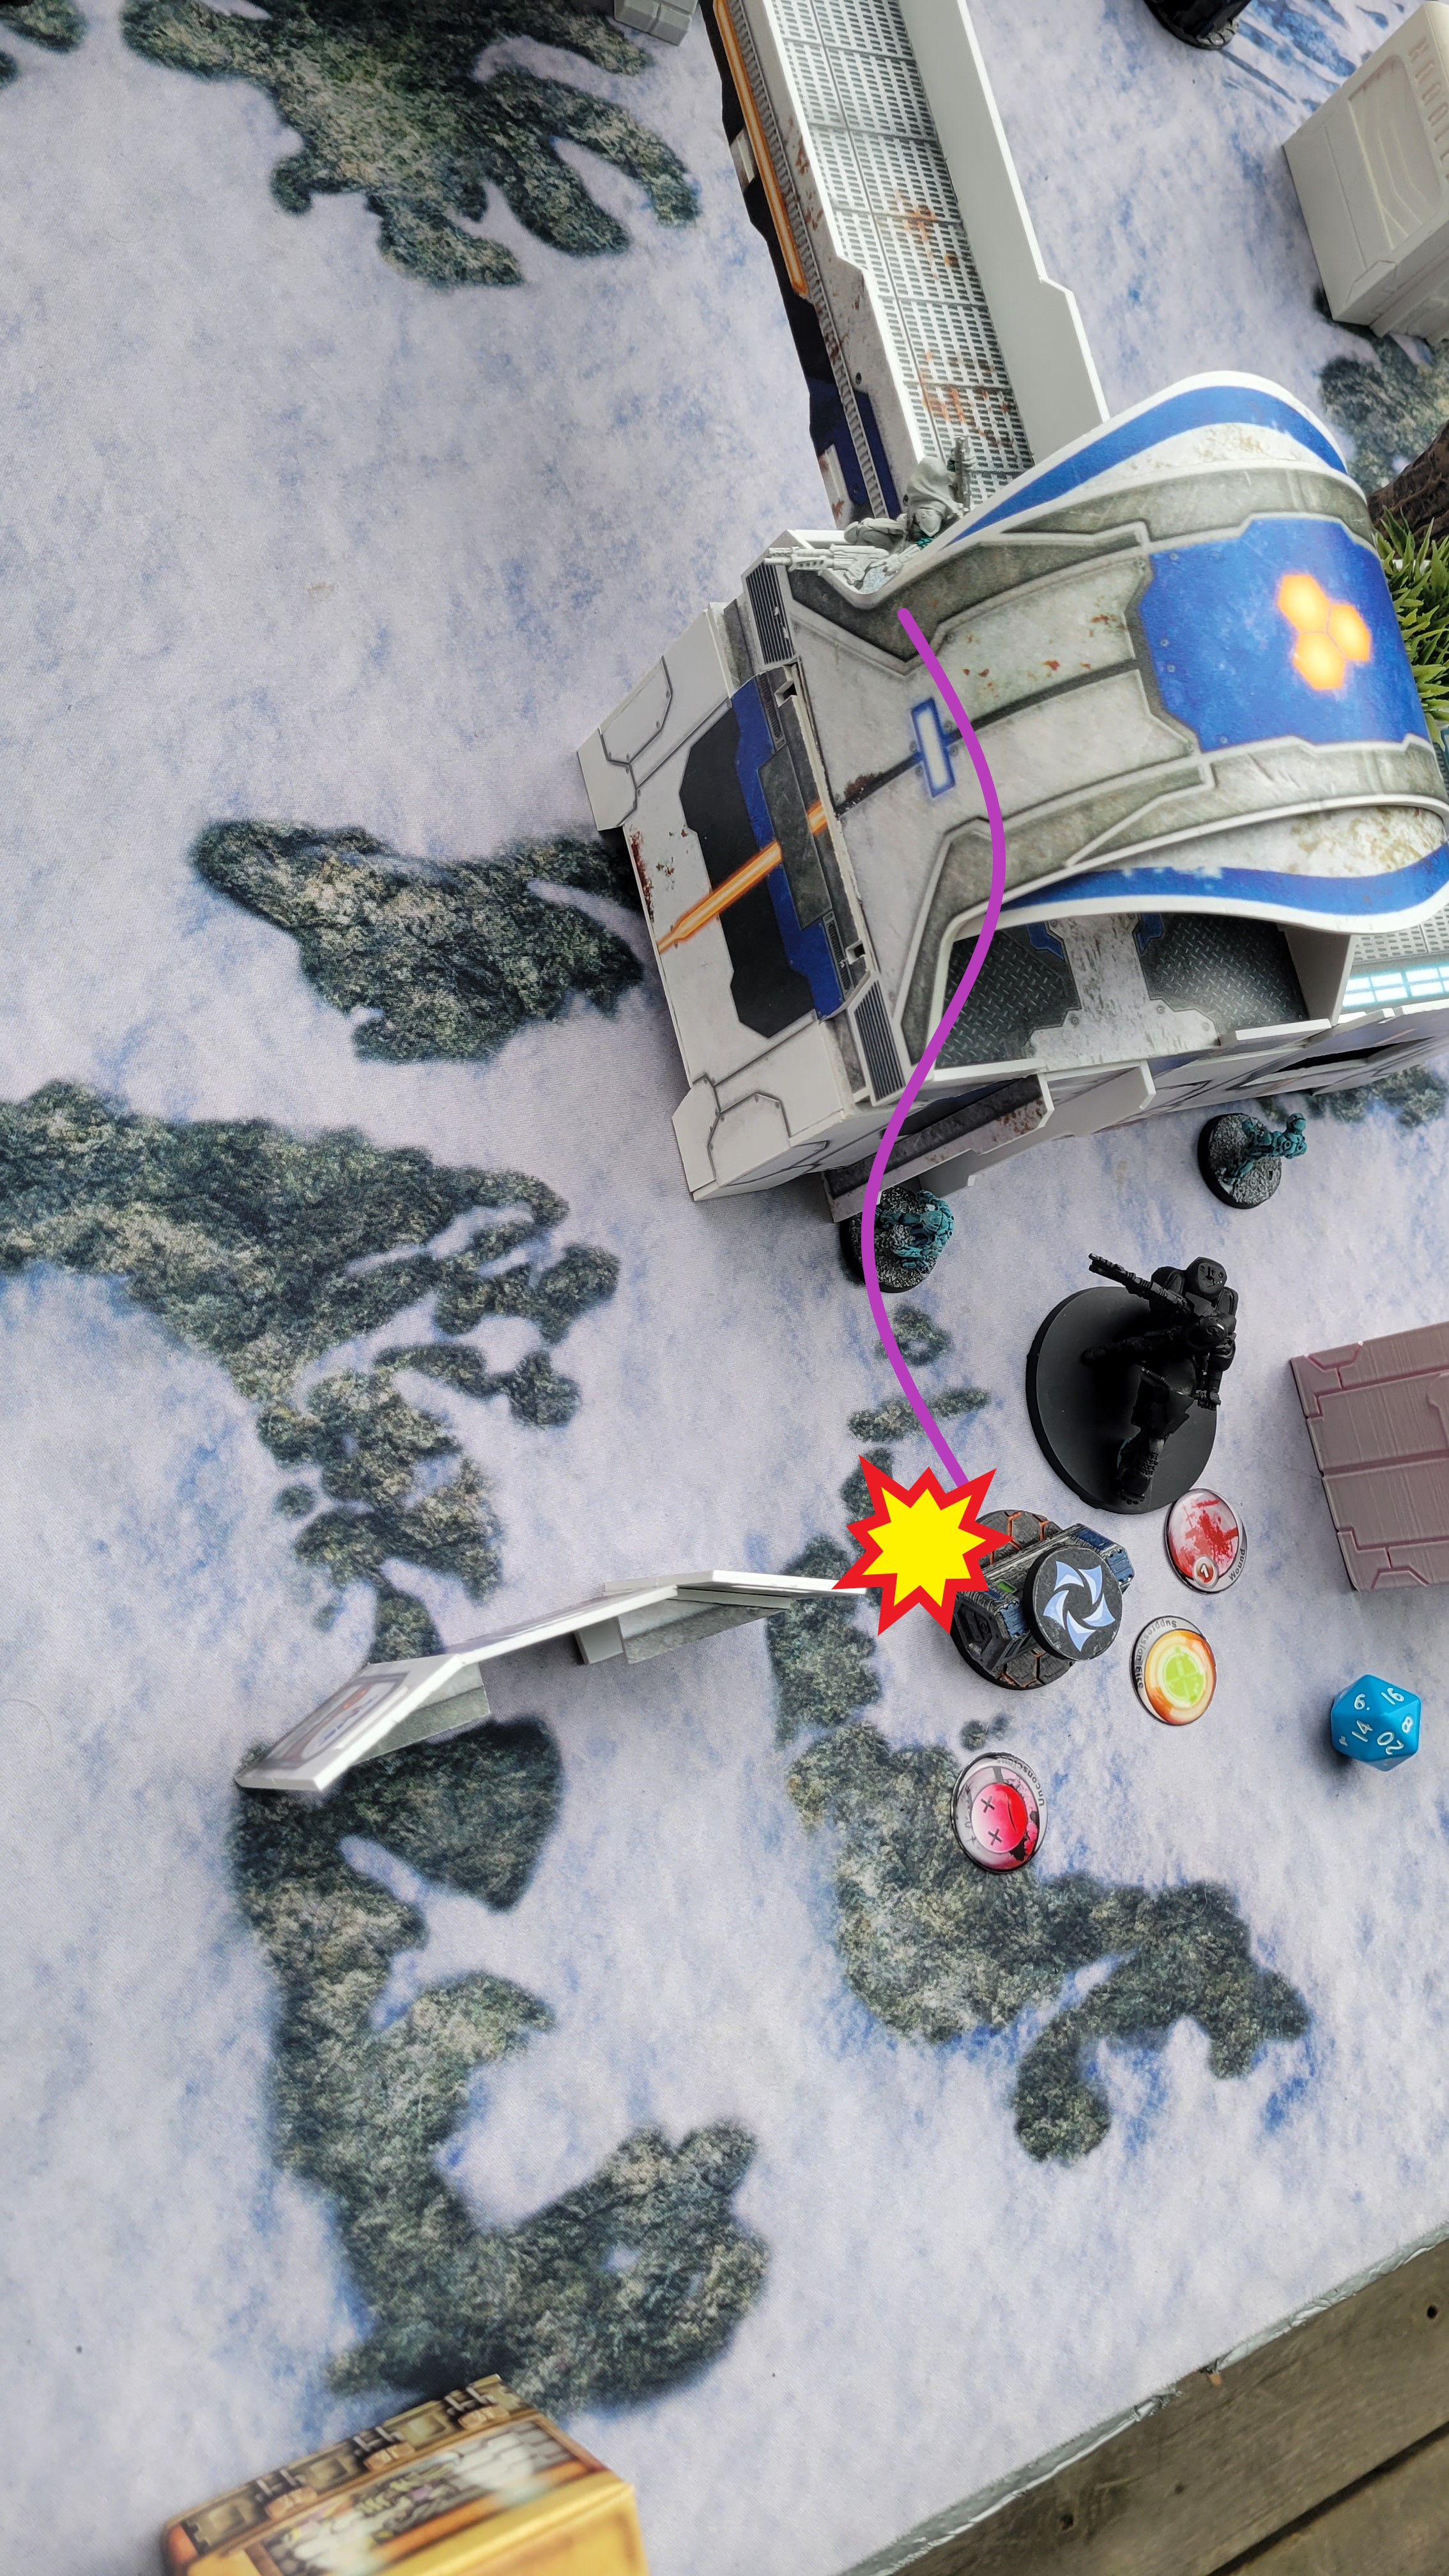
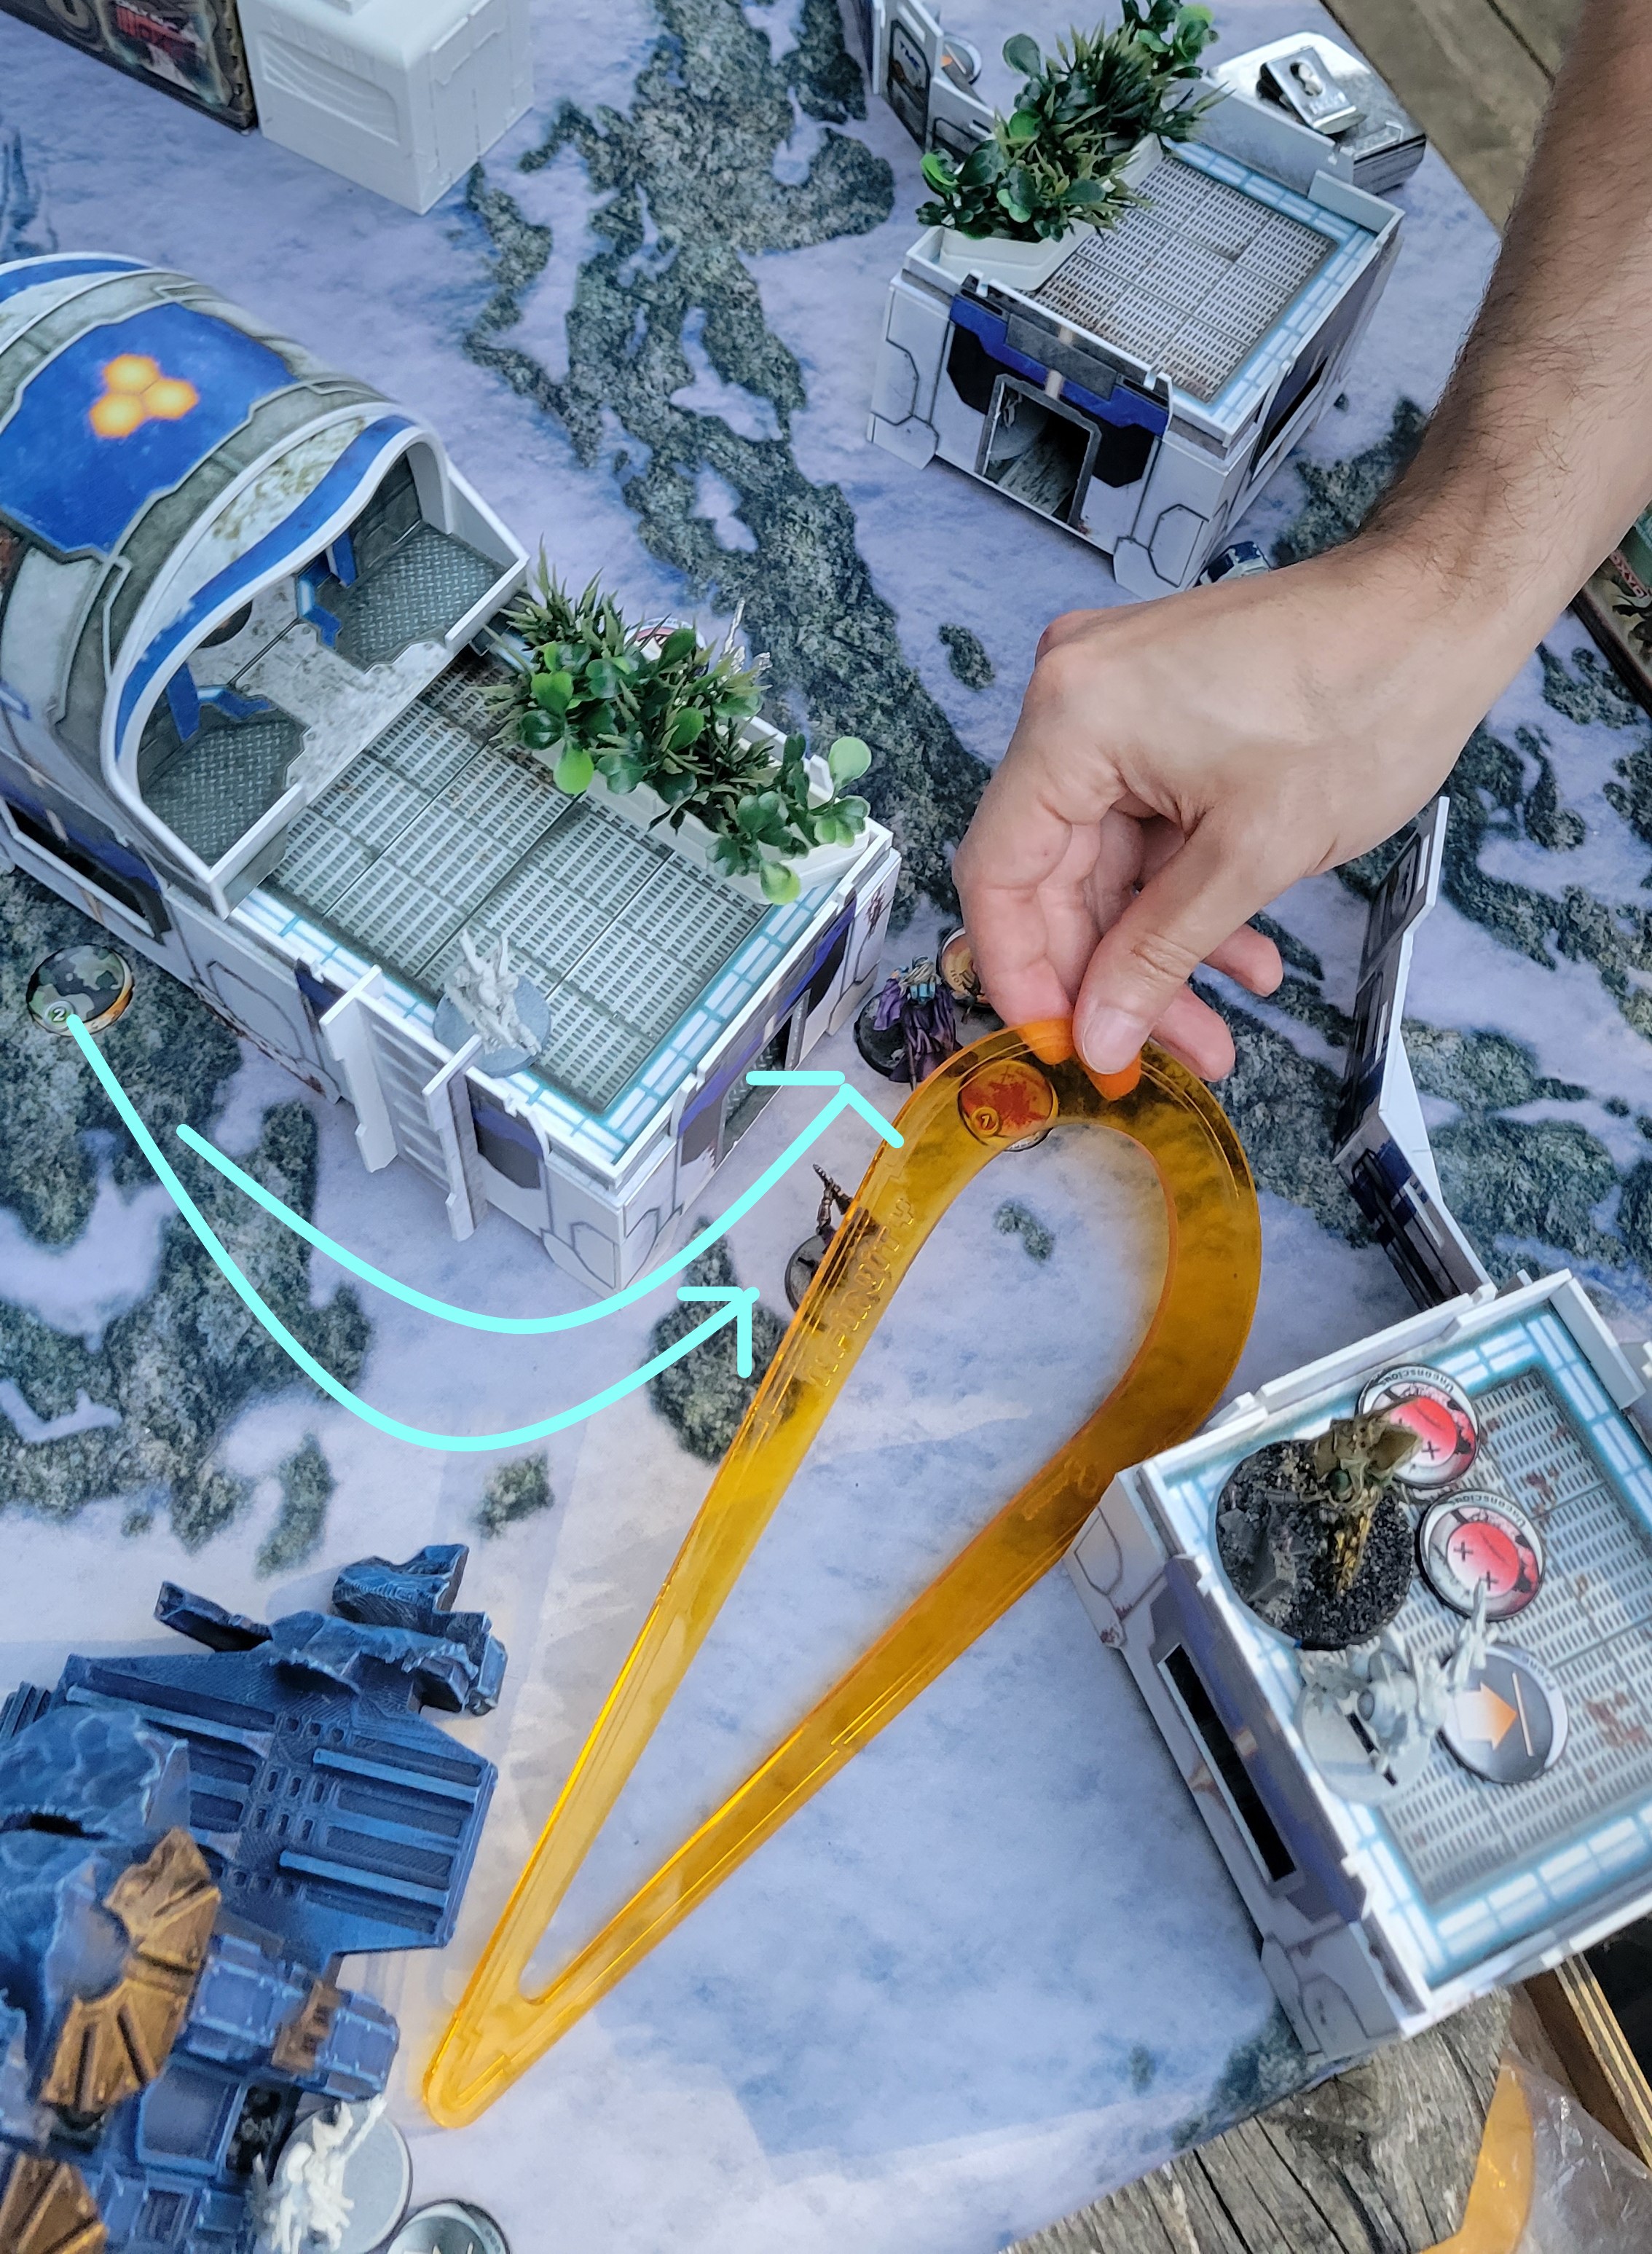 Coordinated Order Pic 2/2 - Joan and the Beast Hunter charge forward, while being hit by a Pulzar. Joan takes a wound, but the Beast Hunter is unscathed.
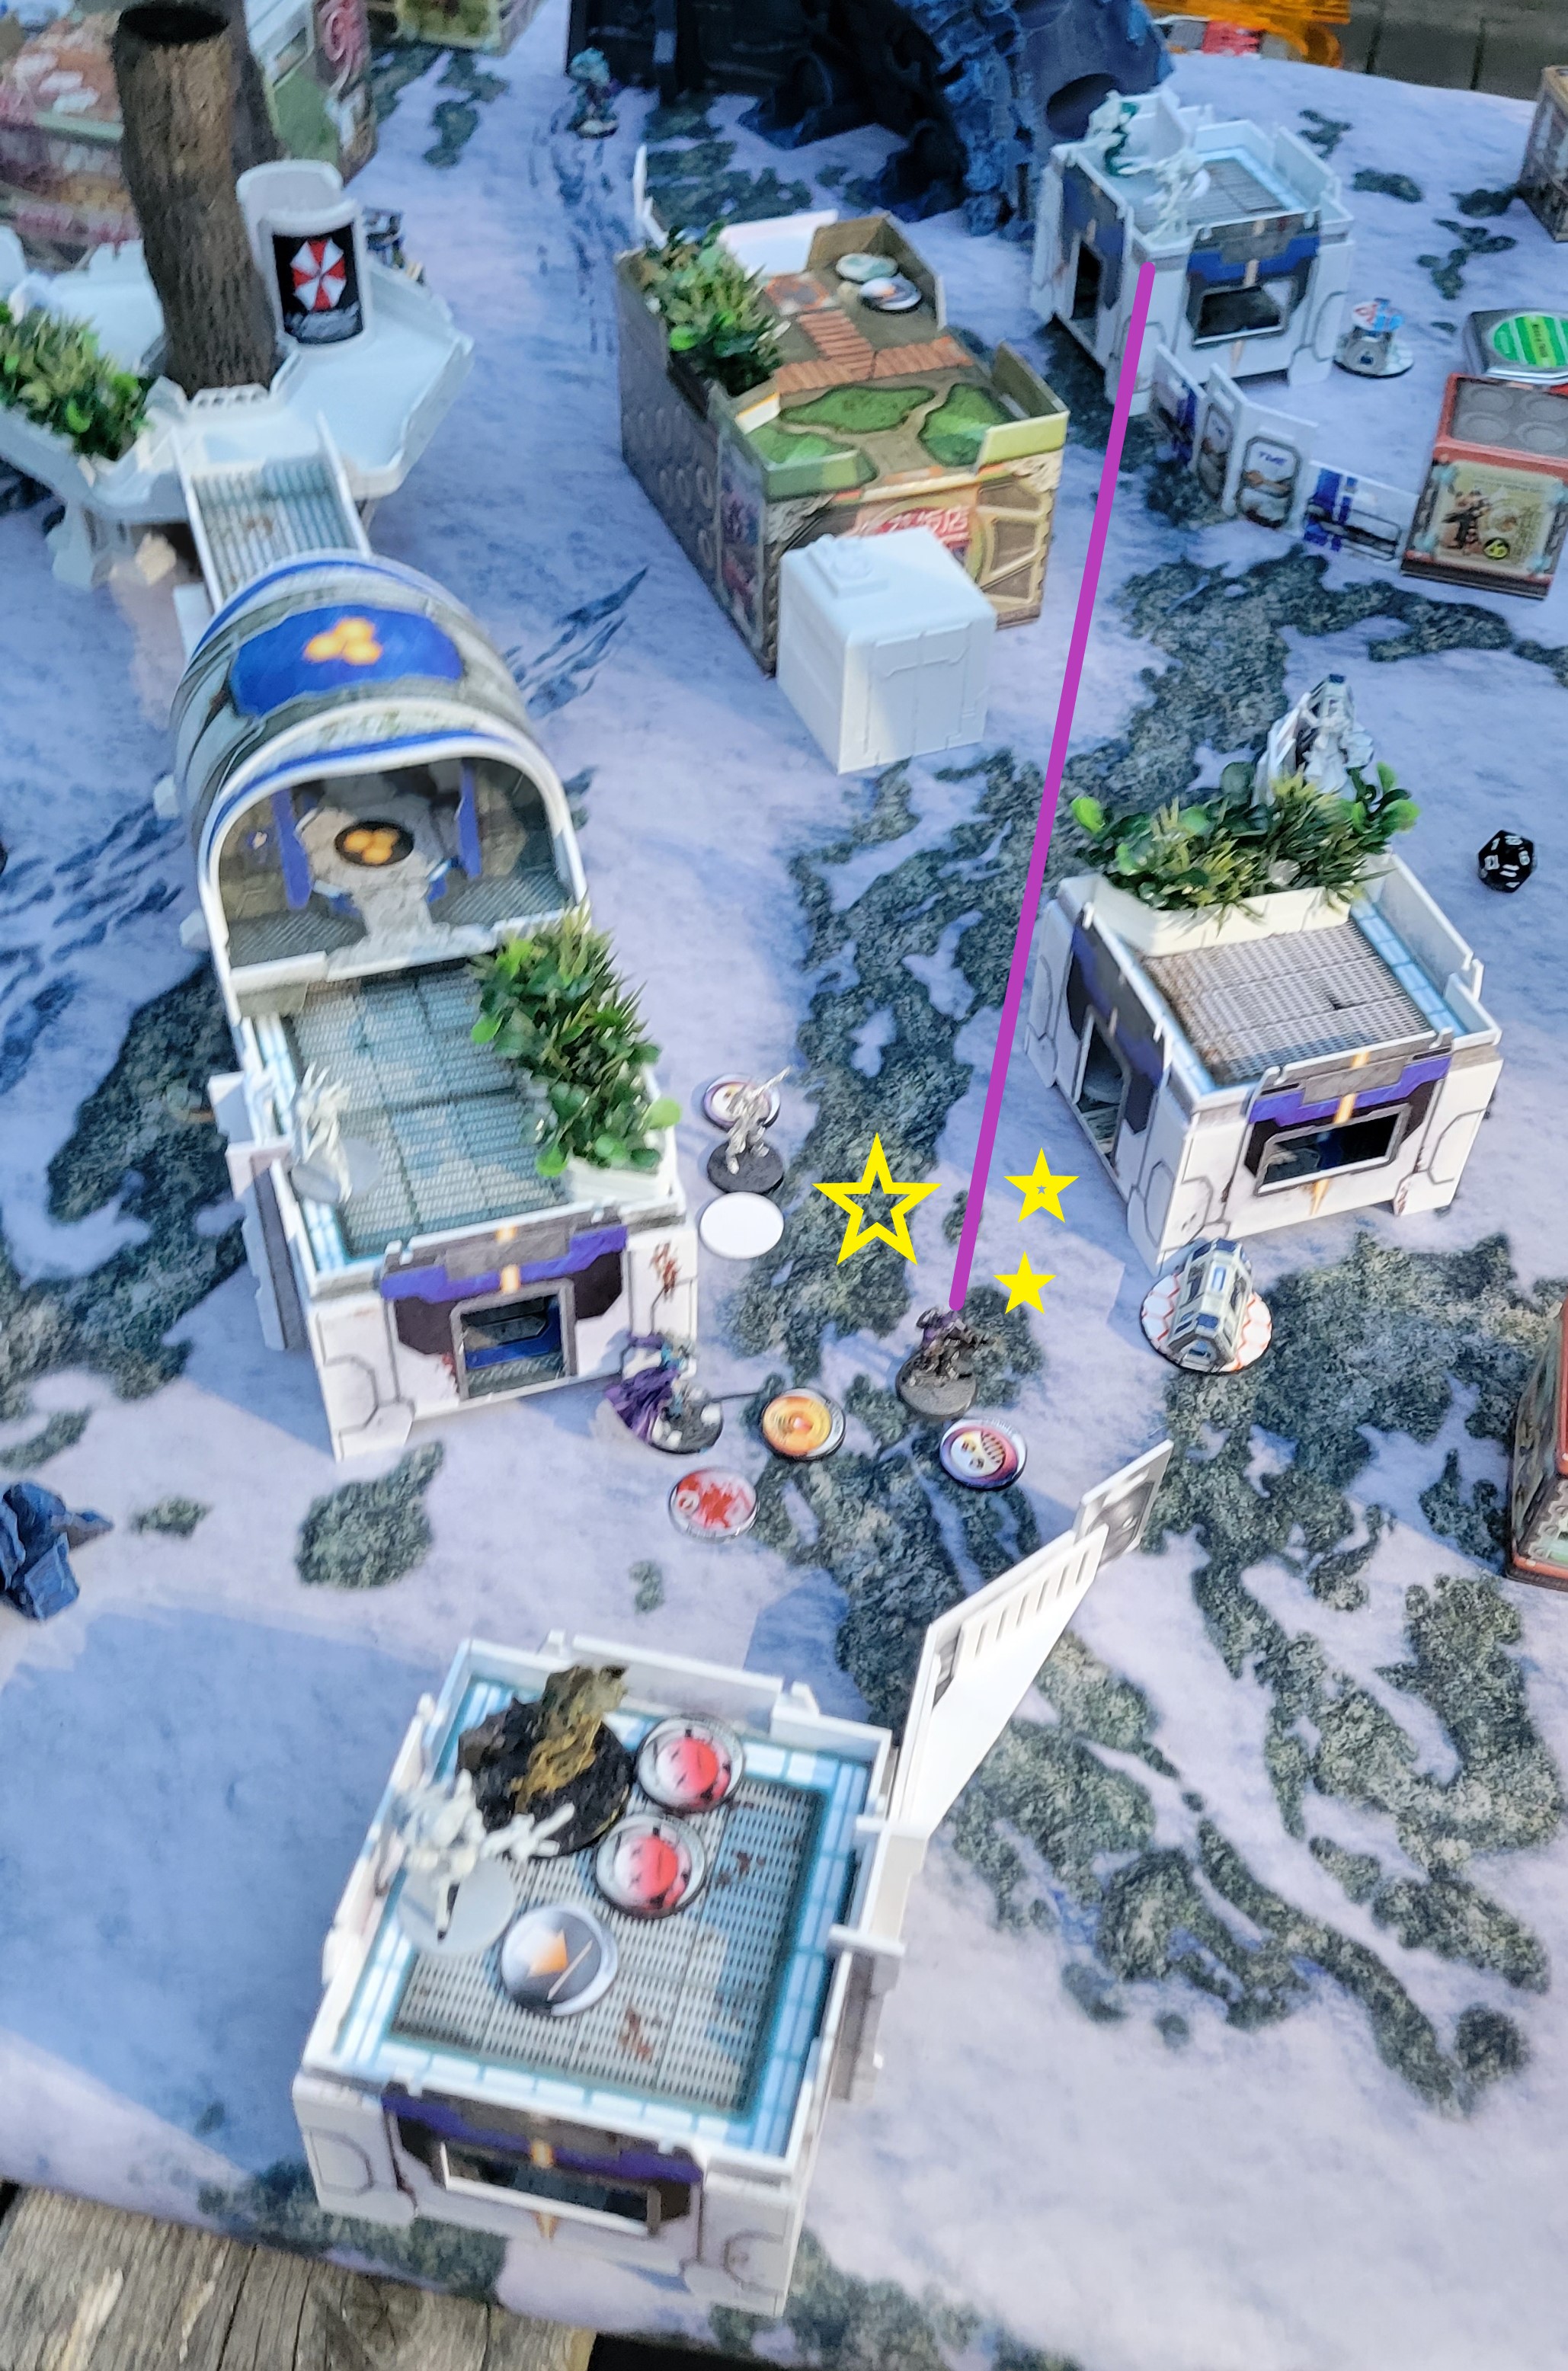 The Beast Hunter, in a last ditch effort, attempts to cross the gap to destroy a server, but is stunned by a flash pulse bot.
Calculating the scores, it was discovered that Shasvastii were currently sitting 10-2, so the game concluded without any more shots being fired.
PanOceania
- Activate Console (+1)
- Complete Classified Objective (+1)
Total: 2
Shasvastii
- Activate Console (+1)
- Complete Classified Objective (+1)
- Destroy Rogue AI (+3)
- Destroy more servers (+2)
- Don't have your Rogue AI Destroyed (+2)
- Don't have any servers destroyed (+1)
Total: 10
Shasvastii Victory
Provide me with a status report. Berithh asked. Not to any one in particular, but to anyone on the bridge.
Warning lights appeared on various consoles, oscillating between Red and Orange colours. A small amount of vital sign trackers blared out warnings, while server downloads show a failed progress bar.
Sir, we suffered minimal casualties, although... a bridge officer began, It seems the Data we were trying to data servers we that were left behind by the Morats, were destroyed by the Shasvastii forces. We were barely able to recover anything.
Withdraw our forces immediately, and begin the process of bringing our soldier's cubes back online. Berithh announced. I want to find out more about this Shasvastii commander, Naakzir was his name, correct?
Super fun game. I feel as though everything was going well, until my turn 3, when a flash pulse bot was able to single handedly stop three main attack pieces. It was an excellent defensive position by my opponent, stacking the TR bot with the Ikadron made it so you would never want to split your burst to hit just the Ikadron, while also being HMG'd.
Good game Philamilapeed!
Battle Report Author

Army Lists Used In This Battle
Recommend Commander For Commendation
Share this battle with friends
PhilamilapeedWins

Very nice battrep!
Excellent report, though sad that PanO for all its bluster could not hold back the Combined Army.
Stunning batrep, easily one of the best I read today.
Keep up the good work!
Awesome report. Good job.
Nice graphics in the pics and also a good narrative.
Awesome report! A clear 10!
It is a pity that it was not a victory:-)
Battle report looks great! I did all my own picture editing last night before seeing your report, funny how we both decided to go for the same general graphics.
great report ! what a game! Keep at it!
Such a good report, love the graphics!
Amazing report! The pictures are stellar. Great effort.
Too bad about them aliens though.