Fought At Cameliard: Reliquary
640 days 3 hours 1 minutes ago
the 57th battles Combined Army forces attempting to claim the reliquary!
300 POINTSWith orders from command coming down that hostilities will soon be coming to an end, Commander Berithh of the 57th regiment, sought one final battle to redeem the 57th.
Just as it happened, sensors were detecting a Combined Army contingent approaching the Reliquary.
So, first we deal with these bastard Yu Jing forces, and now the Combined Army dares try to take what is so rightfully ours? Scoffed Berithh.
Deploy our Military Orders assets, we'll drive these invaders from our lands.
The combined army wins the initiative roll off, and chooses to go second, deeming it a strategic necessity. As such, the PanOceanian forces decide to deploy on the right (relative to the first picture) side of the table, and to have the Combined Army deploy first.
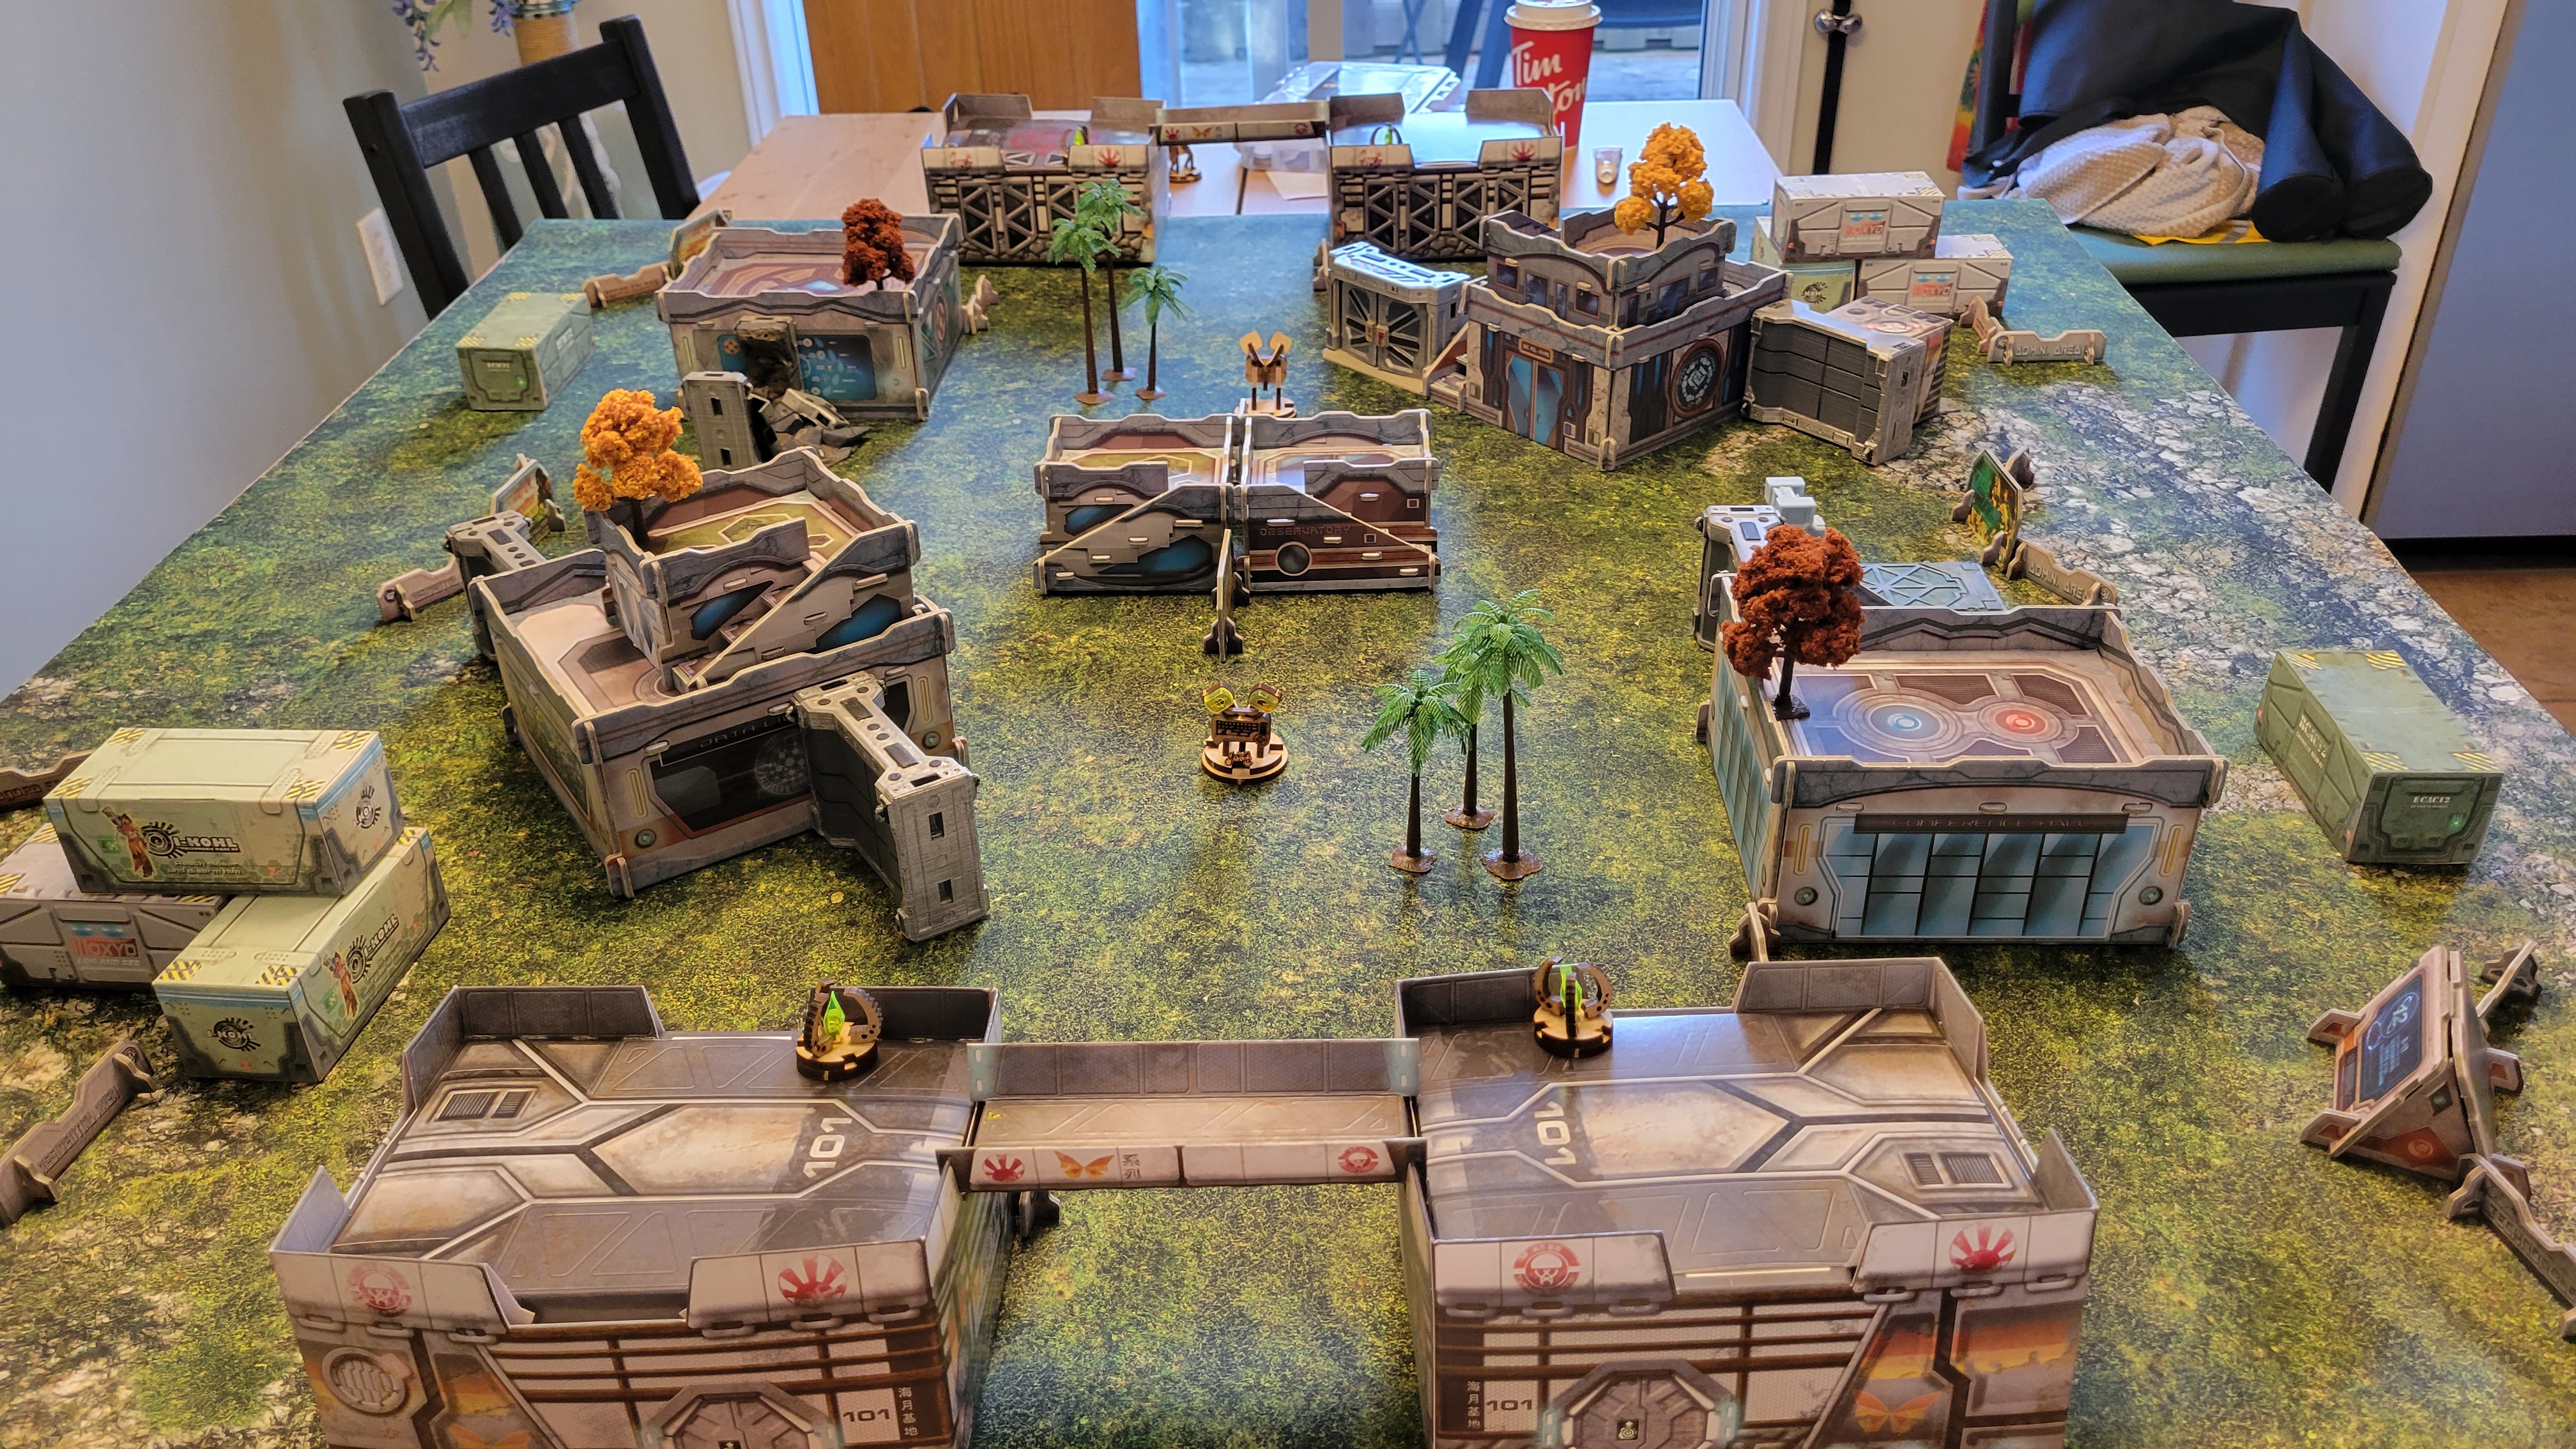 Table layout. PanOceania takes right side of the field, leaving the left for the Combined Army scourge.

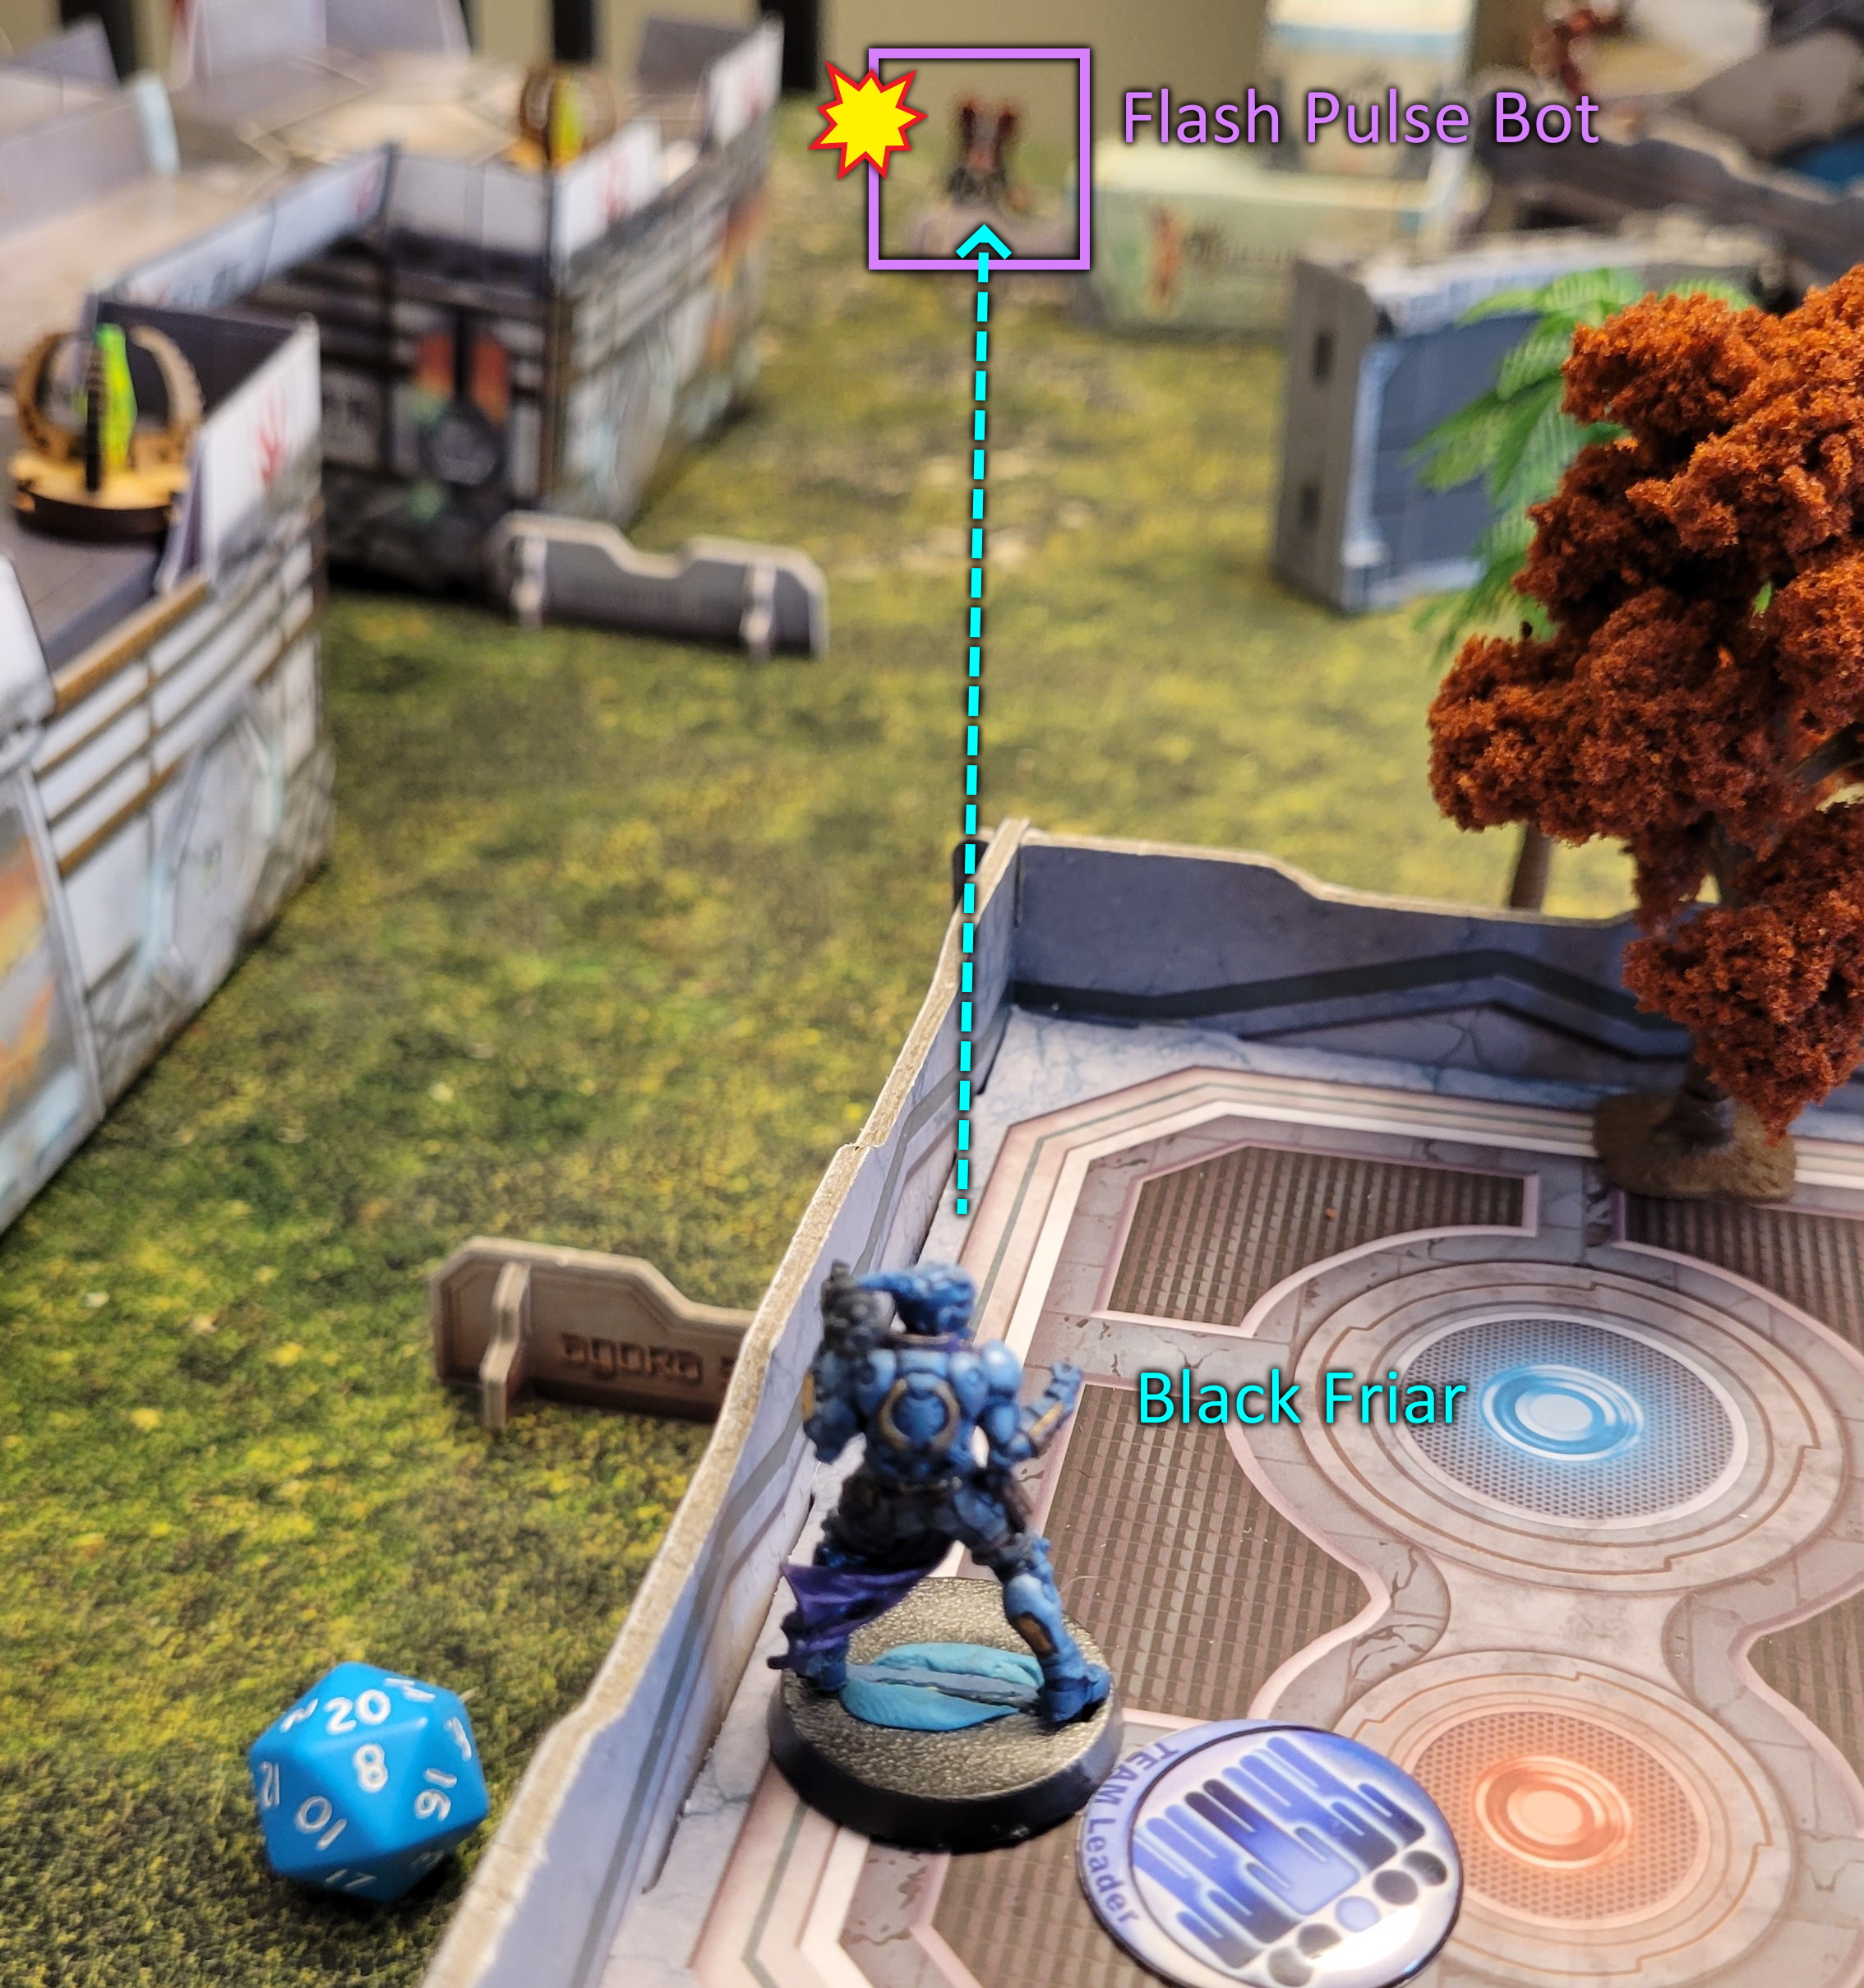
The turn begins with the Black Friar opening up a salvo onto the left side Flash Pulse bot. After the fire is done burning, the bot is left in the Unconscious 2 state.
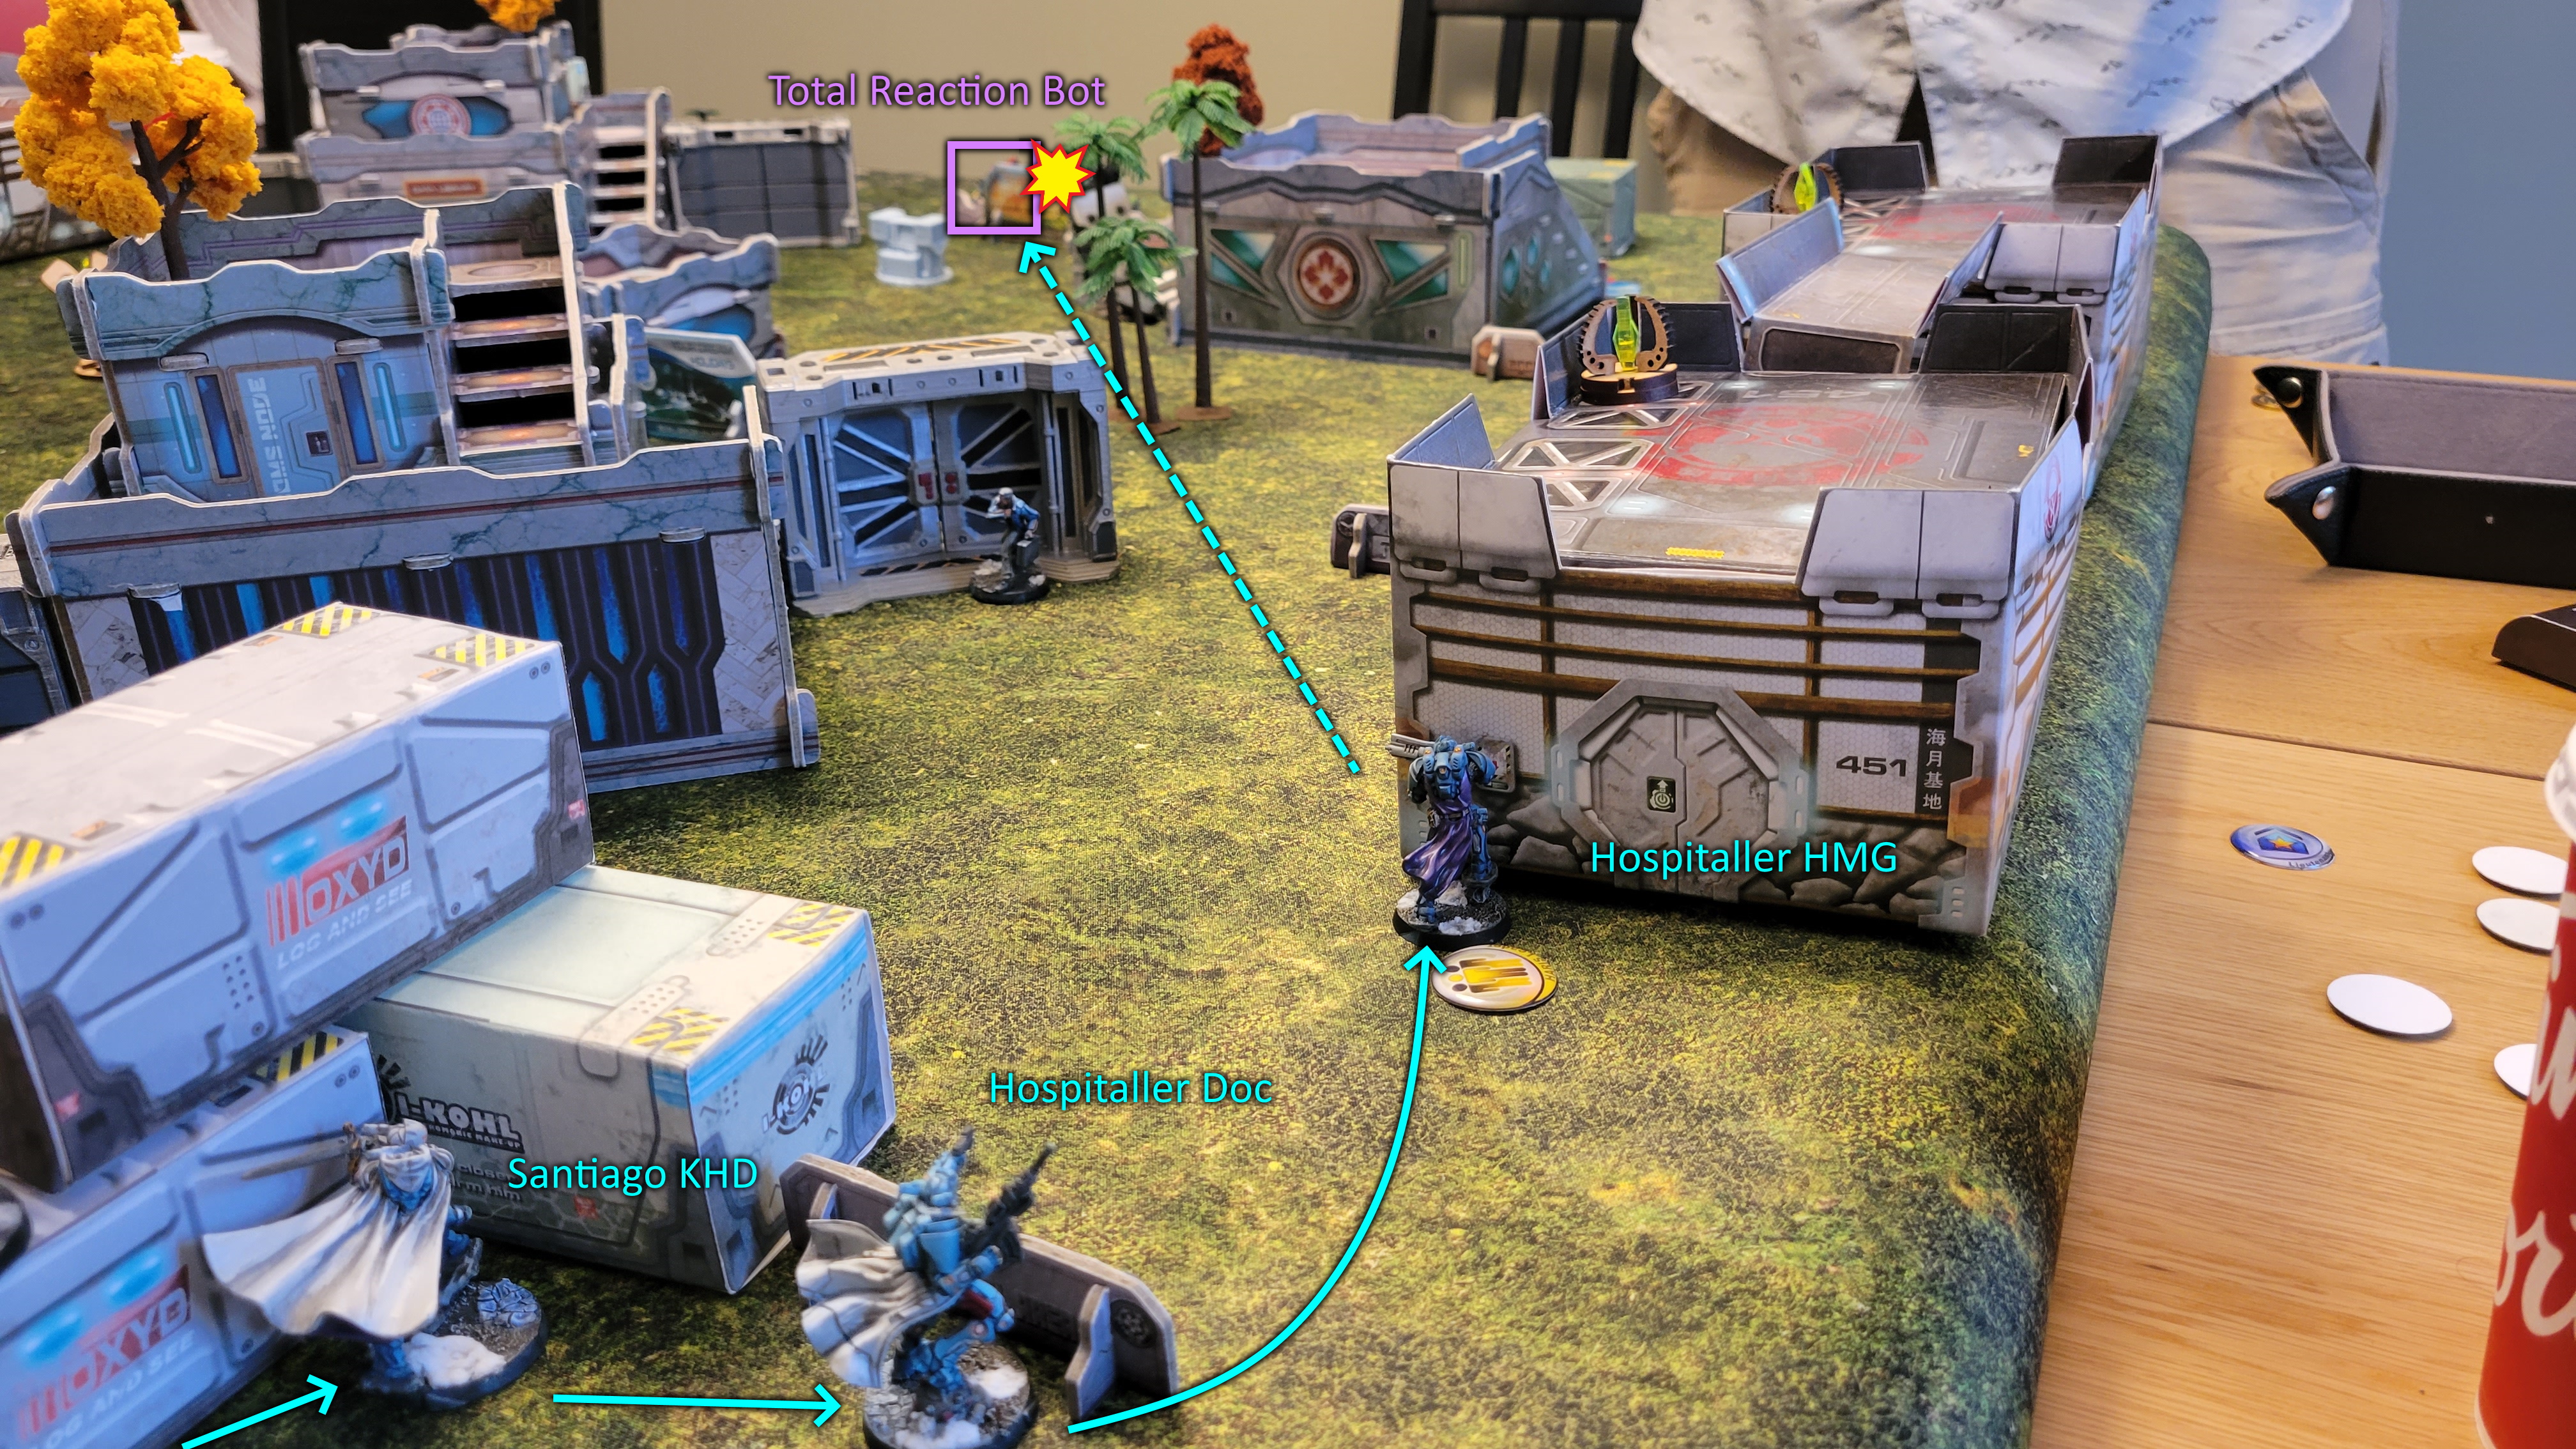
Once the Flash Pulse bot has been laid low, on the other side of the field, the Crusade Team haris advances slowly. Unsure if there is a hidden Noctifier, the HMG acts as the link lead and stays far away from his teammates. The HMG moves into cover, and begins firing at the enemy Total Reaction Bot. Through all modifiers (including a mutually agreed upon saturation), the Hospitallier is 4 dice on 5's, vs the TR Bot's 3 dice on 5s. The Hospitallier is able to put down the bot, after 2 rounds of combat.
The black friar then moves and eliminates the other Flash Pulse Bot, and returns to his original position.
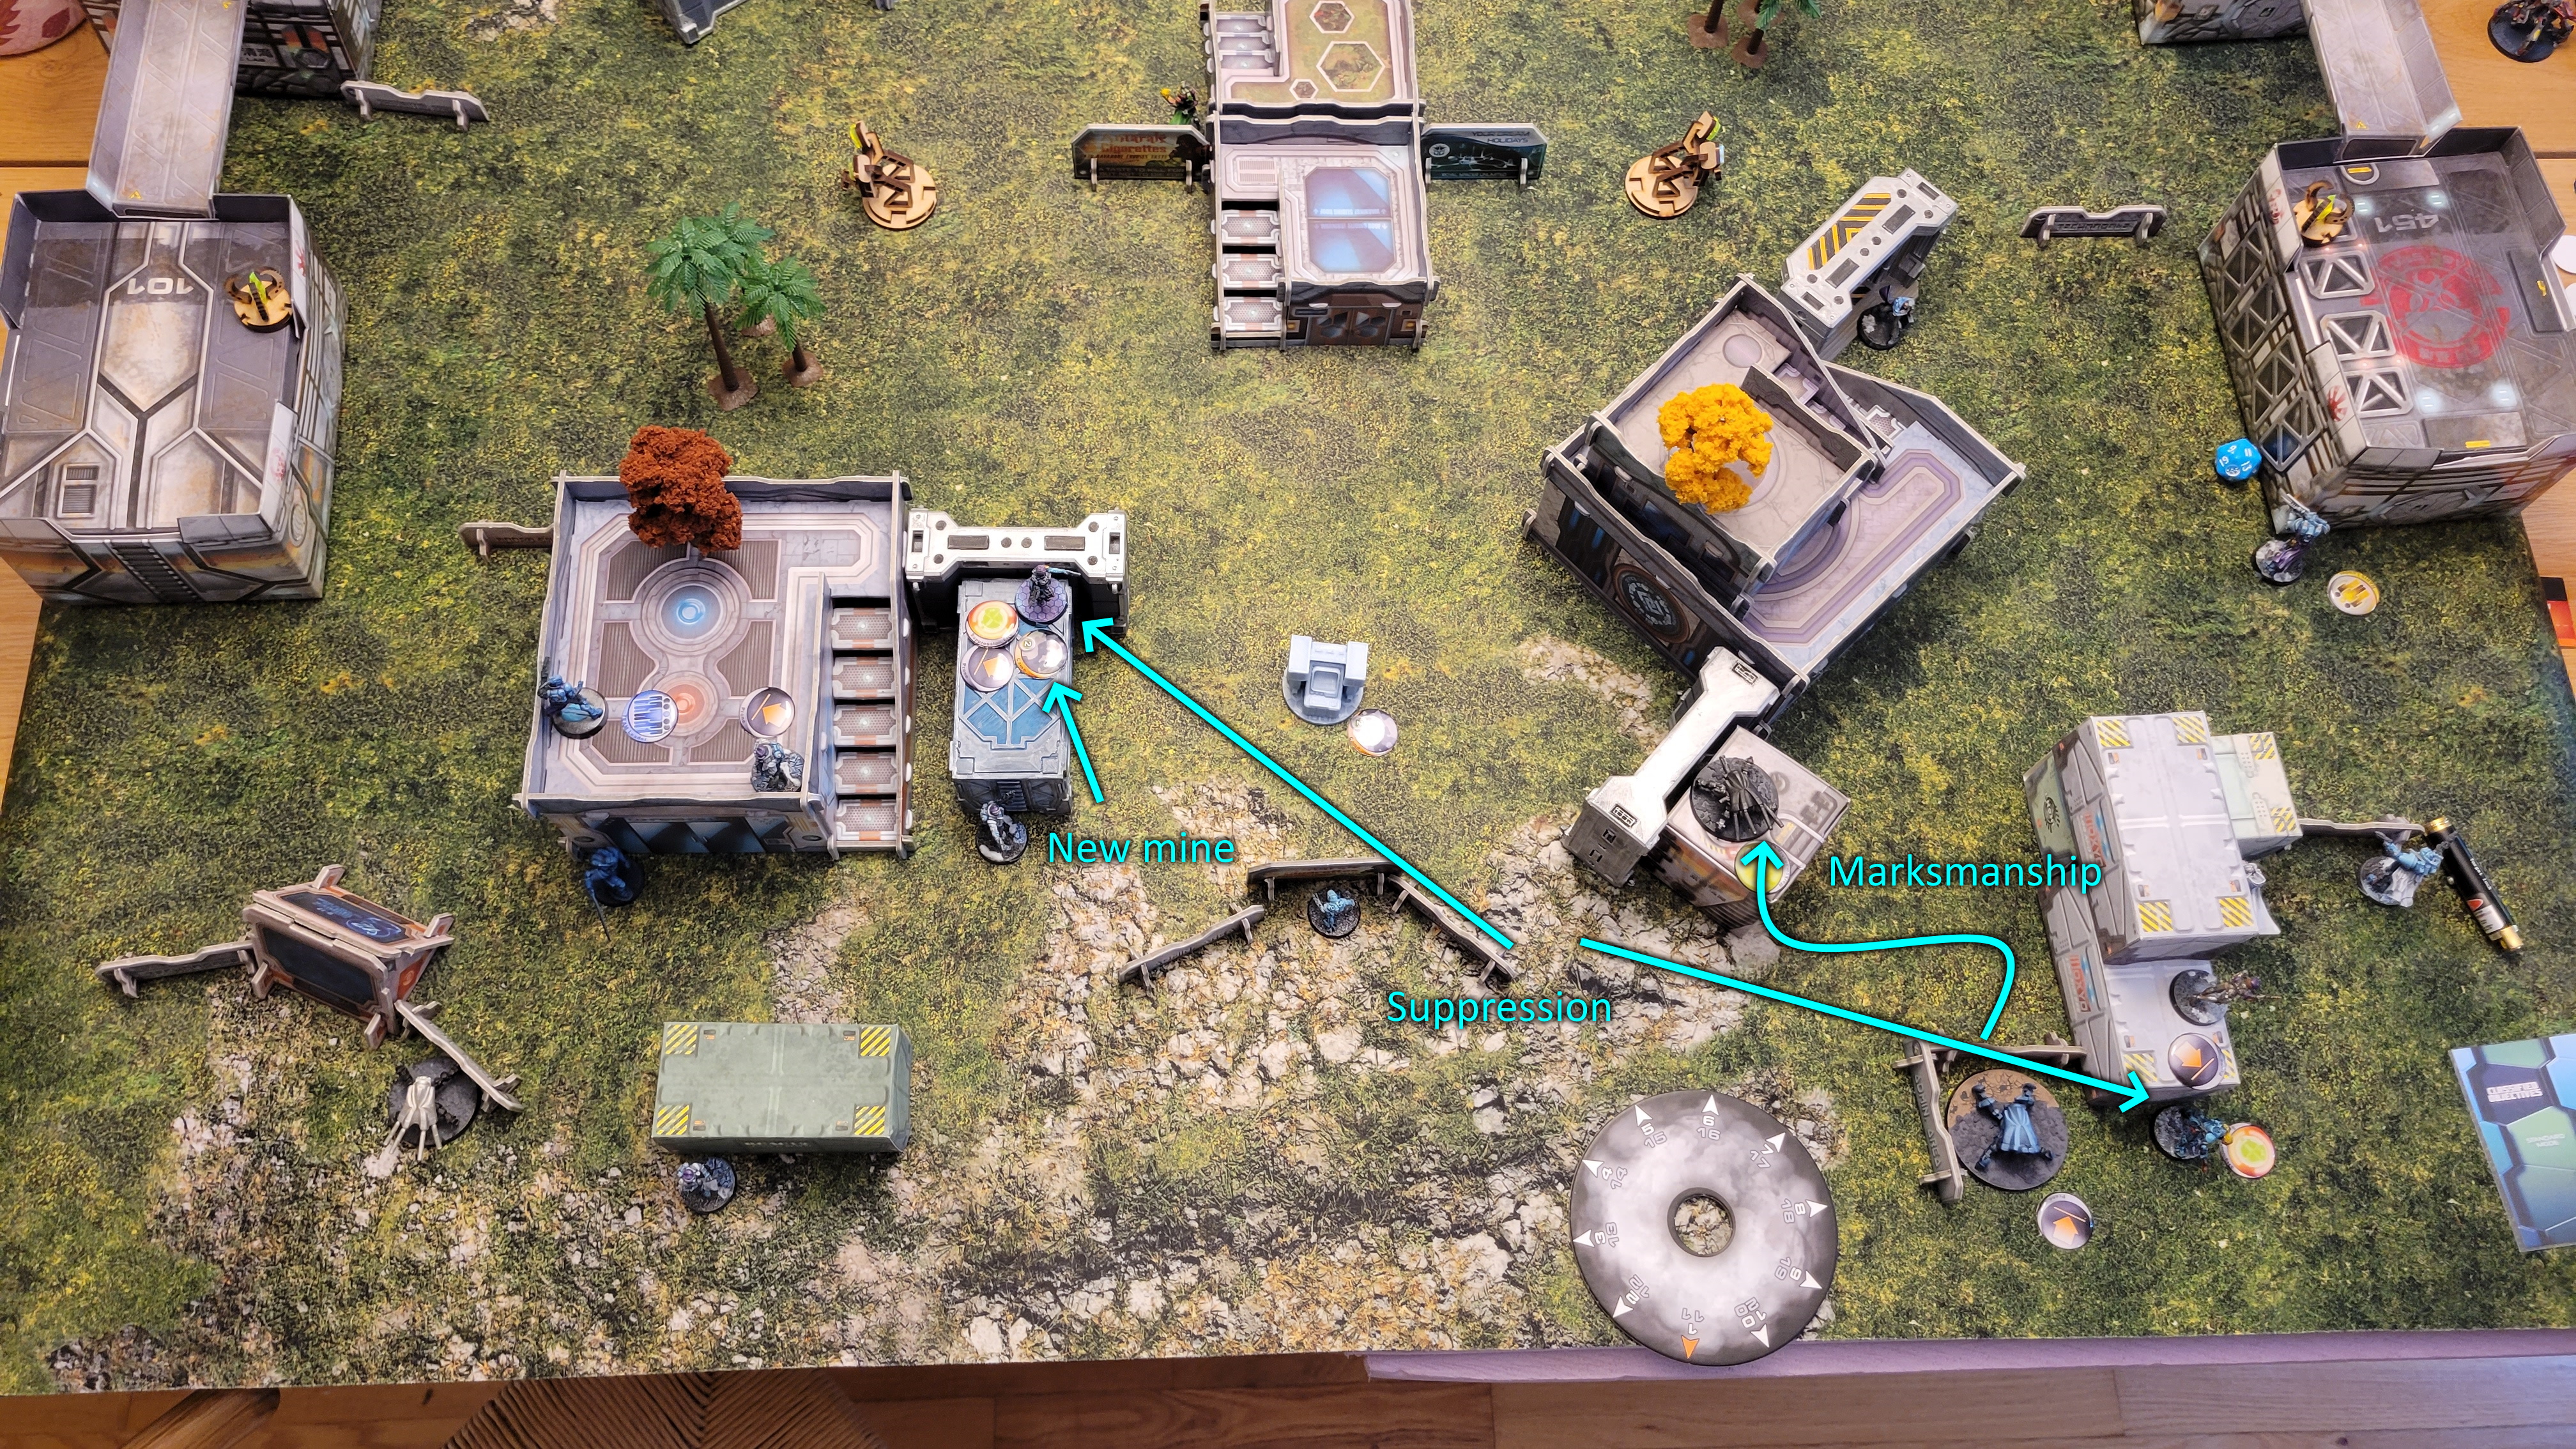
With pool 2, the Raveneye officer lays down another mine and enters suppressive fire, covering the AC2. The EVO bot puts Marksmanship onto the TR bot, and the Engineer enters suppressive fire, targeting the back of the board.
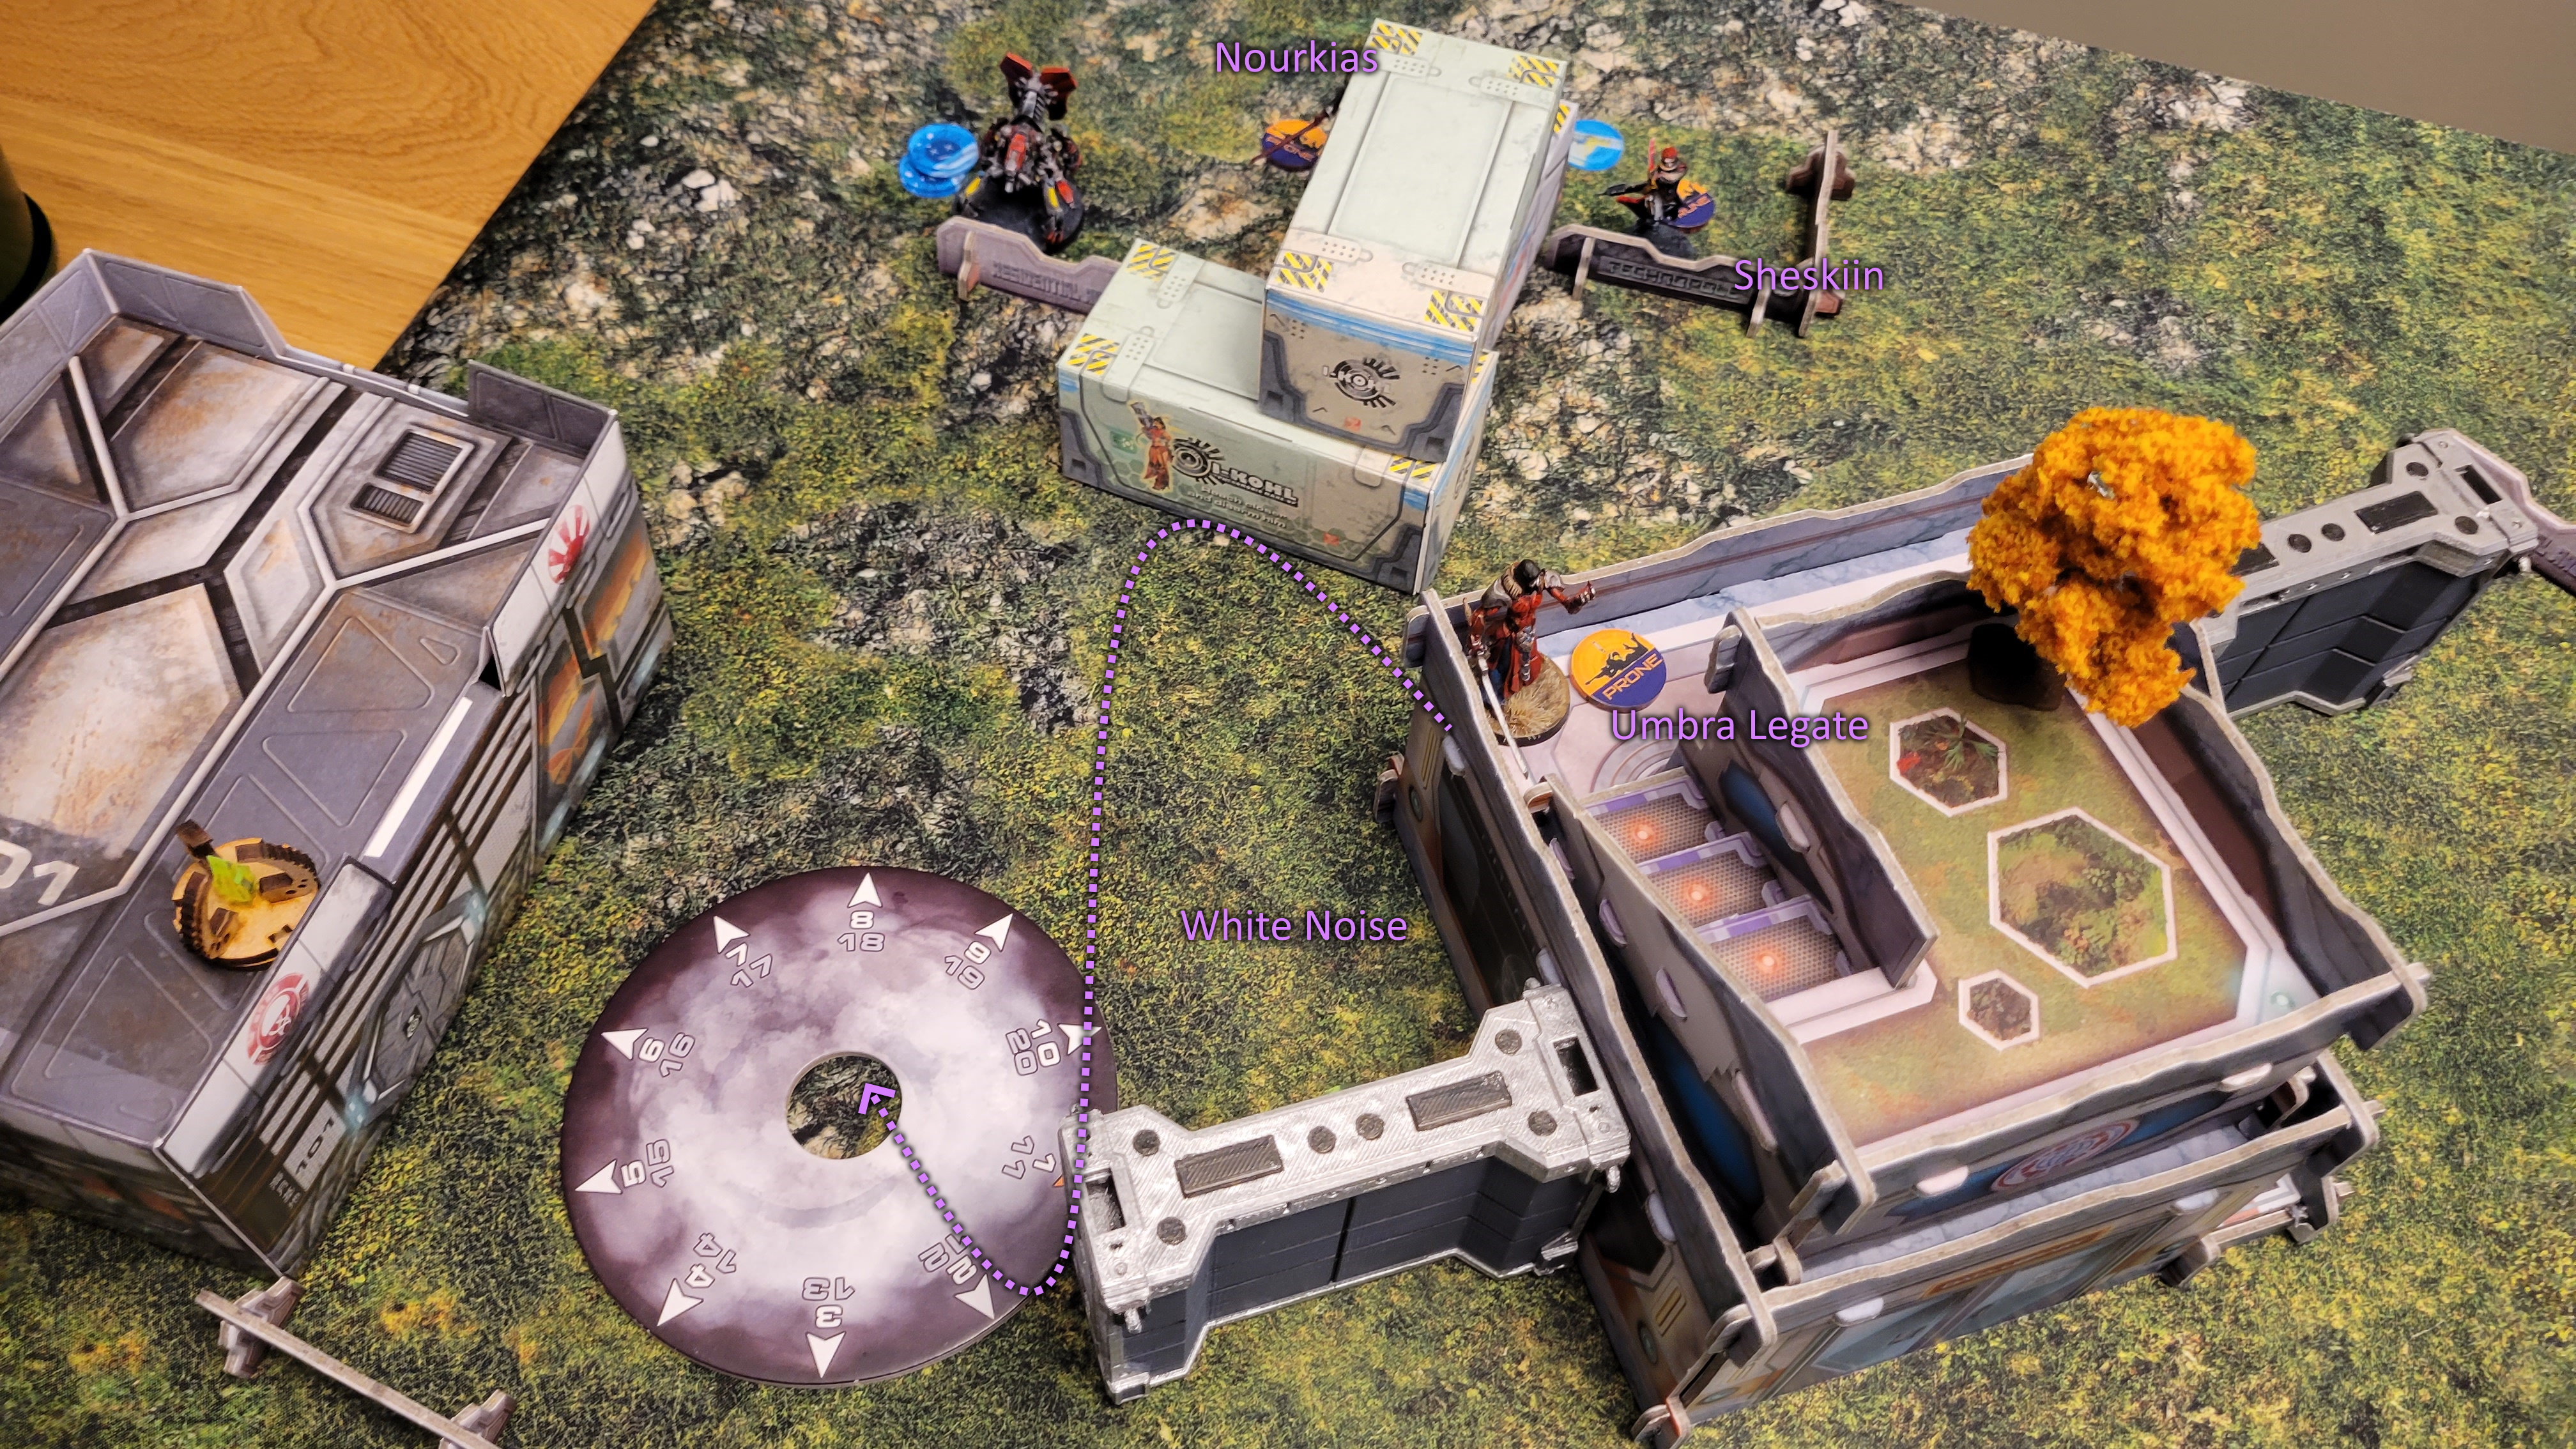
The Umbra Legate begins the turn by throwing down a White Noise, blocking the LOS of the Black Friar. He then climbs down the building, and enters the cybermask state along with Noukrias in a coordinated order. He advances up the board, with the Flash Pulse Bot, Black Friar, and Total Reaction bots, all taking their turns attempting to discover, but all fail. The Legate enters ZoC of the Teutonic Knight (Who is in total cover), and opens fire on the Black Friar. The Black Friar survives the incoming shots, while the Teutonic dodges into LOS of the Legate. The Legate then charges into melee with the Teutonic, who, combined with the oncoming Multi Pistol fire of the Black Friar, are able to kill the legate.
Some other Combined Army forces adjust their positions for the oncoming PanOceanian assault.
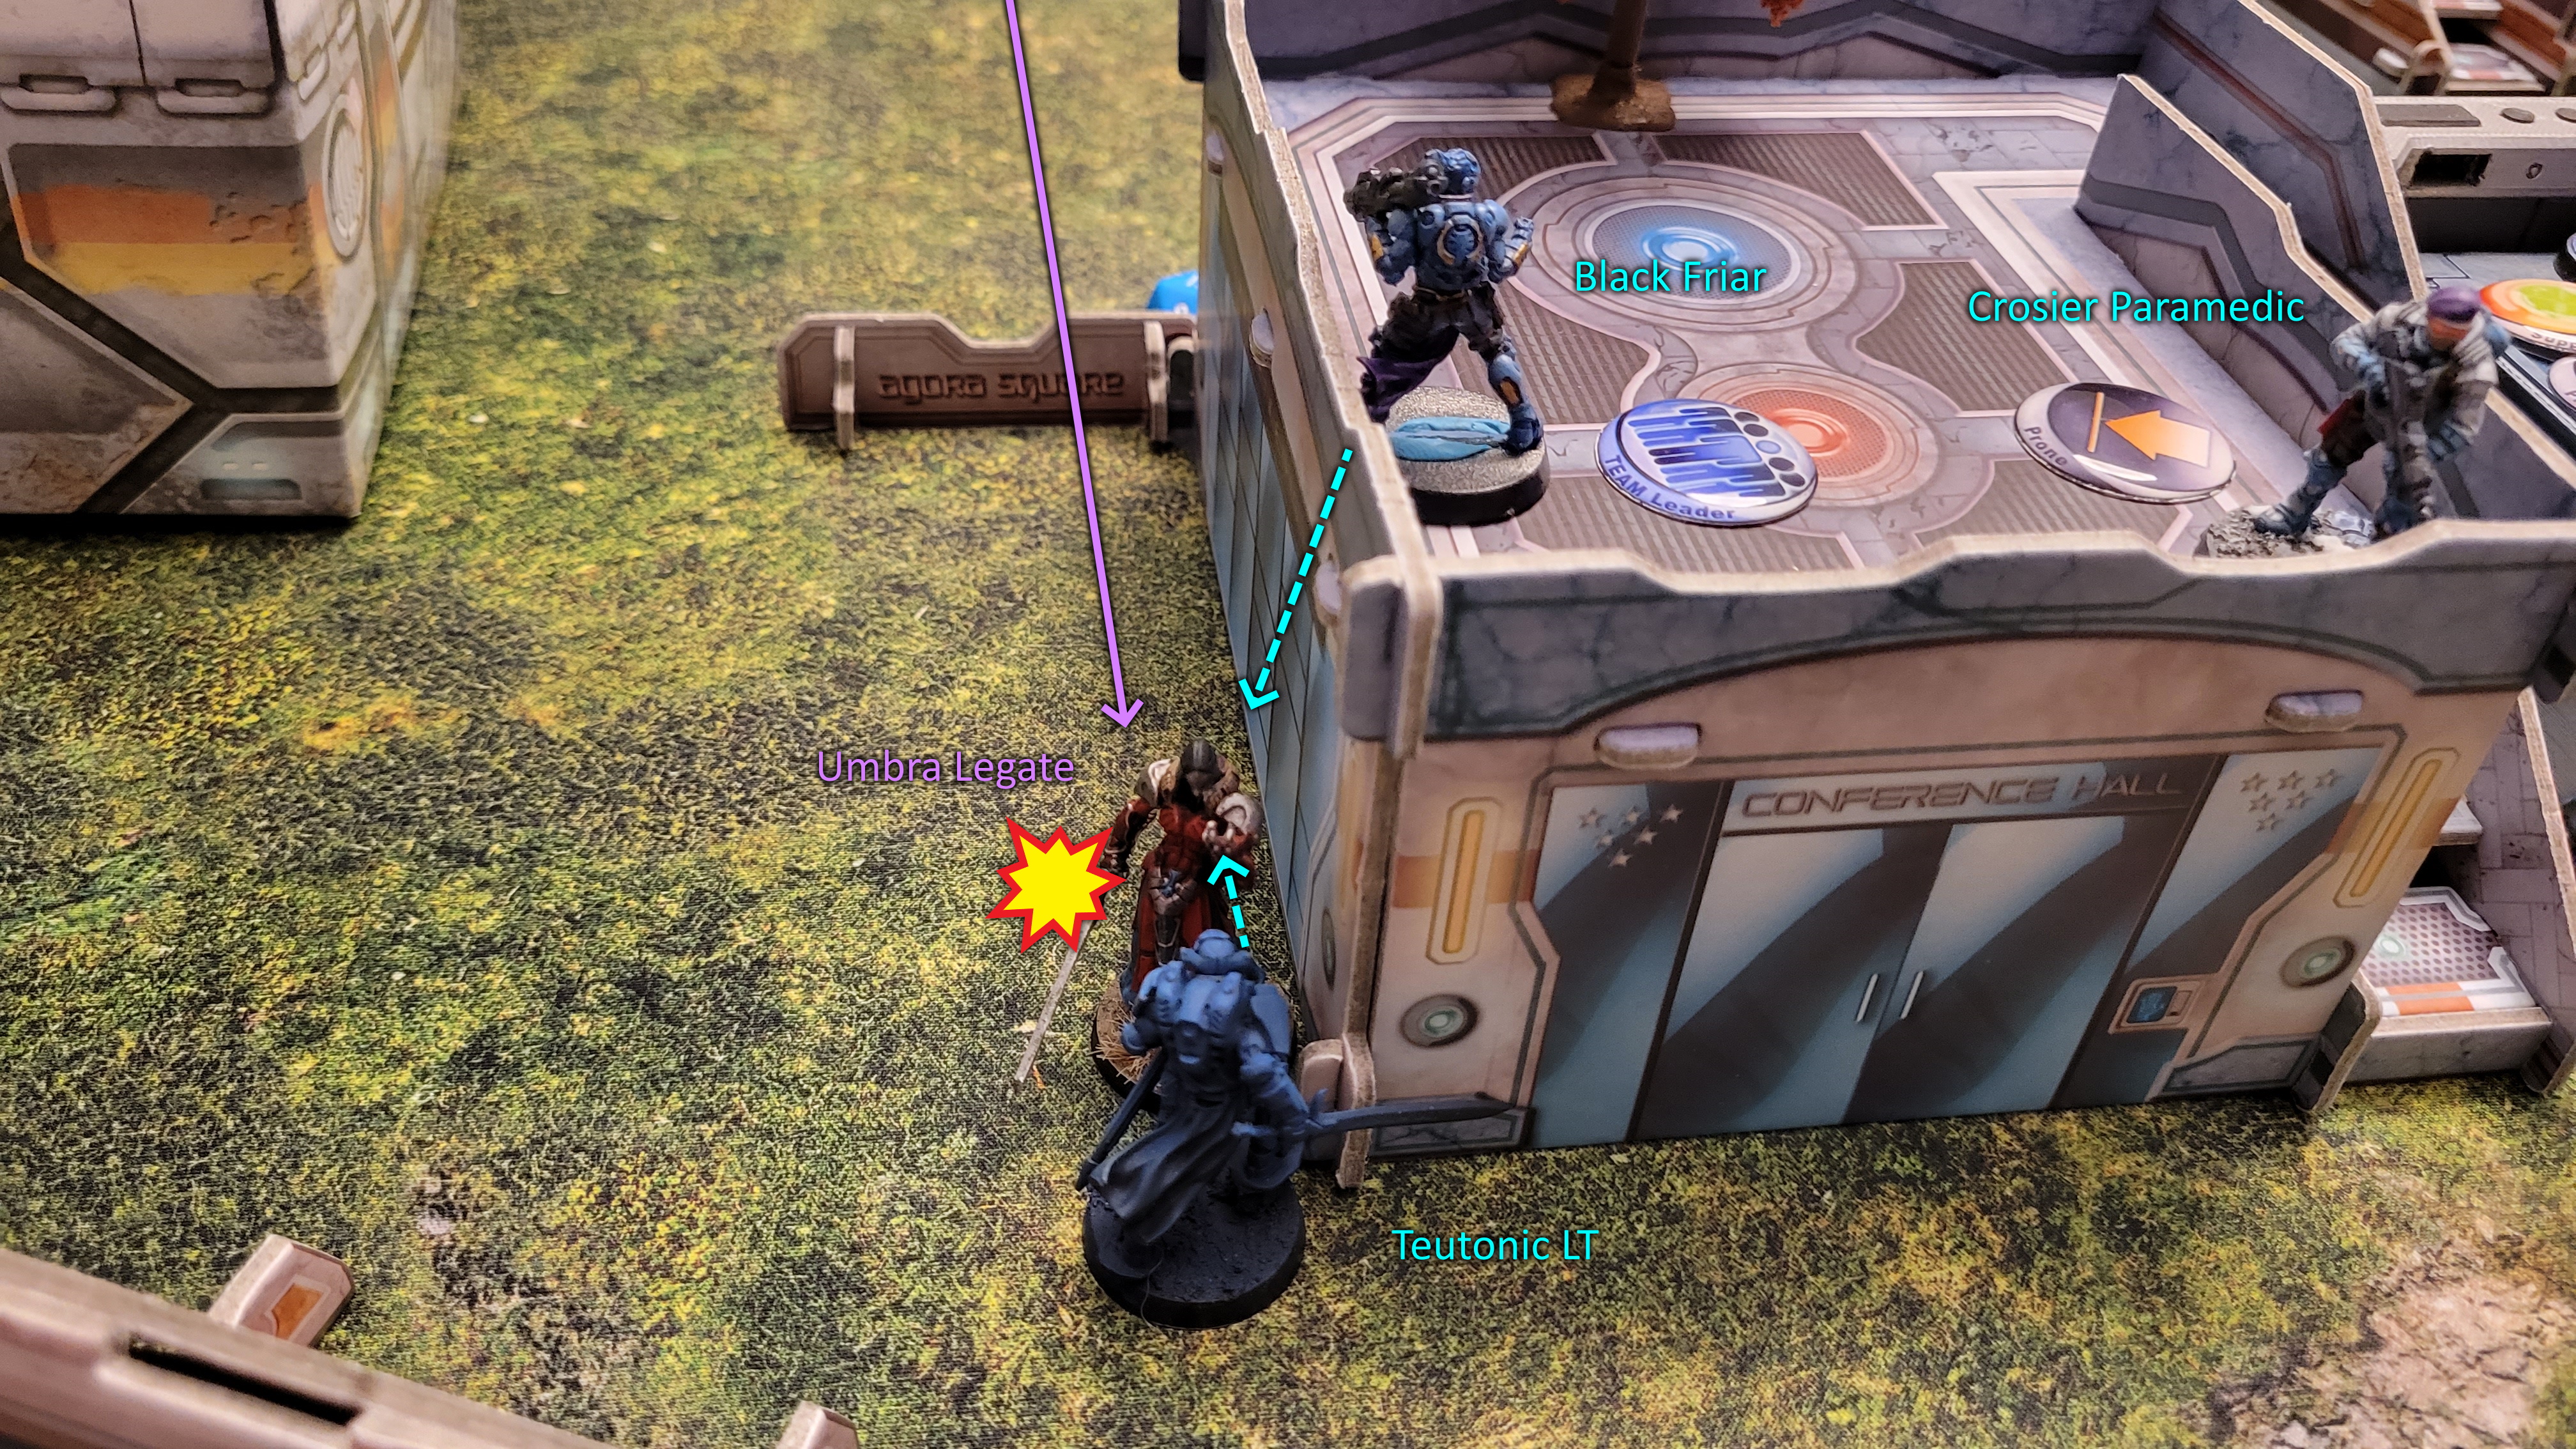 The Umbra Legate advances, eventually reaching melee with the Teutonic LT. Between melee strikes of the Knight, and Multi Pistol shots of the Black Friar, the Legate dies.
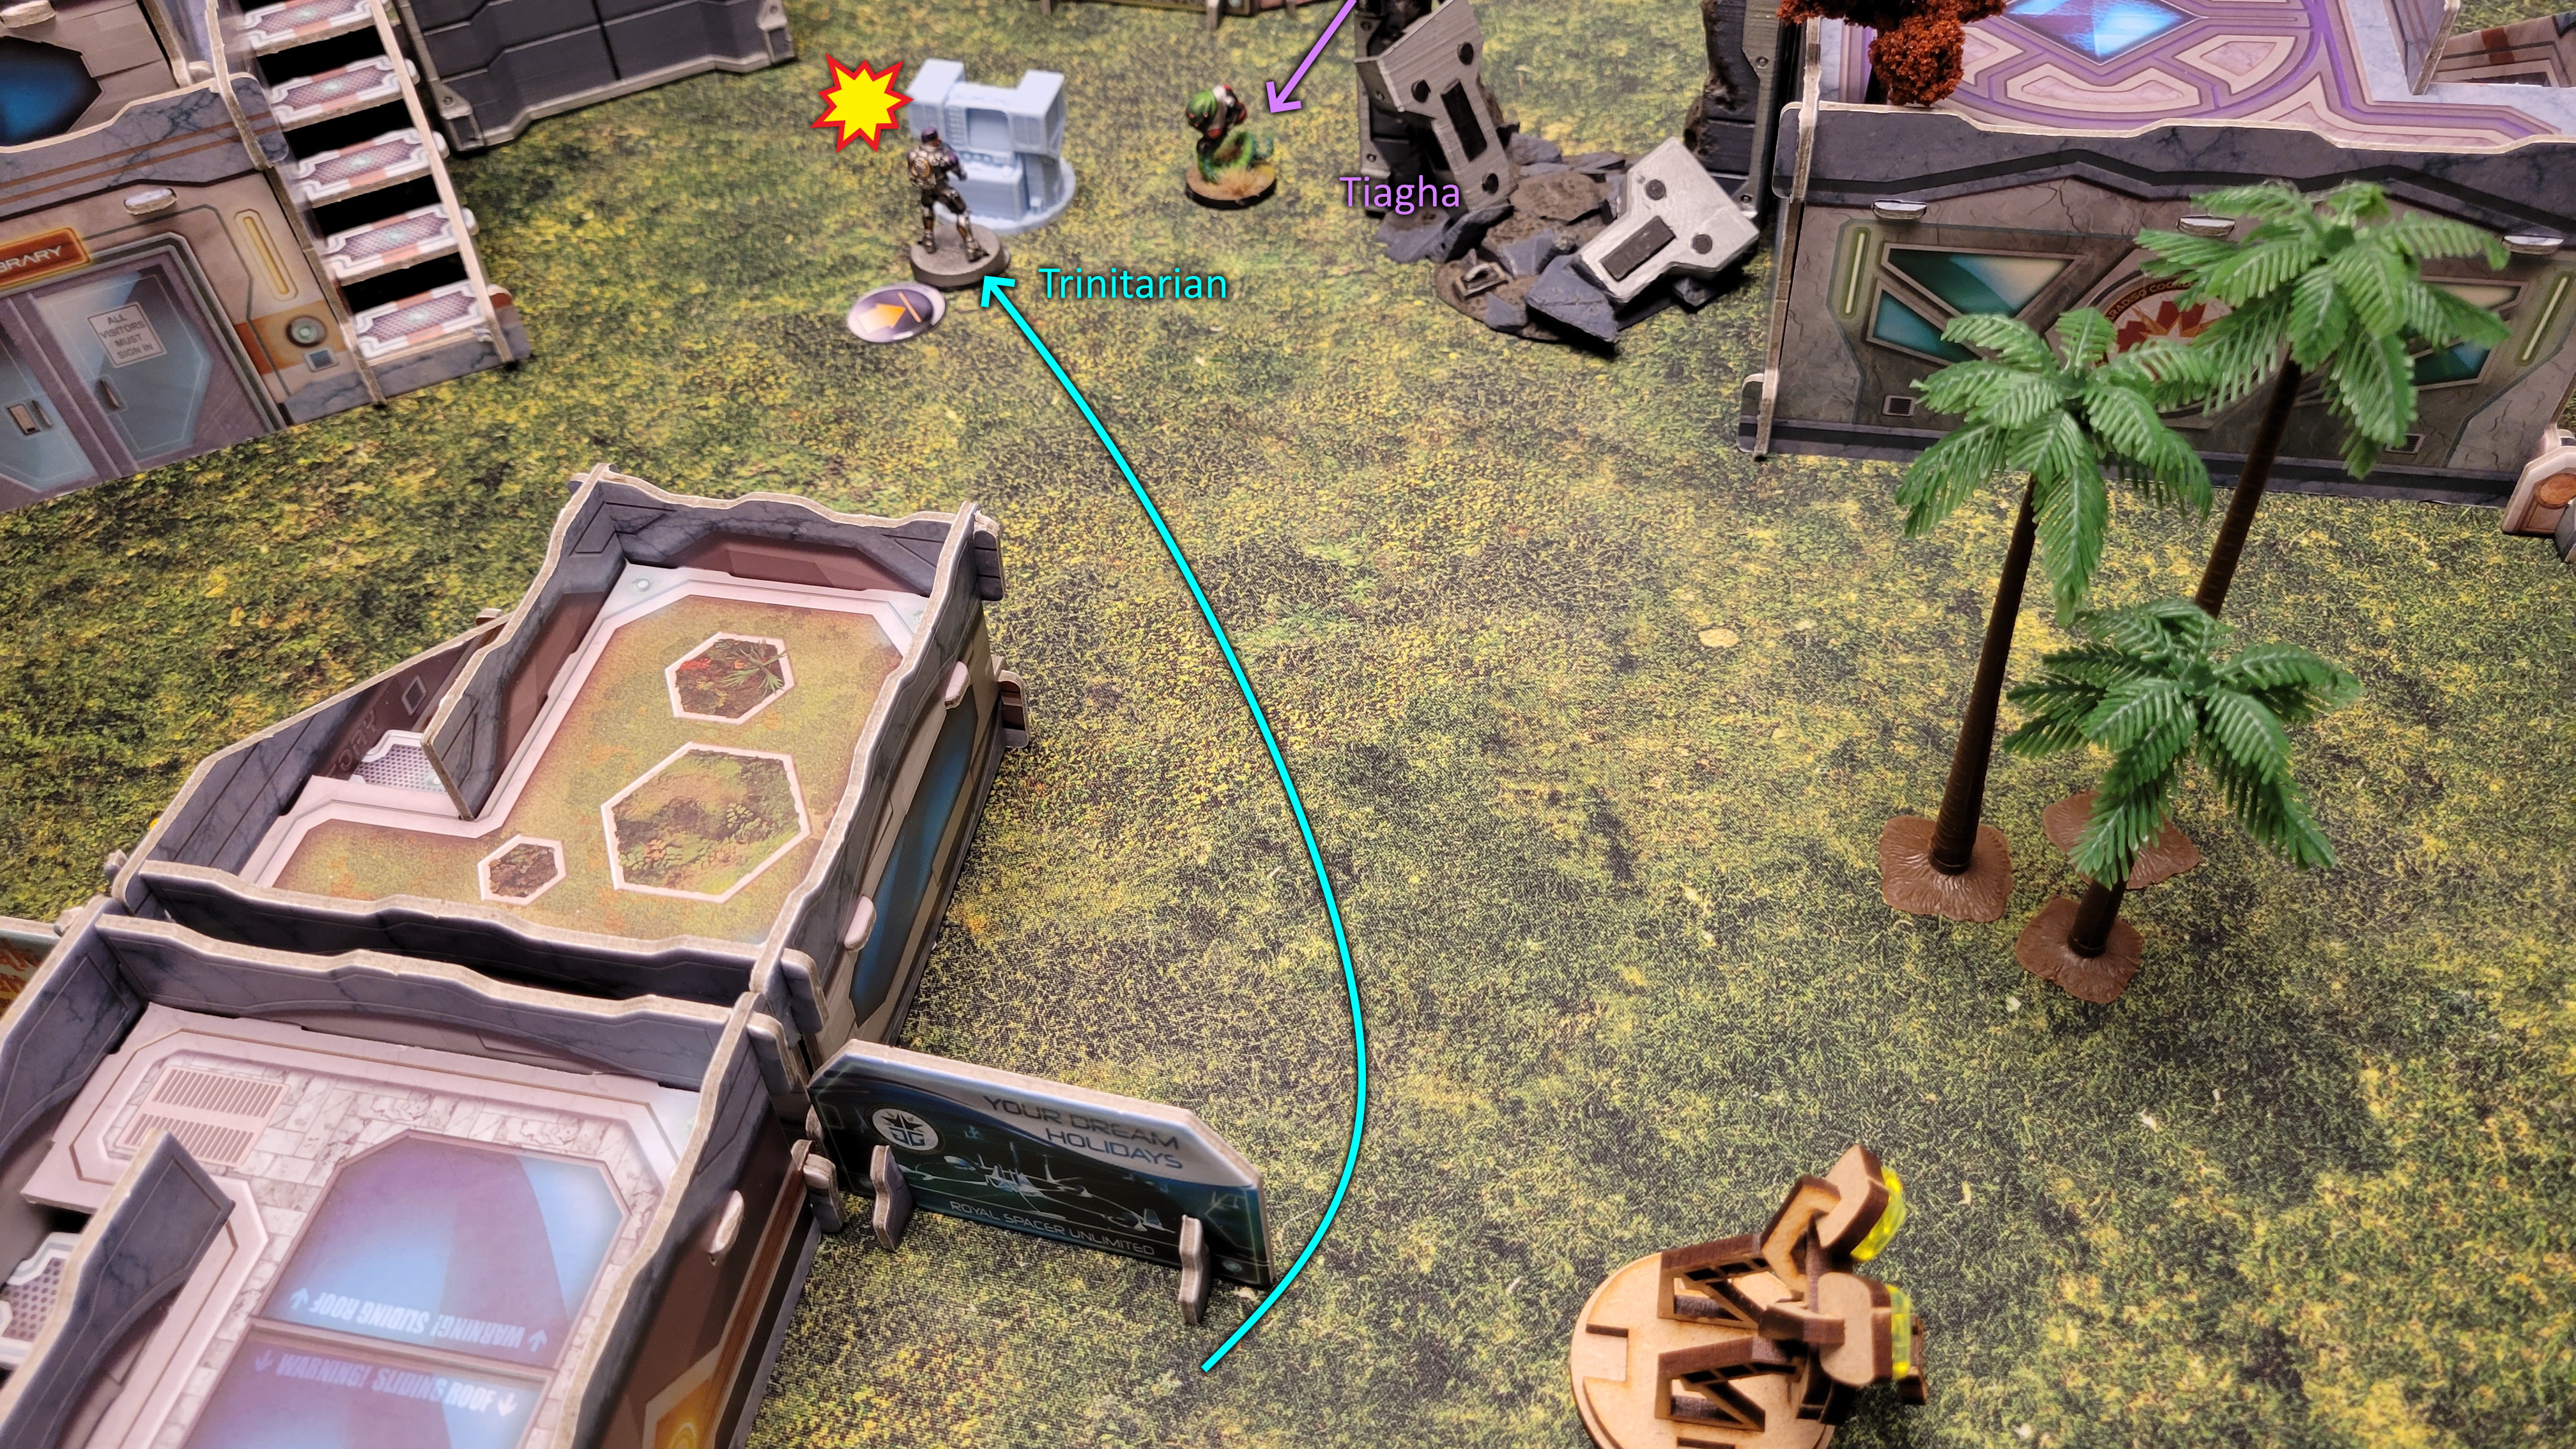
With the enemy Total Reaction, and right most flash pulse bot destroyed, a hidden deployment, Mimitism -6, camouflage marker appears on the field. It makes its way towards the enemy AC2, and reaches base to base contact. Revealing itself to be a Trinitarian, it places a D-Charge on the AC2. The detonation takes a wound from the AC2. A nearby Tiagha, hearing the blast, dodges forward, towards the Trinitarian. With a disregard for his own life, the Trinitarian places another D charge while being shot by a chain colt. A great success, with the AC2 failing 3 more saves, being utterly destroyed, while the Trinitarian passes his armour save from the Chain Colt.
The Hospitaller HMG opens fire on the Tiagha assailing the Trinitarian, ripping it to shreds in a hail of fire from the HMG.
The Trinitarian then re-enters the Camo state, and advances towards Sheskiin. Revealing with a surprise attack and an SMG, he attempts to kill her, however she successfully dodges and reaches B2B contact with the Trinitarian.
With pool 2, the Raveneye officer climbs down from her ledge, approaches the panoply, gets +1 armour, moves into cover while laying a mine, and enters suppressive.
 The Trinitarian advances, and places a D Charge on the AC2, causing 1 wound. The noise of the blast alerts a nearby Tiagha, who dodges forward.
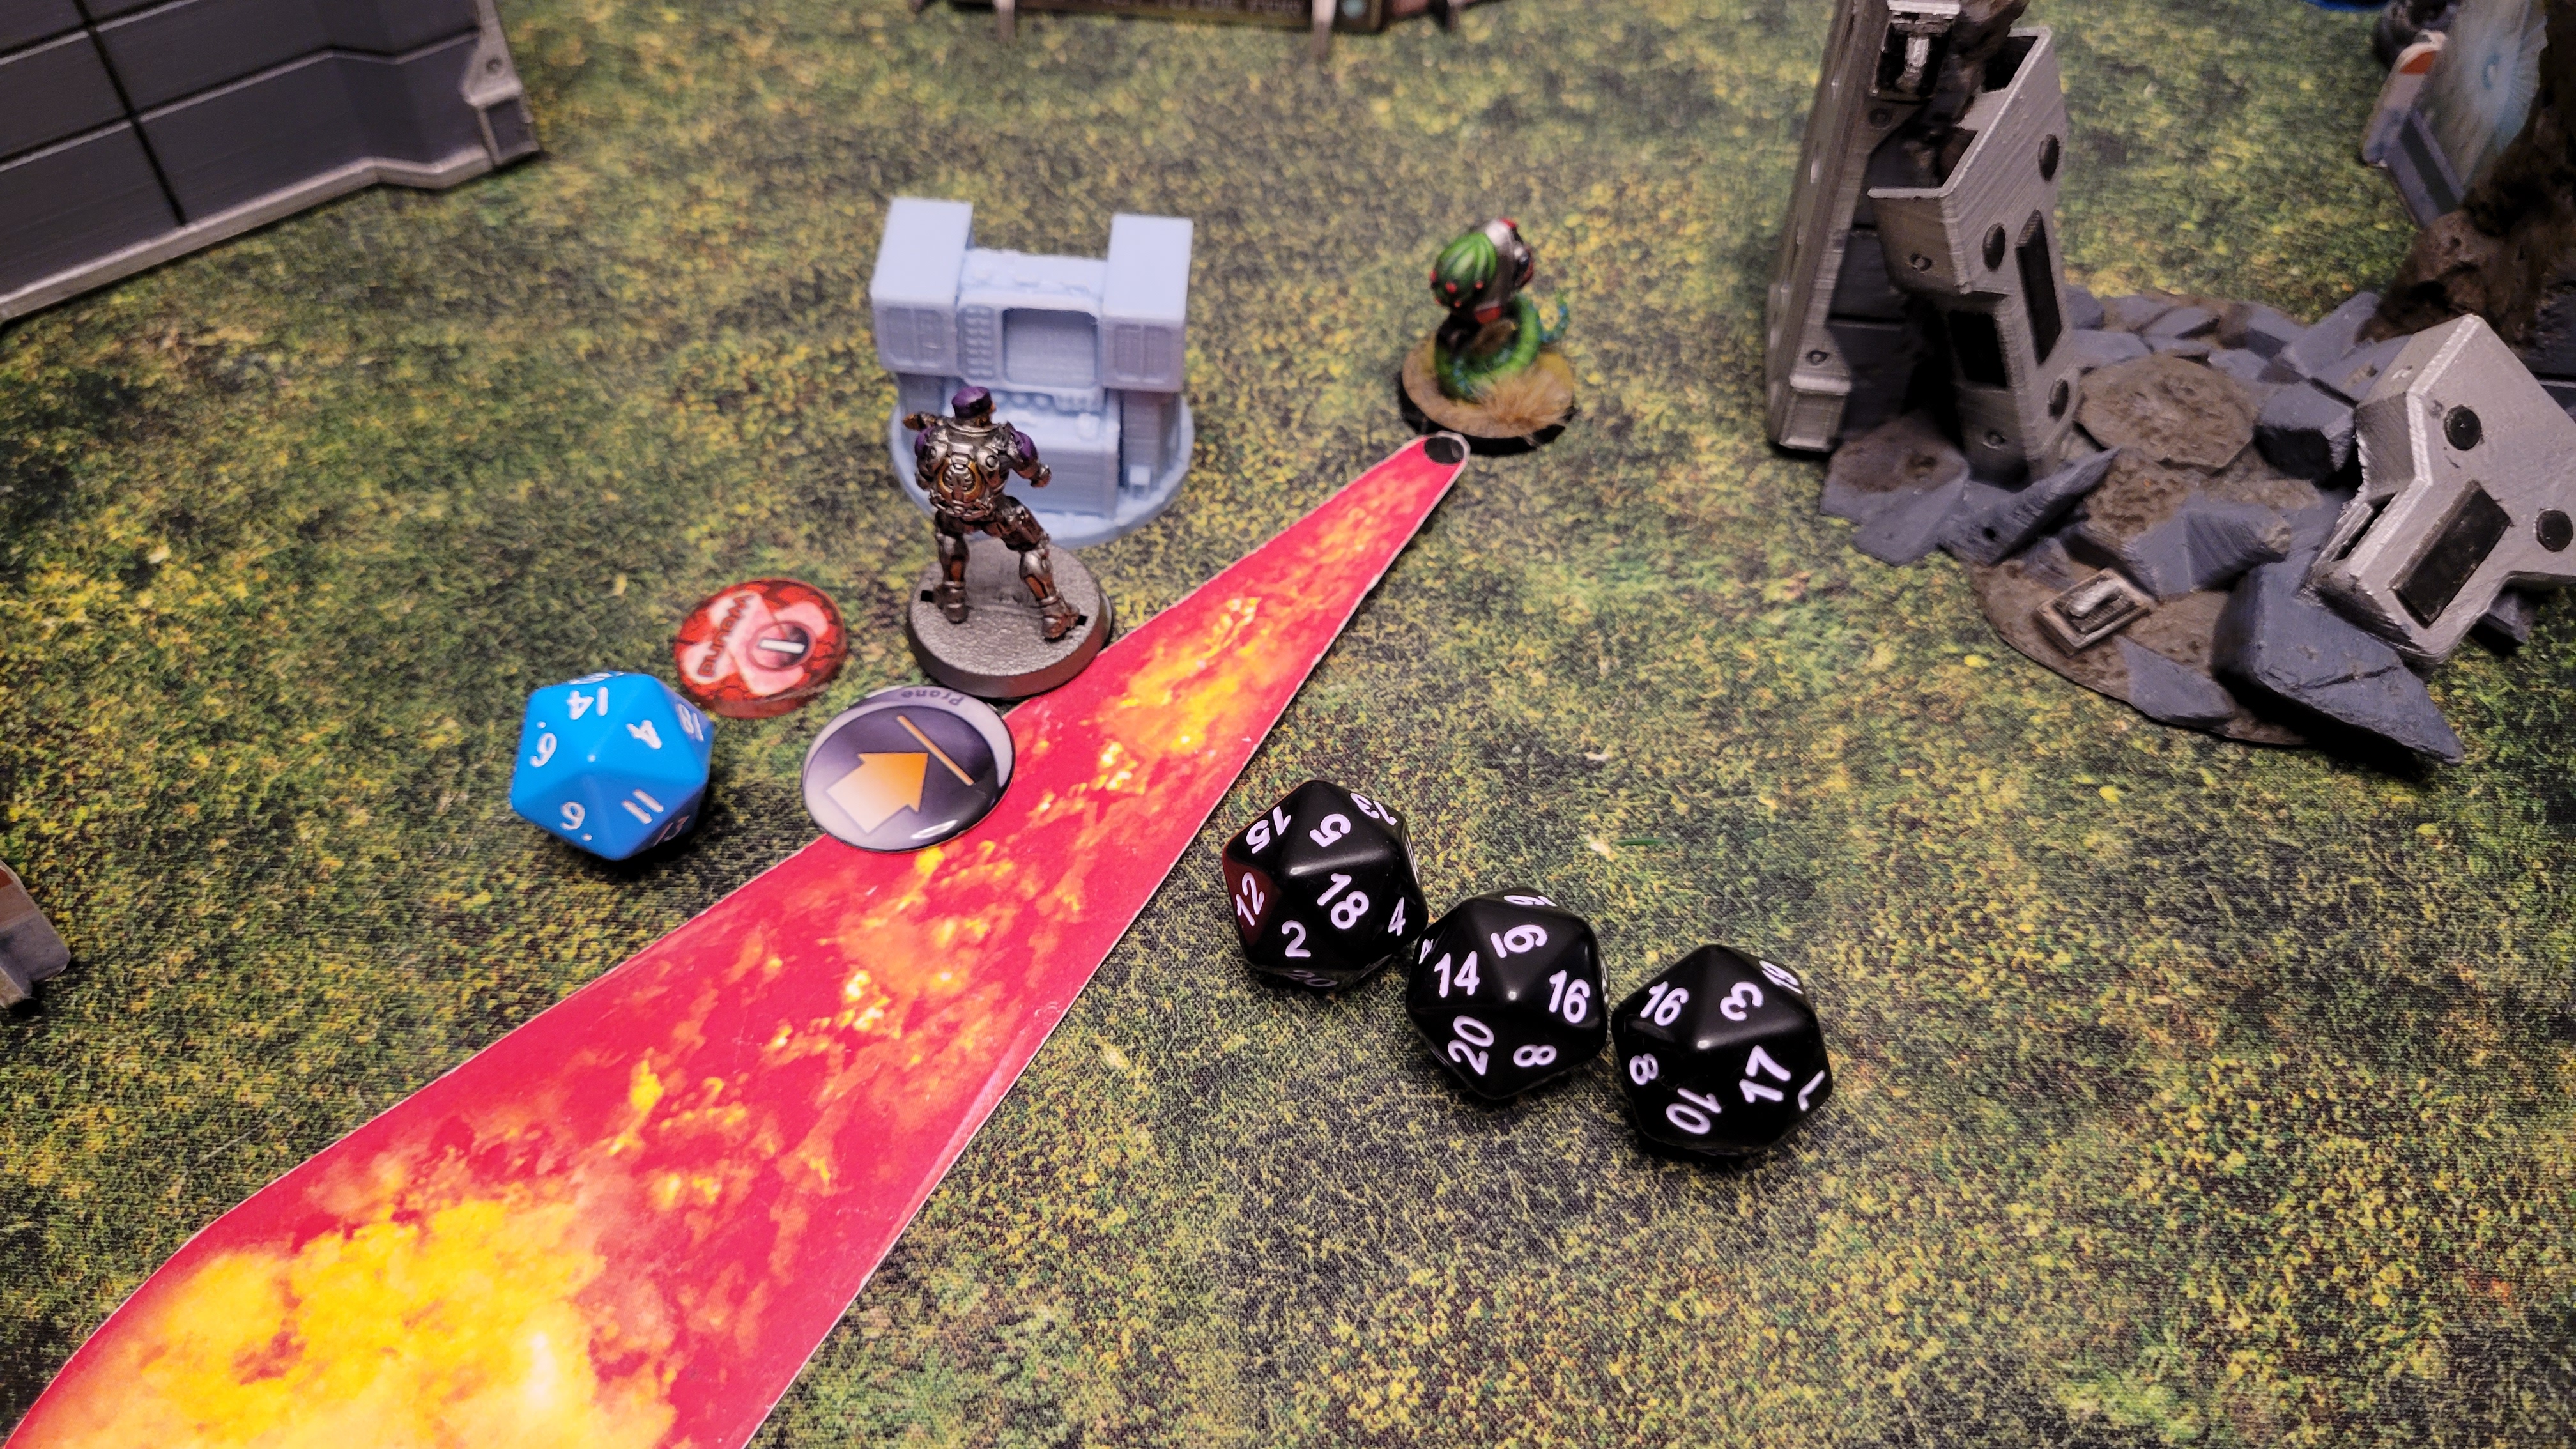 No edits, just the dice rolls of what happened. The AC2 is destroyed by D charges, while the Trinitarian survives the chain colt.
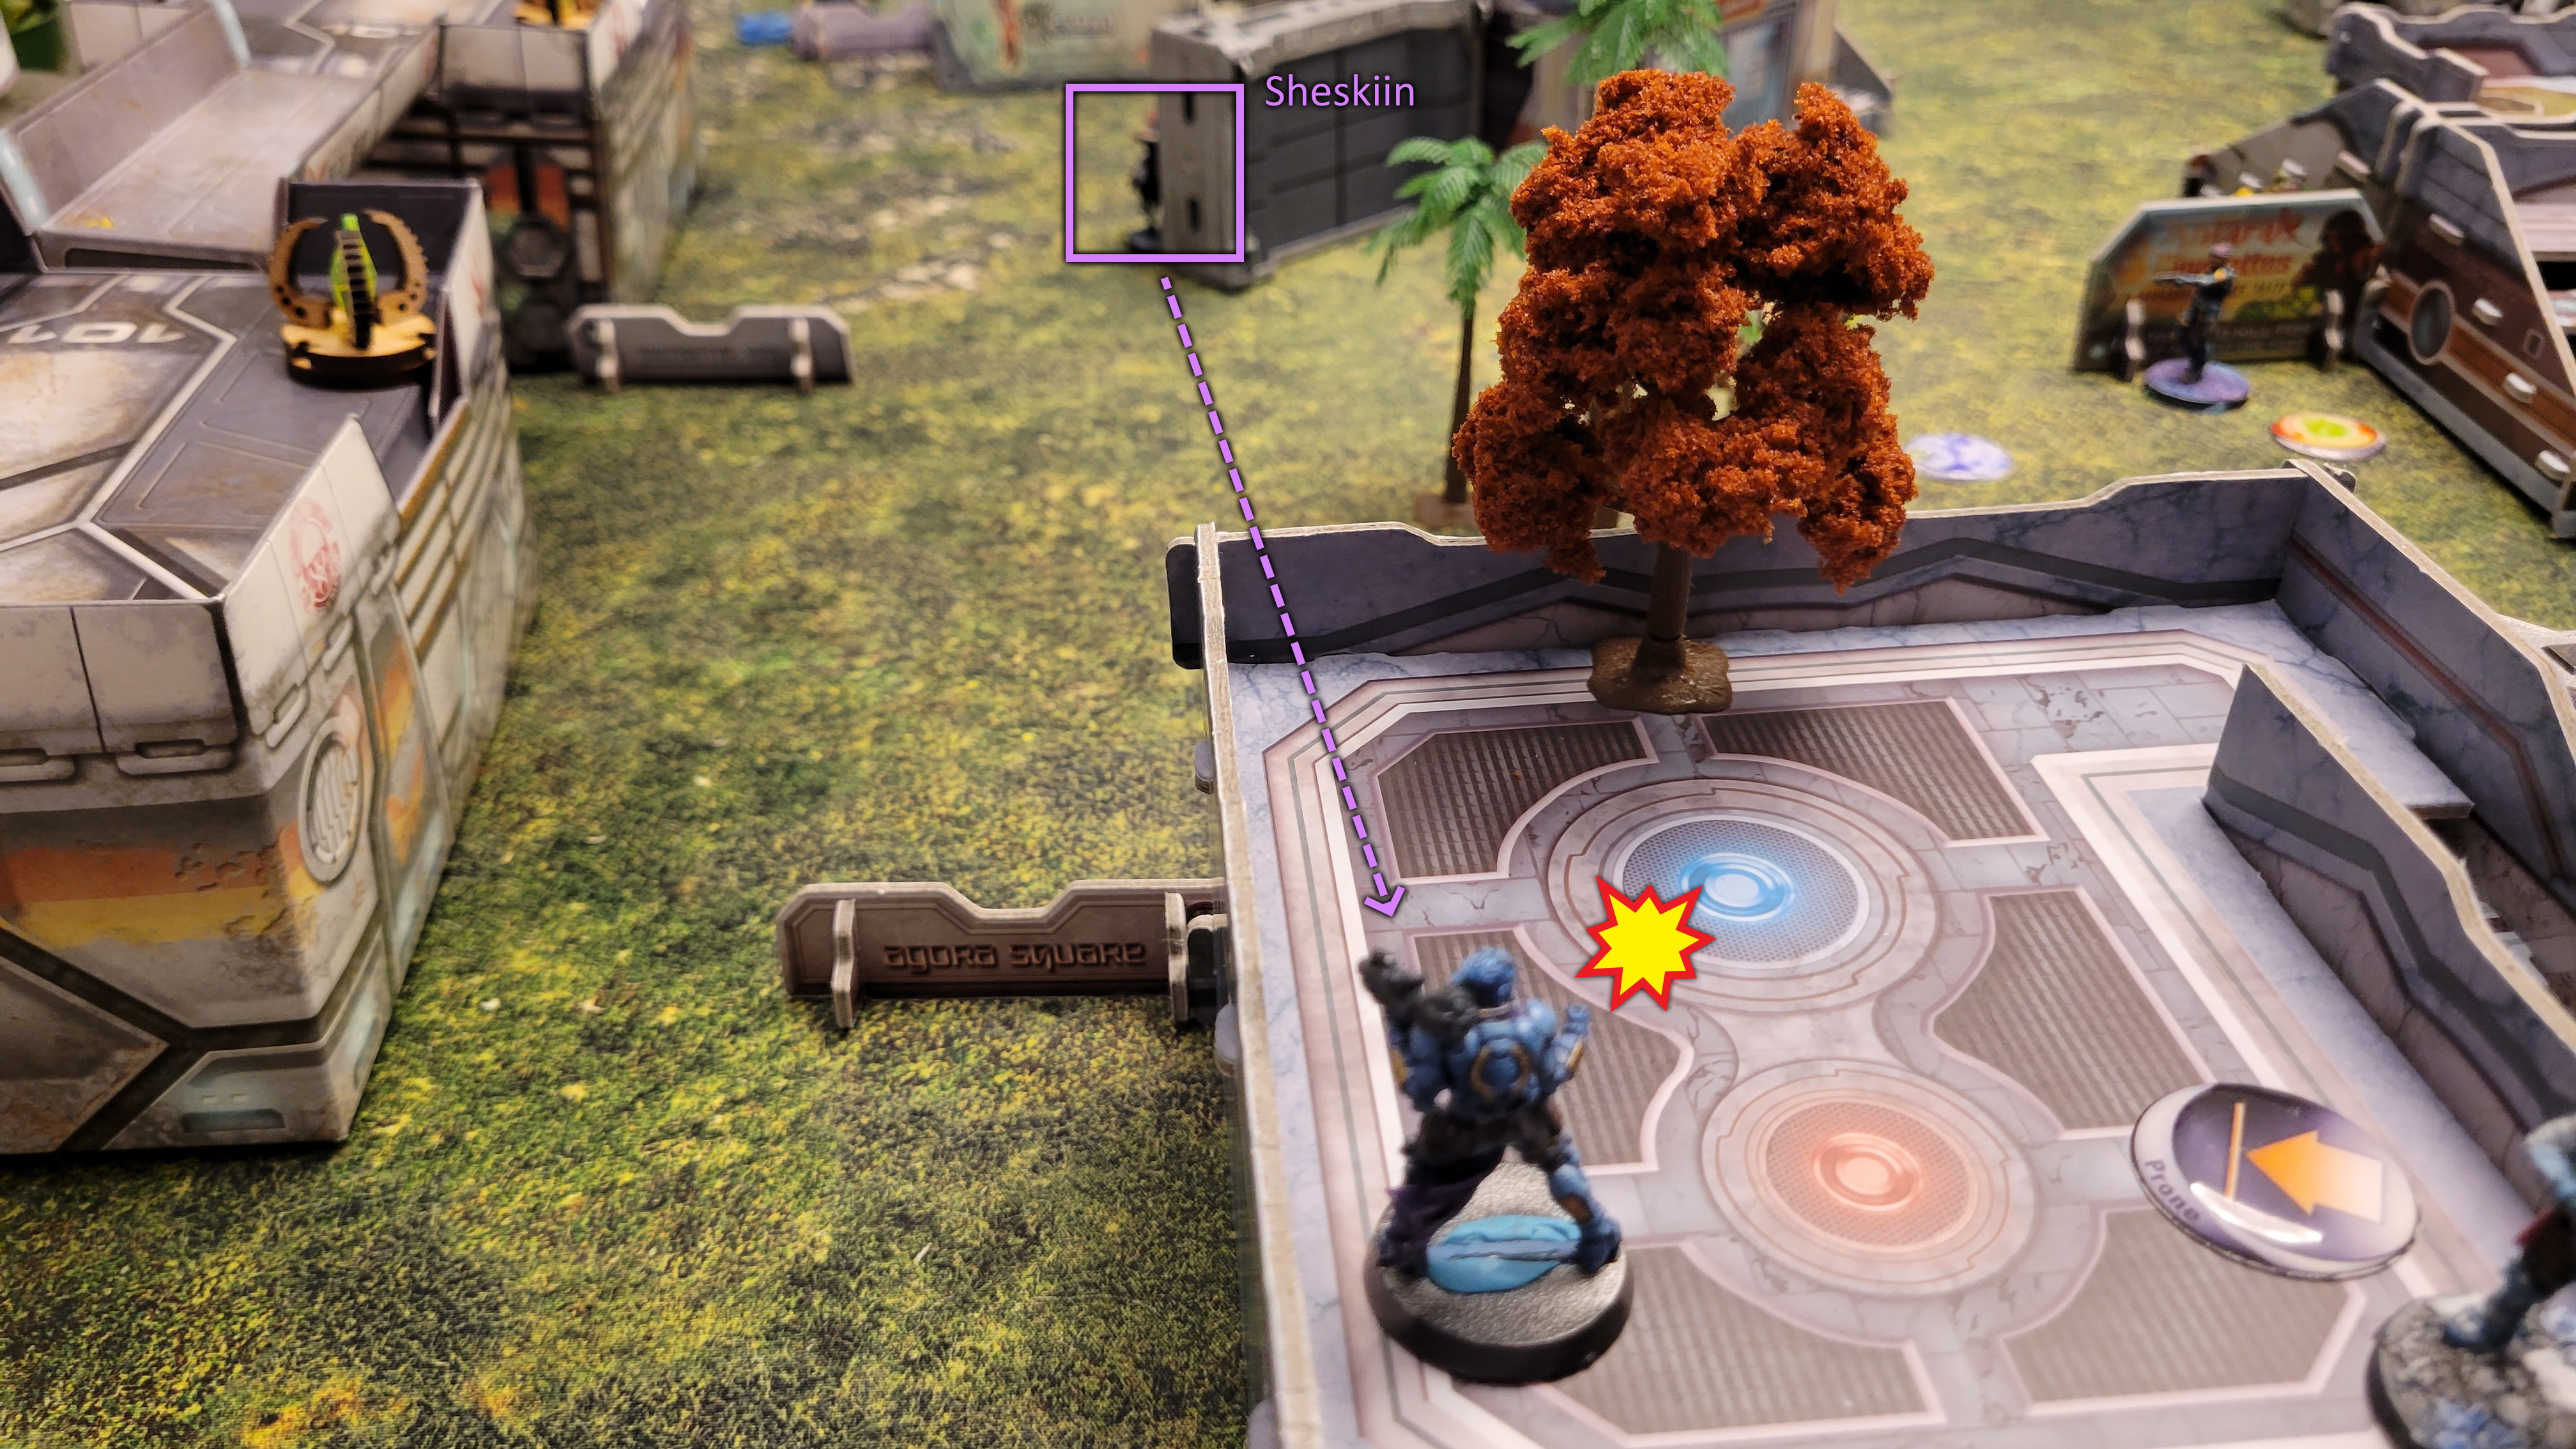
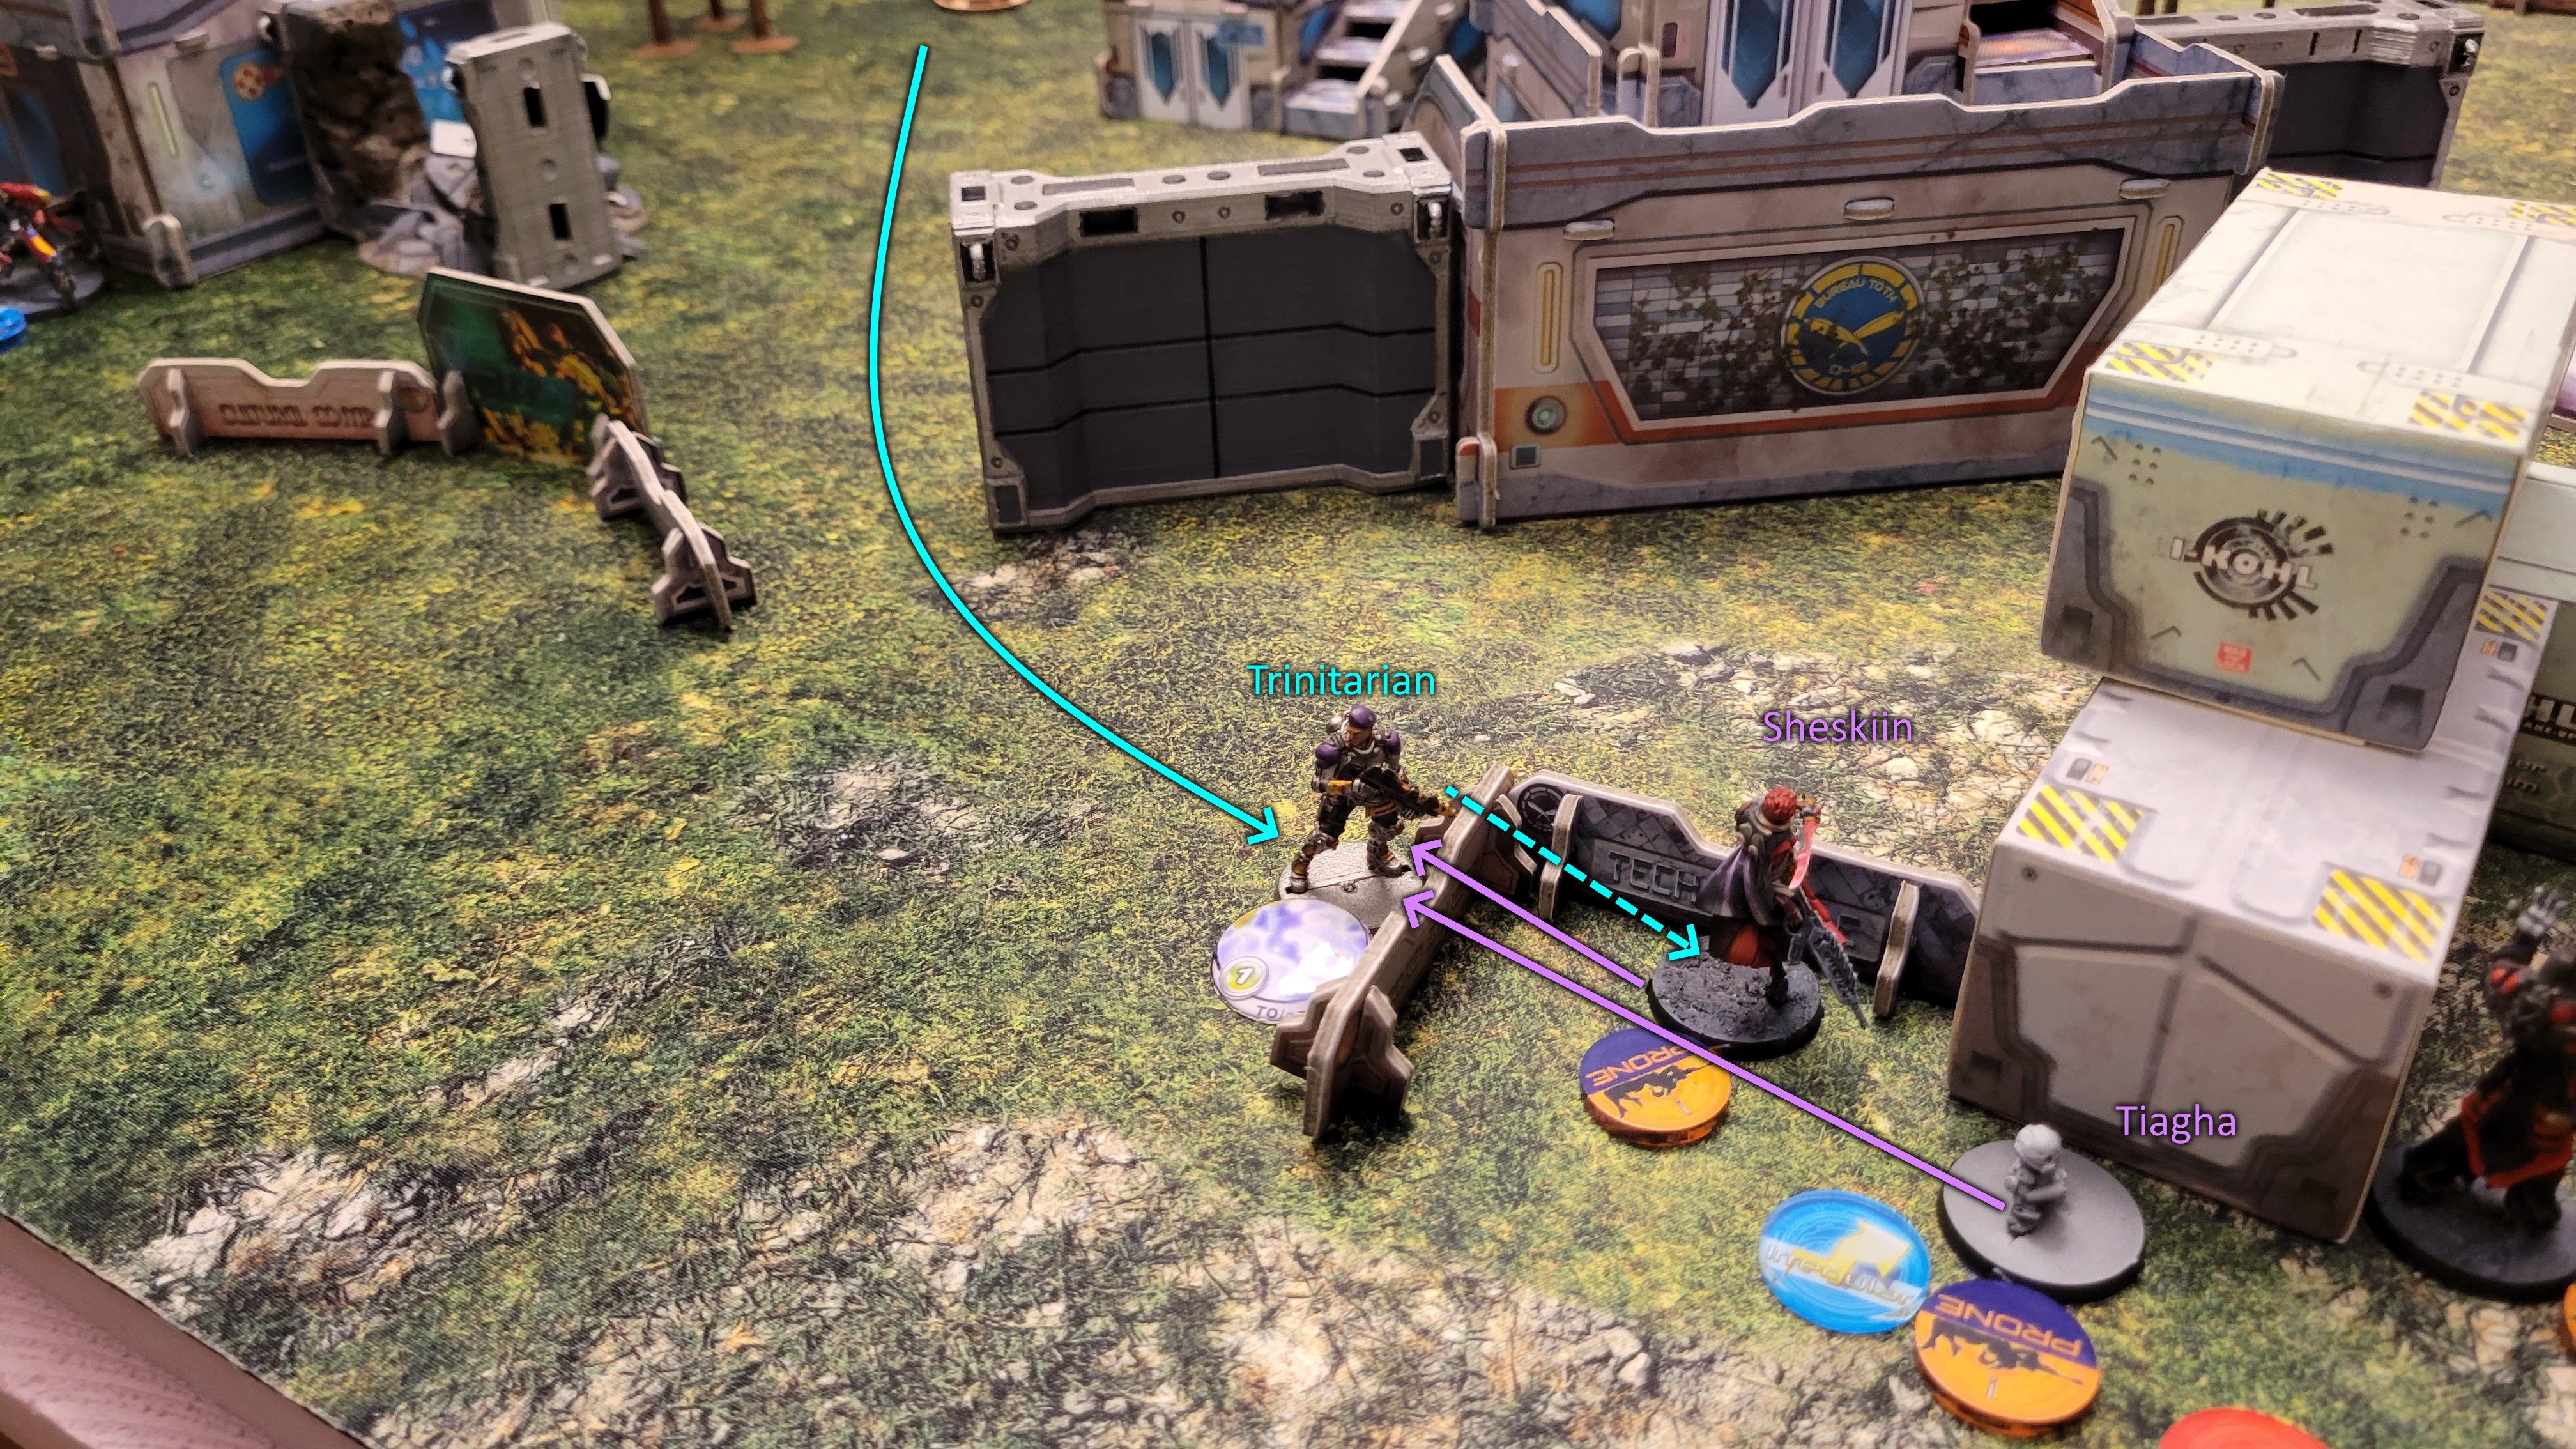 The Trinitarian advances, and opens fire onto Sheskiin. She, and a Tiagha, successfully dodge into melee.
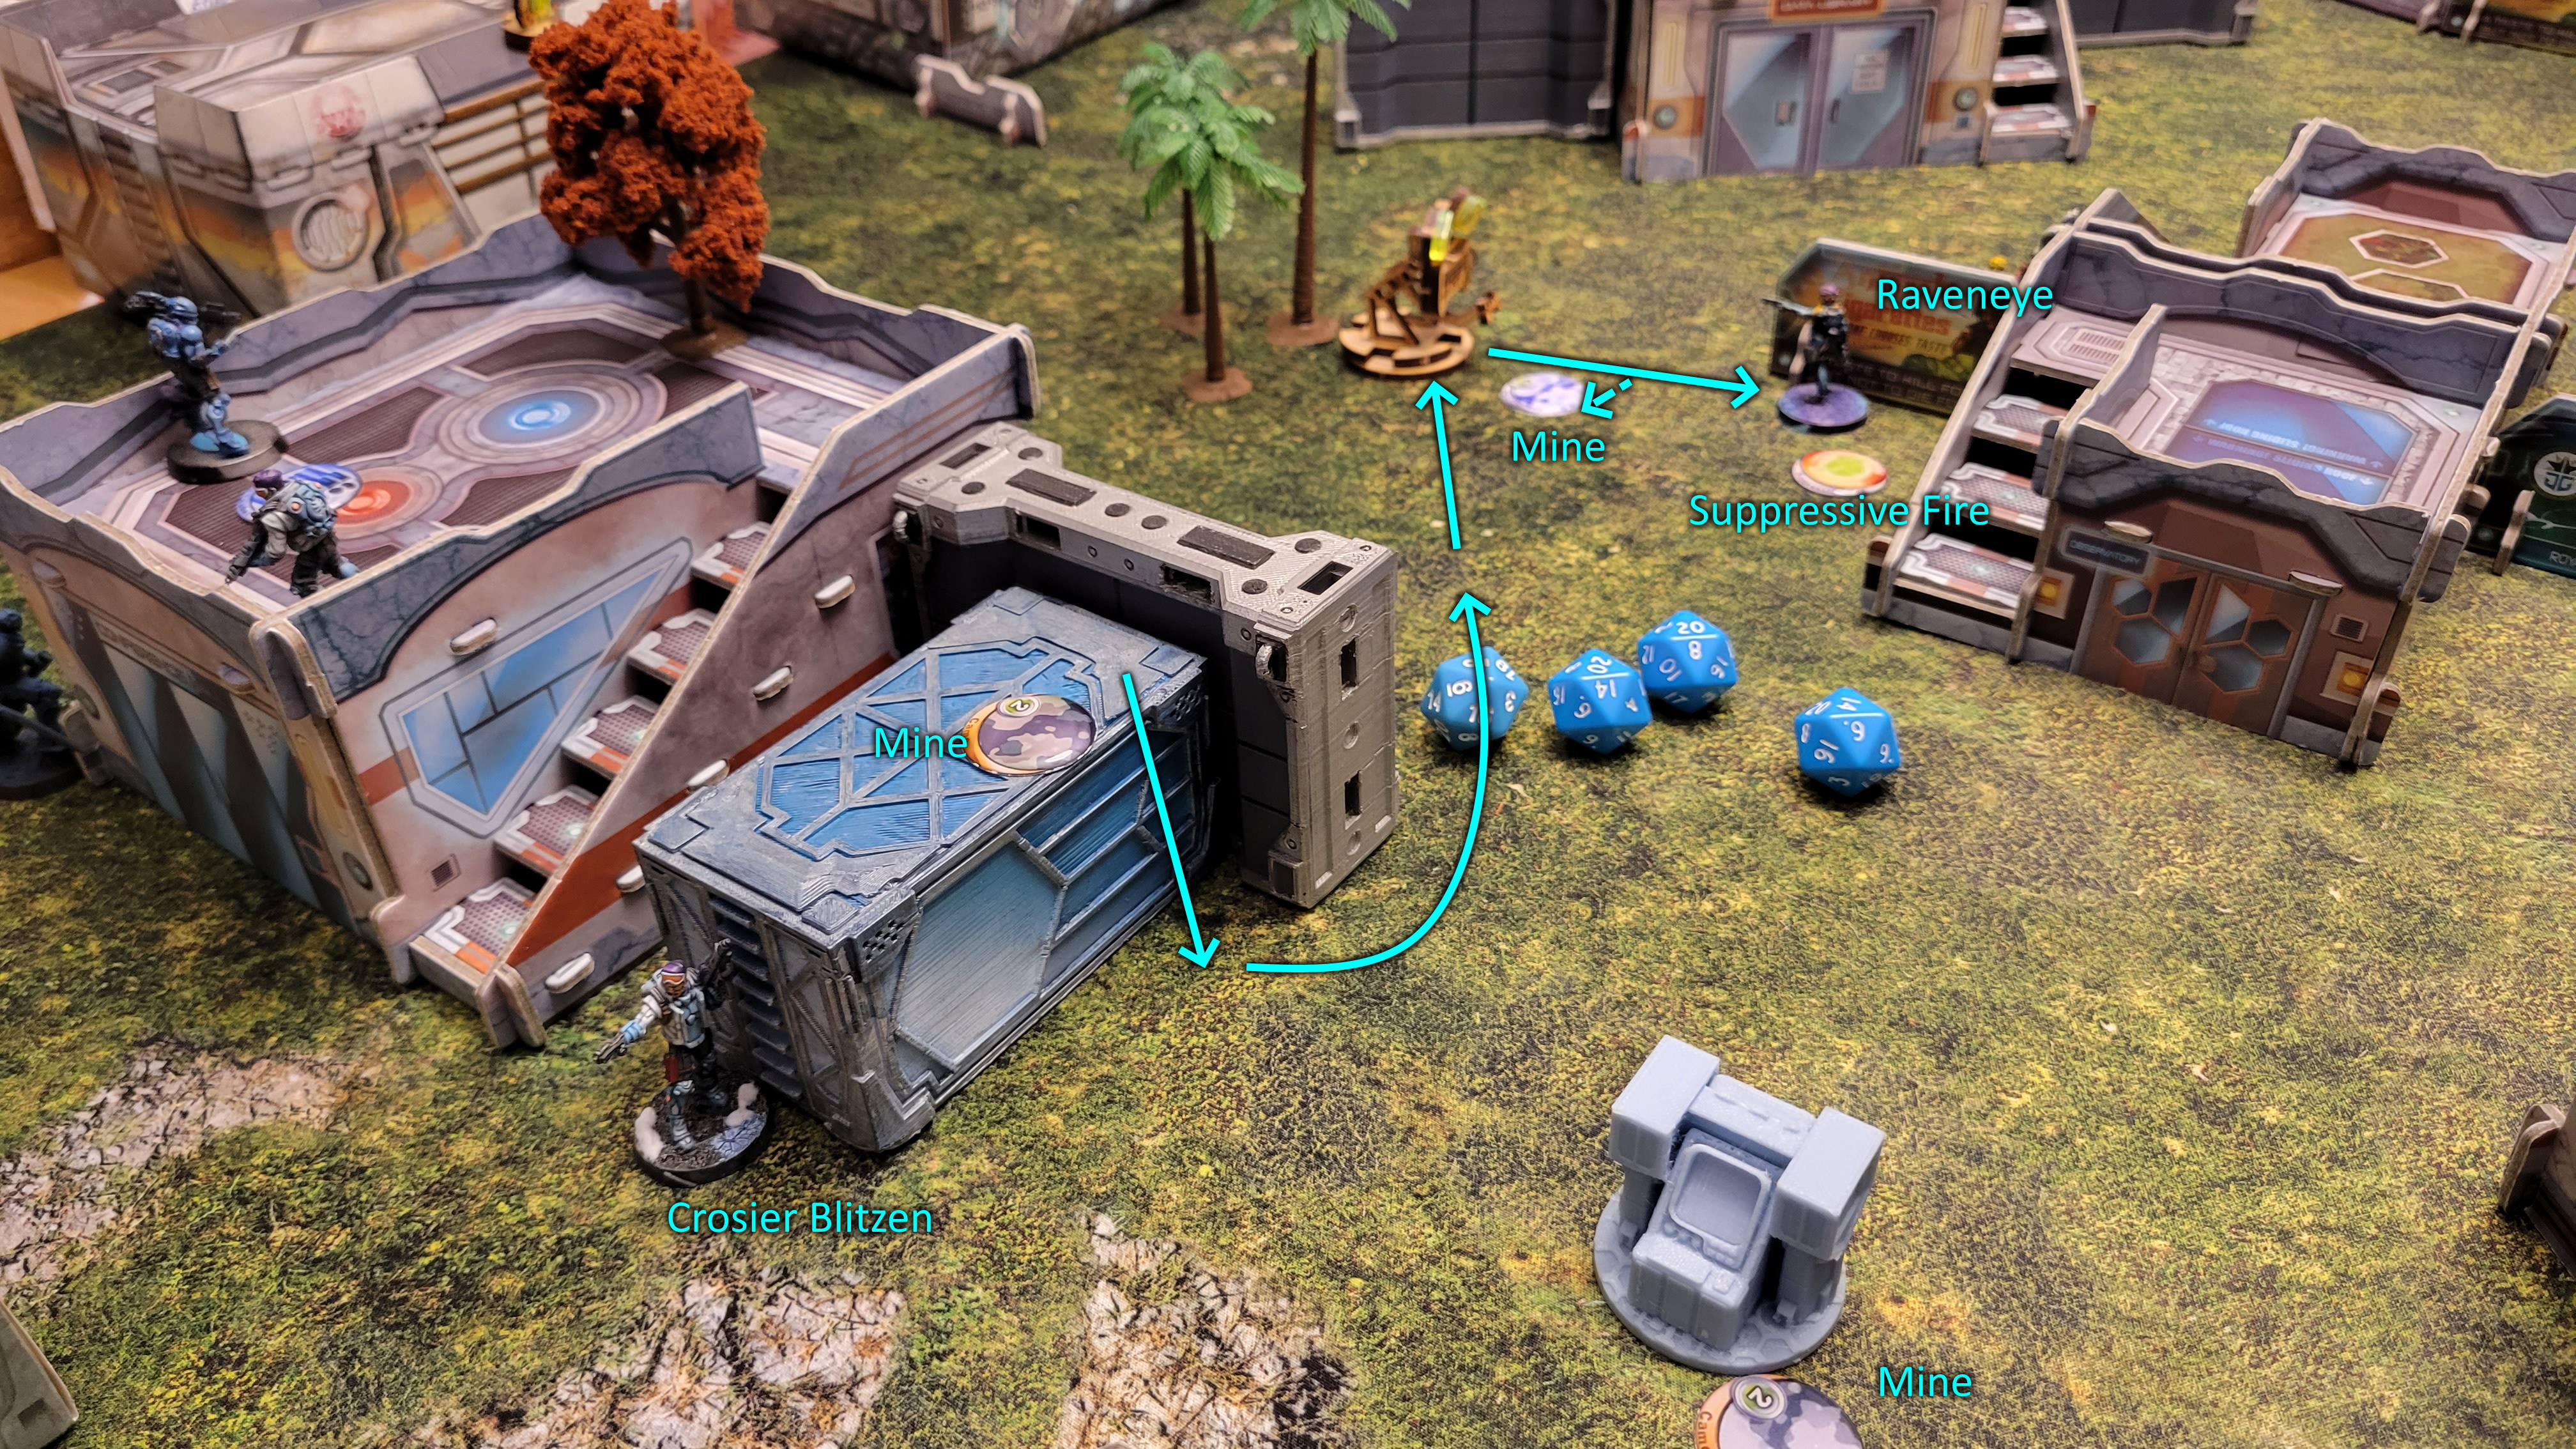 To end the turn, all Pool 2 orders are used on the Raveneye, who advances to a panoply, gets +1 armour, and moves away, laying an mine and entering suppressive.
Sheskiin is able to kill the Trinitarian in melee, achieving the Power Up 2 state. Over the course of several orders, she is able to kill: The Teutonic LT, The Black Friar. She also renders the Flash Pulse Bot unconscious.
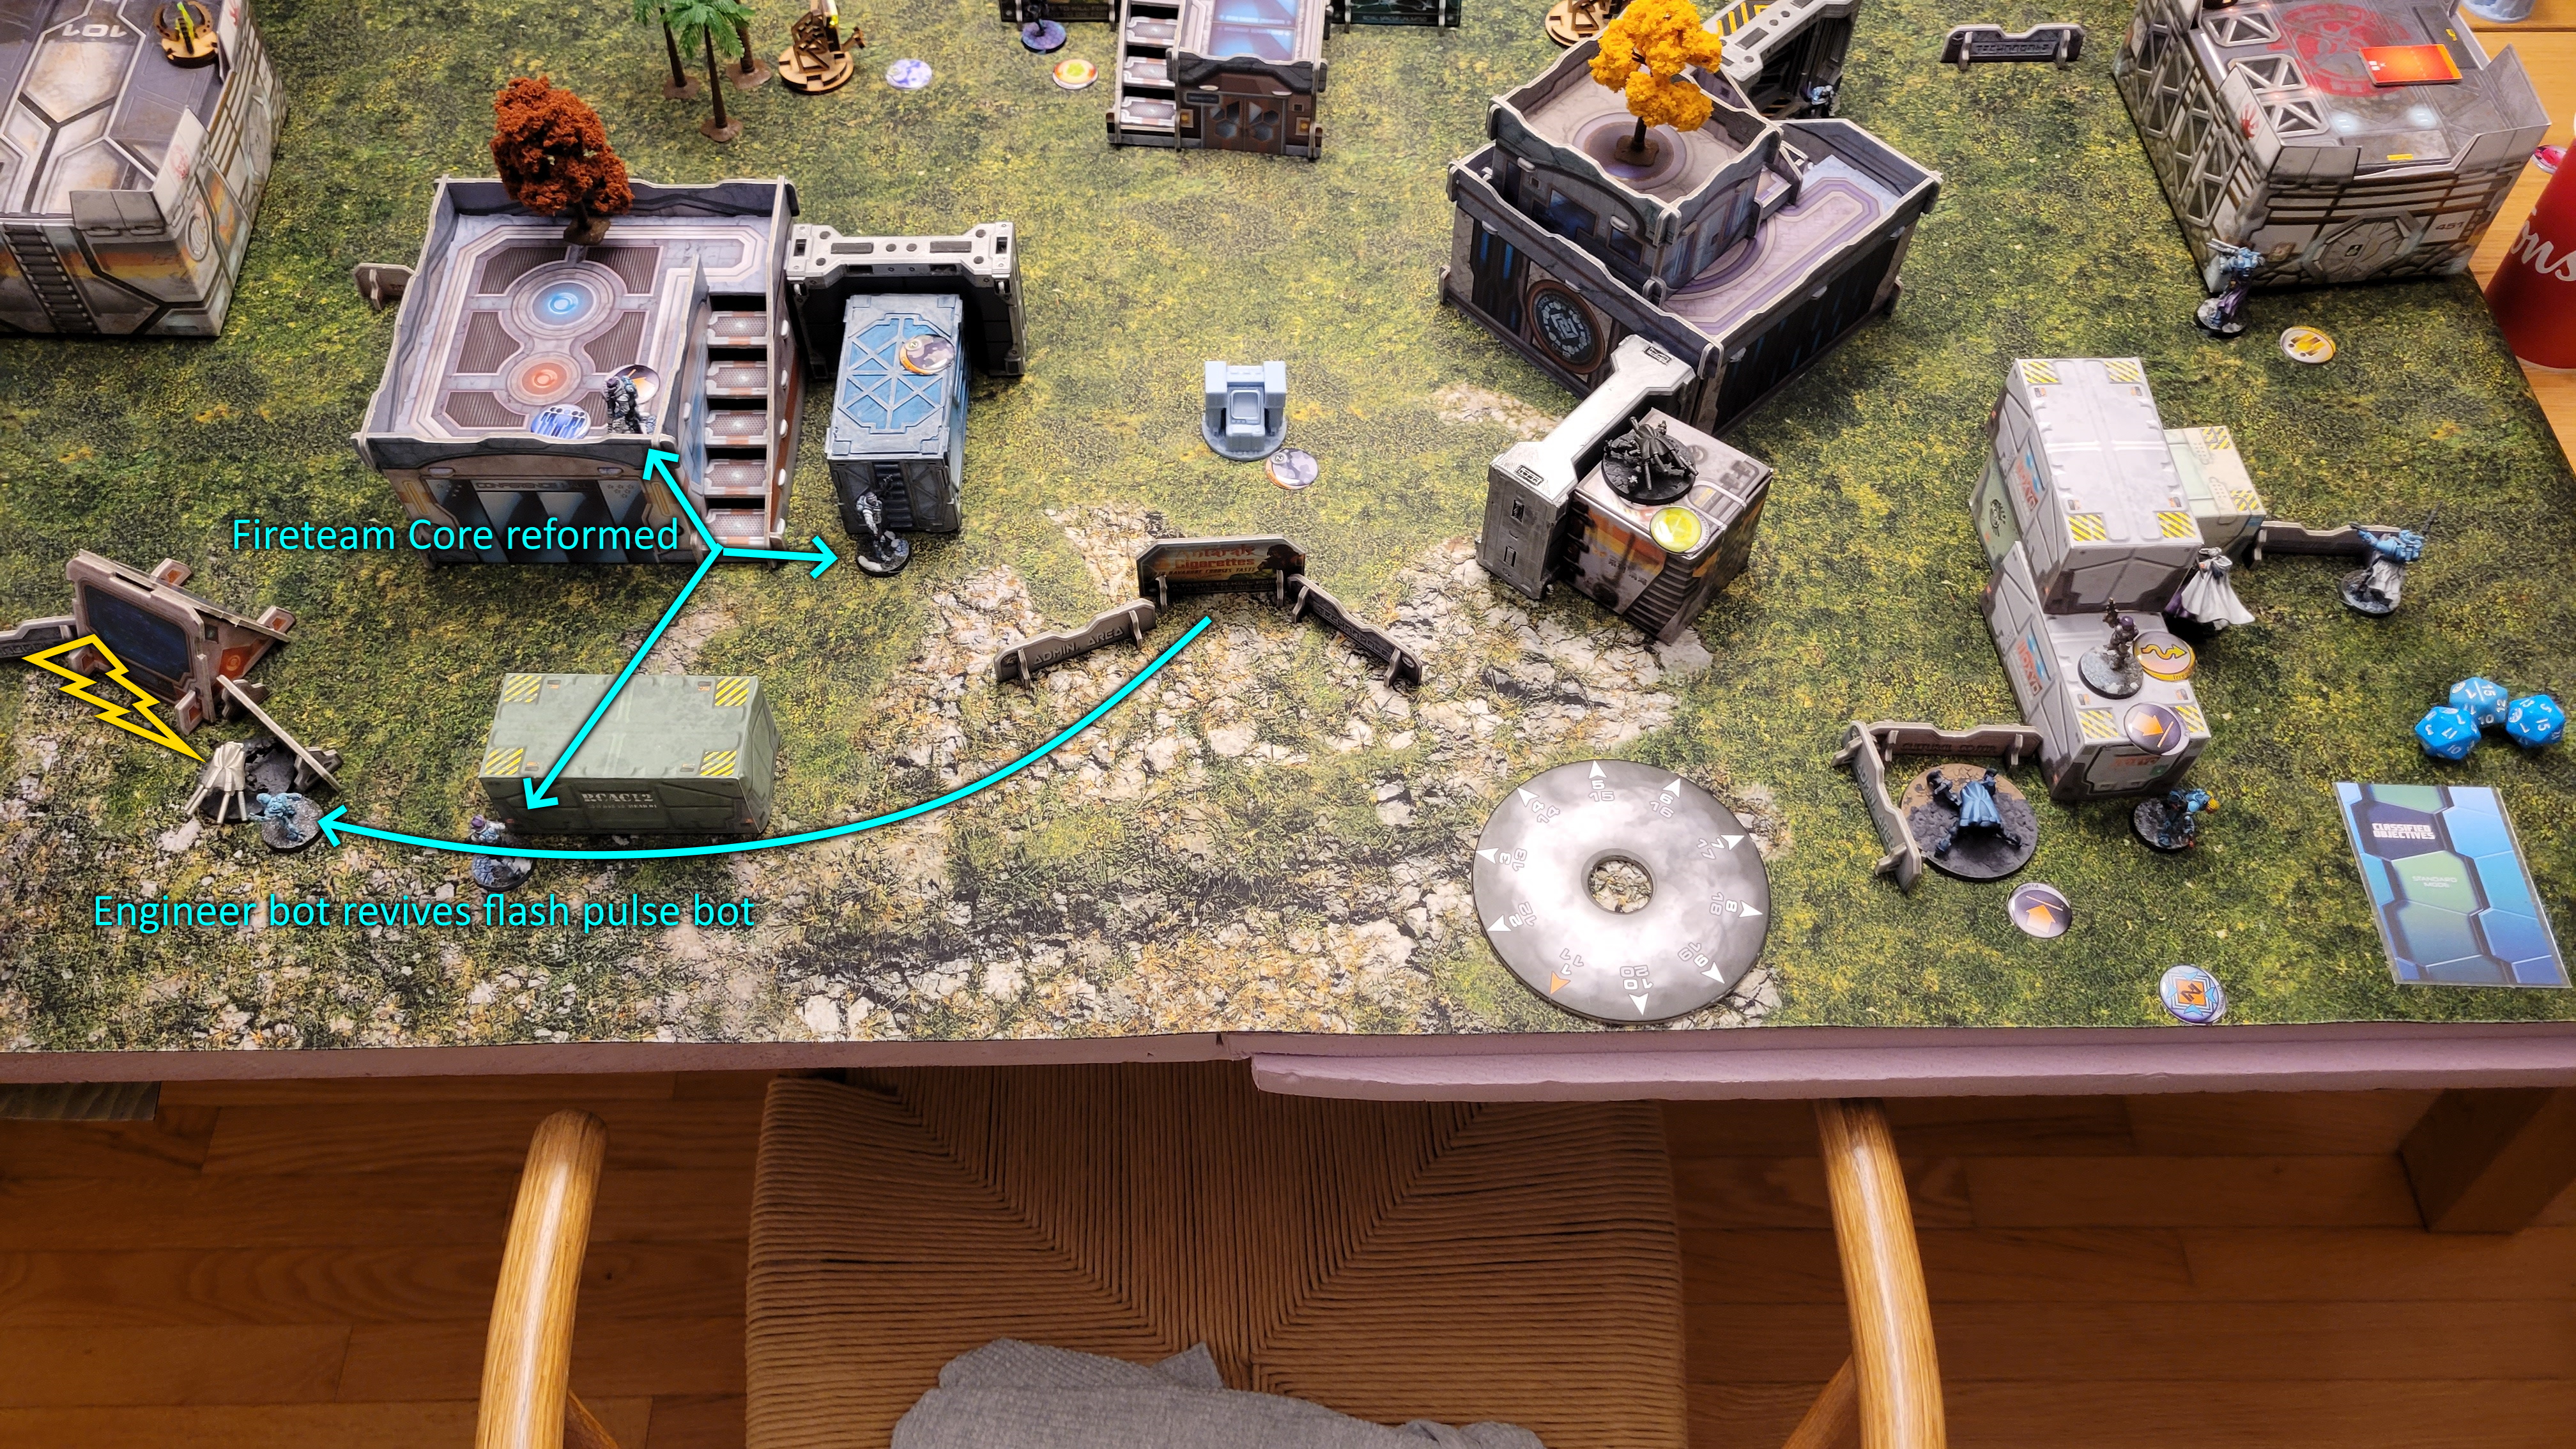
While in Loss of Lieutenant, 3 command tokens are spent.
The first two are used, converting 2 orders from Pool 2 into regular orders - So that the Flash Pulse bot can be revived by the Engineer's helper bot
The final one is spent reforming a "Fireteam Core" of the 3 remaining Crosiers.
It is at this point, that the flood gates opened.
On the right hand flank, the Hospitaller HMG and Doctor engage several targets; two Tiaghas move forward with their impetuous orders, a Libertos reveals and shotguns the HMG, and finally, the Skiavoro moves forward to engage. The two knights gun down all enemy forces, without suffering a wound.
Sheskiin advances, in one attack, splitting burst; 1 on a Flash Pulse Bot, 1 on the Raveneye, and 2 into a TR bot. The raveneye and TR bot are killed / knocked unconcious, respectively. While the Flashpulse bot is able to land a flash pulse, Sheskiin passes her BTS saves.
Sheskiin advances more, reaching base to base contact with the AC2. She places 1 D Charge, and is able to inflict 1 wound on the AC2. However, the E/M mines laid by the Raveneye are able to isolate Sheskiin.
With that, the Combined Army player resigns.
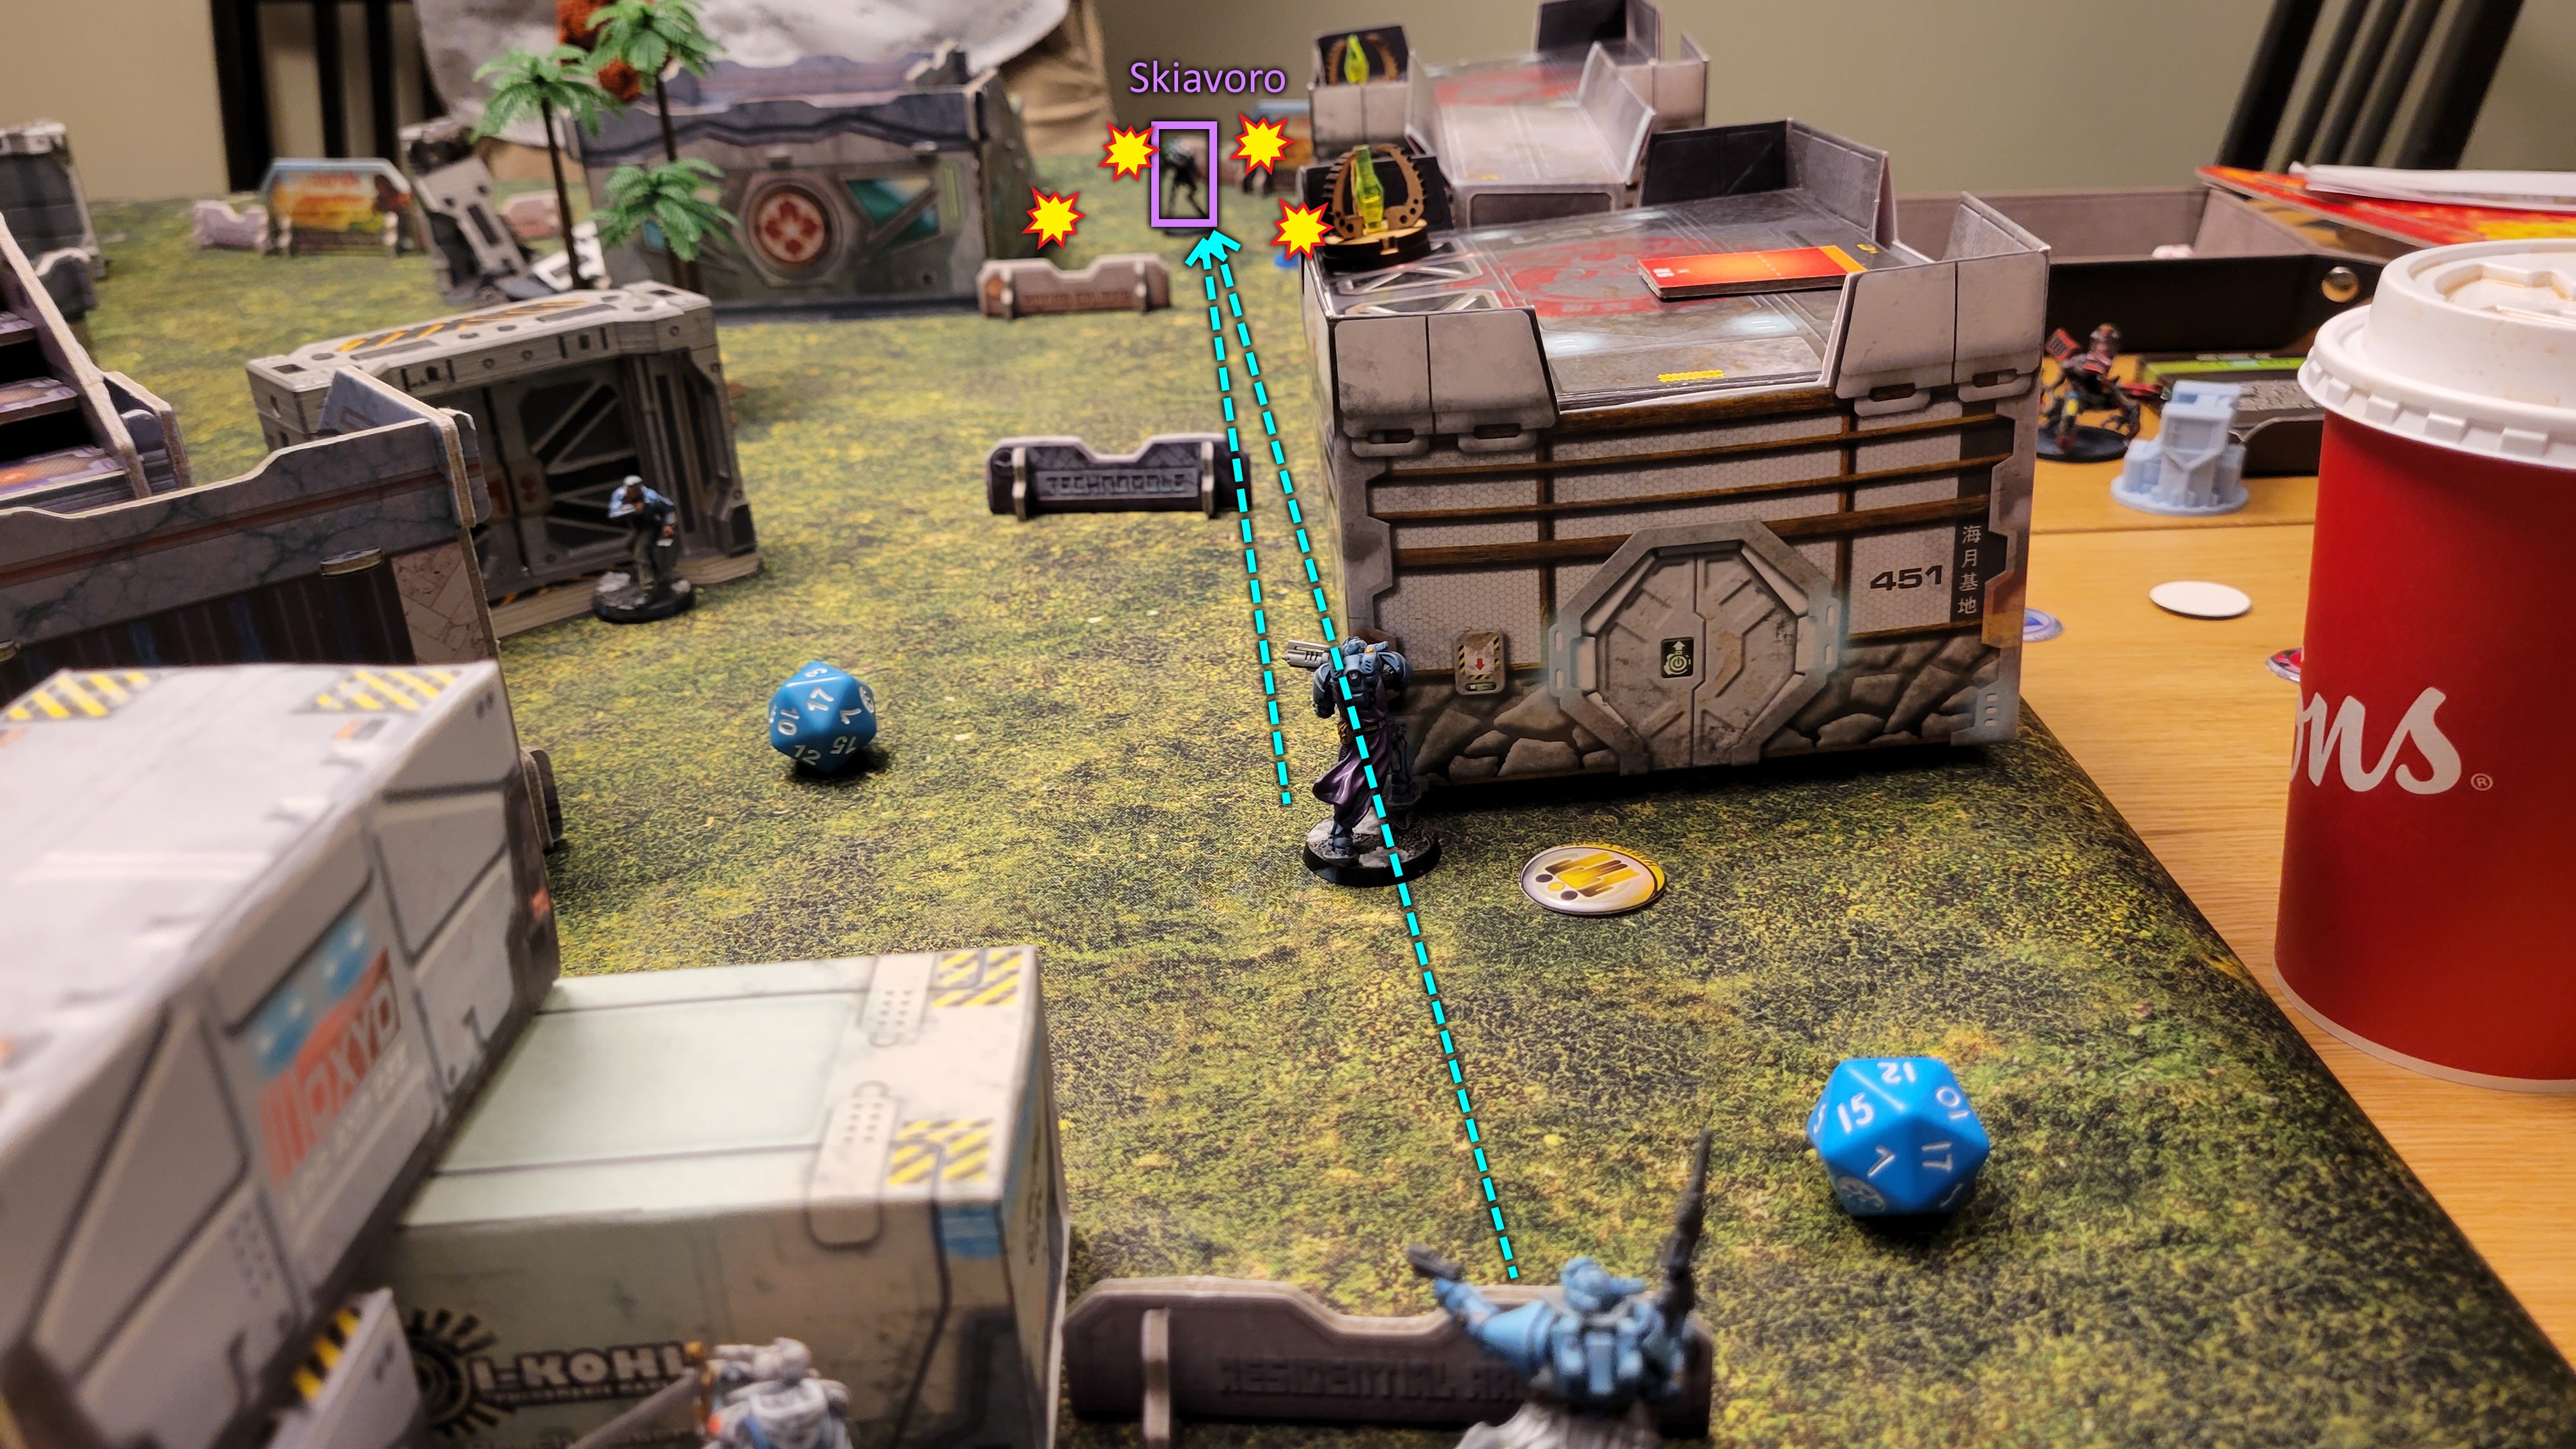 The Hospitaller HMG and Doctor hold the right flank, eliminating 2x Tiaghas, a Libertos, and the Skiavoro.
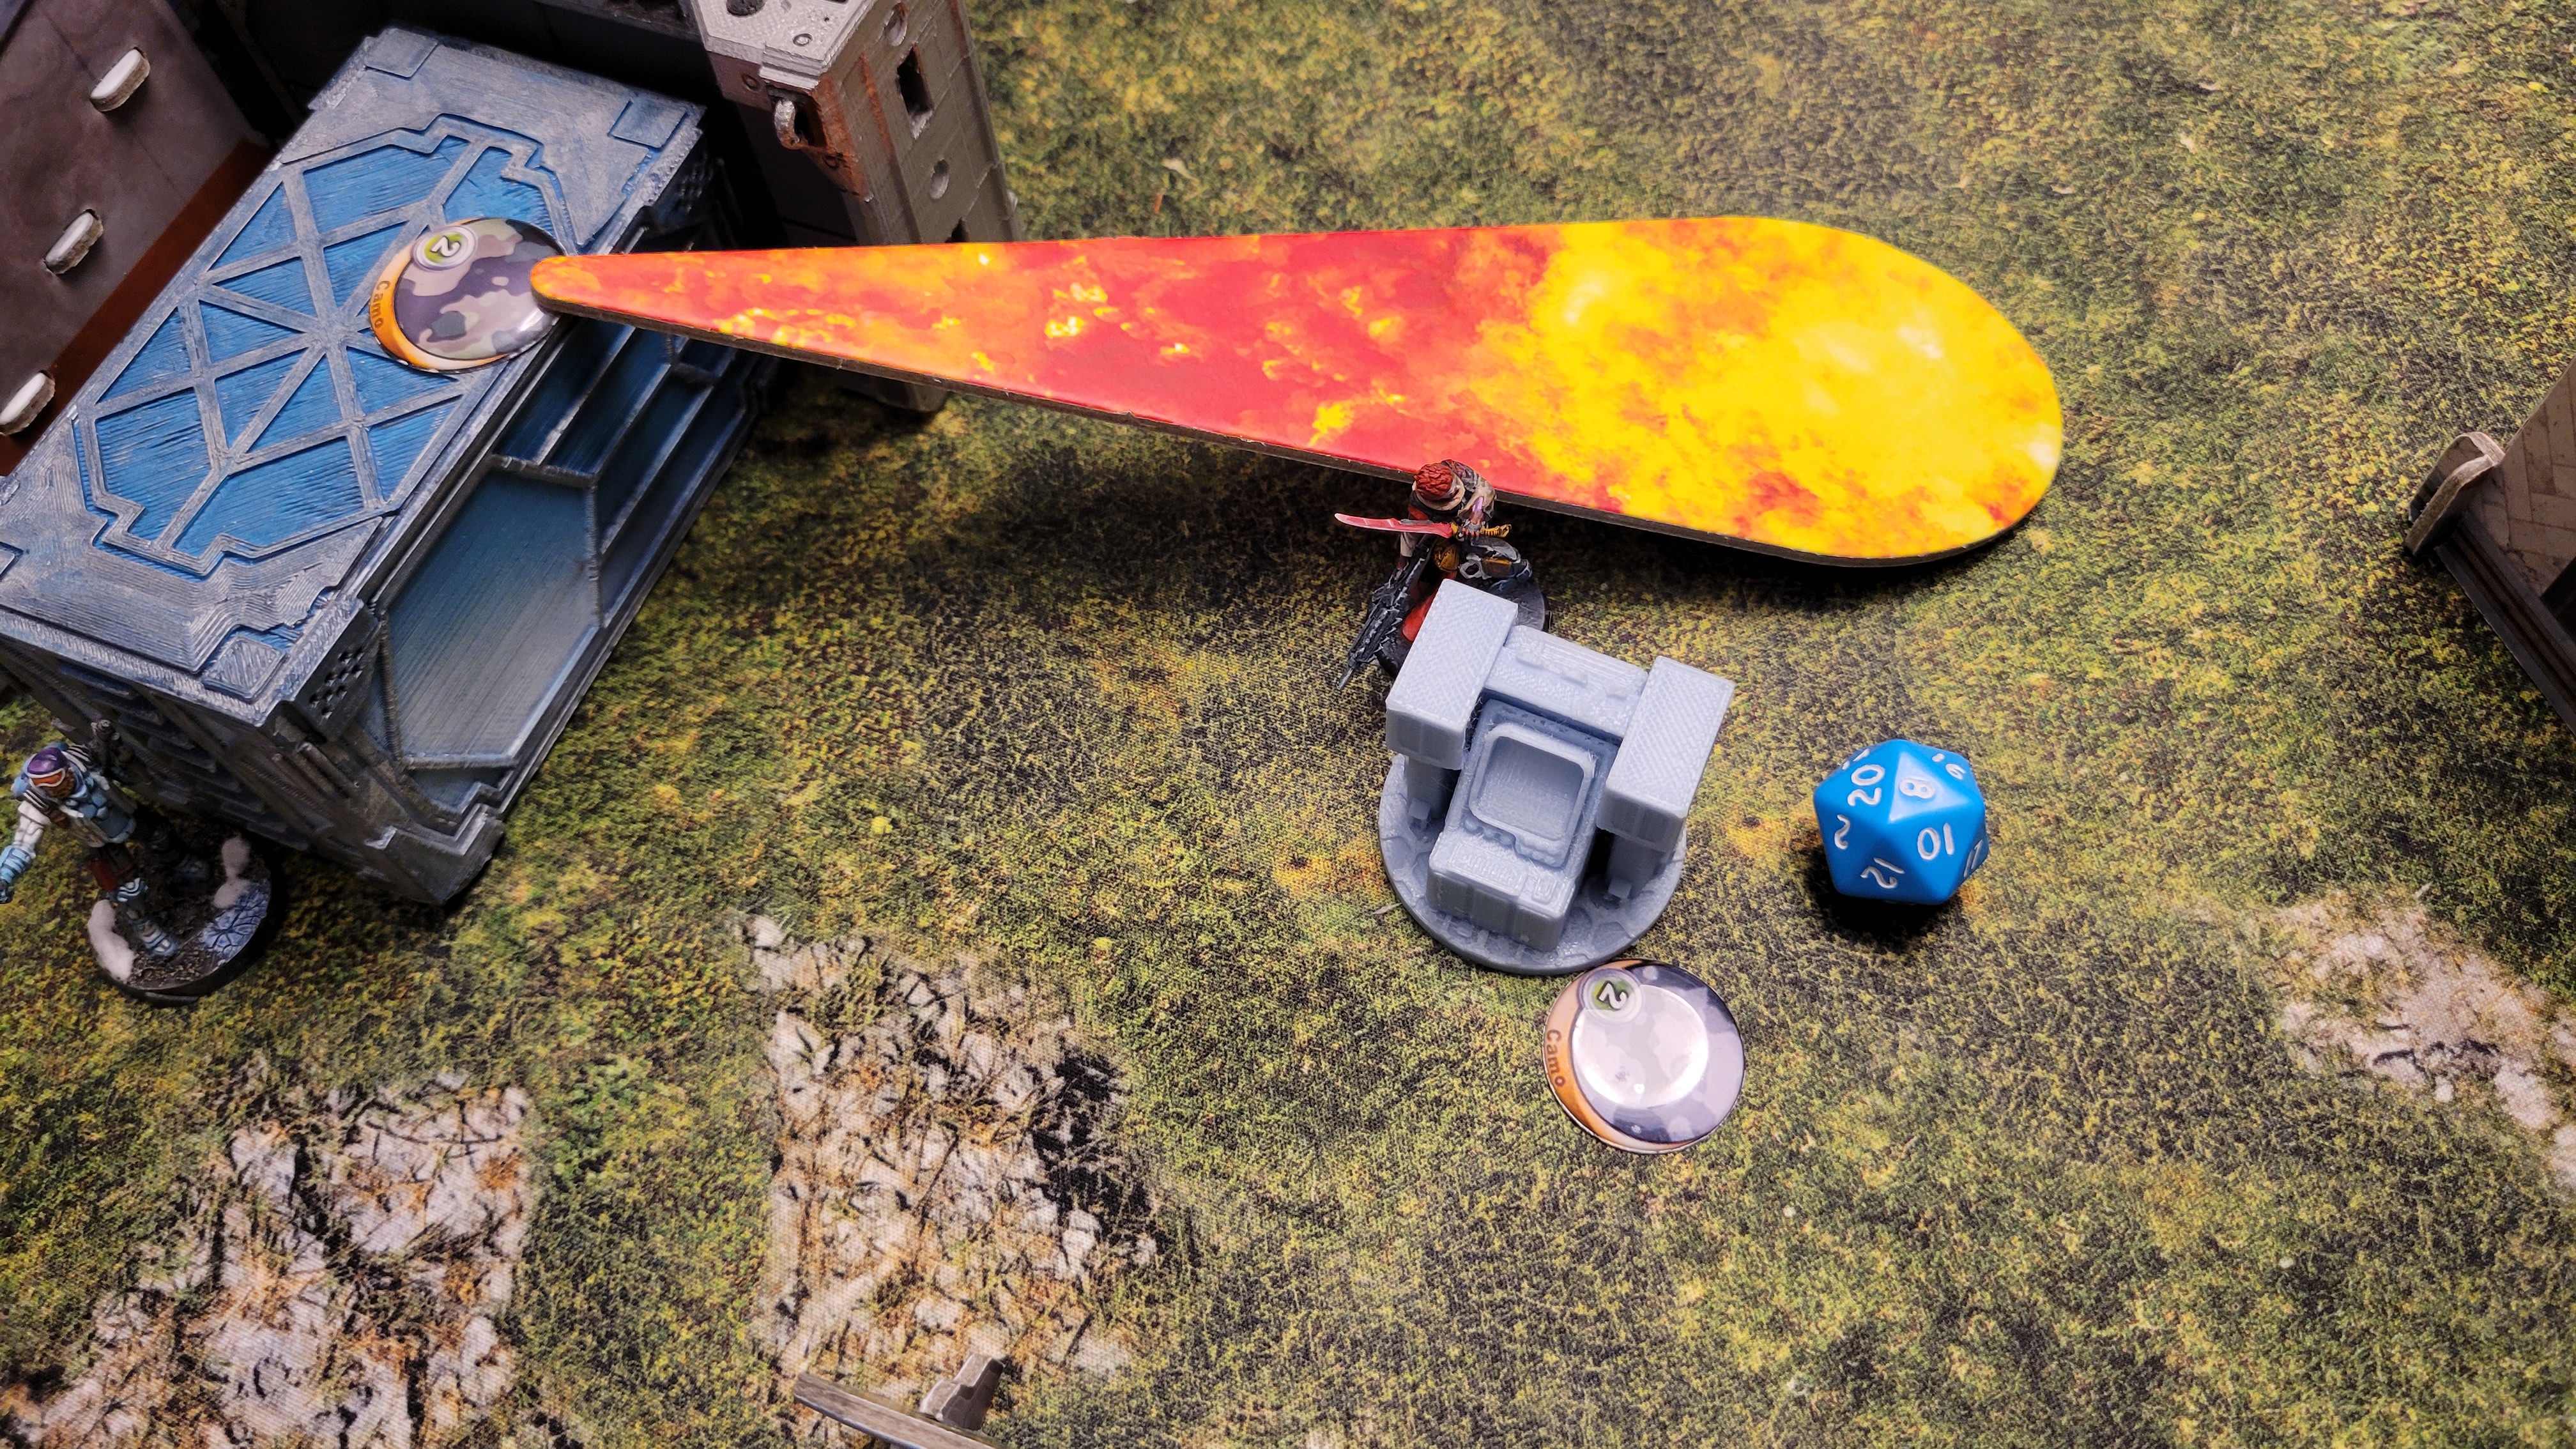 Sheskiin charges in, and is able to do damage to the AC2 with her D-Charges but is isolated by an E/M mine.
PanOceania
Damage the enemy AC2 (3x) - 3 Points
Destroy the enemy AC2 - 2 Points
Protect my own AC2 - 2 Points
Acquire more from the Panoplies - 1 Point
Total: 8 Points
Combined Army
Damage the enemy AC2 - 1 Point
A smile crossed over Berithh's face, with the enemies of not only PanOceania, but of all of mankind, being laid to waste.
We had some hard battles, but this is it. We can claim victory, at least temporarily. He thought.
Gloria Aeterna.
Battle Report Author

Army Lists Used In This Battle
Recommend Commander For Commendation
Share this battle with friends
BerithhWins

Awesome job. Very detialed. Hope your work will be acknowledged.
Great report! I am very much into the aesthetic of the table.
Cool images
This gets a 10 star rating purely for the music. Amazing report.
Yeah, superb job. One of the better batreps so far
GREAT work, Commander! I love the edits on the photos!